Create a dynamic queue
Dynamic queues are populated automatically using records that match a specific filter condition. For example, you can use dynamic queues to process new cases that have not yet been assigned to an agent.
Create a dynamic queue for cases where the resolution deadline is today or falls within the nearest three days.
-
Go to the Queues section.
-
Open the Queues settings view → New queue. This opens a page.
-
Specify the name of the queue in the Name field.
-
Select the priority for the queue in the Priority field. The queue priority influences the display order of the queue elements in the Agent Inbox. Learn more: Sort queue elements.
-
Select an object in the Queue type field. For this example, it is "Case." You can customize queue objects in the Queue objects lookup by clicking the Queue sorting setup action in the Queues settings view of the Queues section. The queue type becomes non-editable after you save the queue.
-
Select the "In progress" queue status. The Agent Inbox displays only active queues. The status of active queues is "In progress". Out of the box, the status is "Planned."
-
Select a business process in the Process field. Creatio runs the selected business process each time an agent takes an element from the queue. For this example, select the "Take case from Agent Desktop" business process.
To be able to use a different process in a queue, add the following global parameters that have the "Unique identifier" type to it:
queueelementIdentityRecordId
The record ID from the Queue element object is passed to the
queueelementIdparameter, and the contact/case/application record ID is passed to theentityRecordIdparameter. -
Go to the Queue population tab → Queue population type field group → select Automatically by filter conditions.
-
Specify the filter conditions in the filter area.
-
Click Add condition → Resolution time column. Select the value of the condition: "Day → Today"(Fig. 1).
Fig. 1 Set up the Resolution time = Today filter condition 
-
Add another filter condition: "Resolution time = Following 3 days" (Fig. 2).
Fig. 2 Set up the Resolution time = Following 3 days filter condition 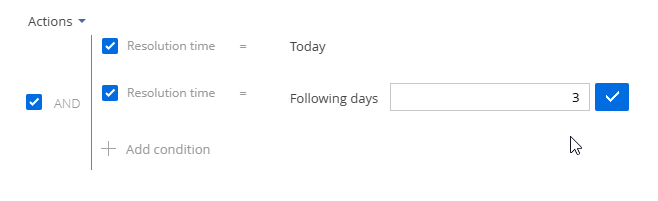
-
Select the "OR" logical operator (Fig. 3).
Fig. 3 Select the OR logical operator 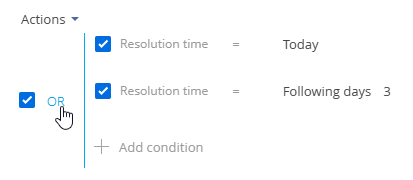
Make sure to specify the filter condition for a dynamic queue to ensure the queue elements are displayed in the Agent Inbox.
-
-
Go to the Team tab to form a list of agents who process objects from the queue. Click
 → select the required employees. The selected contacts can process the content of the queue from the Agent Inbox.
Only those agents whose status is Active on the Team tab can process the queues. Out of the box, this parameter is true for all contacts on the detail. You can clear the checkbox for certain agents. In this case, the queue elements of the queue will not be displayed in the Agent Inbox for these agents.
- Save and close the page.
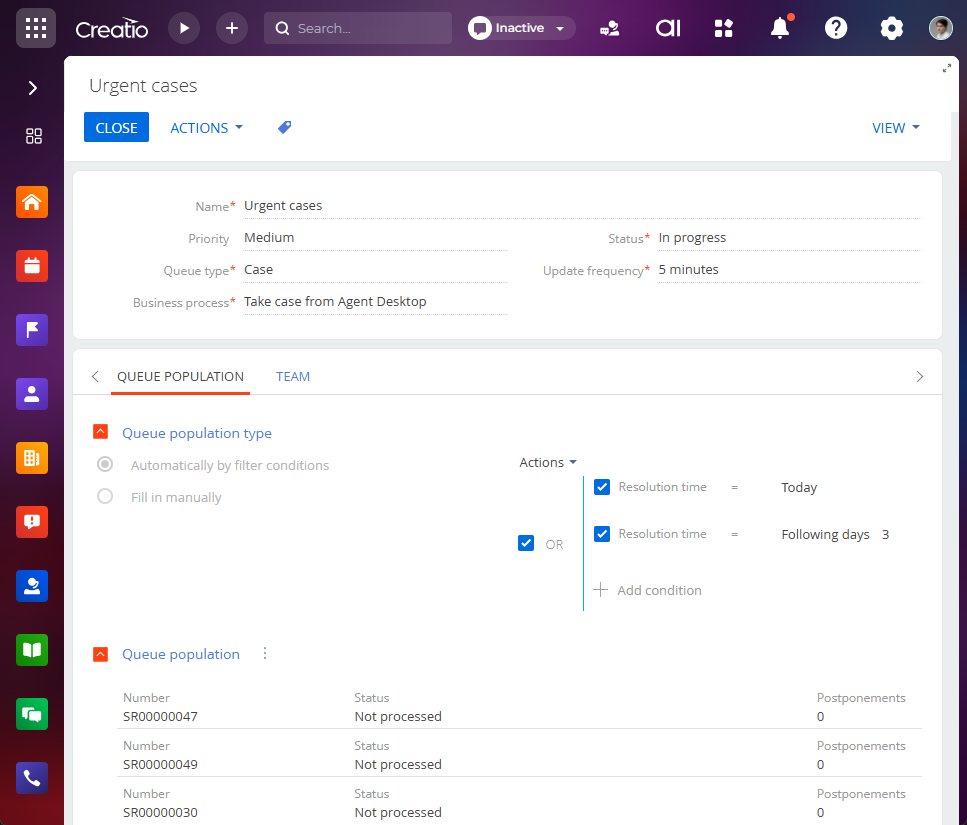
To view the content of the queue, select the Fill queues action from the action menu of the Queues section and open the queue record. All cases in the current queue will be displayed on the Queue population detail (Fig. 4). Data is available in read-only mode.
See also
Get started with the Contact Center app