Products
All Creatio products
A newly-created app contains a list page and record page that has a minimum set of components. Perform further customization in the UI designer using no-code tools.
Take the following steps to customize the app UI:
- Structure the app by adding relevant pages and other elements
- Structure each page using tabs, areas, columns.
- Add the relevant elements to the page:
- fields and data sources
- dashboards
- buttons and other components
Set up the edit page
- Click the
 button in the top right to open the System Designer.
 - Click the Installed applications link.
- Open the Financial benefits app or create a new app. Learn more in a separate article: Create a custom app.
- Open the “Financial benefits form page” page in the Pages block. Creatio adds the page automatically when you create an app. The page UI already contains a minimum set of components. You can copy, edit, move, or delete any element. In this case, keep the flex container to add buttons to it later.
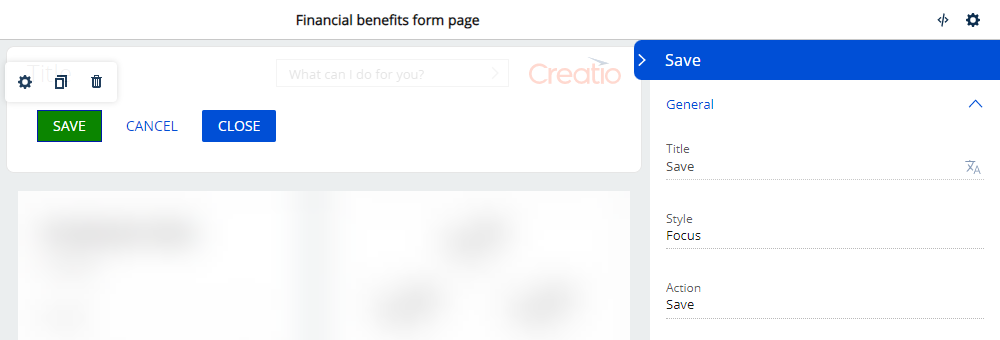
- Add the “Save” button that saves updated page data.
- Drag the button to the flex container.
- Click the button → the gear icon to open the setup area.
- Enter “Save” in the Title field.
- Select “Focus” in the Style field.
- Select “Save” in the Action field (Fig. 1).
Fig. 1 Add a button
- Add Cancel and Close buttons in a similar way. You can add as many elements as needed to the flex row. The row lets you place elements horizontally without fixed binding to the layout.
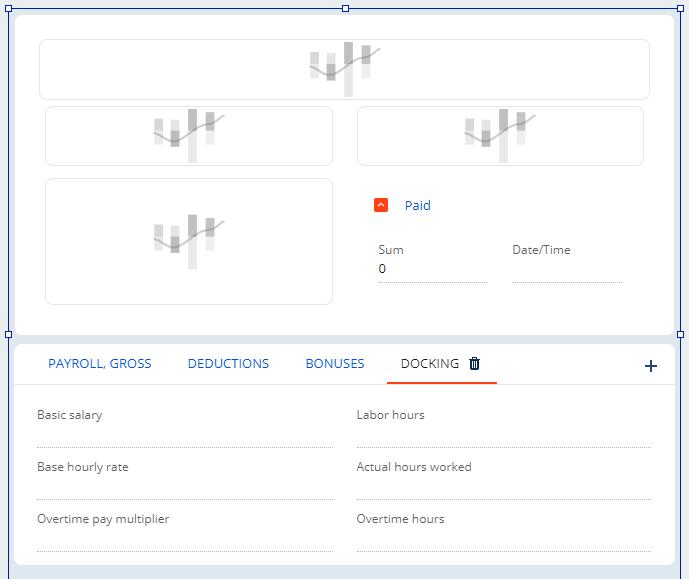
- Add the desired number of areas to the page by dragging them from the element library. For example, areas can contain tabs, expansion panels, and other elements that let you divide the content structurally and visually, as shown on the Fig. 2.
Fig. 2 Set up the layout
- Add a flex column to the first area. The column lets you place other elements vertically.
- Add a Label element. For example, set its text to “Employee data.”
- Attach the following fields to the area:
- Employee (lookup). Specifies the employee to pay the benefits. Specify the following data in the field setup area:
- Enter “Employee” in the Title field. The field determines the name of the corresponding app field. Required.
- Enter “UsrEmployee” in the Code field. The field determines the unique name Creatio uses to create an object column.
- Select “Lookup” in the Format field. The field determines the data display format. Required.
- Add information to display as the tooltip for app users to the Description field (optional).
- Specify whether the user must fill out the field to save the app edit page in the Required field. In this case, select “Application Level.”
- Specify whether to copy the field data when copying the record in the Copy this value when copying records field.
- Specify the object from which to request available field options in the Lookup field. Required.
- Make the field non-editable by selecting “Read only” checkbox, specify the title on the page if it must differ from the title in Creatio, and verify that the field data source is specified correctly (Fig. 3) (optional).
Fig. 3 Add a field
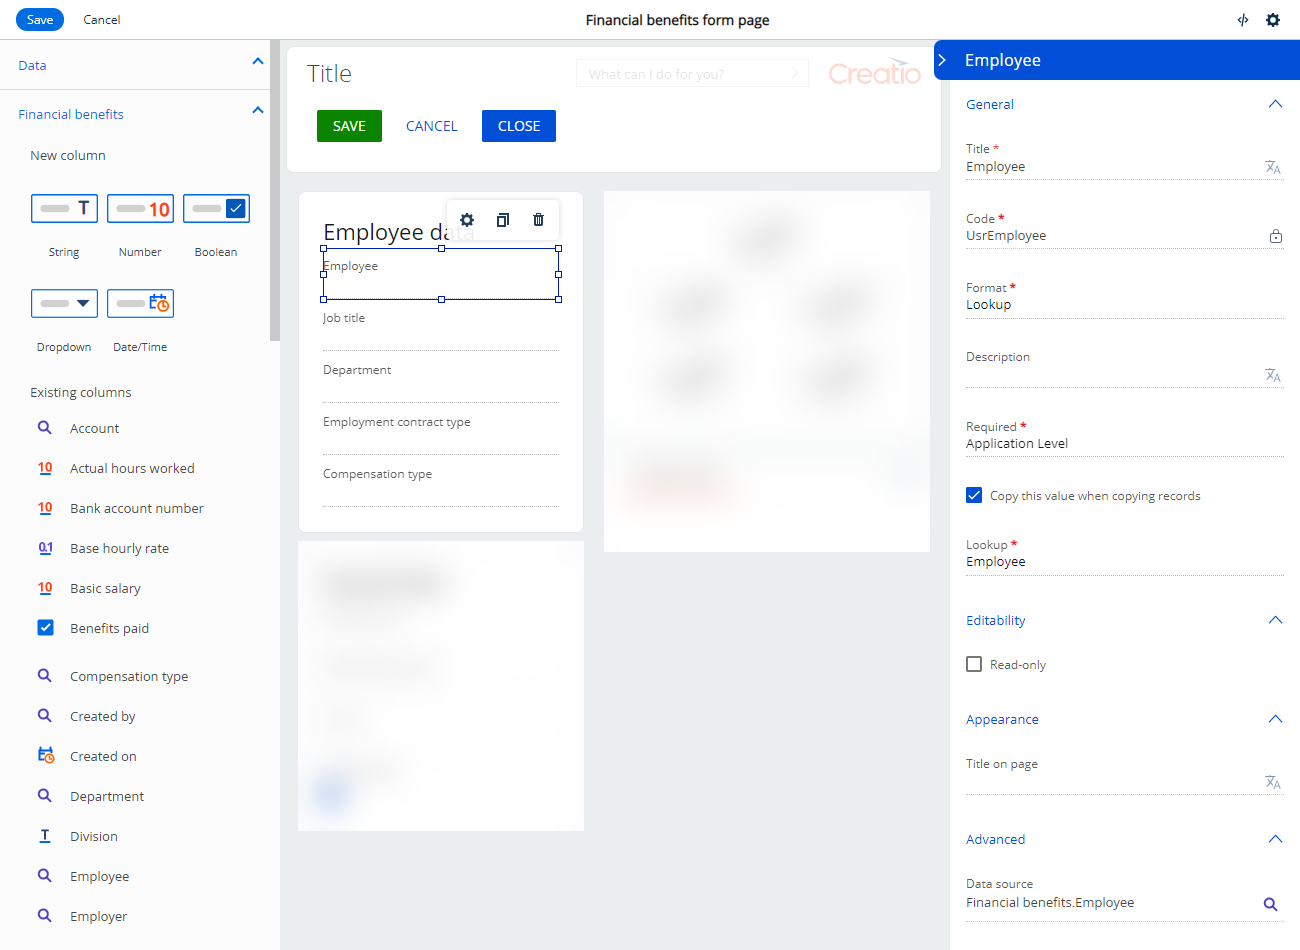
- Add other fields to the area and set them up in a similar way:
- Job title (lookup)
- Department (lookup)
- Employment contract type (lookup)
- Compensation type (lookup)
- Employee (lookup). Specifies the employee to pay the benefits. Specify the following data in the field setup area:
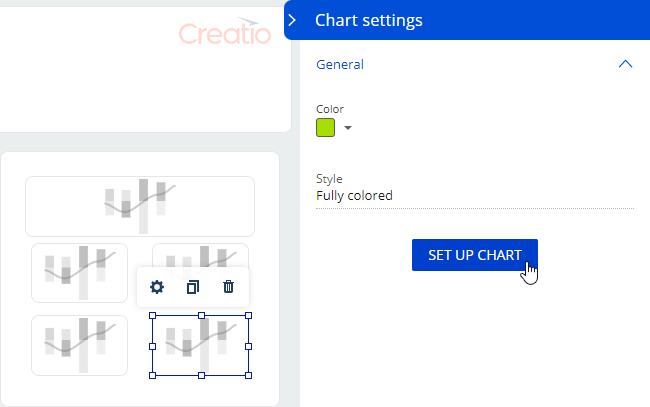
- Set up the layout of another area in a similar way and add the Metric element from the Charts group to the area. The element must display the internal pay rate of the employee. Click the element → the gear icon to set up the metric view.
- Select the desired chart color and style (fully colored or plain white) in the setup area, then click the Set up chart button (Fig. 4).
Fig. 4 Go to the chart setup
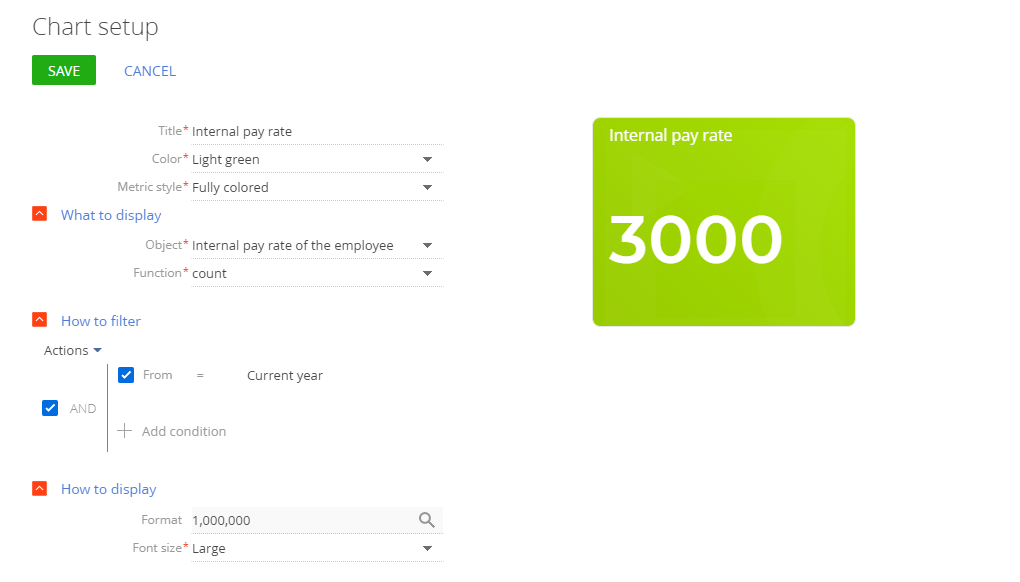
- Fill out the following fields in the chart setup area:
- Enter the name to display on the dashboard in the Title field. The field is required.
- Change the color selected on the previous step in the Color field if needed. The field is required.
- Change the display style selected on the previous step in the Style field if needed. The field is required.
- Select the object whose data to display on the dashboard in the Object field. The field is required.
- Select the function to calculate the object data in the Function field. The field is required.
- Specify the numerical data display format on the dashboard in the Format field.
- Select default or large metric data font in the Font size field.
- Specify the filtering conditions in the How to filter field group (optional). In this case, display the internal pay rate of the employee for the calendar year. As such, filter data by From column and select “Current year.” (Fig. 5).
Fig. 5 Set up a chart
- Set up other dashboards in a similar way.
- Select the desired chart color and style (fully colored or plain white) in the setup area, then click the Set up chart button (Fig. 4).
- Click Save in the top left. Proceed to the app list setup.
Set up the list
- Open the “Financial benefits list page” page in the Pages block. Creatio adds the page automatically when you create an app. The page UI already contains a minimum set of components. You can copy, edit, move, or delete any element. For example, keep the flex container with the “Add” button that adds a new list record.
- Add the “Save” button that saves updated data for benefit calculation in the app.
- Drag another button to the flex container and place the button next to the “Add” button.
- Click the button → the gear icon to open the setup area.
- Enter “Save” in the Title field.
- Select “Primary” in the Style field.
- Select “Save” in the Action field (Fig. 6).
Fig. 6 Set up a button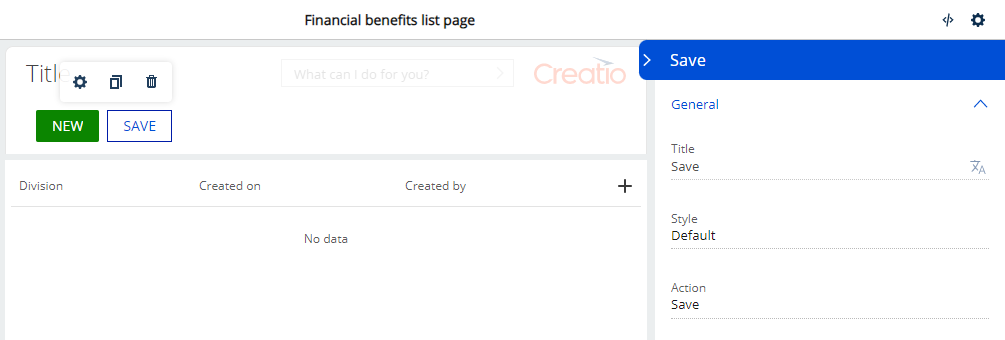
- Set up the Financial benefits section list:
- Click the
 button → Hide to hide the automatically added Created on and Created by columns (Fig. 7).
Fig. 7 Hide a column
button → Hide to hide the automatically added Created on and Created by columns (Fig. 7).
Fig. 7 Hide a column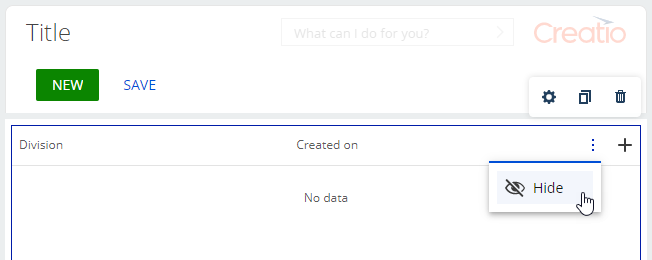
- Add Employee, Job title, Department, and Payroll period columns to the list. To do this, click the
 button → select the relevant fields → Select (Fig. 8).
Fig. 8 Add columns
button → select the relevant fields → Select (Fig. 8).
Fig. 8 Add columns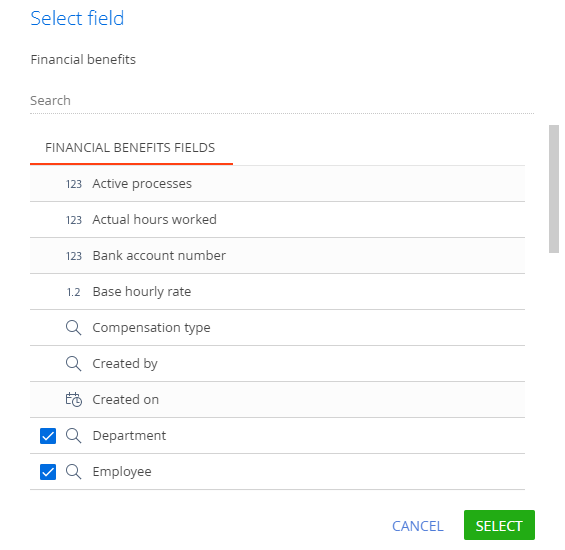
- Click Save to apply the changes to the section UI.
 button instead of dragging a new element to the canvas. After that, edit the settings of the new button as described above.
See also