Types of fields and field operations
Creatio provides the following field types:
- simple field
- image field
- calculated field
- multicurrency field
Creatio lets you execute the following field operations:
- implement the field validation
- set the default field value
- set up the field requirement
- set up value filtering for a lookup field
- set up the field locking conditions
- set up the field locking exceptions
- set up the field display conditions
- add automatic field numbering
- add an info button to the field
- add a tooltip to the field
- calculate the date difference between the fields
Add a field
You can add a field using the following tools:
- Section Wizard
- Creatio IDE
Add a simple field
You can add a simple field in the following ways:
- use an existing column
- use a new column
Add a simple field in the Section Wizard
To add a simple field in the Section Wizard, follow the instructions in the user documentation article: Set up page fields.
Add a simple field in Creatio IDE
To add a simple field in Creatio IDE using an existing column:
- Create a replacing view model schema of the record page that contains the field. To do this, follow the guide in a separate article: Develop configuration elements.
- Set up the field layout in the replacing view model schema. To do this, add a configuration object with the settings that determine the field layout to the diff array of modifications.
You can add a simple field in Creatio IDE using a new column in the following ways:
- Create a replacing object schema and add a column to it.
- Create a replacing view model schema of the record page that contains the field. Then create an attribute in the view model schema and add a field to the created virtual column.
This article covers one of the ways below.
To add a simple field in Creatio IDE using a new column:
- Create a replacing object schema. To do this, follow the guide in a separate article: Develop configuration elements.
- Add a column that corresponds to the page field of the replacing view model schema to the replacing object schema. To do this, follow the guide in a separate article: Develop configuration elements.
- Create a replacing view model schema of the record page that contains the field. To do this, follow the guide in a separate article: Develop configuration elements.
- Add a localizable string that contains the field name to the replacing view model schema (optional). To do this, follow the guide in a separate article: Operations with localizable resources.
- Set up the field position in the replacing view model schema. To do this, add a configuration object with the settings that determine the field layout to the diff array of modifications.
Add an image field
- Create a replacing object schema. To do this, follow the guide in a separate article: Develop configuration elements.
- Add an Image Link type column that corresponds to the page field of the replacing view model schema to the replacing object schema. To do this, follow the guide in a separate article: Develop configuration elements.
- Create a replacing view model schema of the record page that contains the field. To do this, follow the guide in a separate article: Develop configuration elements.
- Add a localizable string that contains the field name to the replacing view model schema (optional). To do this, follow the guide in a separate article: Operations with localizable resources.
- Add an image to the schema image collection.
-
Set up the image field in the replacing view model schema.
-
Implement the following methods in the methods property:
- the method that receives the image by link
- the method that is called before the image selection box opens
- the method that is called upon the image change
- the method that saves the link to the changed image in the object column
-
Add a configuration object with the settings that determine the field layout to the diff array of modifications. Use the auxiliary PhotoContainer wrapper container that has the "image-edit-container" class to add an image field to the page. Implement the following properties in the values property of the diff array of modifications:
- getPhotoSrcMethod(). Receives the image by link.
- onPhotoChange. Called upon the image change.
- beforePhotoFileSelected(). Called before the image selection box opens.
- readonly. Defines whether the image is modifiable.
- generator. The control generator. Specify ImageCustomGeneratorV2.generateCustomImageControl for the image field.
-
Add a calculated field
A calculated field is a record page control whose value is calculated based on the status and values of other controls of the page.
In Creatio, calculated fields operate based on subscriptions to attribute change events of the page view model schema. When the column values of the object schema change, the current column value changes.
To add a calculated field to the record page:
- Create a replacing object schema. To do this, follow the guide in a separate article: Develop configuration elements.
- Add a column that corresponds to the page field of the replacing view model schema to the replacing object schema. To do this, follow the guide in a separate article: Develop configuration elements.
- Create a replacing view model schema of the record page that contains the field. To do this, follow the guide in a separate article: Develop configuration elements.
-
Set up the calculated field in the replacing view model schema.
-
Add a calculated column (attribute) for which to set dependencies to the attributes property. Declare the dependencies property for the attribute. The property contains the array of configuration objects. The dependencies property includes the following properties:
- columns. An array of column names. The current column value depends on the values of listed columns.
- methodName. The name of the handler method that is called when the value of at least one of the listed columns changes.
-
Implement the following in the methods property:
- The handler method of the column change event. The calculated column depends on the changed column.
- onEntityInitialized(). An overrided base virtual method. Called after Creatio initializes the object schema of the record page. Call the handler method in the onEntityInitialized() method. The handler method ensures the field is calculated not only when the dependency columns change but also when the record page opens.
- Add a configuration object with the settings that determine the field layout to the diff array of modifications.
-
Add a multicurrency field
A multicurrency field is a record page control whose value is calculated based on the status or values of other controls of the page.
Multicurrency field lets you:
- Enter a monetary amount.
- Specify the currency of the monetary amount.
- Record the equivalent of the amount in the base currency specified in Creatio settings.
When the currency changes, Creatio automatically converts the amount based on the currency exchange rates.
To add a multicurrency field to the record page:
- Create a replacing object schema. To do this, follow the guide in a separate article: Develop configuration elements.
-
Add the following columns to the replacing object schema:
- a Lookup type column that stores the currency
- an exchange rate column
- a column that stores the total amount in the selected currency
- a column that stores the amount in base currency
You can only define a single column in the object schema. The defined column must store the total amount in the selected currency. The rest of the columns can be virtual unless the business task requires their values to be stored in the database. You can define the columns as attributes in the view model schema.
To do this, follow the guide in a separate article: Develop configuration elements.
- Create a replacing view model schema of the record page that contains the field. To do this, follow the guide in a separate article: Develop configuration elements.
- Add the MoneyModule, MultiCurrencyEdit, MultiCurrencyEditUtilities modules as dependencies to the declaration of the view model class.
-
Set up the multicurrency field in the replacing view model schema.
-
Add the following attributes to the attributes property:
- currency
- exchange rate
- total amount
- amount in base currency
- exchange rate collection
- collection for the currency selection button
Declare the dependencies property for the attributes. The property contains an array of configuration objects. The dependencies property includes the following properties:
- columns. An array of columns whose values determine the value of the current column.
- methodName. The name of the handler method that is called when the value of at least one of the listed columns changes.
- Add the MultiCurrencyEditUtilities mixin to the mixins property.
-
Implement the following methods in the methods property:
- onEntityInitialized(). Overrides the base virtual method. Called after Creatio initializes the object schema of the record page.
- setCurrencyRate(). Sets the currency exchange rate.
- recalculateAmount(). Recalculates the total amount.
- recalculatePrimaryAmount(). Recalculates the amount in base currency.
- onVirtualCurrencyChange(). Handles the changes to the virtual currency column.
-
Add a configuration object with the settings that determine the field layout to the diff array of modifications. Implement the following properties in the values property of the diff array of modifications:
- primaryAmount. The name of the column that contains the amount in base currency.
- currency. The name of the column that references the currency lookup.
- rate. The name of the column that contains the exchange rate.
- generator. The control generator. Specify MultiCurrencyEditViewGenerator.generate for the multicurrency field.
-
Implement the field validation
Creatio performs validation by checking whether the filled out fields conform to the specified requirements. Page fields are validated at the column level of the page view models. The custom validator method executes the field validation logic.
To implement the field validation:
- Create a replacing view model schema of the record page that contains the field. To do this, follow the guide in a separate article: Develop configuration elements.
- Add a localizable string that contains the validation message to the replacing view model schema (optional). To do this, follow the guide in a separate article: Operations with localizable resources.
-
Set up the field validation in the replacing view model schema.
To do this, implement the following methods in the methods property:
-
The validator method that checks whether the condition is true. Validator is a view model method that matches the value of the view model column to the business requirements. The method must return the object that contains the validation results.
- If the field validation is successful, the validator method returns an object that contains an empty string.
- If the field validation is unsuccessful, the validator method returns an object that contains the invalidMessage property. The invalidMessage property contains a message string displayed below the field when a user attempts to enter an invalid value and in the message box when a user attempts to save a page with the field that did not pass the validation.
-
setValidationConfig() is an overrided base method that binds the validator method to the corresponding column of the record page’s replacing view model schema. The setValidationConfig() method calls the addColumnValidator() method. The addColumnValidator() method has the following parameters:
- the name of the view model column to bind the validator
- the name of the method that validates the column value
If you implement the field validation in the replacing view model schema of the base page, call the parent implementation of the setValidationConfig() method before calling the addColumnValidator() method to ensure the validators of the base page fields are initialized correctly.
-
Set the default field value
Creatio lets you set the default field value in the following ways:
-
at the level of business object columns in the replacing object schema
When you create a new object, some page fields must be populated with the corresponding values. In this case, specify the values of the corresponding object columns as default values in the Object Designer.
-
in the source code of the replacing view model schema of the record page
In some cases, you cannot set a default value via the object column properties. For example, the values might be calculated based on the values of other object columns. In this case, you can only set a default field value via coding.
View the record page’s default field value types set at the level of business object columns in the replacing object schema in the table below.
|
|
|
|---|---|
| Constant |
You can set a constant default value for the following column types:
|
| System setting | The System settings section contains system settings. You can add a custom system setting to the section. The system setting value is set at the user level, not the application level. |
| System variable | System variables are global variables that store data about Creatio settings. The system variable value is set at the application core level, not the user level. |
To set the default field value:
- Create a replacing view model schema of the record page that contains the field. To do this, follow the guide in a separate article: Develop configuration elements.
-
Set up the default field value in the replacing view model schema.
To do this, implement the following methods in the methods property:
- onEntityInitialized(). An overrided base virtual method. Called after Creatio initializes the object schema. Call the handler method in the onEntityInitialized() method. The handler method ensures the field value is set when a record page opens.
- The handler method that calculates the field value.
Make the field required
- Create a replacing view model schema of the record page that contains the field. To do this, follow the guide in a separate article: Develop configuration elements.
- Add the BusinessRuleModule and ConfigurationConstants modules as dependencies to the declaration of the view model class.
-
Make the field required in the replacing view model schema.
To do this, take the following steps in the rules property:
- Set the ruleType property to BINDPARAMETER. The value sets the business rule type. The BusinessRuleModule.enums.RuleType enumeration represents the rule types.
- Set the property property to REQUIRED. The value marks the column as required. The BusinessRuleModule.enums.Property enumeration represents the properties of the BINDPARAMETER business rule.
- Specify the execution conditions of the business rule in the conditions array.
Set up the filtering of lookup field values
Creatio lets you set up the filtering of lookup field values in the following ways:
- use the FILTRATION business rule
- specify the filters explicitly in the attributes property of the column description
To set up the filtering of lookup field values using the FILTRATION business rule:
- Create a replacing view model schema of the record page that contains the field. To do this, follow the guide in a separate article: Develop configuration elements.
- Add the BusinessRuleModule module as a dependency to the declaration of the view model class.
-
Set up the filtering of lookup field values in the replacing view model schema.
-
Take the following steps in the rules property:
- Set the ruleType property to FILTRATION. The value sets the business rule type. The BusinessRuleModule.enums.RuleType enumeration represents the rule types.
- Set the autocomplete property to true. The value performs inverse filtering.
- Add a configuration object with the settings that determine the field layout to the diff array of modifications.
-
Set up the filtering of lookup field values by specifying the filters explicitly in the column description to apply arbitrary filtering, sorting, and to add extra columns to the query when displaying the drop-down list.
To set up the filtering of lookup field values by specifying the filters explicitly in the column description:
- Create a replacing view model schema of the record page that contains the field. To do this, follow the guide in a separate article: Develop configuration elements.
- Add the BusinessRuleModule module as a dependency to the declaration of the view model class.
-
Set up the filtering of lookup field values in the replacing view model schema.
To do this, take the following steps in the attributes property:
- Set the dataValueType property to LOOKUP. The value sets the column data type. The Terrasoft.core.enums.DataValueType enumeration represents the column data types.
-
Specify the configuration object of the lookup field in the lookupListConfig property.
The lookupListConfig property has the following optional properties:
- columns. An array of column names added to the query besides the Id column and the primary column for display.
- orders. An array of configuration objects that determine the order of displayed data.
-
The property that sets the filtering:
- filter. The method that returns the object of the Terrasoft.BaseFilter class or its inheritor. Creatio applies the returned object to the query.
- filters. The array of methods that return the collection of the Terrasoft.FilterGroup class.
Add the filters to the collection using the add() method. View the parameters of the add() method in the table below.
|
|
|
|
|---|---|---|
| key | String | Key. |
| item | Mixed |
Element. The object of the Terrasoft.BaseFilter class or its inheritor serves as the item parameter. Learn more about setting up filters in a separate article: Data-operations (front-end). By default, the AND operator combines the filters in the collection. If you need to use the OR operator, specify it explicitly in the logicalOperation property of the Terrasoft.FilterGroup object. |
| index | Number | The index to insert. If the index is not specified, it is not rated. |
Lock the field based on specific conditions
Creatio can lock every field and detail of the record page simultaneously if the corresponding conditions are met. This lets you avoid creating a large number of business rules.
You can lock the fields of the following detail types:
- list detail
- editable list detail
- field detail
To lock the field based on specific conditions:
- Create a replacing view model schema of the record page that contains the field. To do this, follow the guide in a separate article: Develop configuration elements.
- Add the BusinessRuleModule module as a dependency to the declaration of the view model class.
-
Set up the conditions that lock the field in the replacing view model schema.
-
Enable locking in the attributes property using the IsModelItemsEnabled attribute.
You can enable field locking in the following ways.
- Set the IsModelItemsEnabled attribute to false.
- Set the IsModelItemsEnabled attribute to the default value.
- Use the IsEnabled attribute for a field detail.
-
Take the following steps in the rules property:
- Set the ruleType property to BINDPARAMETER. The value sets the business rule type. The BusinessRuleModule.enums.RuleType enumeration represents the rule types.
- Set the property property to ENABLED. The value sets the column availability. The BusinessRuleModule.enums.Property enumeration represents the properties of the BINDPARAMETER business rule.
- Specify the execution conditions of the business rule in the conditions array.
-
Add a configuration object to the diff array of modifications:
- Specify the CardContentWrapper global container in the name property to lock all record page fields.
- Specify the DisableControlsGenerator generator in the generator property of the values property for containers whose fields to lock.
-
Creatio locks detail buttons and menu items that launch detail operations. However, you can still open the object page of an editable list detail. The fields of the object page are locked based on the business rules.
Creatio does not lock the field if it is bound to the enabled property in the diff array of modifications or business rule.
Keep the field unlocked
Creatio lets you keep certain fields and details unlocked.
To specify the field to keep unlocked:
- Create a replacing view model schema of the record page that contains the field. To do this, follow the guide in a separate article: Develop configuration elements.
-
Specify the field to keep unlocked in the replacing view model schema.
- Enable locking in the attributes property using the IsModelItemsEnabled attribute.
-
Implement the methods that return the list of fields and details to keep unlocked in the methods property:
- getDisableExclusionsColumnTags(). Keeps a column unlocked.
- getDisableExclusionsDetailSchemaNames(). Keeps a detail unlocked.
- isModelItemEnabled(). Keeps a column unlocked. Complex exception logic. The method is called for each field. Accepts the name and returns the field availability flag.
- isDetailEnabled(). Keeps a detail unlocked. Complex exception logic. The method is called for each detail. Accepts the name and returns the detail availability flag.
- Add a configuration object to the diff array of modifications. The object must contain the settings of the CardContentWrapper container that locks the fields.
To disable field locking, use the corresponding toggle of the CompleteCardLockout item on the Feature toggle page. Learn more about the Feature toggle page in a separate article: Feature toggle mechanism.
Set up the field display conditions
- Create a replacing object schema. To do this, follow the guide in a separate article: Develop configuration elements.
- Add a column that corresponds to the page field of the replacing view model schema to the replacing object schema. To do this, follow the guide in a separate article: Develop configuration elements.
- Create a replacing view model schema of the record page that contains the field. To do this, follow the guide in a separate article: Develop configuration elements.
-
Set up the field display conditions in the replacing view model schema.
-
Take the following steps in the rules property:
- Set the ruleType property to BINDPARAMETER. The value sets the business rule type. The BusinessRuleModule.enums.RuleType enumeration represents the rule types.
- Set the property property to VISIBLE. The value sets the column visibility. The BusinessRuleModule.enums.Property enumeration represents the properties of the BINDPARAMETER business rule.
- Specify the execution conditions of the business rule in the conditions array.
- Add a configuration object with the settings that determine the field layout to the diff array of modifications.
-
Enable automatic field numbering
Automatic field numbering generates a record number automatically based on the specified template. Automatic numbering is implemented in the Documents, Invoices, and Contracts sections.
You can enable automatic field numbering in several ways:
- in the front-end
- in the back-end
Enable automatic field numbering in the front-end
-
Create the following system settings:
- [Entity]CodeMask. The object number mask.
- [Entity]LastNumber. The current object number.
Entity. The name of the object to whose column to apply automatic numbering. For example, InvoiceCodeMask is the invoice number mask and InvoiceLastNumber is the current invoice number.
- Create a replacing view model schema of the record page that contains the field. To do this, follow the guide in a separate article: Develop configuration elements.
-
Set up automatic field numbering in the front-end in the replacing view model schema.
To do this, implement the onEntityInitialized() overrided base virtual method in the methods property. Called after Creatio initializes the object schema. Call the getIncrementCode() handler method of the BasePageV2 base record page schema in the onEntityInitialized() method. The handler method assigns a generated number to the Code field.
The getIncrementCode() method includes the following parameters:
- callback. The function that is called after receiving the service response. Pass the response to the corresponding column (attribute).
- scope. The scope to call the callback function (optional).
Enable automatic field numbering in the back-end
-
Create the following system settings:
- [Entity]CodeMask. The object number mask.
- [Entity]LastNumber. The current object number.
Entity. The name of the object to whose column to apply automatic numbering. For example, InvoiceCodeMask is the invoice number mask and InvoiceLastNumber is the current invoice number.
- Create a replacing object schema. To do this, follow the guide in a separate article: Develop configuration elements.
- Add a Before record added event to the replacing object schema.
- Implement the event subprocess in the business process.
Add an info button to the field
- Create a replacing view model schema of the record page that contains the field. To do this, follow the guide in a separate article: Develop configuration elements.
- Add a localizable string that contains the field name to the replacing view model schema (optional). To do this, follow the guide in a separate article: Operations with localizable resources.
-
Attach an info button to the field in the replacing view model schema.
To do this, attach a configuration object with the settings that determine the info button layout to the page field in the diff array of modifications. Implement the itemType property in the values property of the diff array of modifications. Set the implemented property to Terrasoft.ViewItemType.INFORMATION_BUTTON.
Add a tooltip to a field
- Create a replacing view model schema of the record page that contains the field. To do this, follow the guide in a separate article: Develop configuration elements.
- Add a localizable string that contains the field name to the replacing view model schema (optional). To do this, follow the guide in a separate article: Operations with localizable resources.
-
Attach an info button to the field in the replacing view model schema.
To do this, attach a configuration object with the settings that determine the tooltip layout to the page field in the diff array of modifications. Set up the tooltip in the tip property of the diff array of modifications.
Calculate the date difference between the fields
- Create a replacing view model schema of the record page that contains the field. To do this, follow the guide in a separate article: Develop configuration elements.
-
Calculate the date difference between the fields in the replacing view model schema.
To do this, implement the following methods in the methods property:
- onEntityInitialized(). Overrides the base virtual method. Called after Creatio initializes the object schema of the record page.
- setEndDate(). The auxiliary method that sets the date. Call the getDate() method in the setEndDate() method. The called method retrieves the date.
1. Create a replacing object schema
- Go to the Configuration section and select a custom package to add the schema.
-
Click Add → Replacing object on the section list toolbar.
/scr_add_entity_schema_replaced.png)
-
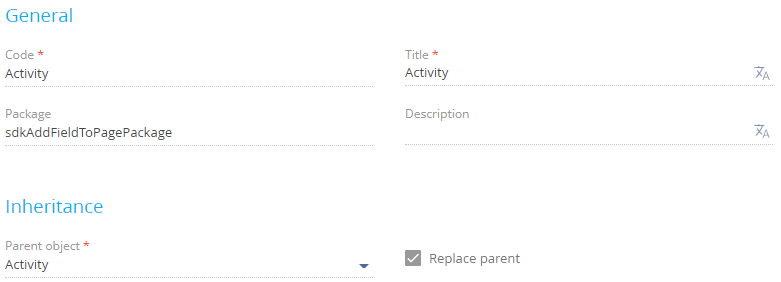
Fill out the schema properties.
- Set Code to "Activity."
- Set Title to "Activity."
- Select "Activity" in the Parent object property.
-
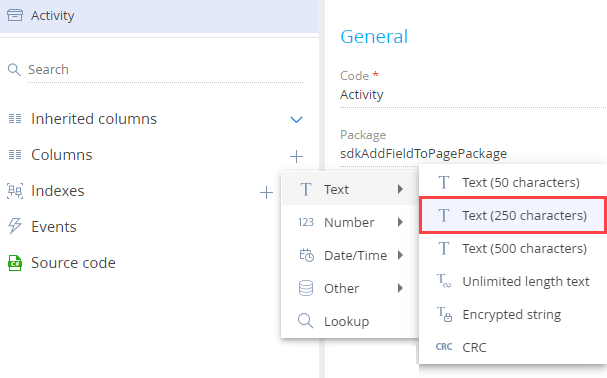
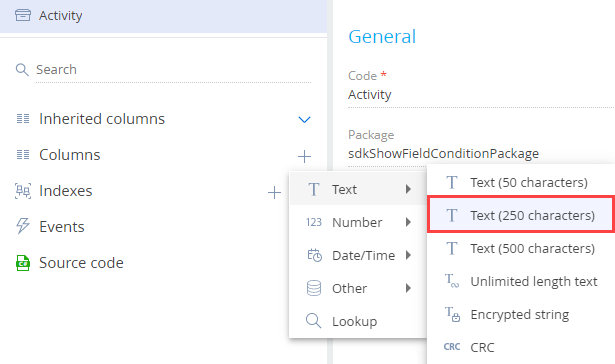
Add a column to the schema.
- Click
 in the context menu of the object structure's Columns node.
 -
Click Text → Text (250 characters) in the drop-down menu.
-
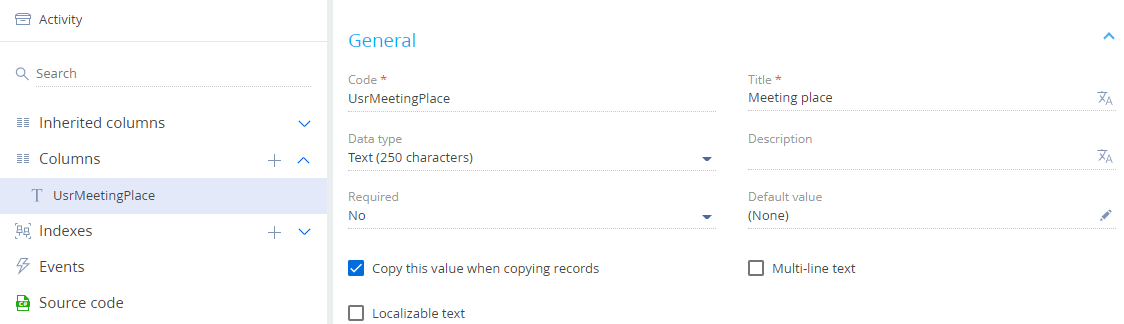
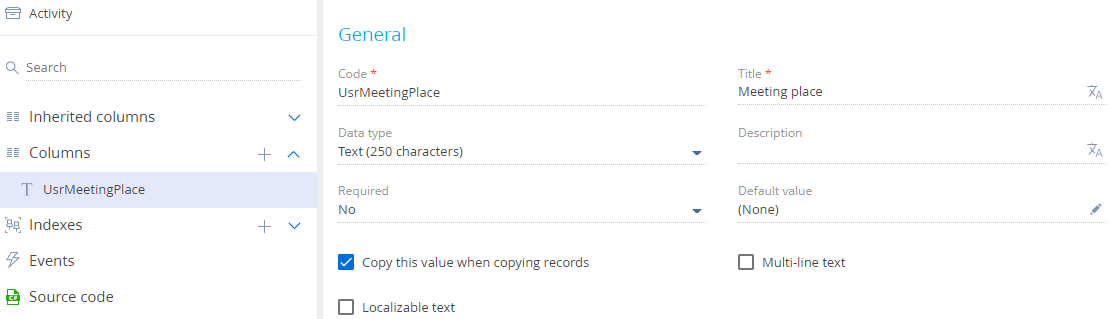
Fill out the properties of the added column.
- Set Code to "UsrMeetingPlace."
- Set Title to "Meeting place."
- Click
- Click Save then Publish on the Object Designer's toolbar.
2. Create a replacing view model schema of the activity page
- Go to the Configuration section and select a custom package to add the schema.
-
Click Add → Replacing view model on the section list toolbar.
/scr_add_replacing_module.png)
-
Fill out the schema properties.
- Set Code to "ActivityPageV2."
- Set Title to "Activity edit page."
- Select "ActivityPageV2" in the Parent object property.

-
Add a localizable string.
- Click the
/scr_add_button.png) button in the context menu of the Localizable strings node.
button in the context menu of the Localizable strings node. -
Fill out the localizable string properties.
- Set Code to "MeetingPlaceCaption."
- Set Value to "Meeting place."
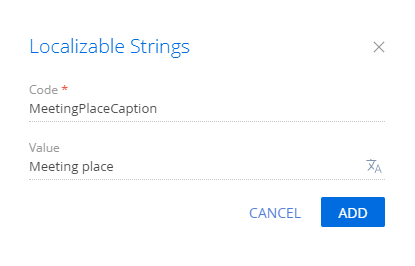
- Click Add to add a localizable string.
- Click the
-
Set up the field layout. To do this, add a configuration object with the settings that determine the field layout to the diff array of modifications.
View the source code of the replacing view model schema of the activity page below.
- Click Save on the Designer's toolbar.
Outcome of the example
To view the outcome of the example:
- Clear the browser cache.
- Refresh the Activities section page.
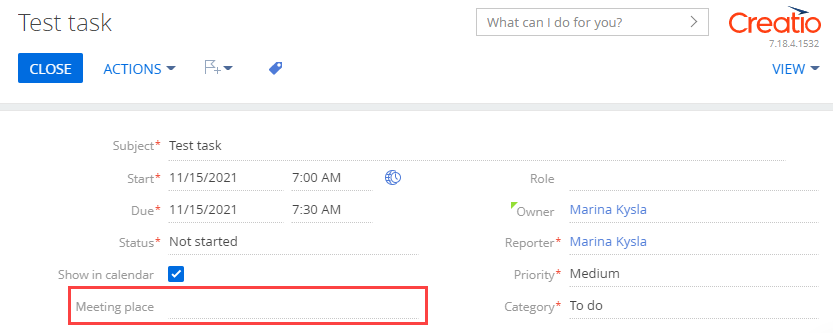
As a result, Creatio will add a Meeting place field to the page.
Create a replacing view model schema of the contact page
- Go to the Configuration section and select a custom package to add the schema.
-
Click Add → Replacing view model on the section list toolbar.
-
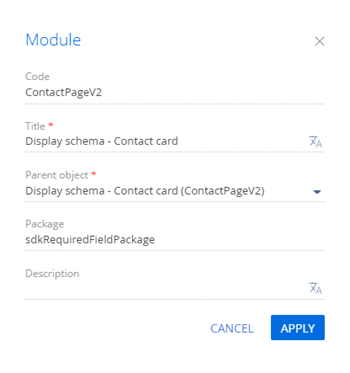
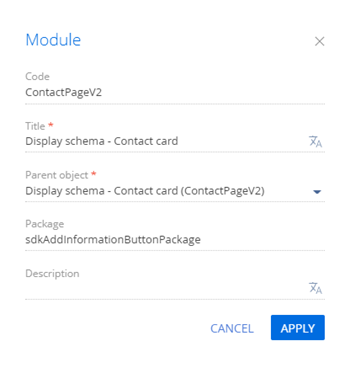
Fill out the schema properties.
- Set Code to "ContactPageV2."
- Set Title to "Display schema - Contact card."
- Select "ContactPageV2" in the Parent object property.

-
Set up the field layout. To do this, add a configuration object with the settings that determine the field layout to the diff array of modifications.
View the source code of the replacement view model of the contact page below.
- Click Save on the Designer's toolbar.
Outcome of the example
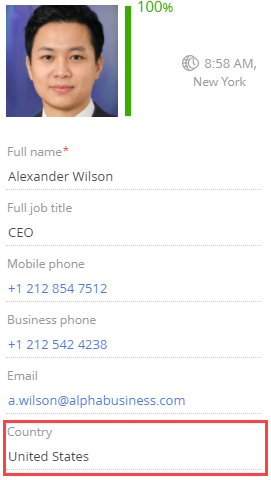
To view the outcome of the example, refresh the Contacts section page.
As a result, Creatio will add a Country field to the contact profile on the contact page.

1. Create a replacing object schema
- Go to the Configuration section and select a custom package to add the schema.
-
Click Add → Replacing object on the section list toolbar.
-
Fill out the schema properties.
- Set Code to "KnowledgeBase."
- Set Title to "Knowledge base article."
- Select "KnowledgeBase" in the Parent object property.

-
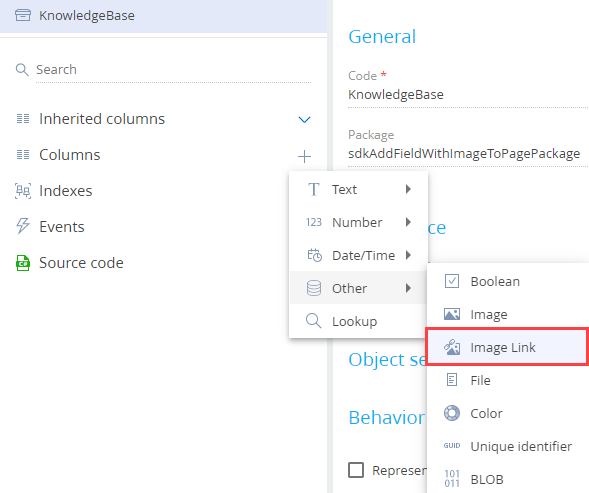
Add a column to the schema.
- Click in the context menu of the object structure's Columns node.
-
Click Other → Image Link in the drop-down menu.
-
Fill out the properties of the added column.
- Set Code to "UsrLogo."
- Set Title to "Knowledge base article logo."

- Click
- Click Save then Publish on the Object Designer's toolbar.
2. Create a replacing view model schema of the page of the knowledge base article
- Go to the Configuration section and select a custom package to add the schema.
-
Click Add → Replacing view model on the section list toolbar.
-
Fill out the schema properties.
- Set Code to "KnowledgeBasePageV2."
- Set Title to "Knowledge base edit page."
- Select "KnowledgeBasePageV2" in the Parent object property.

-
Add an image.
- Click the button in the context menu of the Images node.
-
Fill out the image properties.
- Set Code to "DefaultLogo."
- Specify the image field in the Image property.
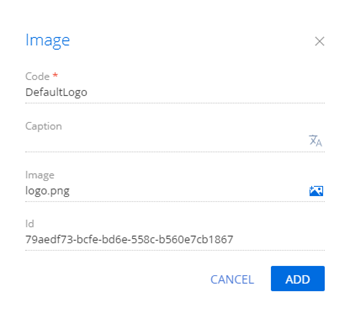
- Click Add to add the image.
- Click the
- Add the KnowledgeBasePageV2Resources and ConfigurationConstants modules as dependencies to the declaration of the view model class.
-
Set up the image field layout.
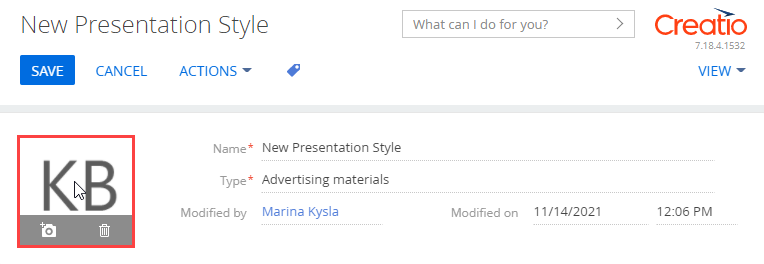
Place the image field at the top of the page of the knowledge base article. If you add an image field, the layout of base page fields can break. To avoid this, change the layout of existing fields at the top of the page besides placing the image field there. These are Name, Type, Modified By fields.
-
Implement the following methods in the methods property:
- getPhotoSrcMethod(). Receives the image by link
- beforePhotoFileSelected(). Called before the image selection box opens.
- onPhotoChange. Called upon the image change.
- onPhotoUploaded(). Saves the link to the changed image in the object column
- Add a configuration object with the settings that determine the layout of the image field and existing page fields to the diff array of modifications. Use the auxiliary PhotoContainer wrapper container that has the "image-edit-container" class to add an image field to the page.
View the source code of the replacing view model schema of the page of the knowledge base article below.
-
- Click Save on the Designer's toolbar.
Outcome of the example
To view the outcome of the example, refresh the Knowledge base section page.
As a result, Creatio will add an image field to the page of the knowledge base article. You can change or delete the image.
1. Create a replacing object schema
- Go to the Configuration section and select a custom package to add the schema.
-
Click Add → Replacing object on the section list toolbar.
-
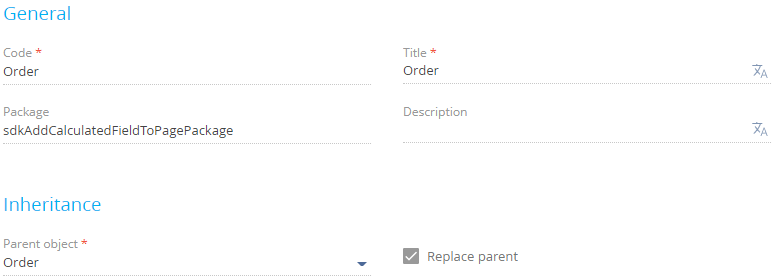
Fill out the schema properties.
- Set Code to "Order."
- Set Title to "Order."
- Select "Order" in the Parent object property.
-
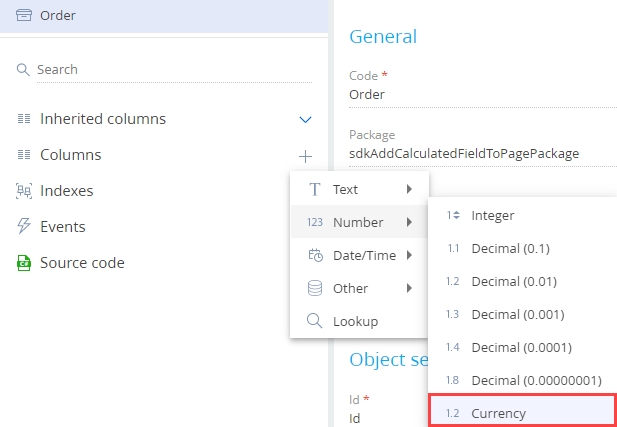
Add a column to the schema.
- Click in the context menu of the object structure's Columns node.
-
Click Number → Currency in the drop-down list.
-
Fill out the properties of the added column.
- Set Code to "UsrBalance."
- Set Title to "Payment balance."
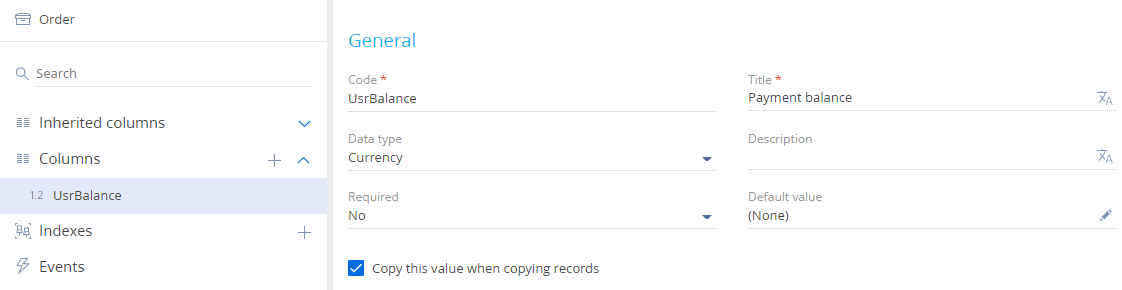
- Click
- Click Save then Publish on the Object Designer's toolbar.
2. Create a replacing view model schema of the order page
- Go to the Configuration section and select a custom package to add the schema.
-
Click Add → Replacing view model on the section list toolbar.
-
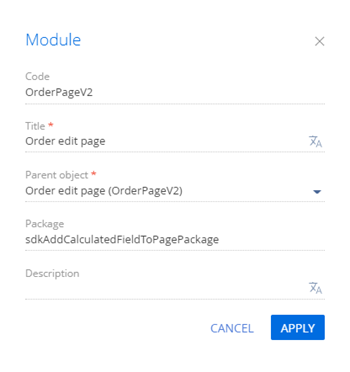
Fill out the schema properties.
- Set Code to "OrderPageV2."
- Set Title to "Order edit page."
- Select "OrderPageV2" in the Parent object property.
-
Set up the layout of the calculated field.
- Add the calculateBalance() handler method and the UsrBalance attribute in the attributes property. The attribute must inherit from the Amount and PaymentAmount columns.
-
Implement the following methods in the methods property:
-
calculateBalance(). Handles change events of the Amount and PaymentAmount columns. Required to calculate the value of the UsrBalance column specified in the UsrBalance attribute.
Keep in mind the data type of the calculation results to display in the calculated field. For example, the Decimal (0.01) data type involves a number with 2 decimal places. In this case, convert the data type using the toFixed() function before you pass the outcome to the object field. View the source code of an example that converts the data type below.
- onEntityInitialized(). Overloads the base virtual method. Called after Creatio initializes the object schema of the record page. Call the calculateBalance() handler method in the onEntityInitialized() method. The handler method ensures the payment remainder is calculated not only when the dependency columns change but also when the record page opens.
-
- Add a configuration object with the settings that determine the layout of the calculated field to the diff array of modifications.
View the source code of the order page's replacing view model below.
- Click Save on the Designer's toolbar.
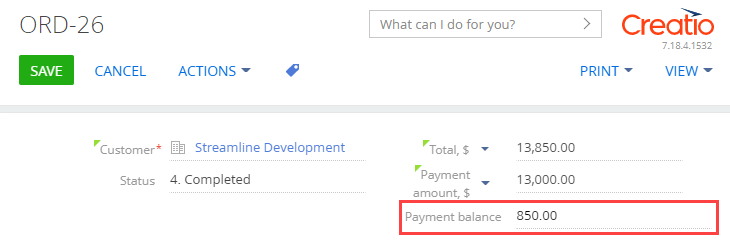
Outcome of the example
To view the outcome of the example:
- Clear the browser cache.
- Refresh the Orders section page.
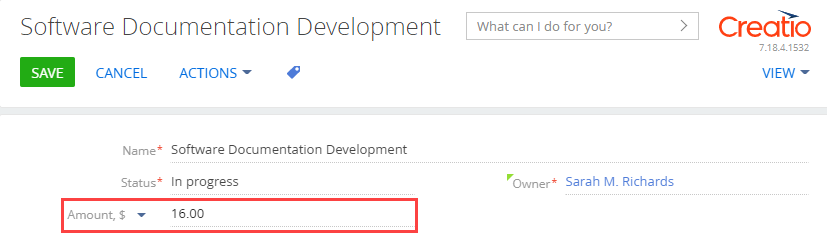
As a result, Creatio will add the Payment balance calculated field to the order page. The field value is the difference between the order (the Total field) and payment (the Payment amount field) amounts.
1. Create a replacing object schema
- Go to the Configuration section and select a custom package to add the schema.
-
Click Add → Replacing object on the section list toolbar.
-
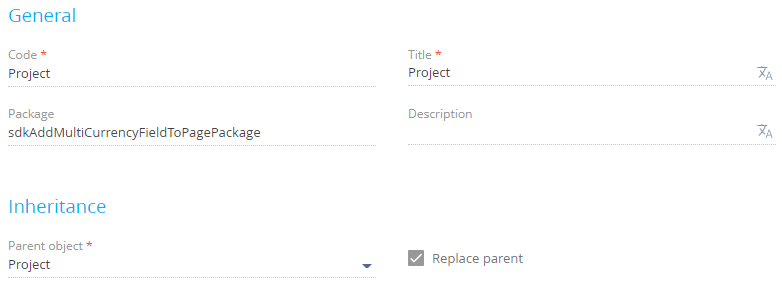
Fill out the schema properties.
- Set Code to "Project."
- Set Title to "Project."
- Select "Project" in the Parent object property.
-
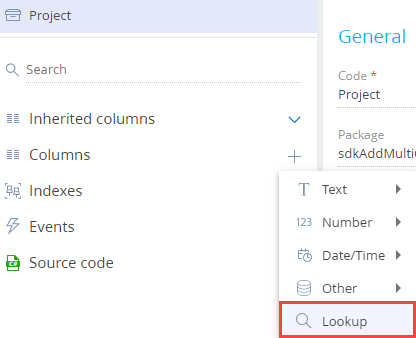
Add a column to the schema.
- Click in the context menu of the object structure's Columns node.
-
Click Lookup in the drop-down menu.
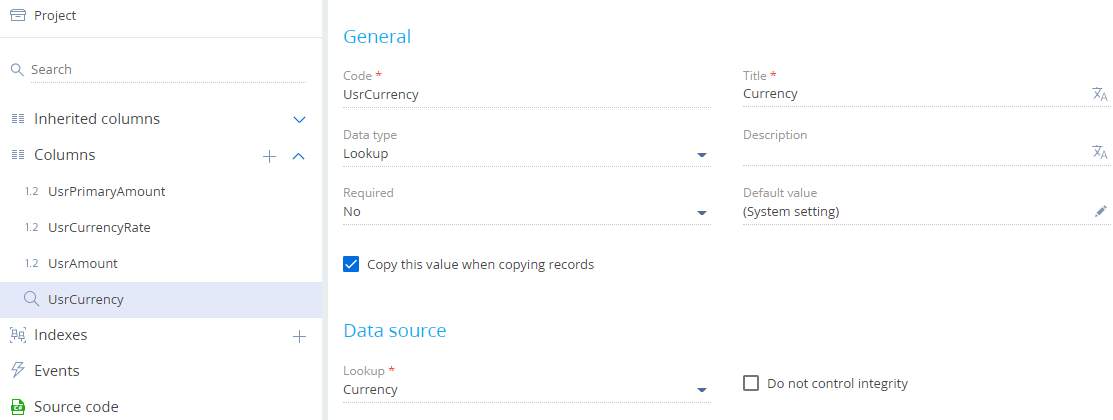
-
Fill out the properties of the added column.
- Set Code to "UsrCurrency."
- Set Title to "Currency."
- Set Lookup to "Currency."
-
Set up the Default value property.
- Click
/scr_edit_button.png) in the Default value field.
in the Default value field. - Select "System setting" in the Default value type property.
-
Select "Base currency" (PrimaryCurrency code) in the System setting property.

- Click
View the column properties in the figure below.
- Click
-
Add columns that contain the total amount, the amount in base currency, and the exchange rate similarly. View the column properties in the table below.
Properties of the columns to addData type) Code Title Currency "UsrAmount" "Amount" Currency "UsrPrimaryAmount" "Amount, base currency" Decimal (0.0001) "UsrCurrencyRate" "Exchange rate" - Click Save then Publish on the Object Designer's toolbar.
2. Create a replacing view model schema of the project page
- Go to the Configuration section and select a custom package to add the schema.
-
Click Add → Replacing view model on the section list toolbar.
-
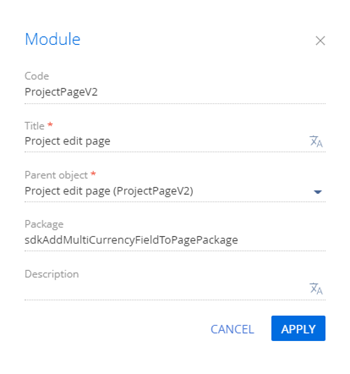
Fill out the schema properties.
- Set Code to "ProjectPageV2."
- Set Title to "Project edit page."
- Select "ProjectPageV2" in the Parent object property.
- Add the MoneyModule, MultiCurrencyEdit, MultiCurrencyEditUtilities modules as dependencies to the declaration of the view model class.
-
Set up the layout of the multicurrency field.
-
Add the following attributes to the attributes property:
- UsrCurrency. The currency. Corresponds to the UsrCurrency column.
- UsrCurrencyRate. The exchange rate. Corresponds to the UsrCurrencyRate column.
- UsrAmount. Total amount. Corresponds to the UsrAmount column.
- UsrPrimaryAmount. The amount in base currency. Corresponds to the UsrPrimaryAmount column.
- Currency. The currency. Corresponds to the Currency column. The multicurrency module interacts with this column. Declare a virtual column in the Currency attribute and link the column to the UsrCurrency column using the handler method.
- CurrencyRateList. The collection of exchange rates. Required for the multicurrency module to operate as intended.
- CurrencyButtonMenuList. The collection for the currency selection button. Required for the multicurrency module to operate as intended.
- Add the MultiCurrencyEditUtilities mixin to the mixins property.
-
Implement the following methods in the methods property:
- onEntityInitialized(). Overloads the base virtual method. Called after Creatio initializes the object schema of the record page.
- setCurrencyRate(). Sets the currency exchange rate.
- recalculateAmount(). Recalculates the total amount.
- recalculatePrimaryAmount(). Recalculates the amount in base currency.
- onVirtualCurrencyChange(). Handles the changes to the virtual currency column.
- Add a configuration object with the settings that determine the layout of the multicurrency field to the diff array of modifications.
View the source code of the replacing view model schema of the project page below.
-
- Click Save on the Designer's toolbar.
Outcome of the example
To view the outcome of the example, refresh the Projects section page.
As a result, Creatio will add an Amount multicurrency field.
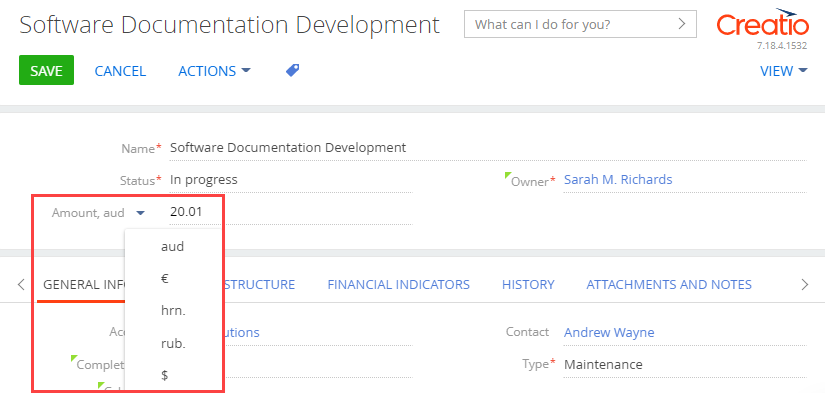
Creatio recalculates the field value automatically after you select the currency in the drop-down list.
Create a replacing view model schema of the opportunity page
- Go to the Configuration section and select a custom package to add the schema.
-
Click Add → Replacing view model on the section list toolbar.
-
Fill out the schema properties.
- Set Code to "OpportunityPageV2."
- Set Title to "Opportunity edit page."
- Select "OpportunityPageV2" in the Parent object property.

-
Add a localizable string.
- Click the button in the context menu of the Localizable strings node.
-
Fill out the localizable string properties.
- Set Code to "CreatedOnLessDueDateMessage."
- Set Value to "Created on must be less than Closed on."

- Click Add to add a localizable string.
- Click the
-
Implement validation of the Date/Time type field.
To do this, implement the following methods in the methods property:
- dueDateValidator(). The validator method that checks whether the condition is true.
- setValidationConfig(). The overloaded base method that binds the validator method to the DueDate and CreatedOn columns.
View the source code of the replacing view model schema of the opportunity page below.
- Click Save on the Designer's toolbar.
Outcome of the example
To view the outcome of the example:
- Refresh the Opportunities section page.
- Enter the date earlier than the Created on field value in the Closed on field.
As a result, Creatio will display the corresponding warning on the opportunity page.
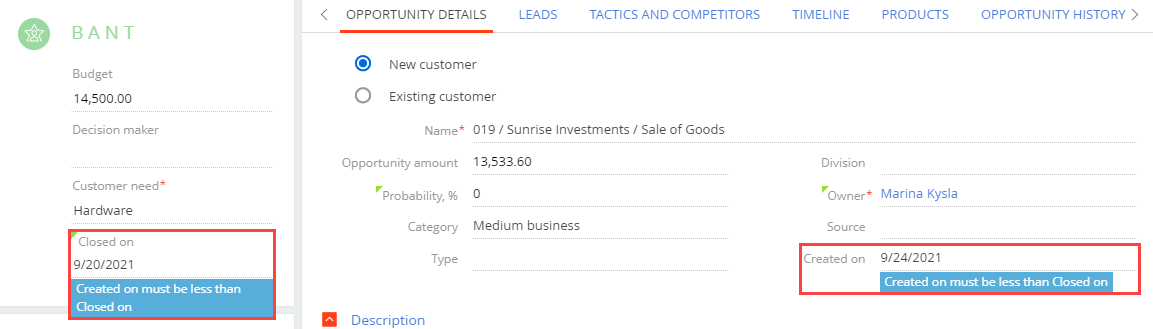
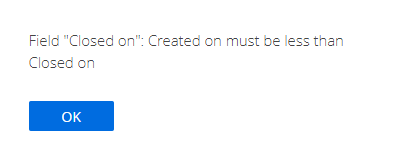
If you try to save an opportunity where the date value of the Closed on field is earlier than the Created on date, a message box will open.
Create a replacing view model schema of the contact page
- Go to the Configuration section and select a custom package to add the schema.
-
Click Add → Replacing view model on the section list toolbar.
-
Fill out the schema properties.
- Set Code to "ContactPageV2."
- Set Title to "Display schema - Contact card."
- Select "ContactPageV2" in the Parent object property.

-
Add a localizable string.
- Click the button in the context menu of the Localizable strings node.
-
Fill out the localizable string properties.
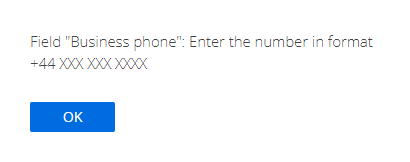
- Set Code to "InvalidPhoneFormatMessage."
- Set Value to "Enter the number in format +44 XXX XXX XXXX.

- Click Add to add a localizable string.
- Click the
- Add the ConfigurationConstants module as a dependency to the declaration of the view model class.
-
Implement the validation of the String type field.
To do this, implement the following methods in the methods property:
- phoneValidator(). The validator method that checks whether the condition is true.
- setValidationConfig(). The overloaded base method that binds the validator method to the Phone column.
View the source code of the replacement view model of the contact page below.
- Click Save on the Designer's toolbar.
Outcome of the example
To view the outcome of the example:
- Refresh the Contacts section page.
- Enter a phone number that does not match the +44 XXX XXX XXXX pattern in the Business phone field.
As a result, Creatio will display the corresponding warning on the contact page.
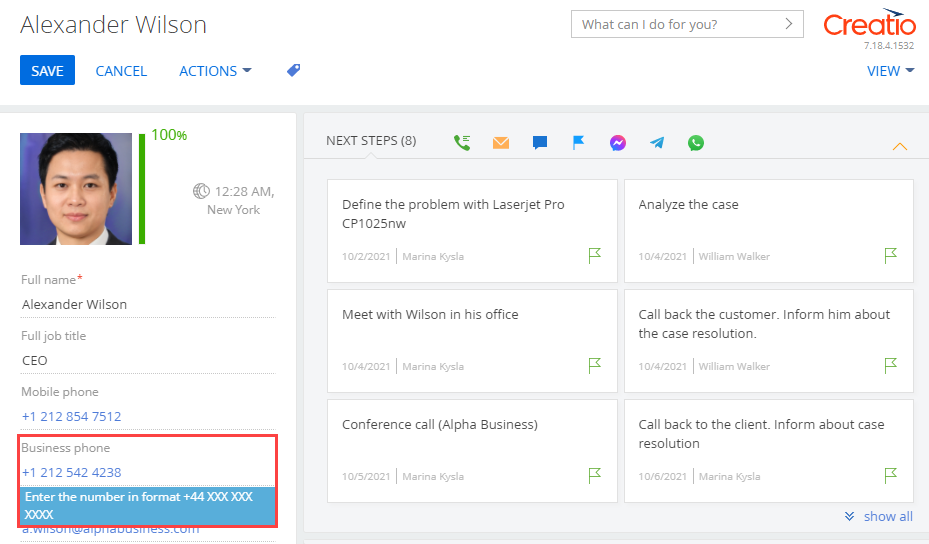
If you try to save a contact whose phone number does not match the +44 XXX XXX XXXX pattern, a message box will open.
Create a replacing view model schema of the project page
- Go to the Configuration section and select a custom package to add the schema.
-
Click Add → Replacing view model on the section list toolbar.
-
Fill out the schema properties.
- Set Code to "ProjectPageV2."
- Set Title to "Project edit page."
- Select "ProjectPageV2" in the Parent object property.

-
Set up the field population logic.
To do this, implement the following methods in the methods property:
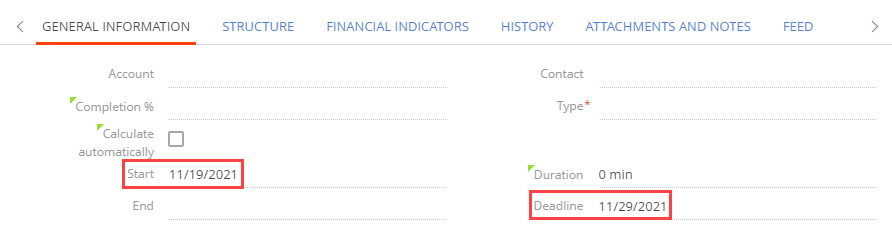
- onEntityInitialized(). An overloaded base virtual method. Called after Creatio initializes the object schema. Call the setDeadline() handler method in the onEntityInitialized() method. The handler method ensures the Deadline field value is set when a record page opens.
- setDeadline(). The handler method that calculates the Deadline field value.
View the source code of the replacing view model schema of the project page below.
- Click Save on the Designer's toolbar.
Outcome of the example
To view the outcome of the example, refresh the Projects section page.
As a result, Creatio will set the date value of the Deadline field that is 10 days later than the Start date on the page that adds a project.
Create a replacing view model schema of the contact page
- Go to the Configuration section and select a custom package to add the schema.
-
Click Add → Replacing view model on the section list toolbar.
-
Fill out the schema properties.
- Set Code to "ContactPageV2."
- Set Title to "Display schema - Contact card."
- Select "ContactPageV2" in the Parent object property.
- Add the BusinessRuleModule and ConfigurationConstants modules as dependencies to the declaration of the view model class.
-
Make the field required.
To do this, set the rules property for the Phone column:
- Set the ruleType property to BINDPARAMETER. The value sets the business rule type. The BusinessRuleModule.enums.RuleType enumeration represents the rule types.
- Set the property property to REQUIRED. The value marks the column as required. The BusinessRuleModule.enums.Property enumeration represents the properties of the BINDPARAMETER business rule.
- Specify the execution conditions of the business rule in the conditions array. The Type column value must match the ConfigurationConstants.ContactType.Client configuration constant that includes the ID of the "Customer" record of the Contact types lookup.
View the source code of the replacement view model of the contact page below.
- Click Save on the Designer's toolbar.
Outcome of the example
To view the outcome of the example:
- Refresh the Contacts section page.
- Select "Customer" in the Type field of the contact page if needed.
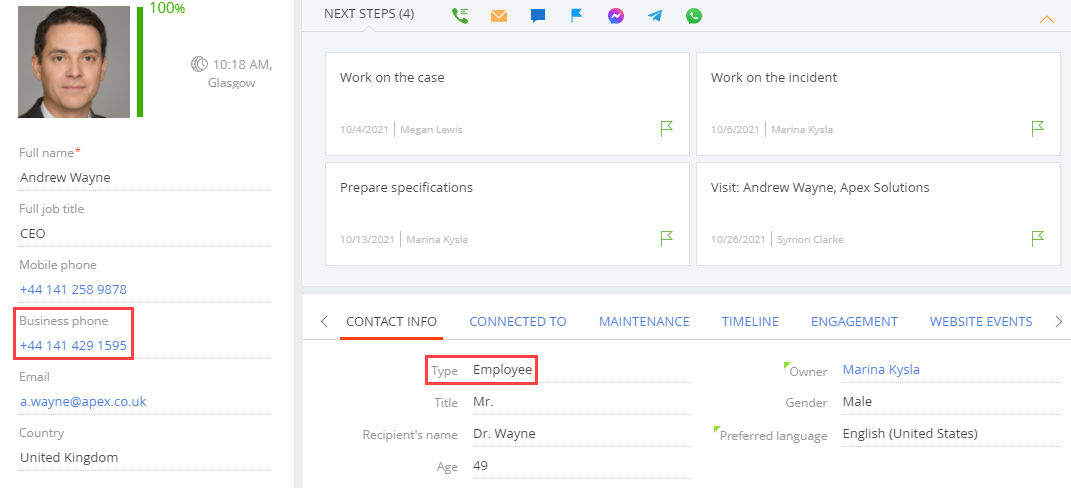
As a result, Creatio will make the Business phone field required for the "Customer" type contacts.
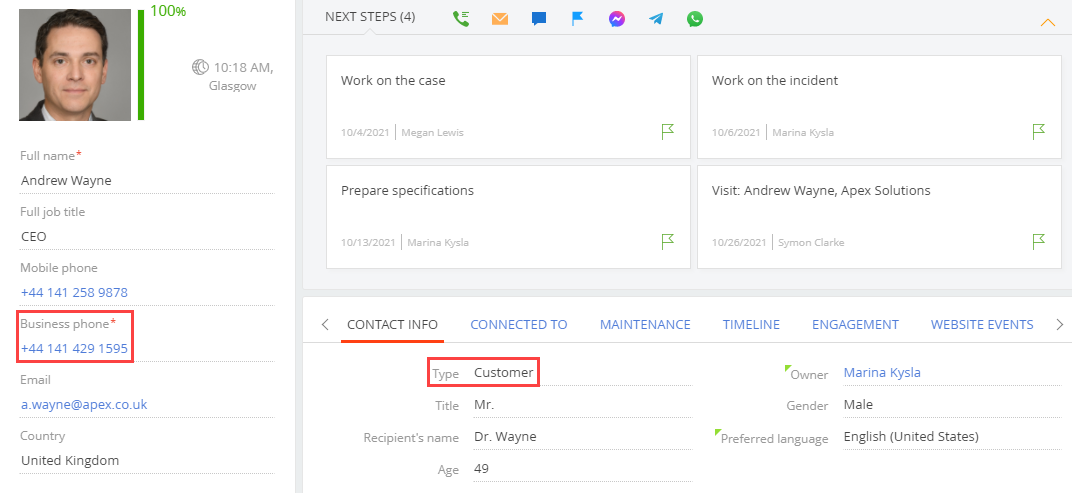
If you try to save a "Customer" type contact whose Business phone field is empty, a message box will open.
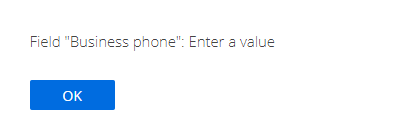
The Business phone field is optional for other contact types. For example, "Employee."
Create a replacing view model schema of the account page
- Go to the Configuration section and select a custom package to add the schema.
-
Click Add → Replacing view model on the section list toolbar.
-
Fill out the schema properties.
- Set Code to "AccountPageV2."
- Set Title to "Account edit page."
- Select "AccountPageV2" in the Parent object property.

-
Implement the filtering of lookup field values.
To do this, set the attributes property for the Owner column:
- Set the dataValueType property to LOOKUP. The value sets the column data type. The Terrasoft.core.enums.DataValueType enumeration represents the column data types.
- Specify the configuration object of the lookup field in the lookupListConfig property.
- Specify the function that returns the filter collection in the filters array.
View the source code of the replacing view model schema of the account page below.
- Click Save on the Designer's toolbar.
Outcome of the example
To view the outcome of the example, refresh the Accounts section page.
As a result, Creatio will filter contacts on the account page when you fill out the Owner lookup field.
For example, you cannot select the Andrew Z. Barber contact in the Owner lookup field on the account page because the contact is inactive.
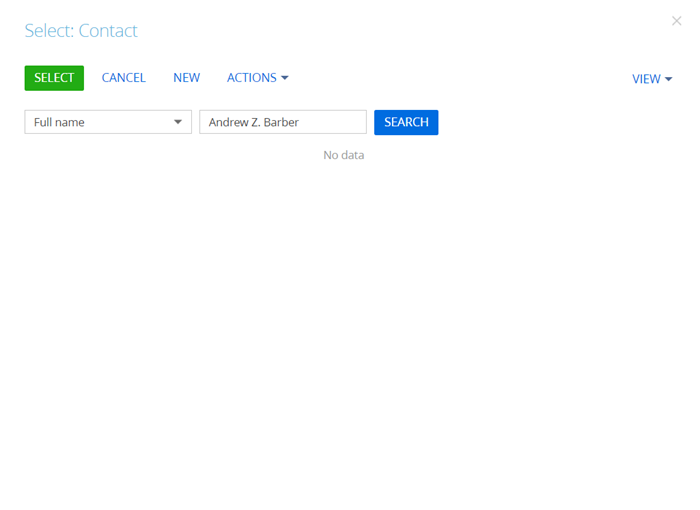
You cannot select the Sheldon Mallen contact in the Owner lookup field on the account page because the contact is not linked to a Creatio user.

Create a replacing view model schema of the contact page
- Go to the Configuration section and select a custom package to add the schema.
-
Click Add → Replacing view model on the section list toolbar.
-
Fill out the schema properties.
- Set Code to "ContactPageV2."
- Set Title to "Display schema - Contact card."
- Select "ContactPageV2" in the Parent object property.

- Add the BusinessRuleModule module as a dependency to the declaration of the view model class.
-
Implement the value filtering for connected lookup fields.
-
Take the following steps in the rules property for the City and Region columns:
- Set the ruleType property to FILTRATION. The value sets the business rule type. The BusinessRuleModule.enums.RuleType enumeration represents the rule types.
- Set the autocomplete property to true. The property performs inverse filtering, i. e., populates the Country and State/province fields automatically depending on the selected city.
-
Add the configuration object with the layout settings of the Country, State/province, City fields to the diff array of modifications.
The base schema of the contact page has a rule for filtering cities by the country specified for the contact. To enable users to select a city from a country not specified for the contact, add a Country field.
View the source code of the replacement view model of the contact page below.
-
- Click Save on the Designer's toolbar.
Outcome of the example
To view the outcome of the example, refresh the Contacts section page.
As a result, Creatio will add the Country, State/province, City connected lookup fields to the contact profile on the contact page.
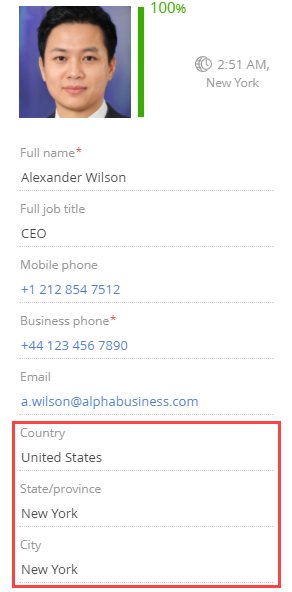
You can change the contact country in the contact profile.
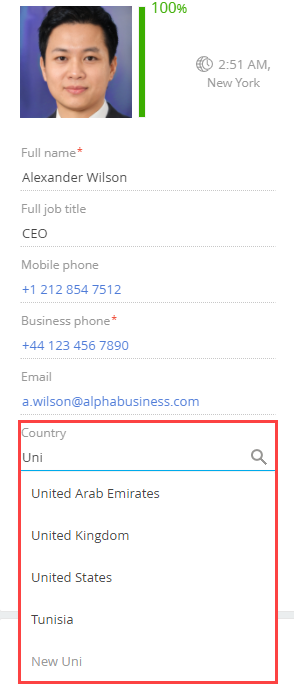
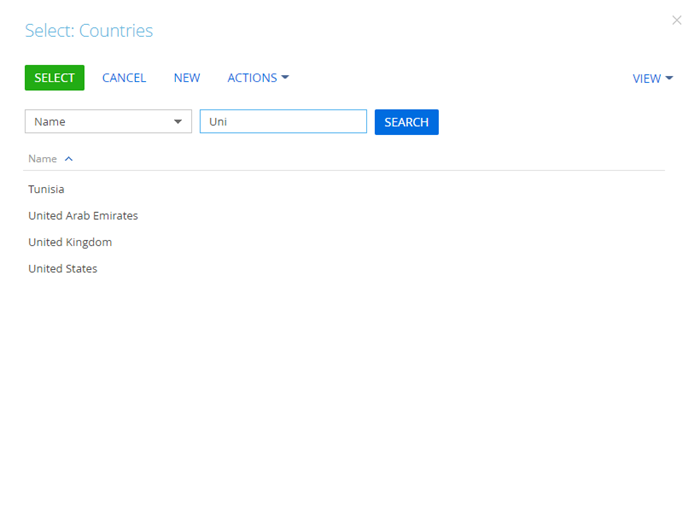
Creatio also filters the country selection box.
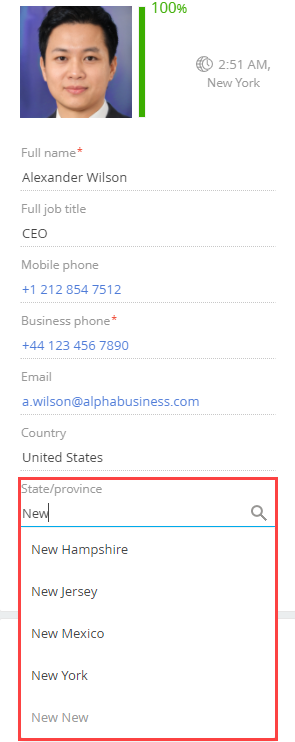
The index of selectable states/provinces depends on the country selected in the Country field. Creatio filters both the input field and state/province selection box.
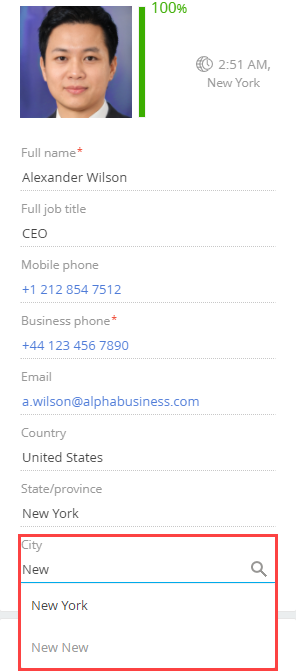
The index of selectable cities depends on the state/province selected in the State/province field. Creatio filters both the input field and city selection box.
Create a replacing view model schema of the contact page
- Go to the Configuration section and select a custom package to add the schema.
-
Click Add → Replacing view model on the section list toolbar.
-
Fill out the schema properties.
- Set Code to "ContactPageV2."
- Set Title to "Display schema - Contact card."
- Select "ContactPageV2" in the Parent object property.

- Add the BusinessRuleModule module as a dependency to the declaration of the view model class.
-
Set up the conditions that lock the field.
-
Take the following steps in the rules property for the Phone column:
- Set the ruleType property to BINDPARAMETER. The value sets the business rule type. The BusinessRuleModule.enums.RuleType enumeration represents the rule types.
- Set the property property to ENABLED. The value sets the column availability. The BusinessRuleModule.enums.Property enumeration represents the properties of the BINDPARAMETER business rule.
- Specify the execution conditions of the business rule in the conditions array. The MobilePhone column value cannot be empty.
View the source code of the replacement view model of the contact page below.
-
- Click Save on the Designer's toolbar.
Outcome of the example
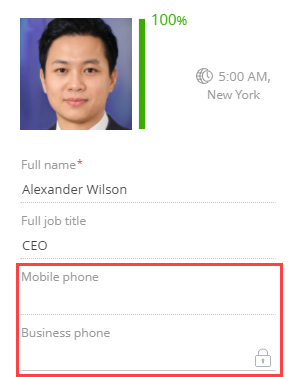
To view the outcome of the example, refresh the Contacts section page.
As a result, Creatio will lock the Business phone field on the contact page if the Mobile phone field is empty.
Create a replacing view model schema of the invoice page
- Go to the Configuration section and select a custom package to add the schema.
-
Click Add → Replacing view model on the section list toolbar.
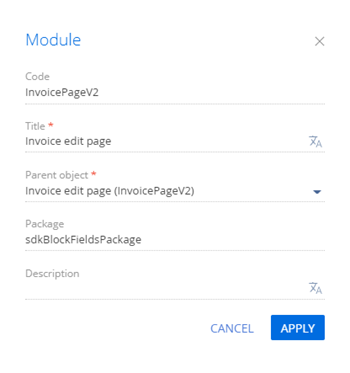
-
Fill out the schema properties.
- Set Code to "InvoicePageV2."
- Set Title to "Invoice edit page."
- Select "InvoicePageV2" in the Parent object property.
- Add the InvoiceConfigurationConstants module as a dependency to the declaration of the view model class.
-
Set up the conditions that lock fields and keep fields unlocked.
- Add the IsModelItemsEnabled attribute to the attributes property. The attribute includes the mechanism that locks the fields.
-
Implement the following methods in the methods property:
- getDisableExclusionsColumnTags(). Keeps the column unlocked.
- getDisableExclusionsDetailSchemaNames(). Keeps the detail unlocked.
- setCardLockoutStatus(). Sets up the conditions that lock fields.
- onEntityInitialized(). Overloads the base virtual method. Called after Creatio initializes the object schema of the record page.
- Add a configuration object to the diff array of modifications. The object must contain the settings of the CardContentWrapper container that locks the fields.
View the source code of the replacing view model schema of the invoice page below.
- Click Save on the Designer's toolbar.
Outcome of the example
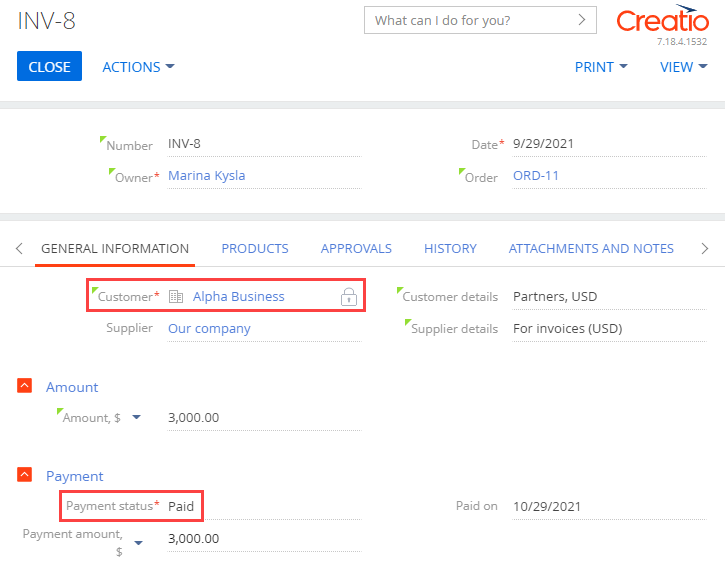
To view the outcome of the example, refresh the Invoices section page.
As a result, Creatio will lock most fields on the page of the invoice that has "Paid" selected in the Payment status field. The following remain unlocked:
- the Payment status field
- the Activities detail
- the fields that have the enabled property of the diff array of modifications set to true
1. Create a replacing object schema
- Go to the Configuration section and select a custom package to add the schema.
-
Click Add → Replacing object on the section list toolbar.
-
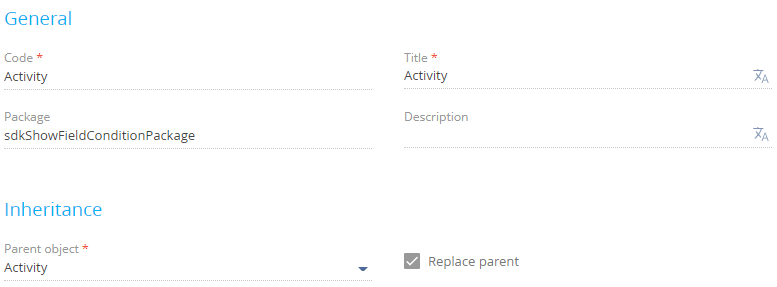
Fill out the schema properties.
- Set Code to "Activity."
- Set Title to "Activity."
- Select "Activity" in the Parent object property.
-
Add a column to the schema.
- Click in the context menu of the object structure's Columns node.
-
Click Text → Text (250 characters) in the drop-down menu.
-
Fill out the properties of the added column.
- Set Code to "UsrMeetingPlace."
- Set Title to "Meeting place."
- Click
- Click Save then Publish on the Object Designer's toolbar.
2. Create a replacing view model schema of the contact page
- Go to the Configuration section and select a custom package to add the schema.
-
Click Add → Replacing view model on the section list toolbar.
-
Fill out the schema properties.
- Set Code to "ActivityPageV2."
- Set Title to "Activity edit page."
- Select "ActivityPageV2" in the Parent object property.

-
Add a localizable string.
- Click the button in the context menu of the Localizable strings node.
-
Fill out the localizable string properties.
- Set Code to "MeetingPlaceCaption."
- Set Value to "Meeting place."
- Click Add to add a localizable string.
- Click the
- Add the BusinessRuleModule and ConfigurationConstants modules as dependencies to the declaration of the view model class.
-
Set up the field display conditions.
-
Take the following steps in the rules property for the UsrMeetingPlace column:
- Set the ruleType property to BINDPARAMETER. The value sets the business rule type. The BusinessRuleModule.enums.RuleType enumeration represents the rule types.
- Set the property property to VISIBLE. The value sets the column visibility. The BusinessRuleModule.enums.Property enumeration represents the properties of the BINDPARAMETER business rule.
- Specify the execution conditions of the business rule in the conditions array. The ActivityCategory column value must match the ConfigurationConstants.Activity.ActivityCategory.Meeting configuration constant that includes the ID of the "Meeting" record of the Activity types lookup.
- Add a configuration object with the settings that determine the layout of the Meeting place field to the diff array of modifications.
View the source code of the replacing view model schema of the activity page below.
-
- Click Save on the Designer's toolbar.
Outcome of the example
To view the outcome of the example:
- Refresh the Activities section page.
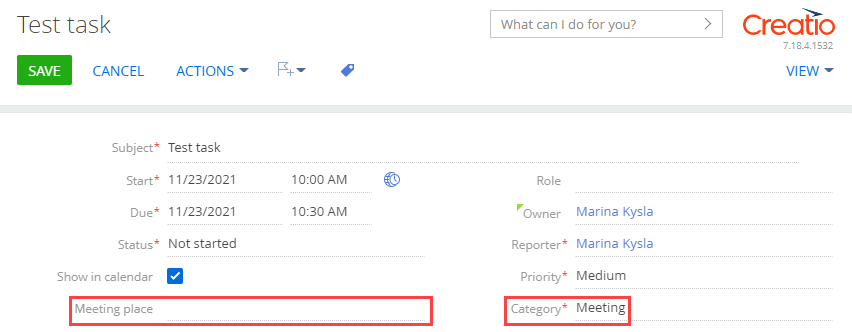
- Select "Meeting" in the Category field of the activity page if needed.
As a result, Creatio will display the Meeting place field for activities that have the "Meeting" category.
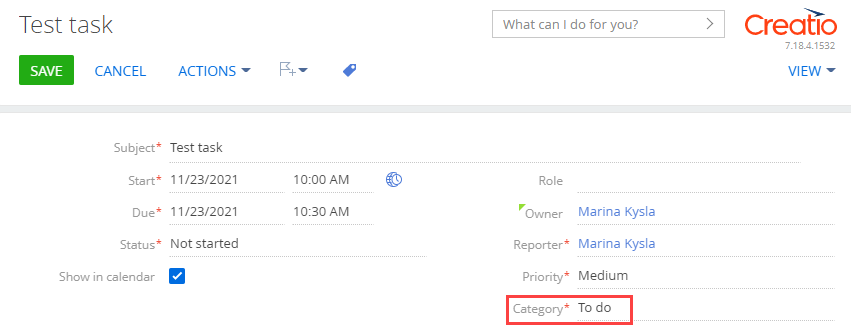
Creatio will not display the Meeting place field for other activity categories. For example, "To do."
1. Create system settings
-
Create a system setting that contains the product code pattern.
- Click
 to open the System Designer.
 - Go to the System setup block → System settings.
- Click Add setting on the section toolbar.
-
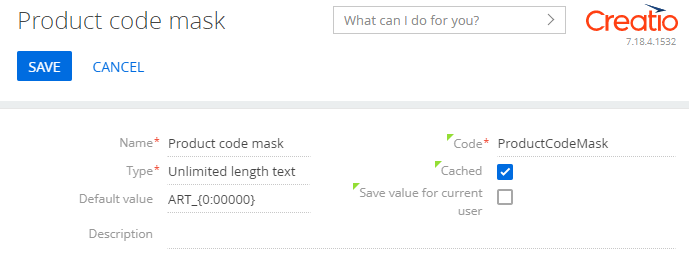
Fill out the properties of the system setting.
- Set Name to "Product code mask."
- Set Code to "ProductCodeMask."
- Select "Unlimited length text" in the Type property.
- Set Default value to "ART_{0:00000}."
- Click
-
Create a system setting that contains the current product code.
- Click to open the System Designer.
- Go to the System setup block → System settings.
- Click Add setting on the section toolbar.
-
Fill out the properties of the system setting.
- Set Name to "Product last number."
- Set Code to "ProductLastNumber."
- Select "Integer" in the Type property.

- Click
2. Create a replacing view model schema of the product page
- Go to the Configuration section and select a custom package to add the schema.
-
Click Add → Replacing view model on the section list toolbar.
-
Fill out the schema properties.
- Set Code to "ProductPageV2."
- Set Title to "Edit page - Product.".
- Select "ProductPageV2" in the Parent object property.

-
Implement the automatic field numbering.
To do this, implement the onEntityInitialized() overloaded base virtual method in the methods property. Called after Creatio initializes the object schema. Call the getIncrementCode() handler method in the onEntityInitialized() method. The handler method assigns the generated number to the Code field.
View the source code of the replacement view model of the product page below.
- Click Save on the Designer's toolbar.
Outcome of the example
To view the outcome of the example:
- Clear the browser cache.
- Refresh the Products section page.
As a result, Creatio will enable the automatic numbering of the Code field on the page that adds a product.
1. Create system settings
-
Create a system setting that contains the product code pattern.
- Click to open the System Designer.
- Go to the System setup block → System settings.
- Click Add setting on the section toolbar.
-
Fill out the properties of the system setting.
- Set Name to "Product code mask."
- Set Code to "ProductCodeMask."
- Select "Unlimited length text" in the Type property.
- Set Default value to "ART_{0:00000}."
- Click
-
Create a system setting that contains the current product code.
- Click to open the System Designer.
- Go to the System setup block → System settings.
- Click Add setting on the section toolbar.
-
Fill out the properties of the system setting.
- Set Name to "Product last number."
- Set Code to "ProductLastNumber."
- Select "Integer" in the Type property.
- Click
2. Create a replacing object schema
- Go to the Configuration section and select a custom package to add the schema.
-
Click Add → Replacing object on the section list toolbar.
-
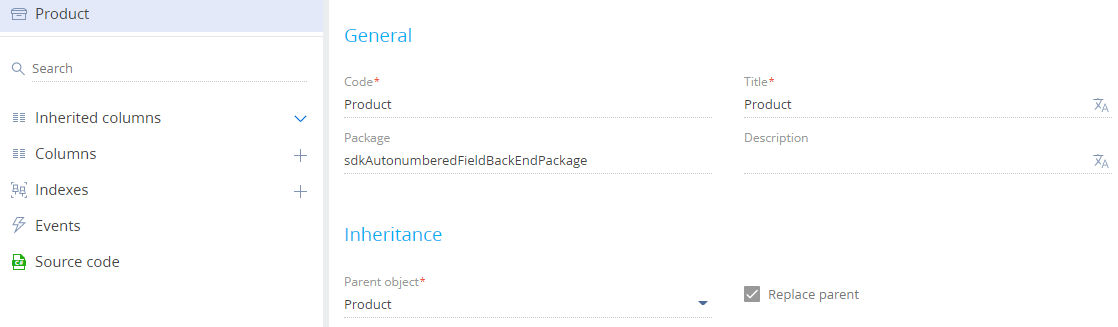
Fill out the schema properties.
- Set Code to "Product."
- Set Title to "Product."
- Select "Product" in the Parent object property.
-
Add an event to the schema.
- Open the Events node of the object structure.
-
Go to the Adding block → select the Before record added checkbox. Creatio names the event ProductInserting.

- Click Save on the Object Designer's toolbar.
-
Implement an event sub-process.
- Click Open process on the Object Designer's toolbar.
-
Click System actions in the element area of the Designer and drag the Event sub-process element to the working area of the Process Designer.
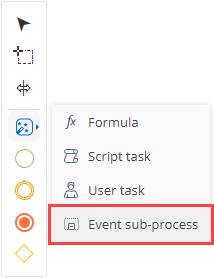
- Set the Title property in the element setup area to "Product Inserting Sub-process."
-
Set up the event sub-process elements.
-
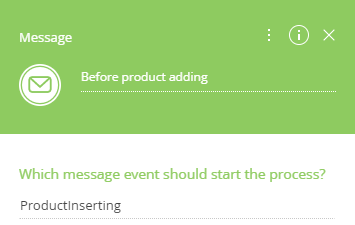
Set up the Message start event.
- Set Title to "Before product adding."
- Set Which message event should start the process? to "ProductInserting."
-
Add the Exclusive gateway (OR) gateway .
To do this, select Exclusive gateway (OR) in the menu of the Message start event.
-
Add the Script task system action.
-
Click System actions in the element area of the Designer and drag the Script task system action to the working area of the sub-process.
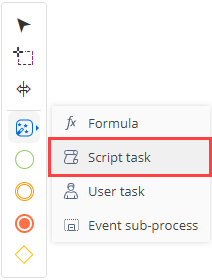
- Name the Script task system action "Get entity schema to generate number."
-
Add the code of the Script task system action.
UserTask1 is the code of the Generate number system action of the User task type. The element setup procedure is covered on the next step. You can edit the code in the advanced setup mode of the User task system action.
- Click Save on the Process Designer's toolbar.
-
-
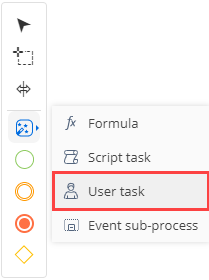
Add the User task system action.
-
Click System actions in the element area of the Designer and drag the User task action to the working area of the sub-process.
-
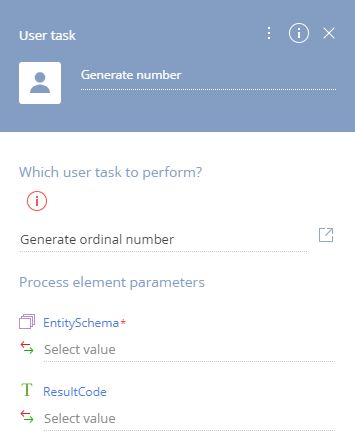
Specify the properties of the system action.
- Set Title to "Generate number."
- Select "Generate ordinal number" in the Which user task to perform? property. The system action generates the current ordinal number based on the pattern specified in the ProductCodeMask system setting.
-
-
Add the Script task system action.
-
Click System actions in the element area of the Designer and drag the Script task system action to the working area of the sub-process.
- Name the Script task system action "Save number to entity column."
-
Add the code of the Script task system action.
- Click Save on the Process Designer's toolbar.
-
-
Add the Terminate event.
To do this, click Terminate in the element area of the Designer and drag the event to the working area of the sub-process.

-
-
Set up the flows.
-
Set up the conditional flow between the Exclusive gateway (OR) gateway and Get entity schema to generate number system action.
- Click
 in the menu of the Exclusive gateway (OR) gateway and connect the Exclusive gateway (OR) gateway to the Get entity schema to generate number system action.
 -
Fill out the conditional flow properties.
- Set Title to "Code is empty."
-
Set up the Condition to move down the flow property.
- Click
 on the element setup area next in the Condition to move down the flow property.
 -
Specify the formula.
- Save the changes.
- Click
- Click
-
Set up the default flow between the Exclusive gateway (OR) gateway and Terminate event.
- Click in the menu of the Exclusive gateway (OR) gateway and connect the Exclusive gateway (OR) gateway to the Terminate event.
-
Convert the sequence flow into a default flow. To do this, click
 in the flow menu → Default flow.
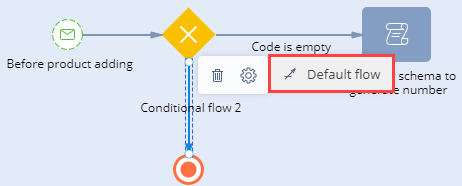
- Click
-
Set up the sequence flows.
- Click in the menu of the Get entity schema to generate number system action and connect the Get entity schema to generate number system action to the Generate number system action.
- Click in the menu of the Generate number system action and connect the Generate number system action to the Save number to entity column system action.
- Click
-
View the event sub-process in the figure below
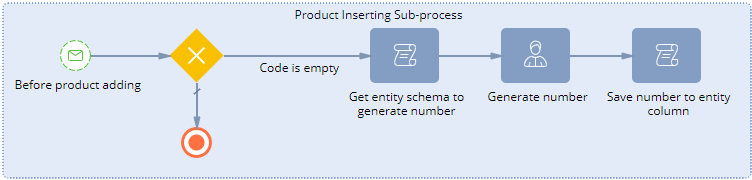
- Click Save then Publish on the Process Designer's toolbar.
Outcome of the example
To view the outcome of the example:
- Clear the browser cache.
- Refresh the Products section page.
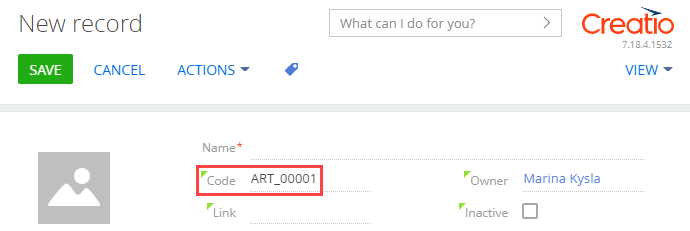
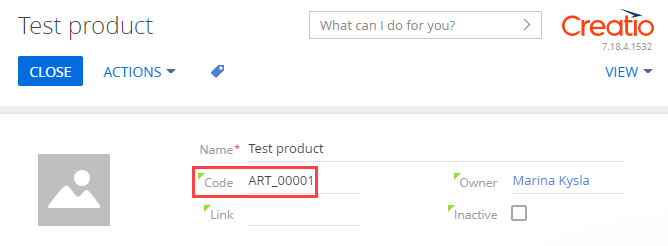
- Add and save a new product. For example, Test product.
Creatio generates the code automatically and saves it to the column server-side when the Before Record Saved event is triggered. The event is triggered server-side when the query to add a record is sent from the front-end. As such, Creatio cannot display the code on the page that adds a product immediately. The number will be displayed when you save the product.
As a result, Creatio will enable the automatic numbering of the Code field on the product page.
Create a replacing view model schema of the contact page
- Go to the Configuration section and select a custom package to add the schema.
-
Click Add → Replacing view model on the section list toolbar.
-
Fill out the schema properties.
- Set Code to "ContactPageV2."
- Set Title to "Display schema - Contact card."
- Select "ContactPageV2" in the Parent object property.
-
Add a localizable string.
- Click the button in the context menu of the Localizable strings node.
-
Fill out the localizable string properties.
- Set Code to "InfoButtonCaption."
- Set Value to "This is obligatory field."
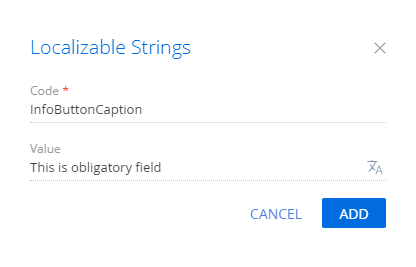
- Click Add to add a localizable string.
- Click the
-
Implement the info button.
To do this, attach a configuration object with the settings that determine the info button position to the page field in the diff array of modifications.
View the source code of the replacement view model of the contact page below.
- Click Save on the Designer's toolbar.
Outcome of the example
To view the outcome of the example, refresh the Contacts section page.
As a result, Creatio will attach an info button to the Full name field of the contact profile on the contact page.

Create a replacing view model schema of the contact page
- Go to the Configuration section and select a custom package to add the schema.
-
Click Add → Replacing view model on the section list toolbar.
-
Fill out the schema properties.
- Set Code to "ContactPageV2."
- Set Title to "Display schema - Contact card."
- Select "ContactPageV2" in the Parent object property.

-
Add a localizable string that contains the tooltip text.
- Click the button in the context menu of the Localizable strings node.
-
Fill out the localizable string properties.
- Set Code to "TypeFieldHint."
- Set Value to "Choose the type of the contact from the list. <a href="https://
academy.creatio.com/ docs/ user/ platform_basics/ user_interface/ record_pages_shortcut/ record_pages" target="_blank">Read more</a>."
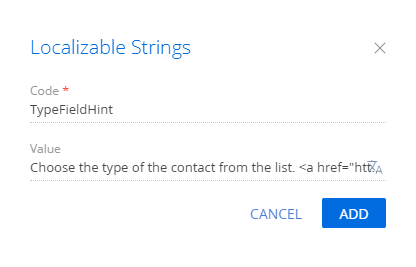
- Click Add to add a localizable string.
- Click the
-
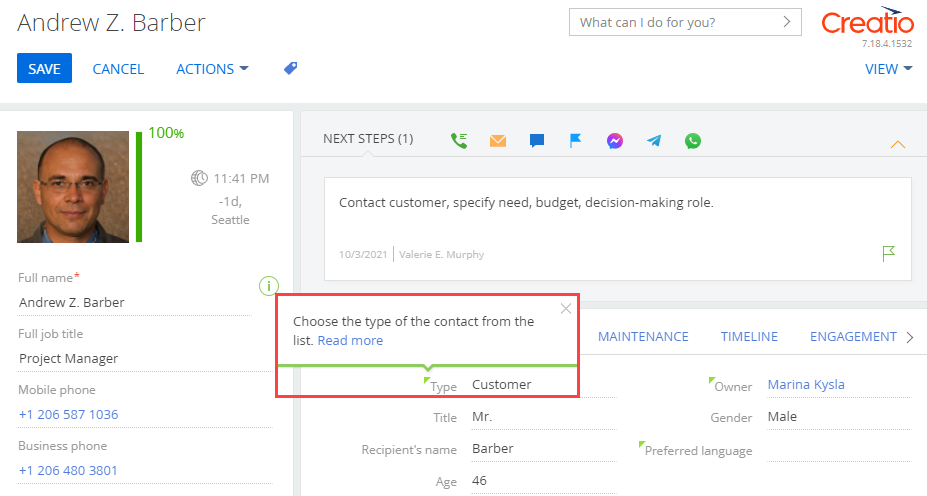
Set up the tooltip of the Type field of the contact page. To do this, add the configuration object of the page field to the diff array of modifications.
View the source code of the replacement view model of the contact page below.
- Click Save on the Designer's toolbar.
Outcome of the example
To view the outcome of the example, refresh the Contacts section page.
As a result, Creatio will add the tooltip to the Type field of the contact page.