
The purpose of the modal box is to display data in a dialog box.
The modal box behaves as follows:
- The page from which the modal box was called remains open.
- Creatio does not go to a new page.
- The browser history does not record the page the modal box displays.
The modal box lets you:
- Display any information. For example, text, buttons, etc.
-
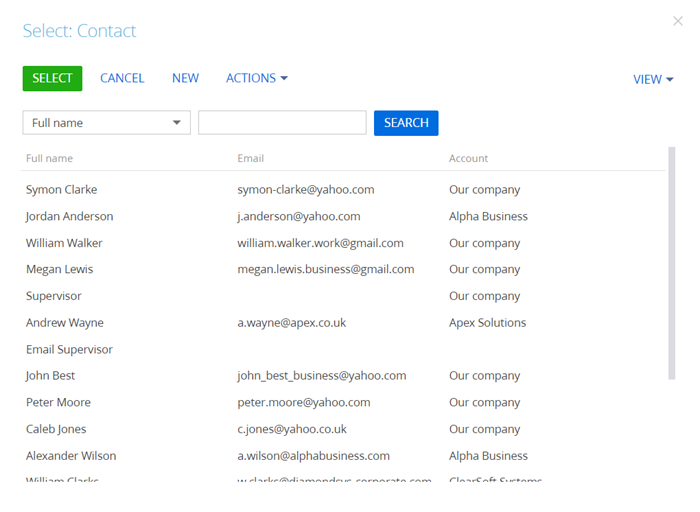
Select data from a lookup. For example, the modal box displays the contact lookup to select the activity owner.
The modal box includes the following components:
- The ModalBox and ModalBoxSchemaModule schemas of the NUI package that implement the functionality of the modal box.
- The LookupUtilitiesV2 schema of the NUI package that implements calls to the modal box for selecting lookup data.

1. Create a process task
- Go to the Configuration section and select a custom package to add the schema.
-
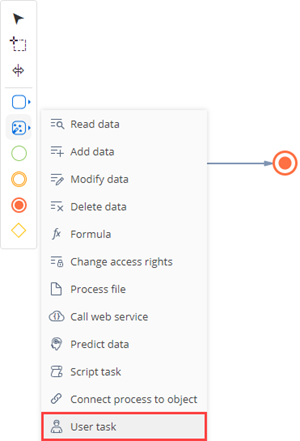
Click Add → User task on the section list toolbar.
/scr_add_user_task.png)
-
Specify the process task properties.
- Set Code to "UsrShowModalPageUserTask."
- Set Title to "Show modal page (process user task)."
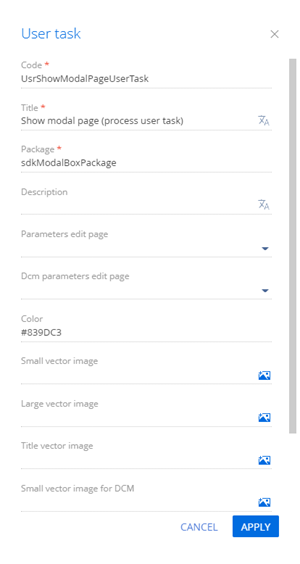
Click Apply to apply the properties.
2. Add process task parameters
-
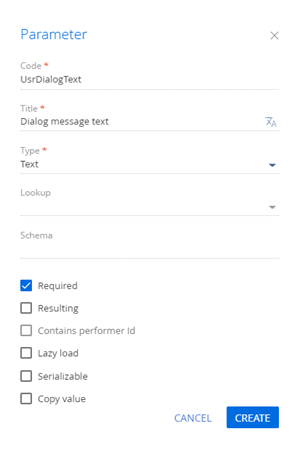
Add a parameter that displays the message to the user.
- Click the
/scr_add_button.png) button in the Parameters node.
button in the Parameters node. -
Fill out the parameter properties.
- Set Code to "UsrDialogText."
- Set Title to "Dialog message text."
- Set Type to "Text."
- Select the Required checkbox.
- Click the
-
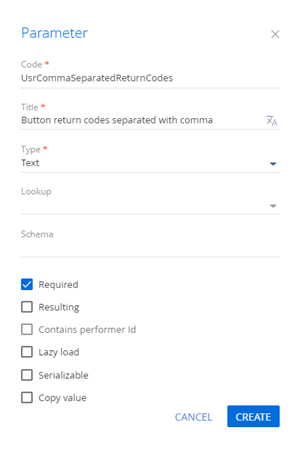
Add a parameter that passes the names of the displayed buttons from the process to the element. The parameter must accept comma-separated button codes in a string.
- Click the button in the Parameters node.
-
Fill out the parameter properties.
- Set Code to "UsrCommaSeparatedReturnCodes."
- Set Title to "Button return codes separated with comma.”
- Set Type to "Text."
- Select the Required checkbox.
- Click the
-
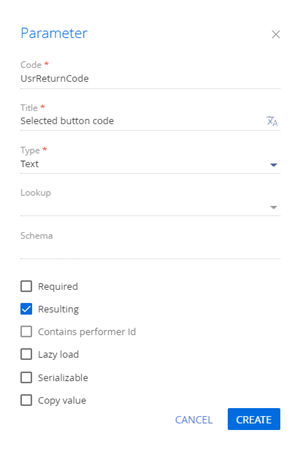
Add a parameter that contains the code of the clicked button.
- Click the button in the Parameters node.
-
Fill out the parameter properties.
- Set Code to "UsrReturnCode."
- Set Title to "Selected button code."
- Set Type to "Text."
- Select the Resulting checkbox.
- Click the
3. Implement the process task in the back-end
-
Set up process logging.
-
Use the using directive to add the needed namespaces.
-
Implement the logic of the process task and process logging
-
- Click Publish on the Designer’s toolbar.
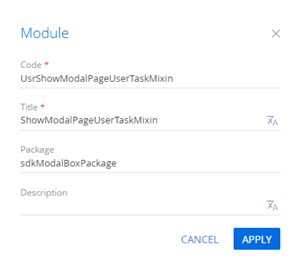
4. Implement the task processing in the front-end
- Go to the Configuration section and select a custom package to add the schema.
- Click Add → Module on the section list toolbar.
/scr_add_module.png)
-
Fill out the module properties.
- Set Code to "UsrShowModalPageUserTaskMixin."
- Set Title to "ShowModalPageUserTaskMixin."
-
Add the source code in the Module Designer.
- Click Save on the Designer’s toolbar.
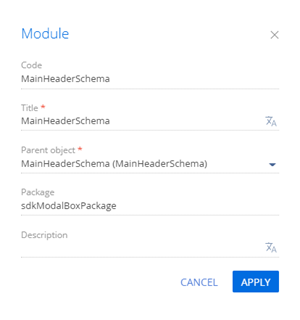
5. Create a replacing view model of the container
- Go to the Configuration section and select a custom package to add the schema.
-
Click Add → Replacing view model on the section list toolbar.
/scr_add_replacing_module.png)
-
Fill out the module properties.
- Set Code to "MainHeaderSchema."
- Set Title to "MainHeaderSchema."
- Set Parent object to "MainHeaderSchema."
-
Add the source code in the Module Designer.
- Click Save on the Designer’s toolbar.
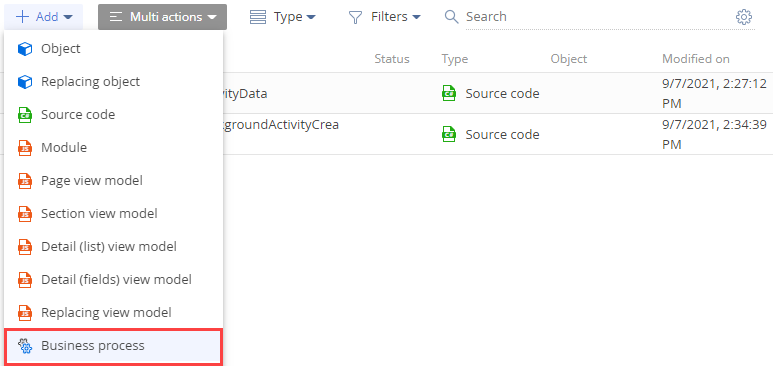
6. Create a business process that displays the modal box
- Go to the Configuration section and select a custom package to add the schema.
-
Click Add → Business process on the section list toolbar.
-
Fill out the process properties.
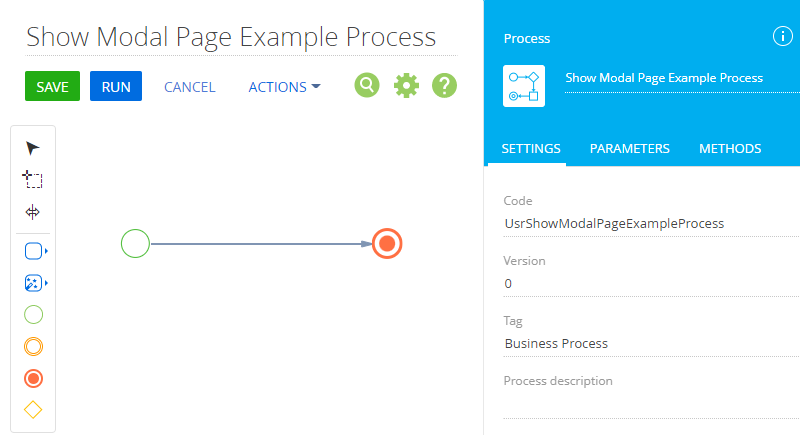
- Set the Title property in the element setup area to "Show Modal Page Example Process."
- Set the Code property on the Settings tab of the element setup area to "UsrShowModalPageExampleProcess."
-
Implement the business process.
-
Add the process task.
-
Click System actions in the Designer’s element area and place a User task element between the Simple start event and Terminate end event on the Process Designer’s working area.
-
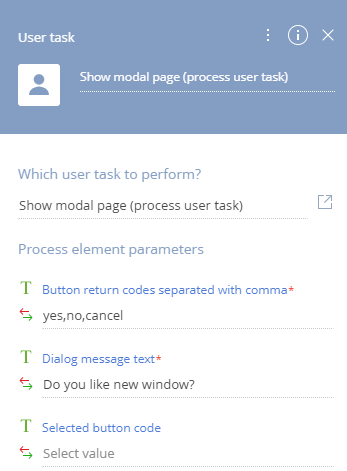
Specify the process task properties.
- Set Which user task to perform? to "Show modal page (process user task)."
-
Fill out the process task parameters.
- Set Dialog message text to "Do you like new window?."
- Set Button return codes separated with comma to "yes,no,cancel."
-
-
Add the auto-generated page.
-
Click User actions in the Designer's element area and place an Auto-generated page element in the Process Designer’s working area.

-
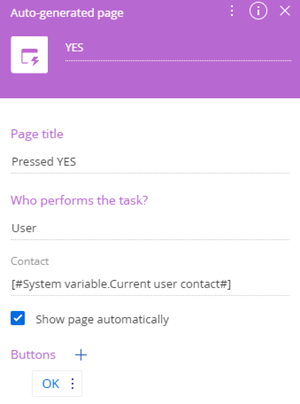
Fill out the auto-generated page properties.
- Set Title to "YES."
- Set Page title to "Pressed YES."
-
Add a button.
- Click the button in the Buttons block.
-
Fill out the button properties.
- Set Caption to "OK."
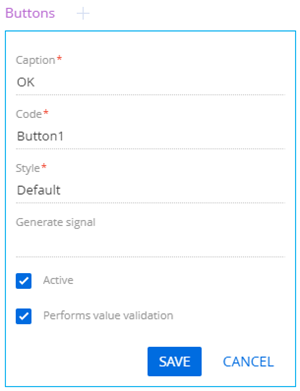
- Save the changes.
- Click the
View the auto-generated page settings on the figure below.
-
-
Set up the conditional flow.
- Select Add flow in the process task menu and connect the process task to the auto-generated page.
-
Convert the sequence flow into a conditional flow. To do this, click the
 button and select Conditional flow in the flow menu.
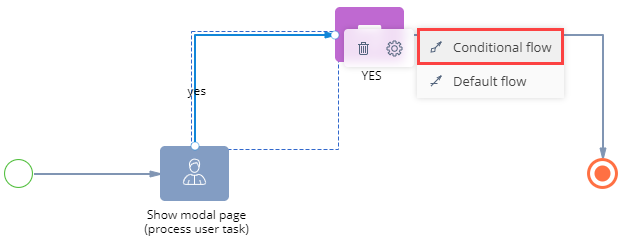
-
Fill out the conditional flow properties.
- Set Title to "yes."
-
Specify the move conditions.
- Click the
 button of the Condition to move down the flow property in the element setup area.
 - Select the "Show modal page (process user task)" process element.
- Double-click the "Selected button code" process parameter.
-
Set the parameter formula.
- Save the changes.
- Click the
- Add a NO auto-generated page connected to the corresponding no conditional flow in a similar way.
-
Set up the default flow.
- Select Add flow in the process task menu and connect the process task to the Terminate end event.
-
Convert the conditional flow into a default flow. To do this, click the
button and select Default flow in the flow menu.
-
Fill out the default flow properties.
- Set Title to "cancel."
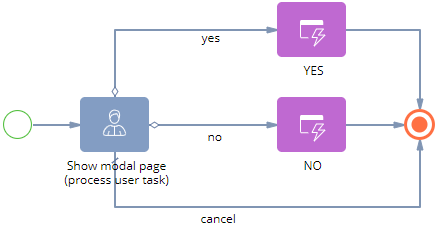
View the business process in the figure below
-
- Click Save on the Process Designer’s toolbar.
Outcome of the example
You can run the Show Modal Page Example Process business process from any Creatio section. For example, run the business process from the Contacts section.
To run the Show Modal Page Example Process business process from the Contacts section:
- Open the Contacts section.
- Click the
 button in the section panel.
 - Select the Show Modal Page Example Process business process and click Run.
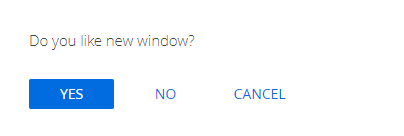
As a result, the Show Modal Page Example Process business process will display the modal box in the Contacts section.
-
If you click the Yes button, the Pressed YES page that contains the OK button will open.

-
If you click the No button, the Pressed NO page that contains the OK button will open.

- If you click the Cancel button, the modal box will close.
View the request logging results in the Common.log file in the Creatio root directory. Use the browser developer tools to track the WebSocket messages passed from the back-end to the front-end.