
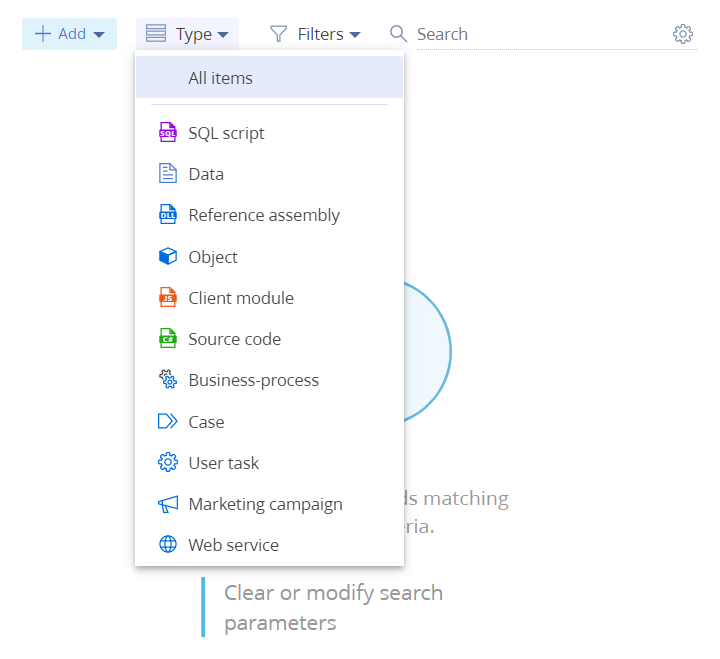
A schema is the basis of Creatio configuration. As far as software implementation is concerned, a schema is a core class inherited from the base Schema class. Configuration elements (the values of the Add drop-down list on the toolbar of the Configuration section list) are represented by schemas of the corresponding type (the Type drop-down list).
Client module
A Client module is a separate functionality block you can upload and run on demand. Following the AMD approach, Creatio client modules have an identical description structure, although there are functional differences.
Use client modules for front-end JavaScript development in the Creatio application.
The types of client module schemas:
- non-visual module (module schema)
- visual module (view model schema)
- expanding module and replacing client module (replacing view model schema)
Learn more about modules in a separate article: Module types and their specificities.
Module schema
Take these steps to develop a schema:
- Go to the Configuration section and select a custom package to add the schema.
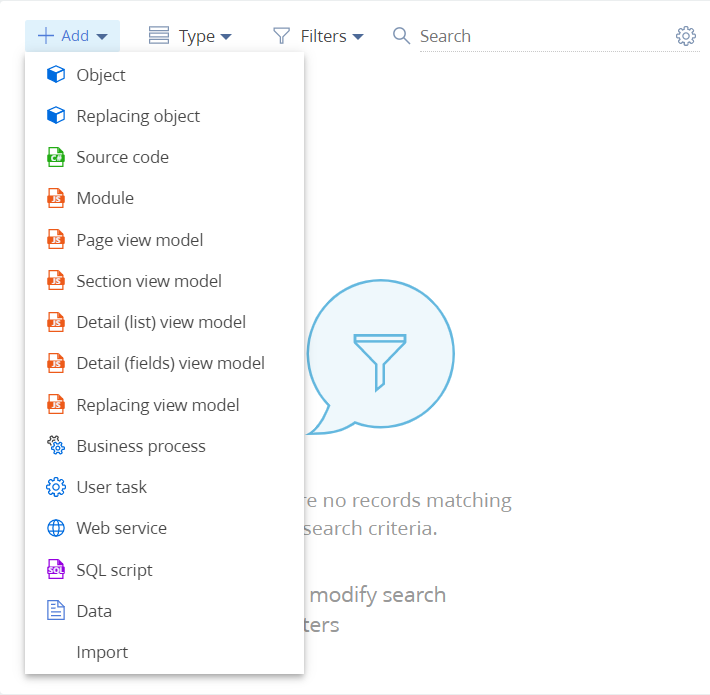
- Click Add → Module on the section list toolbar.
/scr_add_module.png)
-
Fill out the schema properties in the Module Designer.
The main schema properties are as follows:
- Code is the schema name. Required. The code must contain a prefix specified in the Prefix for object name (SchemaNamePrefix code) system setting. The setting accepts alphanumeric characters, and is set to Usr by default.
- Title is the localizable schema title. Required.
- Package is the custom package in which you create the schema. This is a non-editable field.
- Description is the localizable schema description.
/scr_source_code.png)
Click Apply to apply the properties.
Use the properties panel to edit the main schema properties (the
/scr_edit_button.png) button) and set additional properties (the
button) and set additional properties (the /scr_add_button.png) button). Additional properties are Localizable strings, Messages, Images.
button). Additional properties are Localizable strings, Messages, Images. -
Add the source code in the Module Designer. The module name in the define() function must match the schema name in the Code property.
Creatio will display the type of the error
 or warning
  – if any – to the left of the row number. Hover over the error type to view a tooltip with the error description.
 - Click Save on the Module Designer’s toolbar.
View module schema
The types of view model schemas:
- schema of the section record page (Page view model option)
- schema of the section list and dashboard page (Section view model option)
- schema of the detail page that contains a list (Detail (list) view model option)
- schema of the detail page that contains fields (Detail (fields) view model option)
Take these steps to develop a schema:
- Go to the Configuration section and select a custom package to add the schema.
- Click Add on the section list toolbar and select the type of the view model schema.
/scr_add_model_view.png)
-
Fill out the schema properties in the Module Designer.
The main schema properties are as follows:
- Code is the schema name. Required. The code must contain a prefix specified in the Prefix for object name (SchemaNamePrefix code) system setting. The setting accepts alphanumeric characters, and is set to Usr by default.
- Title is the localizable schema title. Required.
- Package is the custom package in which you create the schema. This is a non-editable field.
- Parent object is the parent object of the current object. Select the parent object whose properties are to inherit in the drop-down list.
- Description is the localizable schema description.
/scr_source_code1.png)
Click Apply to apply the properties.
Use the properties panel to edit the main schema properties (the
button) and set additional properties (the button). Additional properties are Localizable strings and Images. -
Add the source code in the Module Designer. The module name in the define() function must match the schema name in the Code property. The view model schema must inherit the BaseModulePageV2 base schema.
Creatio will display the type of the error
or warning – if any – to the left of the row number. Hover over the error type to view a tooltip with the error description. - Click Save on the Module Designer’s toolbar.
Replacing view model schema
Use replacing view model schemas to expand the functionality of existing schemas. The existing schemas can also be replacing and belong to different packages.
Take these steps to develop a schema:
- Go to the Configuration section and select a custom package to add the schema.
- Set up the package dependencies. You must add the package that contains the replaced client module to the dependency list.
- Click Add → Replacing view model on the section list toolbar.
/scr_add_replacing_module.png)
-
Select the parent object in the Module Designer.
To replace a section or a page with the module, specify the title of the base view model schema to replace in the Parent object required property. For example, specify the ContactSectionV2 schema as the parent object to create a replacement schema for the Contacts section. To do this, start typing the “Contacts section” title in the Parent object field in the replacing schema properties and select the relevant value from the drop-down list.
/scr_props_ContactSectionV2.png)
After you confirm the parent object, Creatio will populate the other properties.
Click Apply to apply the properties.
Use the properties panel to edit the main schema properties (the
button) and set additional properties (the button). Additional properties are Localizable strings and Images. -
Implement the functionality that distinguishes the replacing client module from the replaced module in the Module Designer. The module name in the define() function must match the schema name in the Code property.
Creatio will display the type of the error
or warning – if any – to the left of the row number. Hover over the error type to view a tooltip with the error description. - Click Save on the Module Designer’s toolbar.
Object
ORM (Object-relational mapping) object layer in Creatio is based on objects (Entity). An object is a business entity that enables declaring a new ORM model class on the server core level. If you create an object, a new table with the same name and the same set of columns as the object is created on the database level. In other words, any Creatio object in most cases is a system view of a physical table in the database.
The schema implemented using the corresponding EntitySchema class represents the object as a configuration element. The object schema describes the list of object columns, indexes, and methods.
The entity schema types are as follows:
- Base. Cannot be edited, located in pre-installed packages. Can be replaced with custom schemas.
- Custom. Created when customizing Creatio, located in custom packages.
Creatio platform does not limit the number of object columns. The number of object columns is limited by the maximum number of columns in the tables of the client database.
Use objects for back-end C# development in the Creatio application.
Object schema
Take these steps to develop a schema:
- Go to the Configuration section and select a custom package to add the schema.
- Click Add → Object in the section list toolbar.
/scr_add_entity_schema.png)
-
Fill out the schema properties in the Object Designer.
The main schema properties are as follows:
- Code is the schema name. Required. The code must contain a prefix specified in the Prefix for object name (SchemaNamePrefix code) system setting. The setting accepts alphanumeric characters, and is set to Usr by default. The object name can contain up to and including 128 characters. Oracle databases version 12.2 and earlier will not accept objects with names longer than 30 characters.
- Title is the localizable schema title. Required.
/scr_schema_props_extended.png)
-
Parent object is the parent object of the current object.
If you want the object to inherit the functionality of the base object, specify the code of the base object schema to inherit in the Parent object schema property. For example, start typing the BaseEntity code in the Parent object field in the schema properties and select the relevant value from the drop-down list to inherit the functionality of the BaseEntity base schema. After you confirm the parent object, Creatio will add columns inherited from the base object to the object structure.
Confirm the parent object/scr_add_message.png) Inherited columns in the object structure
Inherited columns in the object structure/scr_entity_columns.png)
-
Id is the system column that serves as the primary key in the database table. Required. Creatio will populate this property after you set the Parent object property.
Since a Creatio object is a database table view, it must contain the ID column. To set the value of the Id property, either specify a base Creatio object in the Parent object field as a parent object or select a custom column of the Unique identifier type in the drop-down list. Learn more about adding custom columns below. Creatio will warn you if you try to save the object schema without an ID.
-
Add a custom column to the object.
Take these steps to add a custom column to the object:
- Click
 in the context menu of the object structure’s Columns node.
 -
Select the column type in the drop-down menu and specify the column properties.
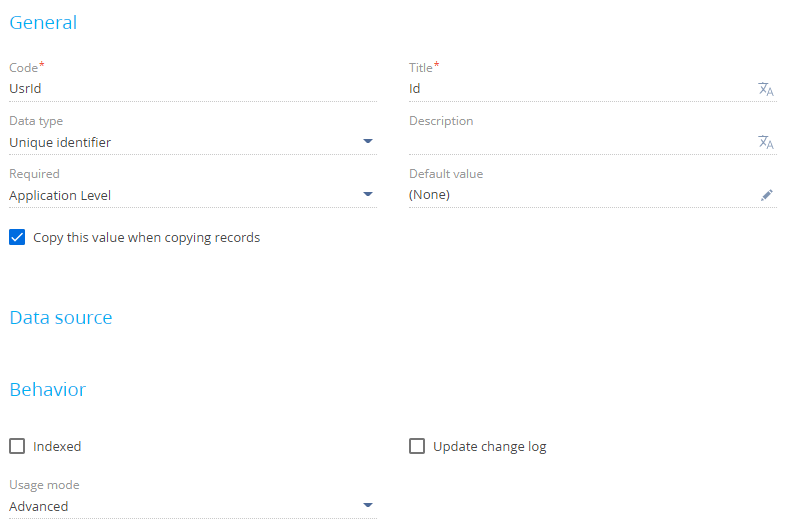
Click Other → Unique identifier to add the Id column.
/scr_add_column_type.png)
-
Fill out the column properties in the Object Designer.
The main column properties are as follows:
-
Code is the column name. Required. The Object Designer sets the default value. You can change it.
- Title is the localizable schema title. Required.
- Data type is the column data type. The Object Designer sets the default value depending on the column type you added.
- Required specifies if the column is required. Select “Application Level” since the column must contain a value.
-
Default value is the default value.
Click
/scr_edit_button.png) and fill out the following fields to set up the default value:
and fill out the following fields to set up the default value:- Set Default value type to "System variable."
- Set System variable to "New Id" since the IDs must be unique.
/scr_default_column_value.jpg)
- Set Usage mode to "Advanced."
Creatio IDE supports the following column usage modes:
- General is the standard column mode in the application.
- Columns in the Advanced mode are displayed in the configuration and are available in the application.
- Columns in the None mode are displayed as system columns in the configuration and are not available in the application.
-
- Click Save on the Object Designer’s toolbar to save the changes to metadata temporarily.
-
Add indexes to the object.
Besides the columns, you can add indexes to the object. Indexes are created automatically in the database table when you publish the object.
Select the Indexed checkbox in the Behavior property block if you need to create an index by a single column. Creatio indexes lookup columns by default.
/scr_Behavior.png)
Take these steps to add a composite index:
- Set the index name. To do this, click
/scr_add_button.png) in the context menu of the Indexes element and specify the custom name in the Code field.
in the context menu of the Indexes element and specify the custom name in the Code field. - Select the Unique checkbox to enable integrity constraints for index columns, i. e., remove the possibility of adding repeating value combinations.
- Add the relevant columns to the index. To do this, click Add in the Index Columns block, select an object column, and specify the sorting order.
/gif_index.gif)
- Set the index name. To do this, click
- Click Save on the Object Designer’s toolbar to save the changes to Creatio metadata temporarily.
-
Click Publish on the Object Designer’s toolbar to save the schema permanently and create the corresponding table in the database.
Since version 7.18.5, the Publish button runs static content generation and database structure updates. However, it does not launch configuration compilation. This accelerates the development of objects and replacing objects. The object compilation on publishing is required if the embedded process of the object was saved while editing but not published in the Process Designer. To compile the configuration, generate static content, and update the database structure, select Publish and compile in the drop-down menu of the Publish button.
- Click
You can establish a cascade connection to an object. Set the connection up for a column of the Lookup type.
Take these steps to add a column of the Lookup type to the object:
- Click in the context menu of the object structure’s Columns node.
-
Click Lookup to add a column of the Lookup type to the object.
/7.18/scr_add_lookup.png)
Set up the cascade connection in the Data source block using:
- Do not control integrity checkbox
-
On lookup value deletion options
/7.18/scr_data_source_lookup.png)
For this example, set up a cascade connection to the Contact object connected to the Account object via the [AccountId] lookup column. To do this, select Account in the Lookup field.
The cascade connection setup options:
- If you select the Do not control integrity checkbox, Creatio will delete the account without deleting the contacts connected to the account.
- If you do not select the Do not control integrity checkbox and select the Block deletion if there are connected records in current object with this value option, Creatio will check for connected contacts. If Creatio detects them, it will display a warning message asking you to confirm the deletion. Confirm the deletion to delete the account without deleting the contacts connected to the account.
- If you do not select the Do not control integrity checkbox and select the Delete records from current object with this value option, Creatio will delete both the account and connected contacts.
Replacing object schema
Use replacing object schemas to expand the functionality of existing schemas. The existing schemas can also be replacing and belong to different packages.
Take these steps to develop a schema:
- Go to the Configuration section and select a custom package to add the schema.
- Set up the package dependencies. You must add the package that contains the replaced object to the dependency list.
- Click Add → Replacing object on the section list toolbar.
/scr_add_entity_schema_replaced.png)
-
Select the parent object in the Object Designer.
If you want the object to replace the functionality of the base object, specify the code of the base object schema to replace in the required Parent object schema property. For example, start typing the BaseEntity code in the Parent object field in the schema properties and select the relevant value from the drop-down list to replace the functionality of the BaseEntity base schema. After you confirm the parent object, Creatio will populate the other properties.
/scr_replacing_base_object.png)
- Implement the functionality that distinguishes the replacing object from the replaced object in the Object Designer.
- Click Save on the Object Designer’s toolbar to save the changes to Creatio metadata temporarily.
- Click Publish on the Object Designer’s toolbar to apply the changes to the database level. After you publish the object successfully, Creatio will add (or modify) physical database objects: table, columns, indexes.
Source code
Use the Source code schema for back-end C# development in the Creatio application.
Take these steps to develop a schema:
- Go to the Configuration section and select a custom package to add the schema.
- Click Add → Source code on the section list toolbar.
/scr_add_schema.png)
-
Fill out the schema properties in the Source Code Designer.
The main schema properties are as follows:
- Code is the schema name. Required. The code must contain a prefix specified in the Prefix for object name (SchemaNamePrefix code) system setting. The setting accepts alphanumeric characters, and is set to Usr by default.
- Title is the localizable schema title. Required.
- Package is the custom package in which you create the schema. This is a non-editable field.
- Description is the localizable schema description.
Use the properties panel to edit the main schema properties (the
button) and set additional properties (the button). The additional property is Localizable strings./scr_schema_designer.png)
Click Apply to apply the properties.
- Add the source code in the Source Code Designer. The name of the class declared in the source code must match the schema name in the Code property.
- Click Save on the Source Code Designer’s toolbar to save the changes to Creatio metadata temporarily.
- Click Publish on the Source Code Designer’s toolbar to apply the changes to the database level.
The class replacement principle, including the creation and use of replaced class instances in the configuration, has unique features.
To create a replacing class:
- Go to the Configuration section and select a custom package to add the replacing class.
- Set up the package dependencies. You must add the package that contains the replaced class to the dependency list.
-
Click Add → Source code on the section list toolbar.
- Create the class to inherit the replaced class.
- Add the [Override] attribute to the class. Learn more about the attribute: [Override] attribute.
- Implement the functionality that distinguishes the replacing class from the replaced class. For example, implement properties and methods that expand the functionality of the replaced class, method overloads of the replaced class, etc. Add the override modifier to replacing the class's properties and methods. Add the virtual modifier to replaced the class's properties and methods to replace. In a base class, you can replace only virtual methods or implement abstract methods. The replacing properties and methods declared without the override keyword will be unavailable before the compilation. The Ninject open-source dependency injection framework binds and injects dependency types only during the execution.
Replacing configuration element
Creatio development is based on the main principles of object-oriented programming. In particular, the Creatio extension model is based on the open-closed principle: the major Creatio logic is open for extension but closed for modification. This means that new features must be developed by introducing new entities rather than modifying the existing entities.
The configuration elements are closed for modification in preinstalled packages on the system level. Develop and modify the functionality in custom packages using the replacement mechanism. In Creatio, the replacement implementation is based on the concepts of replacing and replaced configuration elements.
The replacing configuration element is a configuration element that replaces another configuration element of the corresponding type.
The replaced configuration element is a configuration element that is replaced by another configuration element of the corresponding type.
You can replace the following Creatio configuration elements:
-
Client module that defines the view model.
Client modules implement the front-end part of Creatio. To create a replacing client module, use the replacing view model schema. Learn more about the schema: Develop configuration elements.
-
Object.
Objects implement the back-end of Creatio. To create a replacing object, use the replacing object schema. Learn more about the schema: Develop configuration elements.
-
Source code.
Classes serve as replacing configuration elements. To create a replacing class, use the schema of the Source code type. Learn more about the schema: Develop configuration elements.
After you implement the replacing configuration element, Creatio will execute the logic of the replacing configuration element when accessing the replaced configuration element.
You can replace a single configuration element in multiple custom packages. The hierarchy of packages that contain the replacing configuration elements defines the resulting implementation of the replacing configuration element in the compiled configuration.