Set up page fields
Add, modify, hide or delete fields on a record page in the Page Designer. You can also manage the section data structure (i. e., the list of section columns). Creatio adds a new column to the section data structure after you add a new field to the section page and save the changes.
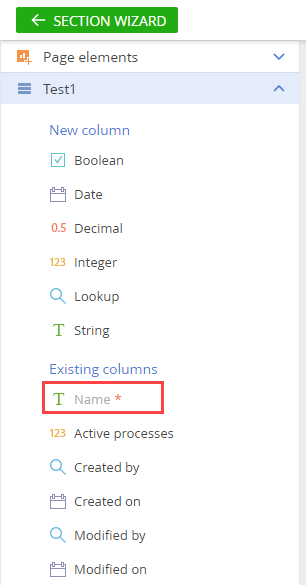
When selecting a column in the Page Designer’s toolbar, review the list in the Existing column block first. The designer might already have the needed column ready for placement. If such a column does not exist, use the elements from the New column block.
Since Creatio 8.3.1, Section and Detail Wizards for Classic UI are no longer available for creating new sections and details. These tools will be deprecated in future releases. We recommend using the modern Freedom UI tools that provide a more flexible and future-ready experience. Learn more: Overview of Freedom UI Designer and its elements.
Add a field based on the existing column
The Existing columns block of the Page elements menu displays columns that are already available in the section. These columns are not always displayed on the record page, but they are used in the Creatio database and cannot be deleted.
Some of the columns can be required on the object level: you cannot create a record in the database if you do not fill them out. Required columns are marked with an asterisk (*) (Fig. 1).
Add all required columns as fields to the record page to ensure that the record page opens correctly.
To add existing columns to the page:
-
Open the relevant section, e. g., Requests.
-
Click View → Open Section Wizard.
-
Take the following steps in the Section pages block of the Section Wizard:
- Click Edit page if the section has a single page.
- Click the link to the relevant page if the section has several pages.
-
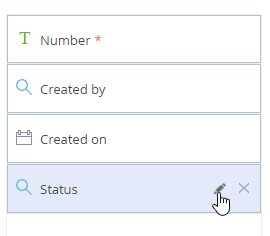
Drag existing columns from the Existing columns area to the record page.
The areas where you can place the field are highlighted. The names of the columns present on the page are highlighted in gray, but you can add the columns again.
Fig. 2 Adding existing columns to a record page 
If you add a new column to a page in the Page Designer and accidentally drop it on top of another column, the new column does not appear in the Page Designer's working area.
To change the column width, drag the edge of a corresponding field.
You can also change the column height for multiline text fields (Fig. 3).
Make sure the unique Code value of the new column does not coincide with the code of other configuration objects. Collision of unique object codes leads to compilation errors, as well as block the modification of schema and integration of Creatio data with external services.
To modify the field properties, highlight the field and click  (Fig. 4).
To delete a field from the page, highlight the field and click  (Fig. 5).
Removing a field from the page will not delete the corresponding column from the section object. You can delete an object column through the Configuration section only. Learn more in developer documentation: Creatio IDE. Besides, you can only delete the columns you created yourself and only if they have not been added to object pages. Delete the columns from the package in which you defined them. Base columns, such as "Id," "Created by," etc., cannot be deleted.
Add a field based on a new column
The New column block of the page elements area displays available types of columns that you can add to the page.
See the type list below:
Column type | Type of field on the page | Case |
|---|---|---|
String | A text field. Can contain letters, numbers, and other characters. Multiline text fields support line breaks and can have a variable height. String fields have several additional parameters. Read more >>> | Single line fields: the Full name and Full job title fields on the contact page. Multiline fields: the Result details field on the activity page. |
Integer | A numeric field that can only contain integer numbers (no fractional numbers). If you use a field of "Integer" type on the page, the analytical data based on the values of this field will be rounded up to integers. | The Age field on the contact page. |
Decimal | A numeric field that can contain fractional numbers. | The Payment amount field on the invoice page. |
Date/time | "Date/Time" type fields register calendar data. | The Start and Due fields on the activity page. |
Lookup | Lets you select values from a manually created or imported list. The values available for selection are stored in the corresponding lookups. Users can fill out lookup fields by selecting a value from either a drop-down list or selection box. Lookup fields have several additional parameters. Read more >>> | Drop-down list lookup fields: the Type and Role fields on the contact page. Selection box lookup fields: the Owner and Reporter fields on the activity page. |
Boolean | Can contain one of the two logic values: "Yes/No." A boolean field cannot be required. | Checkbox fields, such as the Remind owner, Remind author fields on the activity page. |
To add a new field to the section:
-
Open the relevant section, e. g., Requests.
-
Click View → Open Section Wizard.
-
Take the following steps in the Section pages block of the Section Wizard:
- Click Edit page if the section has a single page.
- Click the link to the relevant page if the section has several pages.
-
Select the needed column type in the New column area and drag it to the page, similarly to adding existing columns (Fig. 6).
Dragging a new column to the section page will add a new field of the corresponding type and a new corresponding column to the database.
Fig. 6 Adding a new column to the record page  Important
When you add a new field to a page and save the changes in the Section Wizard, Creatio will add the corresponding column to the section object as well.
-
Specify the parameters of the new column and the field from which to populate the column (Fig. 7). The set of available parameters differs depending on the type of field.
Fig. 7 Set up the parameters 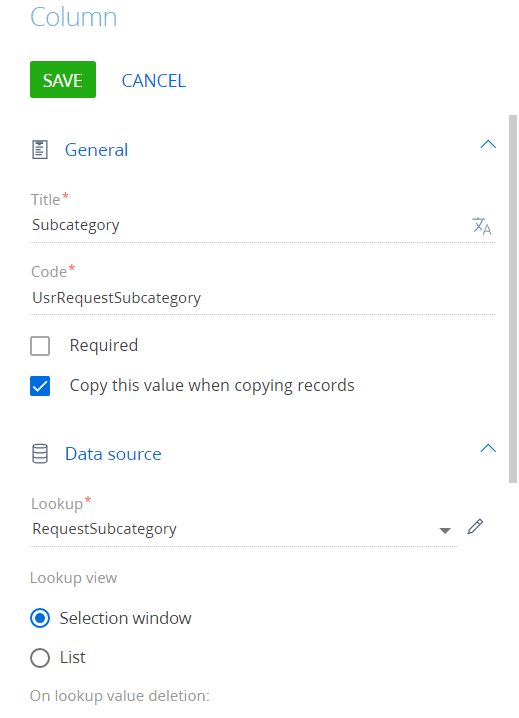
Set up the "String" type field
When managing string columns, you can use single line text fields or multiline text fields.
The Multiline text checkbox is unique to "String" type fields. Multiline text fields have variable heights and are designed for entering larger volumes of text that might take several paragraphs. For example, the Result details field on an activity page is a multiline field. If you select the Multiline text checkbox, you will be able to modify the field height in the Page Designer by dragging (Fig. 8).
Leave the Multiline text checkbox clear to add a single line text field.
Specify how many characters a page field can contain in the Text length field (Fig. 9). You can set the Text length field value to 50 characters, 250 characters, 500 characters, or make the field length unlimited.
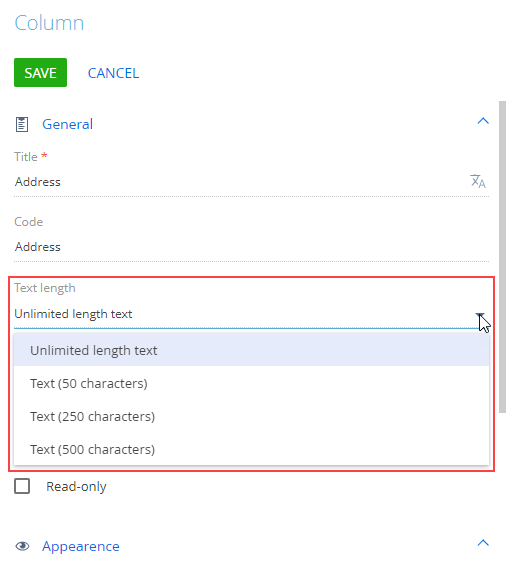
Text field length setup for the Pre-configured page business process element in the Pre-configured Page Designer works similarly.
Set up the "Decimal" type field
The "Decimal" field lets you customize the precision of decimal numbers, ranging from 1 to 8 digits after the decimal point (Fig. 10). You can also select "Integer" to change the field type to "Integer." Select "Currency" if you intend to use the field with financial data.
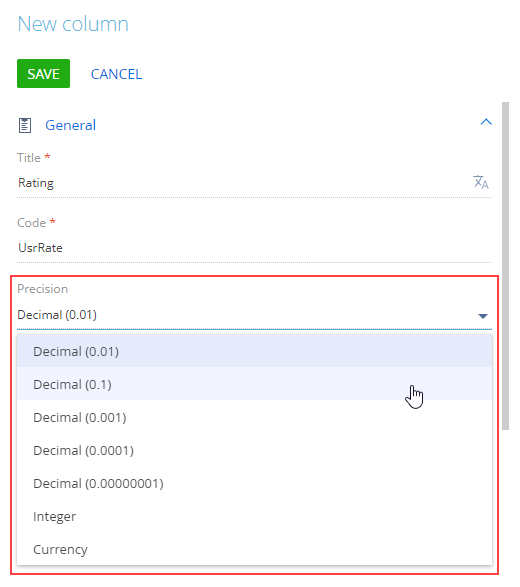
Lowering the number precision for existing "Decimal" fields will make the calculated data based on these fields less accurate.
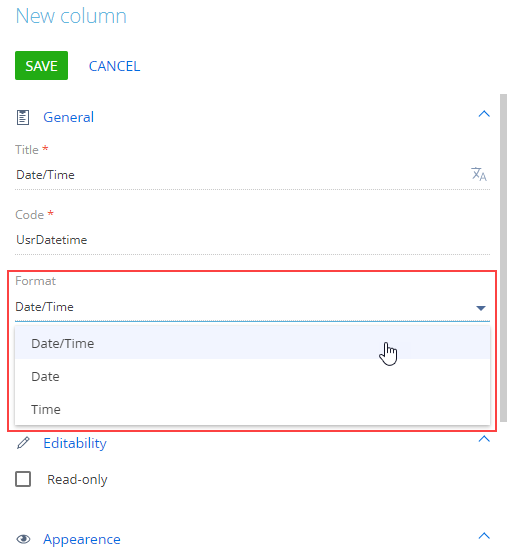
Set up the "Date/time" type field
You can use the Format field to select the date format when setting up a "Date/Time" column for your section page (Fig. 11). The Format field provides the following options:
- "Date." The field will only display the specified date in the corresponding format.
- "Time." The field will only display the specified time.
- "Date/Time." The field will display both the specified date and time.
When you modify the "Date/Time" column format for the existing section, the data in this column is updated for existing records as well. If the new column format is less precise than the previous format, the data for existing records also becomes less precise. For example, if you change the "Date/Time" format to "Date," the time data will not display. In this case, Creatio will display a corresponding notification.
"Date/Time" column format setup for the Pre-configured page business process element in the Pre-configured Page Designer works similarly.
Set up the "Lookup" type field
Fill out the "Lookup" field by selecting a value from a list. To set up this field, specify the object to use as the lookup, the lookup view, and the connection type between the records in the current object and the lookup object.
Lookup object
The list of lookup values is based on the records of a lookup object. Depending on whether the needed object already exists, select the Select existing lookup or Add new lookup option.
If you select an existing lookup, specify the lookup object in the Lookup field. For example, select the "Contact" object as a lookup for the Owner field (Fig. 12).

Select Add new lookup to add a new Creatio object. Specify the name and title for the new lookup object (Fig. 13):
-
Specify a title that distinguishes the lookup object from other objects in the Title field.
-
Specify a code for the new lookup object in the database in the Name field. The object name must contain a prefix. You can specify the prefix in the "Prefix for object name" ("SchemaNamePrefix" code) system setting. The prefix is set to "Usr" by default.
noteSaving the changes in the Section Wizard will automatically register a new lookup in Creatio and bind this lookup to the package where the Wizard saves changes. The lookup name will match the name specified in the Title field. You can view and modify the lookup content via the Lookups section. Learn more in a separate article: Manage lookup values.
Lookup view
The lookup view determines the field type that represents a lookup column on a page:
-
Select the "List" view to make the lookup field a drop-down list (Fig. 14). This view is a good option for fields that contain a small number of lookup values.
Fig. 14 A drop-down list view of a lookup field 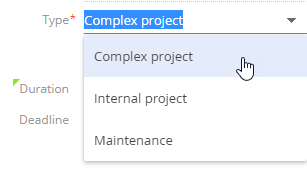
-
Select the "Selection window" view to make the field open a selection box that contains lookup values (Fig. 15). Filter, edit or delete existing lookup records, as well as add new records in the box. This view is a good option if you use an object of a different section, e. g., Contacts, as a lookup.
Fig. 15 A lookup selection box 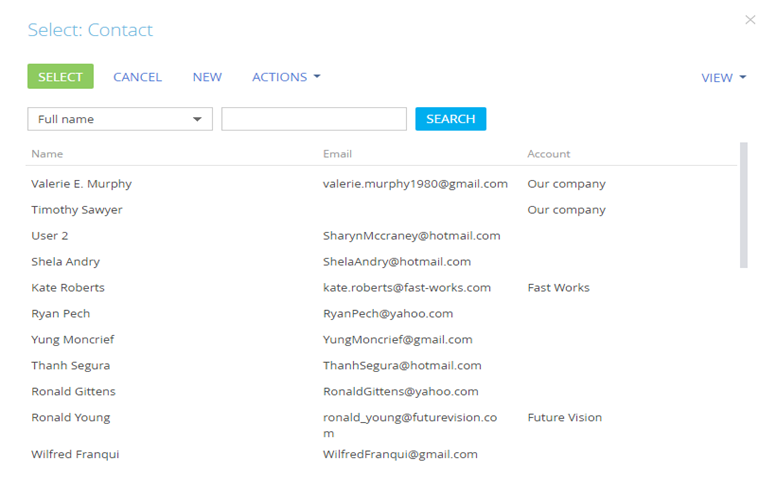
-
If you want to preserve detail records when you delete the record to which the detail is linked, select the Block deletion if there are connected records with these values option. Otherwise, select Delete records with this value (Fig. 16).
Fig. 16 Block the record deletion 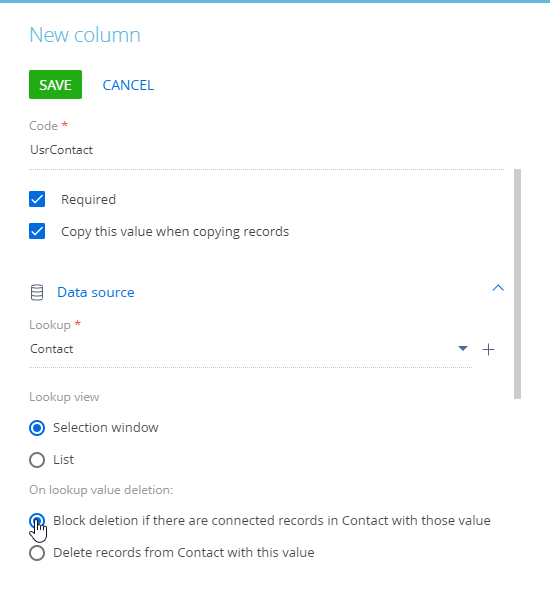
Add a tooltip to the field
-
Open the relevant section, e. g., Requests.
-
Click View → Open Section Wizard.
-
Take the following steps in the Section pages block of the Section Wizard:
- Click Edit page if the section has a single page.
- Click the link to the relevant page if the section has several pages.
-
Select a field that needs a tooltip and click
 . If such a field does not exist yet, add it.
 -
Enter the text users are going to see in the Tooltip field of the column setup window (Fig. 17). You can add HTML markup to the tooltip. Use HTML to add bold text, lists, hyperlinks, and other formatting options.
Fig. 17 Add a tooltip to the field 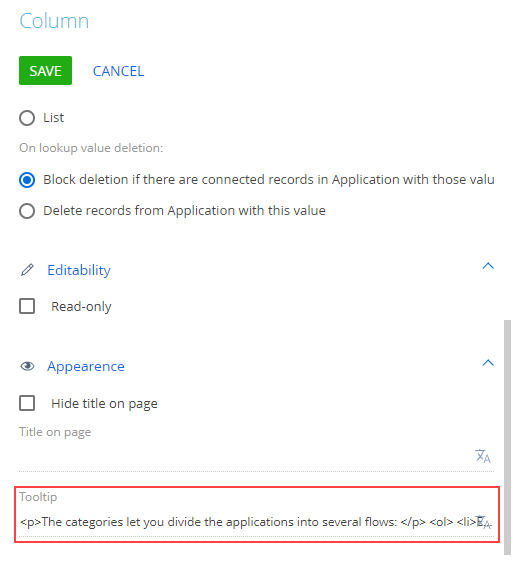
-
Click Save.
As a result, the field on the record page will have an
 icon in the top left. Hover over the icon to see the tooltip (Fig. 18).
Fig. 18 View a tooltip 