
Unit testing (module testing) is a software development process that lets you verify the operation capacity of isolated program components. Usually, developers write tests for each non-trivial method of a developed class. This lets you detect source code regression: errors in previously tested parts of the program.
One of the unit testing frameworks for .NET apps is NUnit, an open-source unit testing environment. A special adapter was developed to integrate NUnit with Visual Studio.
You can install the adapter in the following ways:
- as Visual Studio extension
- as NuGet project package that contains the implemented unit tests
Use of the NUnit adapter as a Visual Studio extension has the following special features:
- The adapter is available for any test project since the adapter becomes part of the IDE.
- The extension is updated automatically.
- Each team member who works on the test project must install a separate adapter.
Use of the NUnit as a NuGet package has the following special features:
- The package is a part of the Visual Studio project and available for all project developers.
- The package must be installed for all unit test projects.
Learn more about working with NUnit in the official NUnit documentation.
To create unit tests for custom package class methods or properties:
- Install NUnit Visual Studio adapter.
- Turn on the file system development mode.
- Set up the unit test project.
- Create tests.
- Test the methods or properties.
1. Install NUnit Visual Studio adapter
Install NUnit adapter as a Visual Studio extension
Option 1:
- Download the extension from the Visual Studio Marketplace.
- Double-click the *.vsix file and run the installation.
- Select the needed Visual Studio versions during the installation.
Option 2:
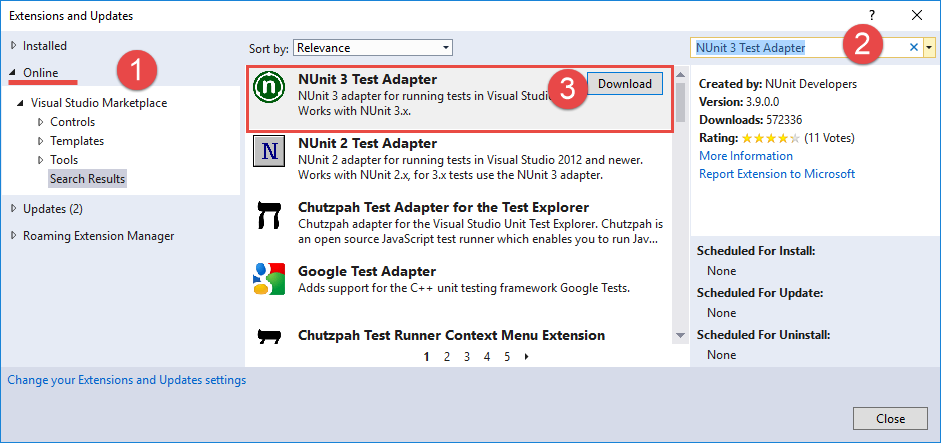
- Click Tools → Extensions and Updates in Visual Studio.
- Select the Online filter (1).
- Enter "NUnit 3 Test Adapter" (2) in the search bar.
- Select the NUnit 3 Test Adapter extension (3) in the search results.
- Click Download to install the extension.
Install NUnit adapter as a NuGet package
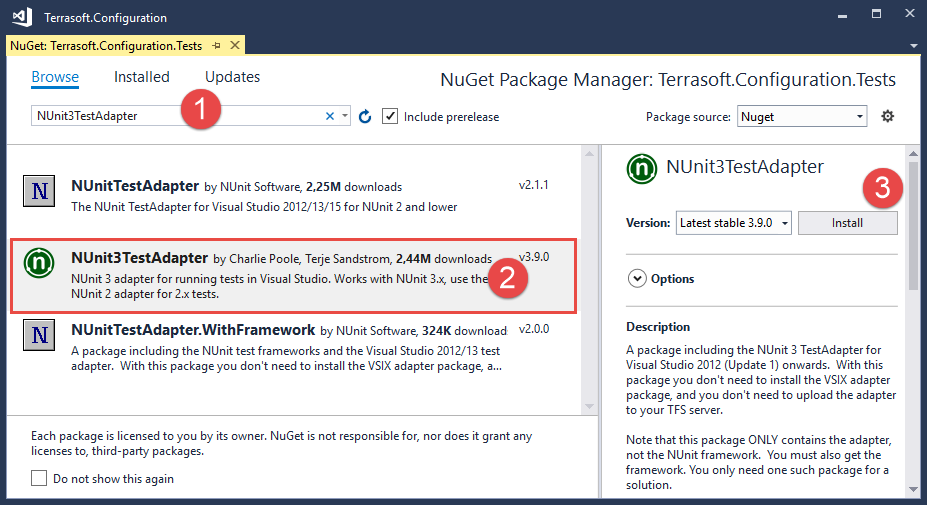
- Right-click the test project name, for example, Terrasoft.Configuration.Tests.csproj, and select the Manage NuGet Packages... command.
- Enter "NUnit3TestAdapter" (1) in the search bar.
- Select the NUnit 3 Test Adapter package (2) extension in the search results.
-
Click Install to install the package.
Learn more about installing the NuGet package in the official Microsoft documentation.
2. Export the package to the file system
You can create unit tests for .NET classes from Creatio packages only in the file system development mode.
This example uses the sdkNUnit custom package.
To download a package to the file system:
- Set up Creatio for the file system development mode. To do this, follow instruction in a separate article: External IDEs.
- Select Download packages to file system in the File system development mode group of the action menu.
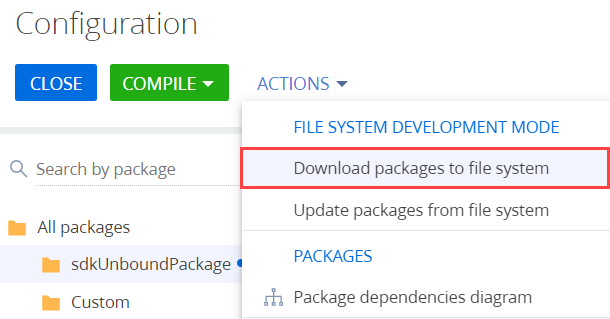
As a result, the packages will be downloaded along the ..\Terrasoft.WebApp\Terrasoft.Configuration\Pkg path to the directory whose name matches the package name. The sdkNUnit package contains the UsrNUnitSourceCode schema of the Source code type.
The UsrNUnitSourceCode class that contains the methods to write tests is implemented in the source code of the UsrNUnitSourceCode schema.
3. Set up the unit test project
This example creates unit tests in the Terrasoft.Configuration.Tests.csproj pre-configured project that is delivered together with the Terrasoft.Configuration.sln solution.
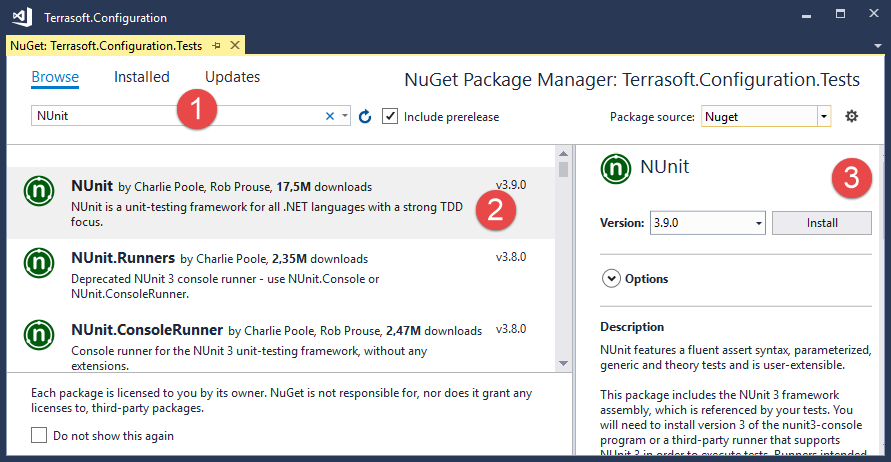
To create tests in the Terrasoft.Configuration.Tests.csproj project using the NUnit framework, add the NUnit NuGet package to the project dependencies. To do this:
- Right-click the Terrasoft.Configuration.Tests project name in the Solution Explore.
- Select Manage NuGet Packages....
- Enter "NUnit" (1) in the search bar.
- Select the NUnit package (2) in the search results.
- Click Install to install the package.
4. Create tests
The name of the class that contains the tests must consist of the class name and the "Tests" suffix. To group tests in a project, it is also convenient to place them in a directory whose name matches the tested package name and has the ".Tests" suffix.
To create tests:
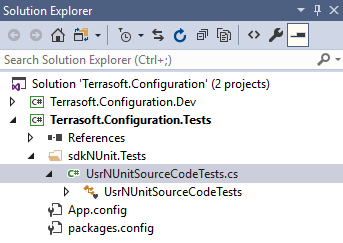
- Create a sdkNUnit.Tests directory in the Terrasoft.Configuration.Tests.csproj project.
- Create a UsrNUnitSourceCodeTestsclass in the sdkNUnit.Tests directory. Visual Studio will save the class source code to the UsrNUnitSourceCodeTests.cs file.
- Add the methods that implement tests to the UsrNUnitSourceCodeTests class.
The [TestFixture] attribute indicates that the UsrNUnitSourceCodeTests class contains tests. Add the [Test] attribute for each method that tests a specific functionality of the class. Learn more about the attributes of NUnit framework in the official NUnit documentation.
Use the Assert.That() method for testing. The method takes the tested value. Use objects that constrain the tested value as arguments. Learn more about the constraint model in the official NUnit documentation.
5. Test the class
- Click Test → Windows → Test Explorer in the Visual Studio.
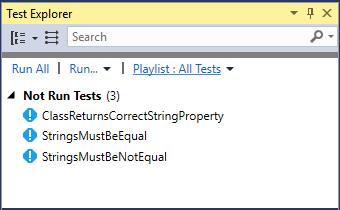
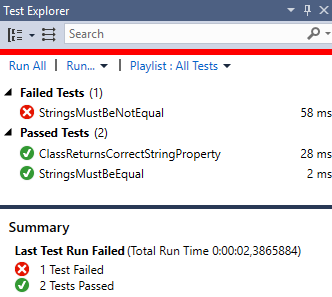
- Execute the Run All command to run the tests. Successfully passed tests will be moved to the Passed Test group, and failed tests will be moved to the Failed Test group.
Learn more about the Test Explorer window functionality in the official Visual Studio documentation.