If you use SendGrid for sending marketing emails, you will need to verify your email address and your corporate domain to allow the provider to send emails on your behalf.
If your recipients use MS Outlook, Hotmail, Gmail, and other common mailing services, they can see that an email was sent from your provider's server on your behalf (this information is available in the “From” field).
The procedure for domain verification for SendGrid consists of several stages:
-
Add your corporate domain on the Bulk email settings page. Read more >>>
-
Obtain MX-, SPF-, and DKIM records. Read more >>>
-
Specify MX-, SPF-, and DKIM records in the DNS area of your domain Read more >>>
Add your corporate domain on the Bulk email settings page
SendGrid users need to add their corporate domain to Creatio before starting their emails. To do so:
-
In the Emails section, select Bulk email settings in the Actions menu (Fig. 1)
Fig. 1 Opening the bulk email settings page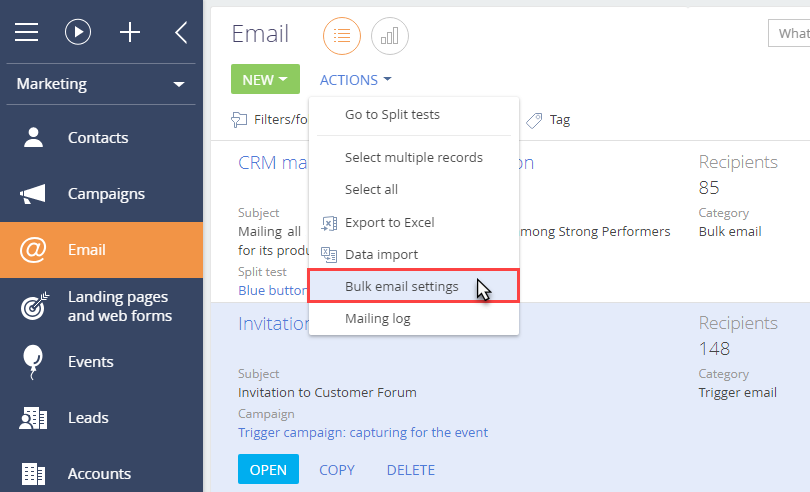
-
On the Bulk email settings page, specify the domain of the necessary email address in the Sender domain area, i.e., “mycompany.com” (Fig. 2).
Fig. 2 The Sender domains tab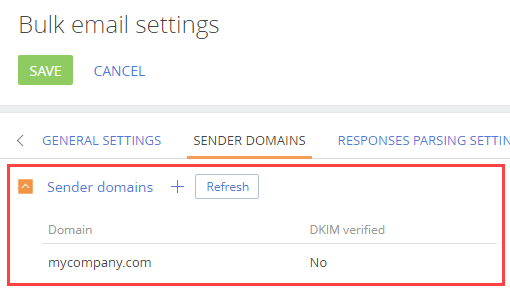
Get setup keys for your domain
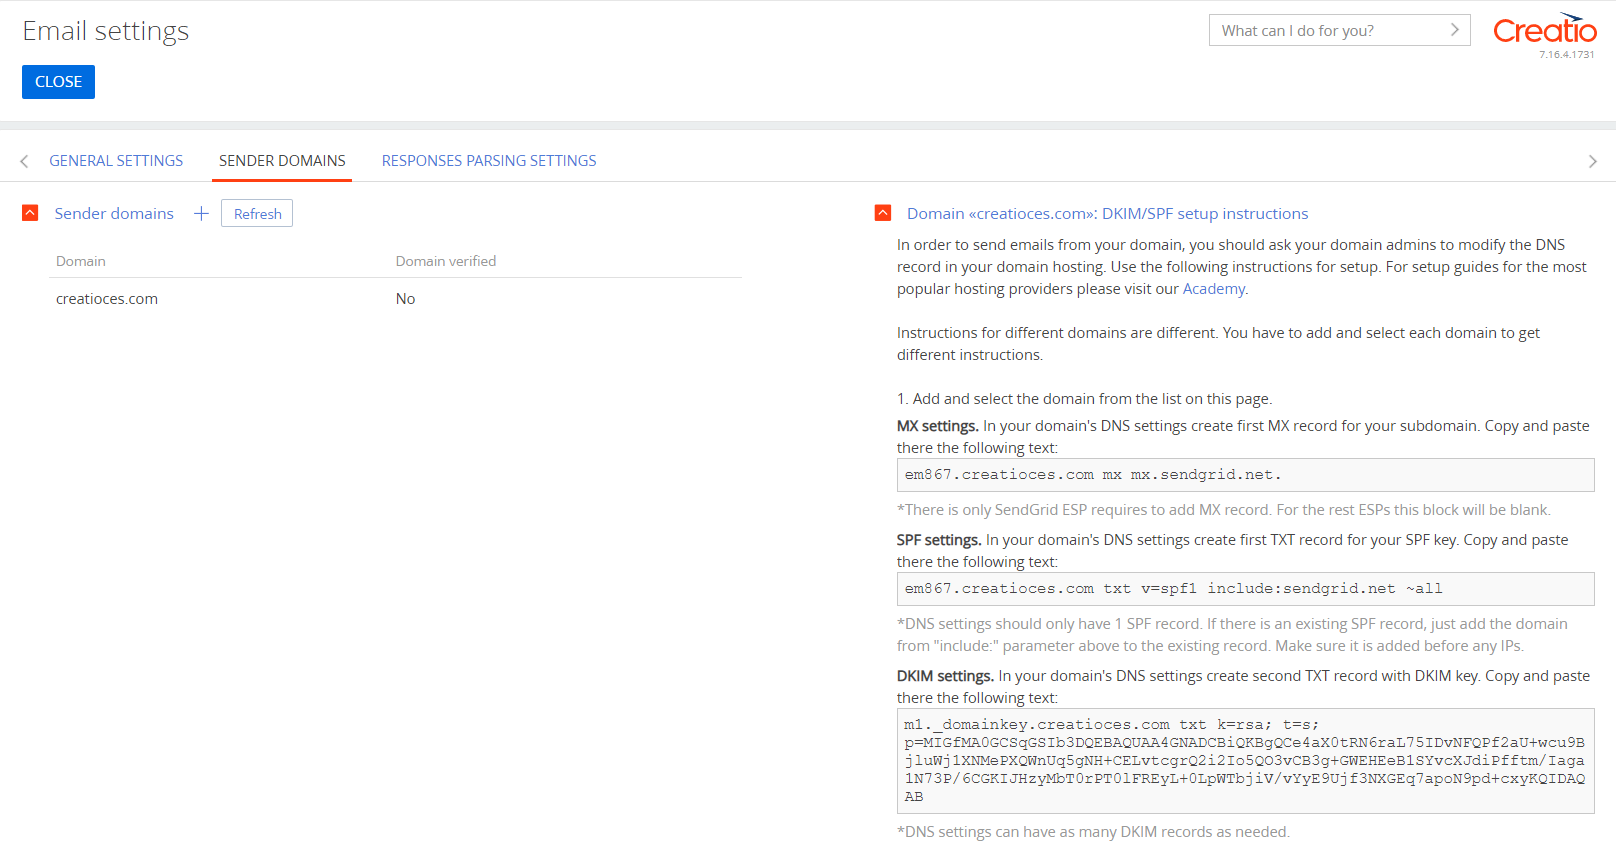
MX-, SPF- and DKIM records are generated automatically in the Email section once the domain is added to the email settings page. To obtain these records, in the Email section, select Email settings in the Actions menu.
The SPF and DKIM records will be generated automatically in the DKIM/SPF setup instructions area on the Bulk email settings page (Fig. 3) for your specified domain once your email is verified.
Add records to the DNS area of your domain
To verify the mail domain using the SendGrid provider, you need to add the MX, SPF to the DNS area of the mail domain settings, otherwise, the domain reputation and the mail delivery quality are not guaranteed.
Specify MX record in the DNS area of your domain
MX record is the primary record in the domain zone; it specifies mailing host names of the domain. The email server checks if MX records are available in the DNS zone and whether they match the sender’s IP address. If the data is unavailable or the IP addresses do not match, the remote server is very likely to deny sending and receiving emails.
Unlike SPF and DKIM records, the syntax of MS records includes priorities. Priority is specified as an integer; it indicates the order in which the availability of email servers is checked. The highest possible priority is “0.” You can add several MS records with equal priority.
An MX record looks like this:
|
Name |
Priority |
Type |
Value |
|---|---|---|---|
|
subdomain.yourdomain.com |
0 |
mx |
mx.sendgrid.net. |
The subdomain name is unique and is generated by the provider.
Specify SPF record in the DNS area of your domain
Copy the generated SPF record from the DKIM/SPF setup instructions area on the Bulk email settings page, which will look as follows: The record will look as follows:
|
Name |
Type |
Value |
|---|---|---|
|
subdomain.yourdomain.com |
TXT |
v=spf1 a mx include:_spf.sendgrid.com ~all |
The subdomain name is unique and is generated by the provider. Add a separate record for each subdomain.
Specify DKIM record in the DNS area of your domain
After the configuration of the SPF record, you need to add DKIM records. For the SendGrid provider, the record should look like this:
|
Name |
Type |
Value |
|---|---|---|
|
m1._domainkey |
TXT |
k=rsa; t=s; p=XXXXXXXXXXXXX |
In the record above, “XXXXXXXXXXXXX” is an individual key for each domain. The key is generated automatically and is available on the Sender domains tab.
Certain DNS settings may require entering the provided subdomain in the “Host / Name” field in the following format: “m1._domainkey.yourdomain.com”