Business process diagram (Fig. 1) elements:
-
Incoming signal for creating a lead through a landing page - when you create a lead through a landing page, the signal is activated and the business process is started.
-
Reading the created lead data - obtaining lead parameters that will be later used in the business process.
-
Sending an email - sending an email with the specified text and the lead data obtained in the previous step of the business process.
Fig. 1 The "Sending email when creating lead via landing page" business process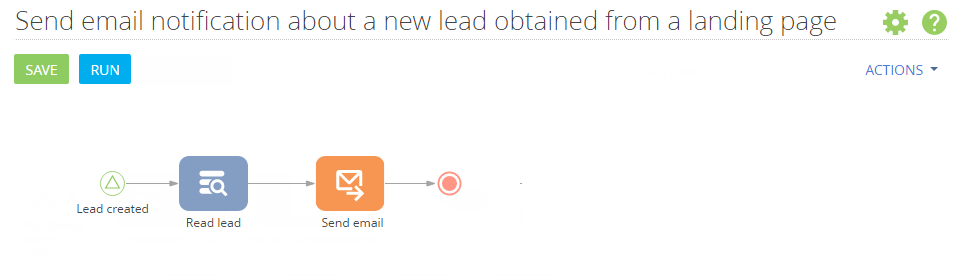
To do this:
- Place the Signal element on the diagram. The element is located in the Initial events group — "Lead created” . The element will be activated when a lead is created registered via a landing page.
- Set up the signal parameters (Fig. 2).
-
In the Object field, set "Lead".
-
In the What event should happen? field, select "Add record".
-
In the Added record must correspond to conditions field, select "Add record".
Fig. 2 Setting up the signal properties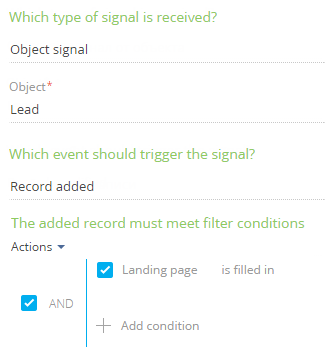
-
- Add the Read data element of the System actions group and name it "Read lead". The "Read lead" element will read data from the added lead.
- Set up the element parameters (Fig. 3).
-
In the Which data read mode to use? field, select “Read the first record in the selection”.
-
In the Which object to read data from? field, select ”Lead”.
-
In the How to filter records? area, set the filter “Id = Lead created.Record ID". To do this, click <Add condition>, select the “Id” column, in the displayed menu select the Compare with parameter, and then in the appeared window select Unique record ID of the “Lead created” element.
Fig. 3 The Read lead element setup area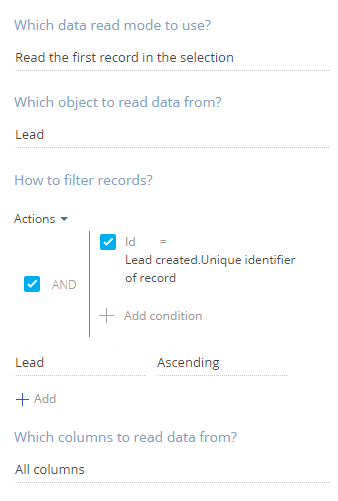
-
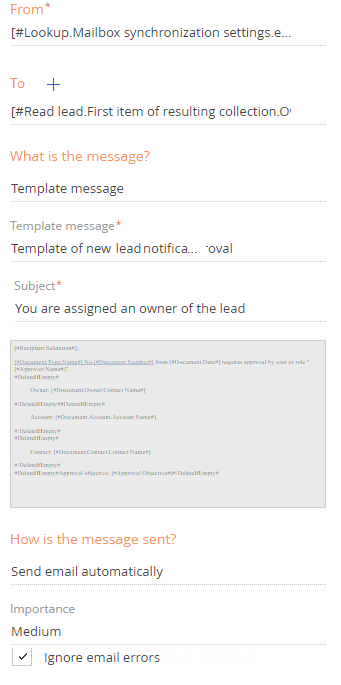
- Add the “Send e-mail” element and set the following parameters (Fig. 4):
-
Specify the necessary email account in the From field. To do this, select Select from lookup in the parameter value menu, then in the Synchronization with mailbox settings lookup, select one of the configured email accounts.
-
In the To field, specify the email of the recipient. To do this, select Process Parameter in the value window of the Contact menu item. Select the “Read lead” element in the pop up window and select “Owner” in the Process parameter field.
-
In the What is the message? field select “Template message”.
-
Select the existing template in the Template message field. The Subject field is populated automatically.
-
Select “Send email automatically” in the How is the message sent? field.
-
- After creating the process elements, connect each element with the next one by dragging the
 element in the upper right corner of the selected process element.
 - Save the created business process.
As a result of the business process, upon receiving a lead via a landing page, an email is sent to the responsible employee.