
In Creatio, you can send emails using both customer and developer means. By developer means, you can send emails:
- Using an existing account
- Using the explicit account credentials
Sending an email is done by using a business process. To set up a business process, use the Auto-generated page and Script task elements.
Sending an email from an existing account algorithm
To send an email from an existing account:
- Create a business process. The process must include Auto-generated page and Script task required elements.
- Create a config file for the email.
- Add an attachment (optional).
- Run the business process to send the email.
Creating a config file for the email
To create a configuration file of the email, use the Terrasoft.Mail.Sender.EmailMessage class. Populate the parameters below to ensure the validity of your email:
Adding attachments optional
You can add attachments to your email. To do this, populate the Attachments field. Attachments are essentially a list of Terrasoft.Mail.Sender.EmailAttachments instances.
Sending the email
To send the email, use the Send method of the EmailSender class with the email parameters and the connection configuration file.
Sending an email using the explicit account credentials algorithm
- Create a business process. The process must include Auto-generated page and Script task required elements.
- Create an instance of the EmailClientFactory class.
- Create an instance of the EmailSender class.
- Create a config file for connecting to the mailbox.
- Create a config file of the email.
- Add an attachment (if applicable).
- Run the business process to send the email.
Creating an instance of the EmailClientFactory class
To create an instance of the EmailClientFactory class, make sure you have UserConnection established.
Creating an instance of the EmailSender class
To create an instance of the EmailSender class, pass the created EmailClientFactory instance and the UserConnection to the constructor.
Creating a config file for connecting to the mailbox
To create a config file for connecting to the mailbox, use the EmailContract.DTO.Credentials class. Populate the following parameters:
Creating a config file of the email
To create a configuration file of the email that you are sending, use the EmailContract.DTO.Email class. Populate the parameters shown below to ensure the validity of your email:
Adding attachments (if applicable)
You can add attachments to your email. To do this, populate the Attachments field. Attachments are essentially a list of EmailContract.DTO.Attachment instances.
Sending the email
To send the email, use the Send method of the EmailSender class with the passed arguments of the email and the connection configuration file.
Example implementation algorithm
1. Create a business process
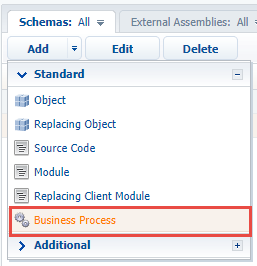
In the Configuration section execute the Add —> Business process action.

In the opened Process Designer, set the following values for the properties in the setup area:
- Title — "Sending emails from existing account".
- Code — "UsrSendEmailFromExistingUserProcess".
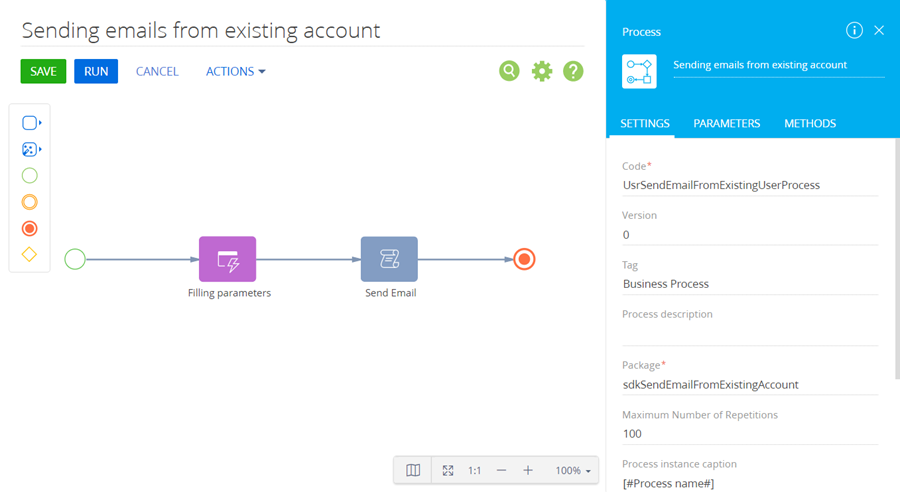
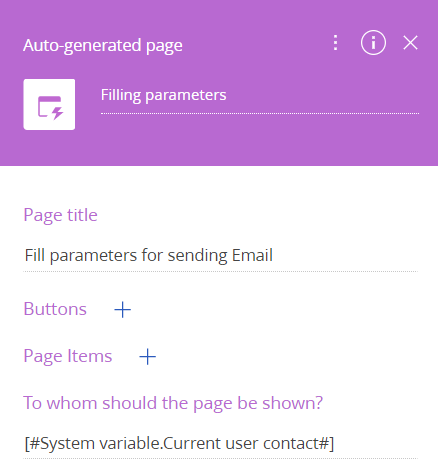
2. Add the Auto-generated page element
The Auto-generated page element enables the process to open an arbitrary page created by the user. For this element, add “Filling parameters” as a caption and set the following properties:
- Page title — "Fill parameters for sending Email".
- To whom should the page be shown? – select "Formula" and specify #System variable.Current user contact#.
3. Add a button to the page
To add a Continue button in the Buttons block, click  and specify the following parameters:
- Caption — "Continue".
- Code – “ContinueButton”.
- Style — select "Green".
- Set the Active checkbox.
- Set the Performs value validation checkbox.
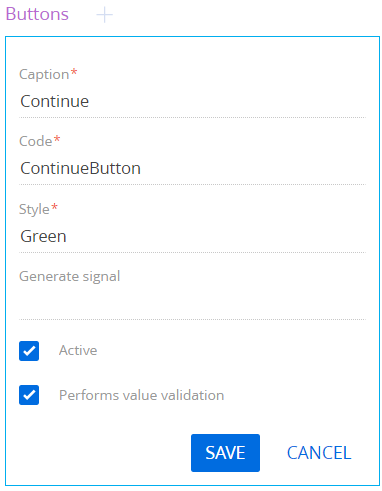
Click Save.
4. Add elements to the page.
To add an element that will contain the email sender’s mailbox, click in the Page Items block, select the Selection field type and specify the following parameters:
- Title – "Sender Mailbox".
- Code – “SenderMailbox”.
- Data source — select "Mailbox synchronization settings".
- View — select "Drop down list".
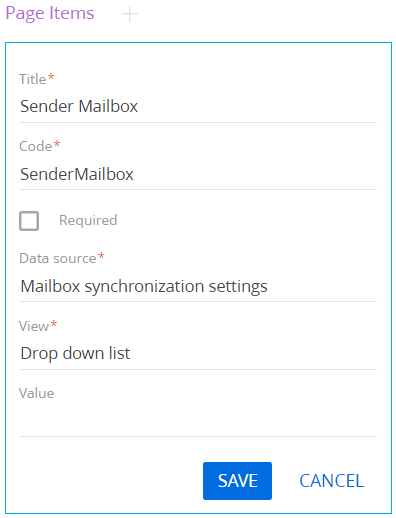
Click Save.
To add an element that will contain the email recipient’s mailbox, click in the Page Items block, select the Text field type and specify the following parameters:
- Title — "Recipient (many recipients separated by semicolon ";")".
- Code – “Recipient”.
- Set the Required checkbox.

Click Save.
To add an element that will contain the subject of the email, click in the Page Items block, select the Text field type and specify the following parameters:
- Title – “Subject”.
- Code – “Subject”.
- Set the Required checkbox.

Click Save.
To add an element that will contain the body of the email, click in the Page Items block, select the Text field type and specify the following parameters:
- Title – “Body”.
- Code – “Body”.
- Set the Required) checkbox.

Click Save.
5. Add a Script task element
Set the value of the Title property of the Script task element to “Send Email” The element must execute the following program code:
6 Add parameters
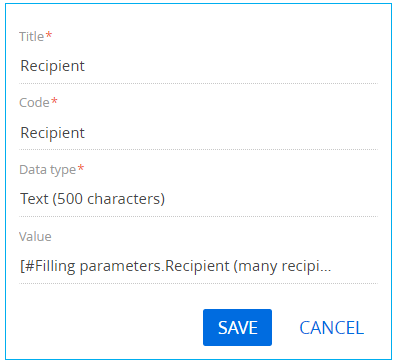
To add a business process parameter that will contain the email recipient’s mailbox, execute the Add parameters —> Text action in the Parameters tab of the setup area and specify the following parameter properties:
- Title – “Recipient”.
- Code – “Recipient”.
- Value – click
 –> Process parameter and select the “Recipient (many recipients separated by semicolon ";")” process element.
Click Save.
To add a business process parameter that will contain the subject of the email, execute the Add parameters —> Text action in the Parameters tab of the setup area and specify the following parameter properties:
- Title – “Subject”.
- Code – “Subject”.
- Value – click –> Process parameter and select the “Subject” process element.

Click Save.
To add a business process parameter that will contain the body of the email, execute the Add parameters —> Text action in the Parameters tab of the setup area and specify the following parameter properties:
- Title – “Body”.
- Code – “Body”.
- Value – click –> Process parameter and select the “Body” process element.

Click Save.
To add a business process parameter that will contain the email sender’s mailbox, execute the Add parameters —> Other —> Unique identifier action in the Parameters tab of the setup area and specify the following parameter properties:
- Title – "Sender Mailbox".
- Code – “SenderMailbox”.
- Value – click –> Process parameter and select the “Sender Mailbox” process element.
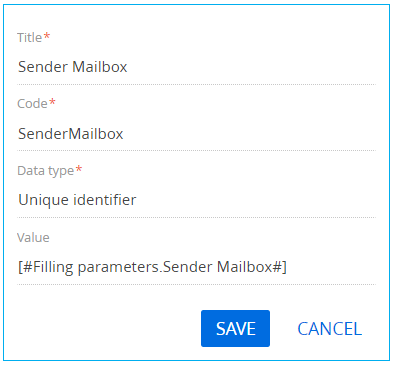
Click Save.
7. Add methods
To add business process methods, click in the Usings block in the Methods tab of the process designer setup area, and specify Terrasoft.Configuration value in the Name Space field. Click Save.
Using the same method, add the following namespaces:
- Terrasoft.Mail.Sender
- Terrasoft.Core.Factories
- Terrasoft.Core
- Terrasoft.Mail
- IntegrationApi
- System.Linq
Save all changes in the Process Designer.
8. Run the business process
After the business process is run using the Run button, a page containing fields for specifying email parameters will open.
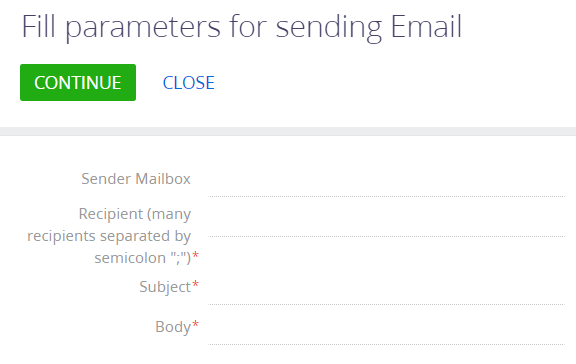
To send an email from the corresponding email account, click Continue.
Example implementation algorithm
1. Create a business process
In the Configuration section execute the Add —> Business process action.
In the opened process designer set the following values for the properties in the setup area:
- Title — "Sending emails using the explicit account credential".
- Code – “UsrSendEmailWithCredentialsProcess”.
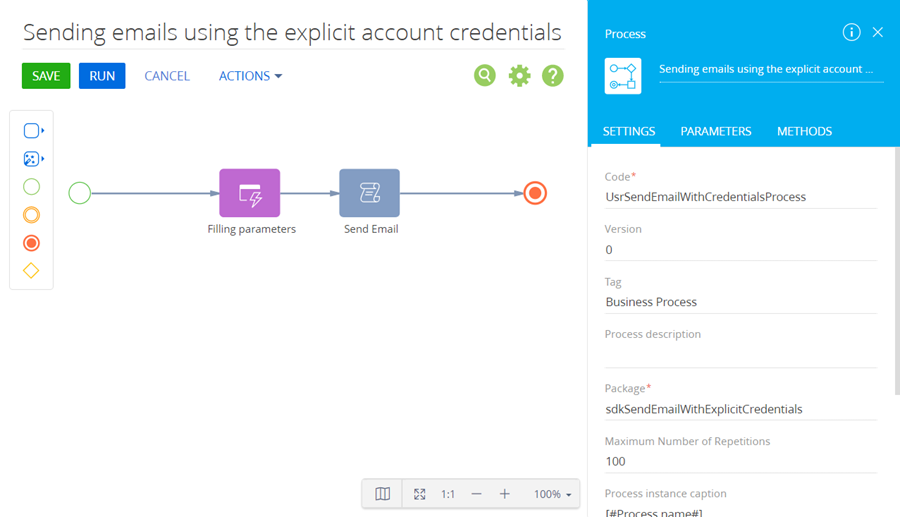
2. Add the Auto-generated page element
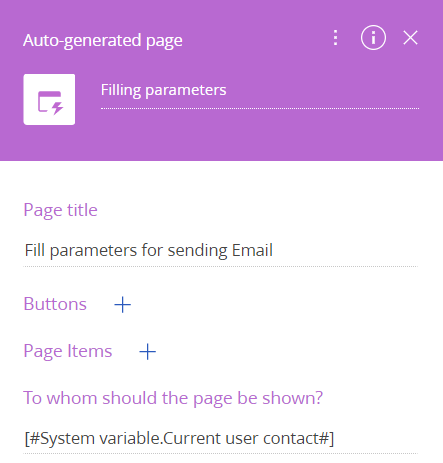
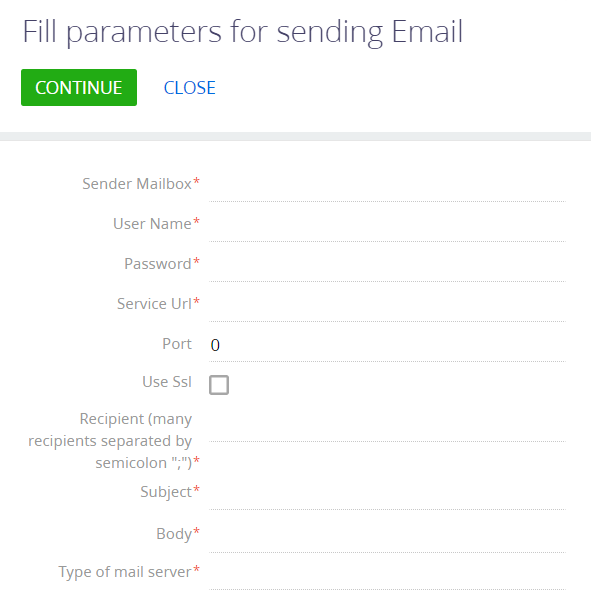
The Auto-generated page element enables the process to open an arbitrary page created by the user. For this element, add Filling parameters as a caption and set the following properties:
- Page title — "Fill parameters for sending Email".
- To whom should the page be shown? – select "Formula" and specify #System variable.Current user contact#.
3. Add a button to the page
To add a Continue button, click  in the Buttons block and specify the following parameters:
- Caption — "Continue".
- Code – “ContinueButton”.
- Style — select "Green".
- Set the Active checkbox.
- Set the Performs value validation checkbox.
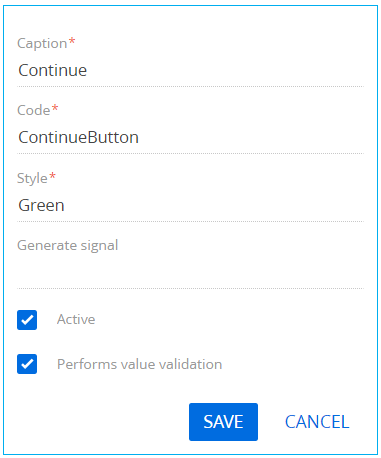
Click Save.
4. Add elements to the page.
To add an element that will contain the email sender’s mailbox, click in the Page Items block, select the Text field type and specify the following parameters:
- Title – "Sender Mailbox".
- Code – “SenderMailbox”.
- Set the Required checkbox.
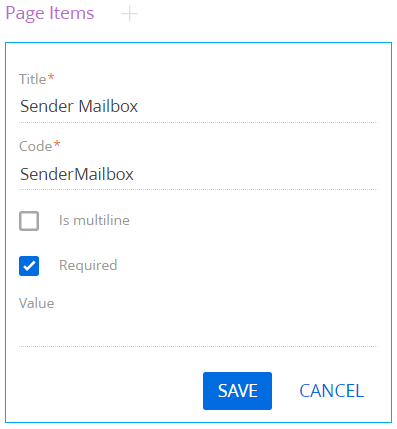
Click Save.
To add an element that will contain the name of the email sender, click in the Page Items block, select the Text field type and specify the following parameters:
- Title – “User Name”.
- Code – “UserName”.
- Set the Required checkbox.
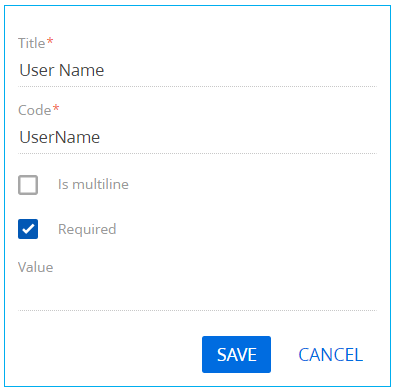
Click Save.
To add an element that will contain the password for email sender’s mailbox, click in the Page Items block, select the Text field type and specify the following parameters:
- Title – “Password”.
- Code – “Password”.
- Set the Required checkbox.
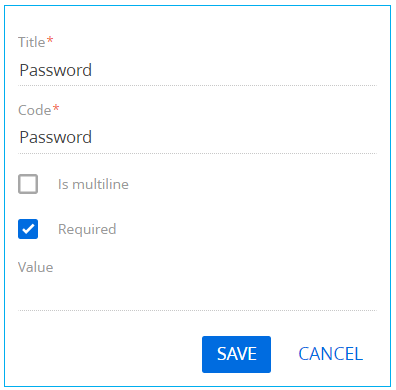
Click Save.
To add an element that will contain the mail server address of the email sender, click in the Page Items block, select the Text field type and specify the following parameters:
- Title – "Service Url".
- Code – “ServiceUrl”.
- Set the Required checkbox.
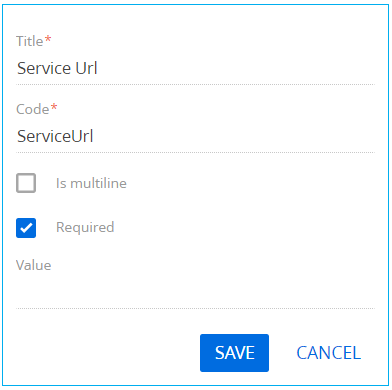
Click Save.
To add an element that will contain the port number of the email sender’s mail provider, click in the Page Items block, select the Integer type and specify the following parameters:
- Title – “Port”.
- Code – “Port”.
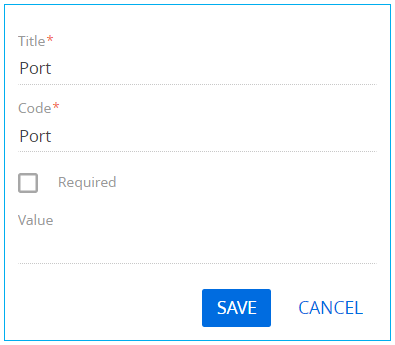
Click Save.
To add an element that will contain the cryptographic protocol to ensure a secure connection, click in the Page Items block, select the Boolean type and specify the following parameters:
- Title – " Use Ssl".
- Code – “UseSsl”.
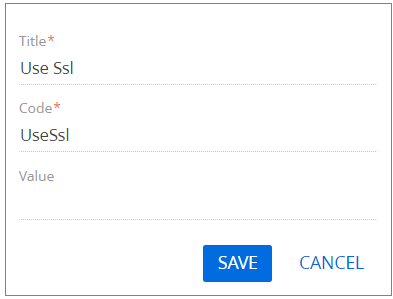
Click Save.
To add an element that will contain the email recipient’s mailbox, click in the Page Items block, select the Text field type and specify the following parameters:
- Title — "Recipient (many recipients separated by semicolon ";")".
- Code – “Recipient”.
- Set the Required checkbox.
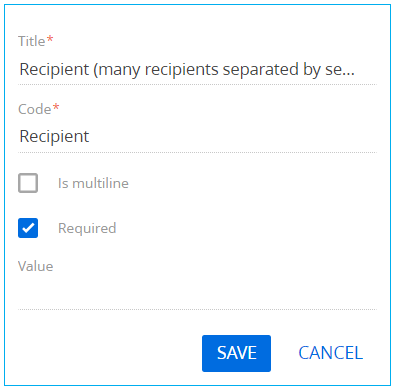
Click Save.
To add an element that will contain the subject of the email, click in the Page Items block, select the Text field type and specify the following parameters:
- Title – “Subject”.
- Code – “Subject”.
- Set the Required checkbox.
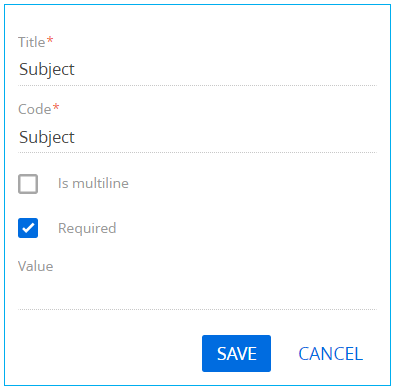
Click Save.
To add an element that will contain the body of the email, click in the Page Items block, select the Text field type and specify the following parameters:
- Title – “Body”.
- Code – “Body”.
- Set the Required checkbox.
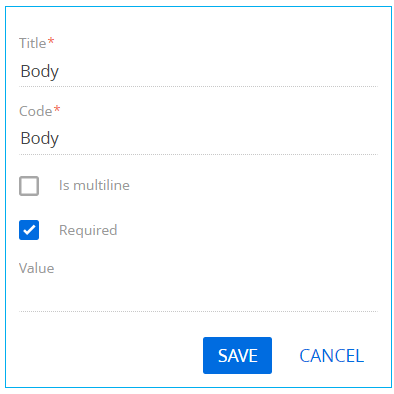
Click Save.
To add an element that will contain the type of the email sender’s provider, click in the Page Items block, select the Selection field type and specify the following parameters:
- Title — "Type of mail server".
- Code – “ServerTypeId”.
- Set the Required checkbox.
- Data source — select "Mail service provider type".
- View — select "Drop down list".
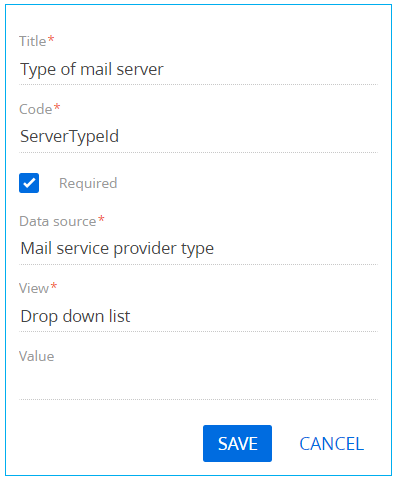
Click Save.
5. Add a ScriptTask element
Set the value of the Title property of the Script task element to “Send Email”. The element must execute the following program code:
6 Add parameters
To add a business process parameter that will contain the address of the sender’s mail server, execute the Add parameters —> Text action in the Parameters tab of the setup area and specify the following parameter properties:
- Title – "Service Url".
- Code – “ServiceUrl”.
- Value – click
 –> Process parameter and select the “Service Url” process element.

Click Save.
To add a business process parameter that will contain the port number of the sender’s email provider, execute the Add parameters —> Integer action in the Parameters tab of the setup area and specify the following parameter properties:
- Title – “Port”.
- Code – “Port”.
- Value – click –> Process parameter and select the “Port” process element.
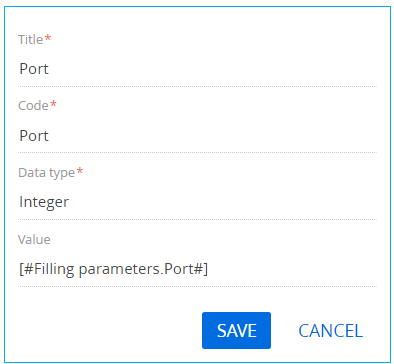
Click Save.
To add a business process parameter that will contain the cryptographic protocol for a secure connection, execute the Add parameters —> Boolean action in the Parameters tab of the setup area and specify the following parameter properties:
- Title – " Use Ssl".
- Code — " UseSsl”.
- Value – click –> Process parameter and select the “ Use SSL” process element.
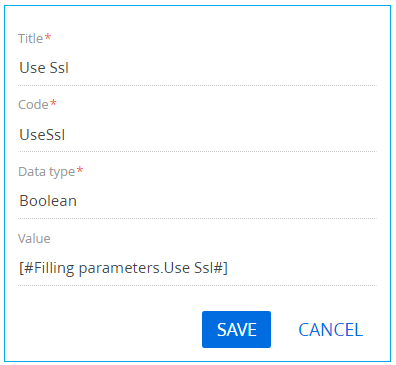
Click Save.
To add a business process parameter that will contain the email sender’s name, execute the Add parameters —> Text action in the Parameters tab of the setup area and specify the following parameter properties:
- Title – “User Name”.
- Code – “UserName”.
- Data type – select “Text (250 characters)”.
- Value – click –> Process parameter and select the “User Name” process element.

Click Save.
To add a business process parameter that will contain the password for the email sender’s mailbox, execute the Add parameters —> Text action in the Parameters tab of the setup area and specify the following parameter properties:
- Title – “Password”.
- Code – “Password”.
- Data type – select “Text (250 characters)”.
- Value – click –> Process parameter and select the “Password” process element.
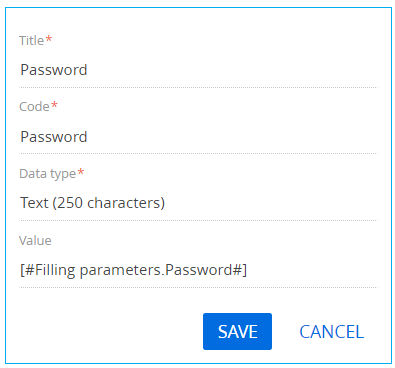
Click Save.
To add a business process parameter that will contain the email recipient’s mailbox, execute the Add parameters —> Text action in the Parameters tab of the setup area and specify the following parameter properties:
- Title – “Recipient”.
- Code – “Recipient”.
- Value – click –> Process parameter and select the “Recipient (many recipients separated by semicolon ";")” process element.

Click Save.
To add a business process parameter that will contain the type of the email sender’s mail provider, execute the Add parameters —> Other —> Unique identifier action in the Parameters tab of the setup area and specify the following parameter properties:
- Title — "Type of mail server".
- Code – “ServerTypeId”.
- Value – click –> Process parameter and select the “Type of mail server” process element.

Click Save.
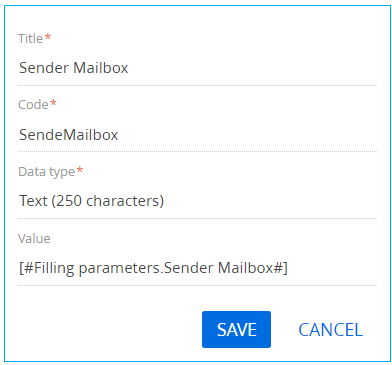
To add a business process parameter that will contain the email sender’s mailbox, execute the Add parameters —> Text action in the Parameters tab of the setup area and specify the following parameter properties:
- Title – "Sender Mailbox".
- Code – “SenderMailbox”.
- Data type – select “Text (250 characters)”.
- Value – click –> Process parameter and select the “Sender Mailbox” process element.
Click Save.
7. Add methods
To add business process methods, click in the Usings block in the Methods tab of the process designer setup area, and specify Terrasoft.Mail.Sender value in the Name Space field. Click Save.
Using the same method, add the following namespaces:
- Terrasoft.Core.Factories
- System.Linq
Save all changes in the Process Designer.
8. Business process launch
After the business process is run using the Run button, a page containing fields for specifying email parameters will open.
To send an email using the explicit account credentials, click Continue.