Create and publish an embedded form
Publish a reusable form to an external website so that every visitor submission becomes a record in Creatio automatically. In Creatio, you create the form in the Embedded forms section, design its fields, publish it to receive a ready-to-use embed snippet, and place that snippet on your webpage.
Learn more: Embedded forms.
The Publish button appears on the form page only after you make and save a real change to the design. The default template on the canvas does not count as saved on its own. Design the form before you try to publish it.
Optionally, you can set up form rules for conditional behavior while designing the form.
-
Go to the Embedded forms section.
-
Click New.
-
Fill out the base fields.
Field
Field value
Name
Name of the embedded form. Required.
Goal
A short description of the form's purpose.
-
Click Save.
The form record is created with the "Draft" status.
-
Click Design.
Creatio opens the Form Designer with a default template already on the canvas: First name, Email, and a Submit button.
-
Select the entity to save submissions to in the Submission entity field.
The fields in the Available fields area come from this entity. Each field you add to the form maps to the corresponding field in this entity.
-
Add, remove, or edit at least one field on the Layout canvas.
To add a field, drag it from the Available fields area to the canvas. To add a new row to the layout, click Add row. Move fields between rows to arrange the form. Creatio does not treat the default template as saved content until you make and save a real change here. Saving without any change does not activate the Publish button in a later step.
-
Select a field on the canvas and adjust its settings in the Field settings area.
Set the field's label, placeholder text, and default value, and mark the field as Required, Is hidden, or Is readonly. Click Appearance to set the container width, spacing, and the styles for Labels, Fields, and Submit button.
Fig. 1 Form designer 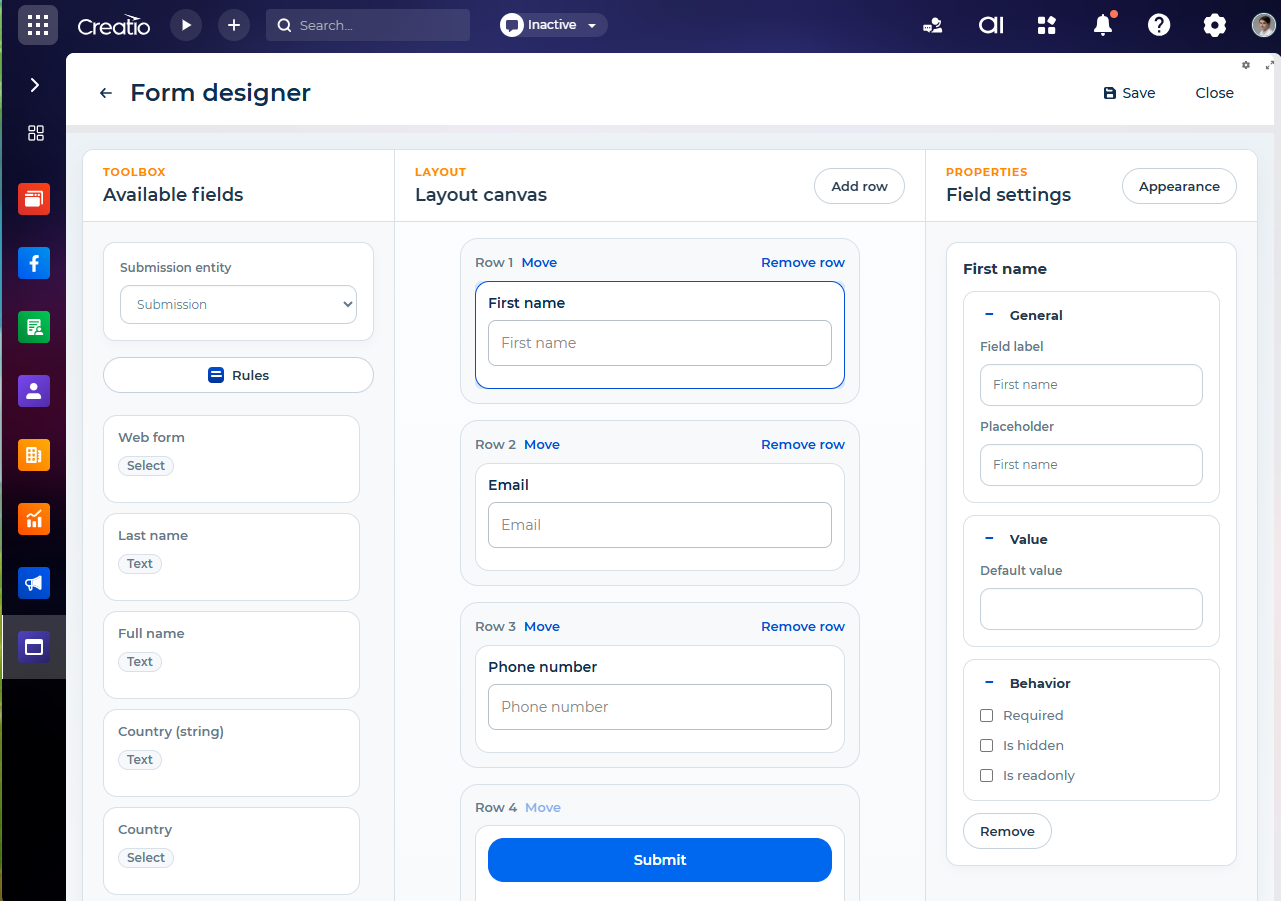
-
Add conditional logic to the form. (Optional)
- Click Rules in the Available fields area.
- Click Add rule.
- Set the condition under IF, select the Show fields action under THEN, and choose the field to show. For example, show the City field once the Country field is filled out.
- Click Save.
Fig. 2 Rules setup window 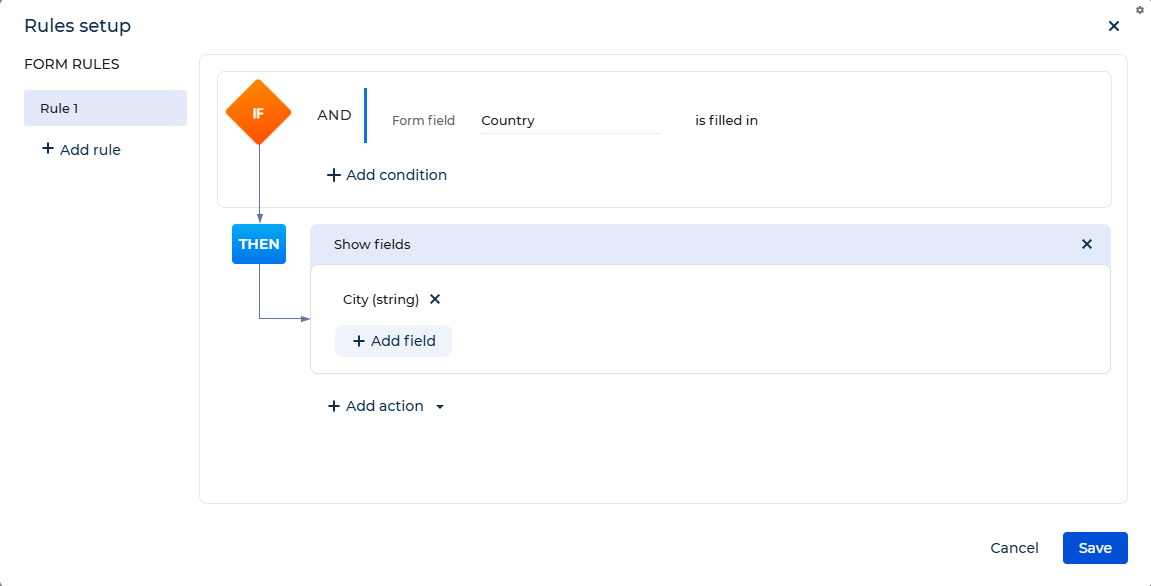
-
Click Save → Close.
-
Click Publish on the form page. This opens a window.
The form's status changes to "Published." The button changes to Update, so any further changes you save and publish again do not replace the embed code already placed on your webpage.
-
Click Copy code.
The window contains the text "Copy and paste the code into your webpage to embed the form" and the embed code: a container
<div>and a<script>tag that loads and renders the form. To retrieve the code again later, click the embedded form actions menu on the form page, then click Get form code.Fig. 3 Embedded form actions menu 
The Form info panel also shows the form's direct URL.
-
Paste the copied code into the HTML of the webpage where the form must appear.
This step is performed on your website, outside Creatio. The loader script renders the form at the location where you paste the code.
As a result, your embedded form will become live on the webpage, and every valid submission will be captured in Creatio. New submissions create or update records in Creatio and appear in the Submissions section. To monitor form performance, open the form record, and go to the Analyze performance tab, where you can review submission dynamics and recent submissions.
To take a published form offline, click the embedded form actions menu on the form page and click Unpublish.