Set up Creatio.ai add-in for Microsoft Outlook
After the system administrator performs preliminary setup, you can configure Creatio.ai in your Microsoft Outlook client. In general, the setup of Creatio.ai add-in consists of the following steps:
- Install Creatio.ai add-in. Learn more: Read more >>>
- Grant Microsoft Outlook access to Creatio Read more >>>
After you install the add-in for Outlook, it will also become available for Microsoft Teams.
1. Install Creatio.ai add-in
You can install the Creatio.ai add-in for Outlook in one of the following ways:
- from Microsoft Outlook for a new Outlook desktop app or Outlook Web. Read more >>>
- from Microsoft Outlook for a classic Outlook desktop app. Read more >>>
- directly from Microsoft Marketplace. Read more >>>
Install Creatio.ai add-in from Microsoft Outlook for a new Outlook desktop app or Outlook Web
-
Open the Outlook desktop app or Outlook Web.
-
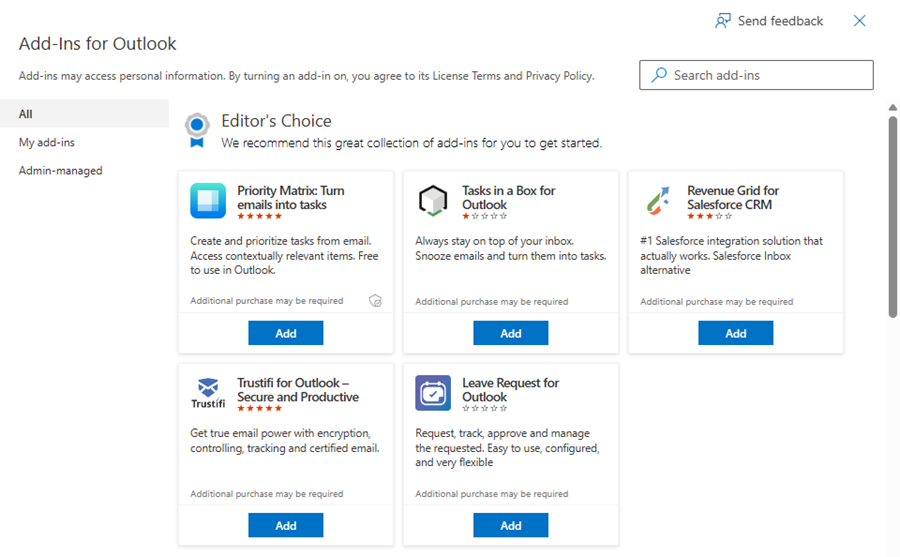
Open the Add-ins for Outlook page. To do this, go to the Outlook navigation panel → click
 → Add apps. This opens the Apps page (Fig. 1).
Fig. 1 Apps page 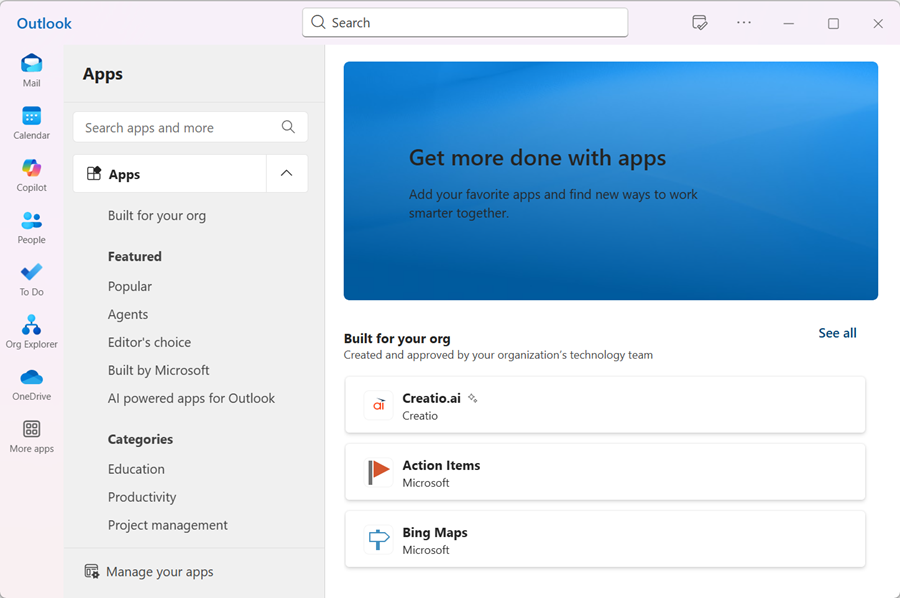
-
Find the Creatio.ai add-in. To do this, go to the Search apps and more field → enter the "Creatio.ai" search query → select the Creatio.ai add-in. This opens the Creatio.ai add-in window (Fig. 2).
Fig. 2 Creatio.ai add-in window 
-
Click Add. The installation might take some time.
As a result:
-
The Creatio.ai add-in will be added to the Apps menu (Fig. 3). Use Creatio.ai when working with a single email or the message list.
Fig. 3 Creatio.ai add-in in the Apps menu 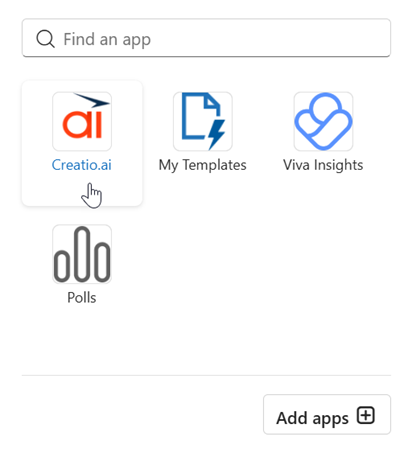
-
The "Creatio.ai" group that includes the Creatio.ai button will be added to the Event tab on the New event window (Fig. 4). Use Creatio.ai when working with a single event in a separate window.
Fig. 4 Creatio.ai add-in in the New event window 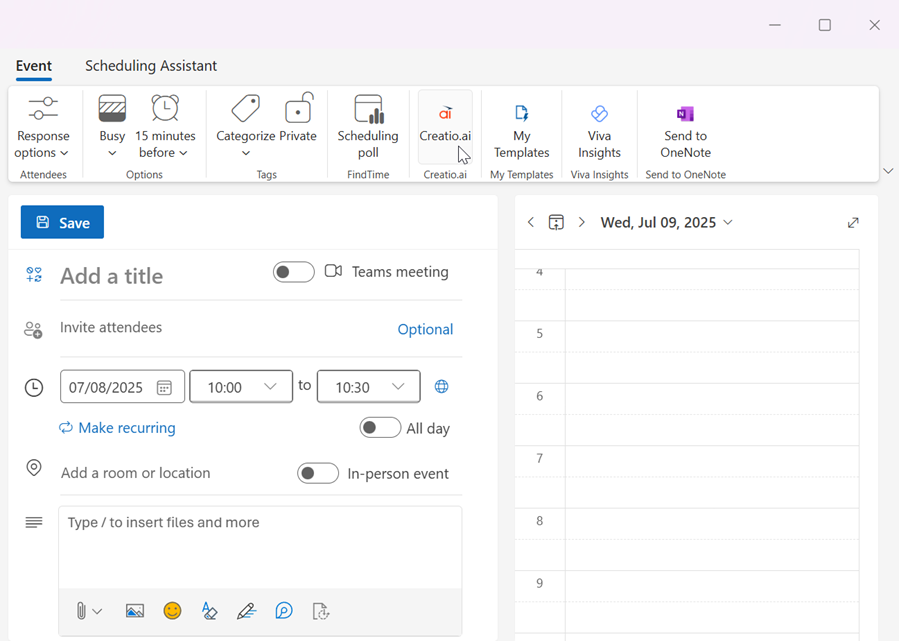
Install Creatio.ai add-in from Microsoft Outlook for a classic Outlook desktop app
-
Open the classic Outlook desktop app.
-
Open the Add-ins for Outlook page.
Depending on the Outlook version you have installed, use one of the following ways:
-
Find the Creatio.ai add-in.
-
If you open the Add-ins for Outlook from the ribbon, go to the Search add-ins field → enter the "Creatio.ai" search query → select the Creatio.ai add-in. This opens the Creatio.ai add-in window (Fig. 6).
Fig. 6 Creatio.ai add-in window 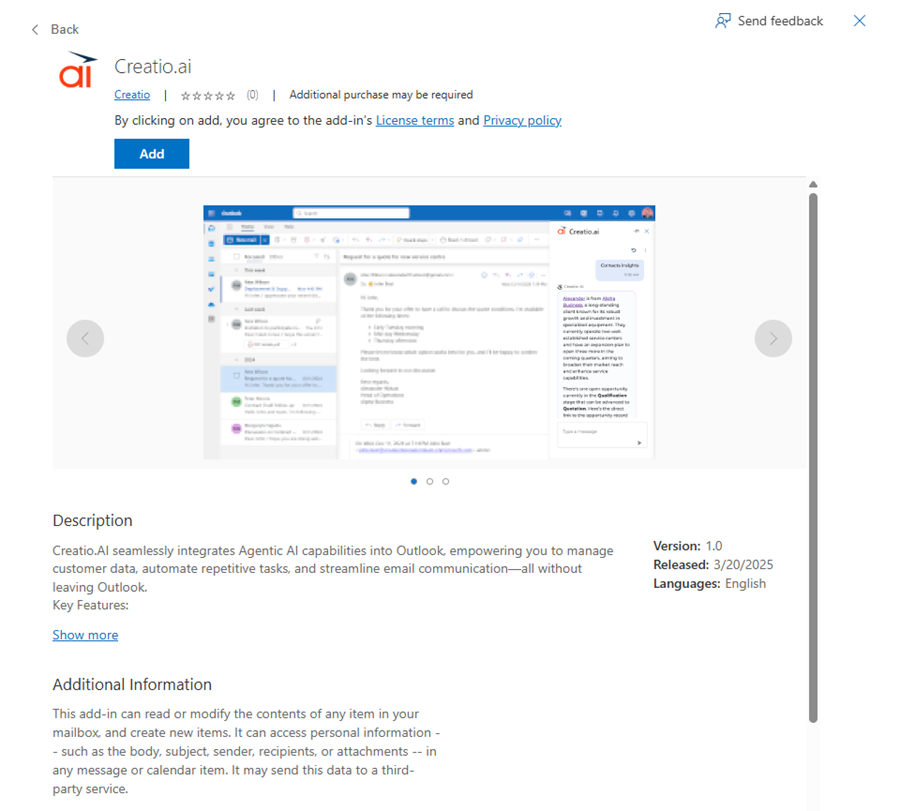
-
If you open the Add-ins for Outlook from the navigation panel, go to the Search apps and more field → enter the "Creatio.ai" search query → select the Creatio.ai add-in. This opens the Creatio.ai add-in window (Fig. 2).
-
-
Click Add. The installation might take some time.
As a result, the "Creatio.ai" group that includes the Creatio.ai Agent button will be added to the following tabs:
-
The Home tab on the Outlook ribbon (Fig. 7). Use Creatio.ai when working with a single email in the message list.
Fig. 7 Creatio.ai add-in on the Home tab 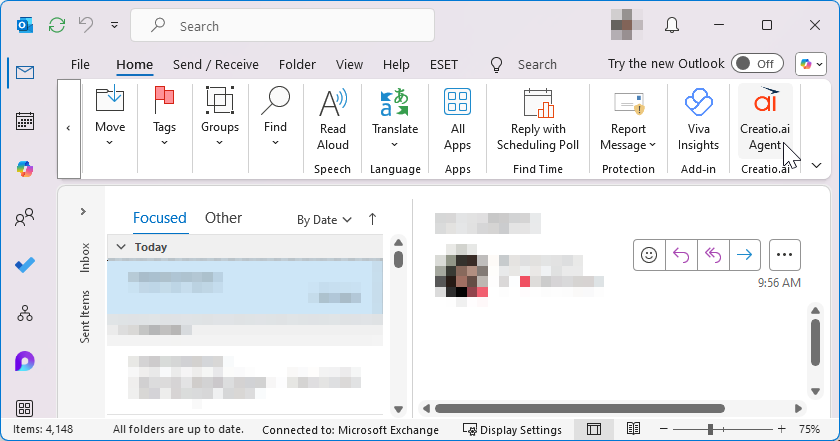
-
The Message tab on the New email window (Fig. 8). Use Creatio.ai when working with a single email in a separate window.
Fig. 8 Creatio.ai add-in in the New email window 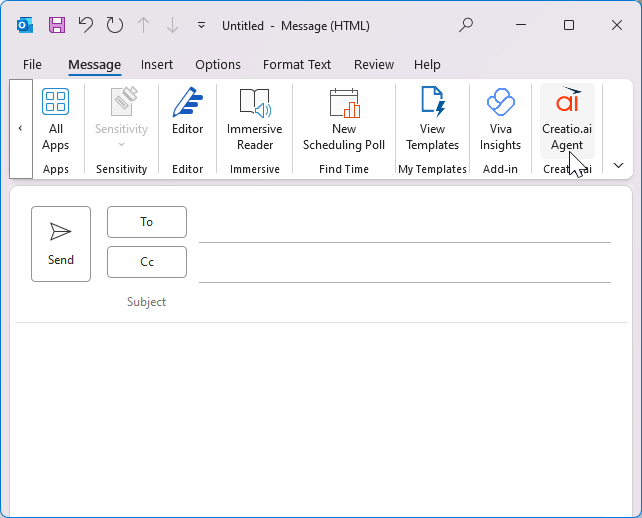
-
The Meeting tab on the New meeting window (Fig. 9). Use Creatio.ai when working with a single meeting in a separate window.
Fig. 9 Creatio.ai add-in in the New meeting window 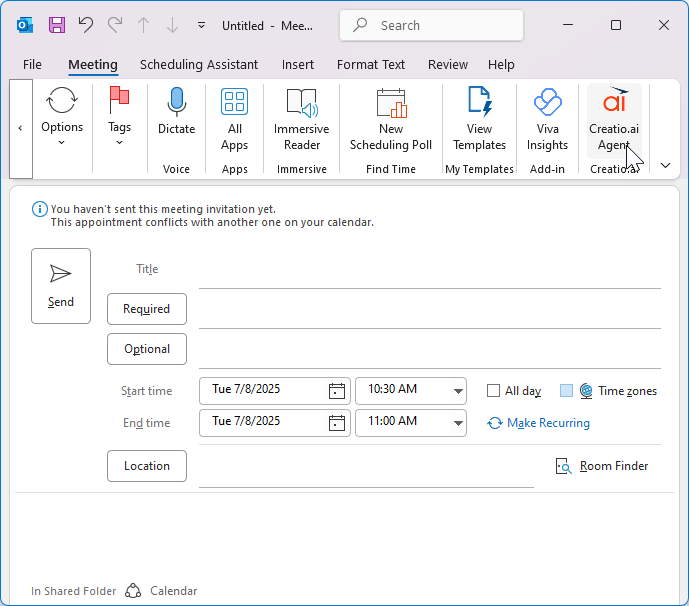
-
The Appointment tab on the New appointment window (Fig. 10). Use Creatio.ai when working with a single appointment in a separate window.
Fig. 10 Creatio.ai add-in in the New appointment window 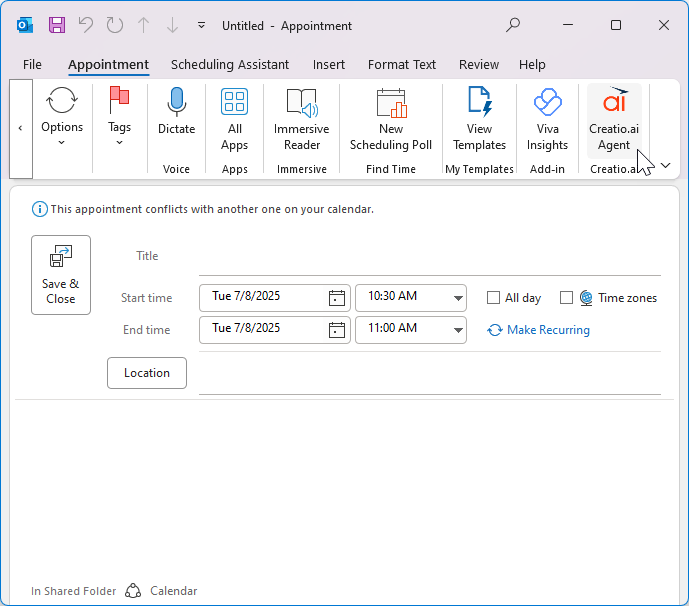
Install Creatio.ai add-in directly from Microsoft Marketplace
-
Open the Microsoft Marketplace.
-
Go to the Search Marketplace field → enter "Creatio.ai" → select the Creatio.ai add-in. This opens the add-in page (Fig. 11).
Fig. 11 Creatio.ai window 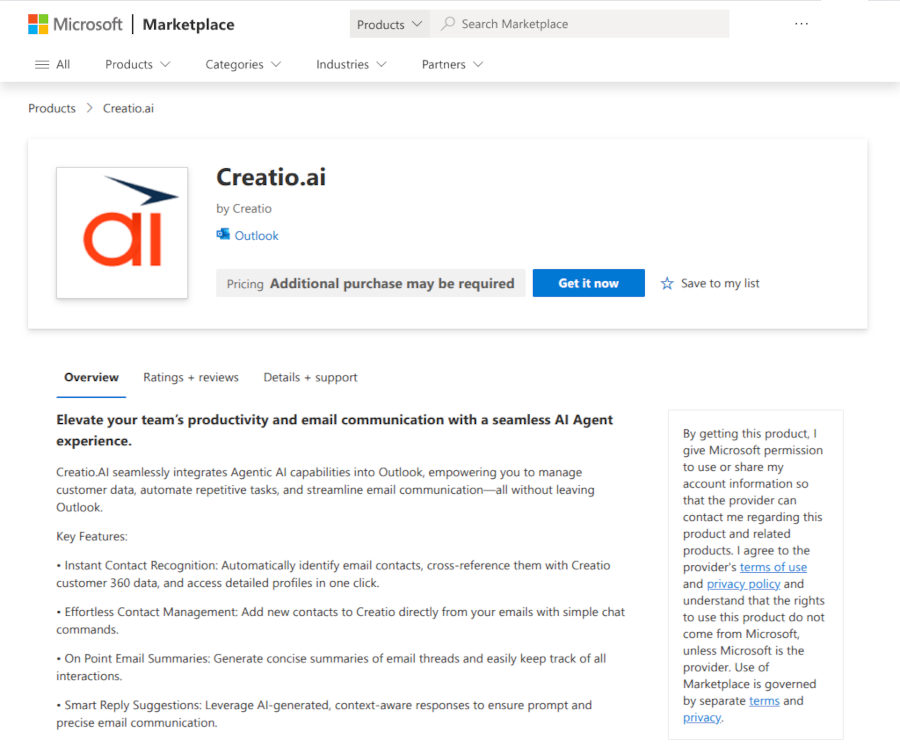
-
Click Get it now.
-
Confirm the installation.
-
Log in to Microsoft account using your credentials if needed.
The installation might take some time.
As a result:
- The Creatio.ai add-in will be added to the Apps page (Fig. 3).
- The "Creatio.ai" group that includes the Creatio.ai button will be added to the Event tab on the new event window (Fig. 4).
2. Grant Microsoft Outlook access to Creatio
-
Open any Outlook version to grant access to Creatio.
-
Open the Outlook task pane that includes Creatio login page (Fig. 12).
- For new Outlook desktop app or Outlook Web, open a single email → click
 → select the Creatio.ai add-in.
 - For a classic Outlook desktop app, open a single email → go to the Message tab → go to the "Creatio.ai" group → click the Creatio.ai Agent button.
Fig. 13 Outlook task pane 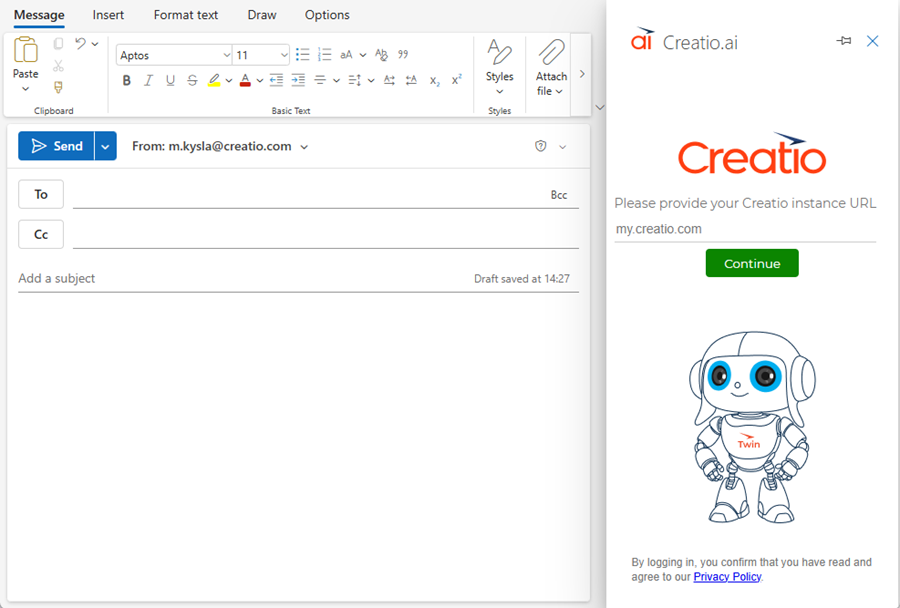
- For new Outlook desktop app or Outlook Web, open a single email → click
-
Log in to Creatio.
- Click Sign in with Microsoft.
- Enter the Creatio URL and click Continue.
- Click Sign in to.... This displays Creatio login page.
- Use your credentials to log in. This displays consent page (Fig. 13).
Fig. 14 Consent page 
-
Click Accept. This opens the Creatio.ai chat panel in the Outlook task pane (Fig. 14).
Fig. 15 Creatio.ai chat panel 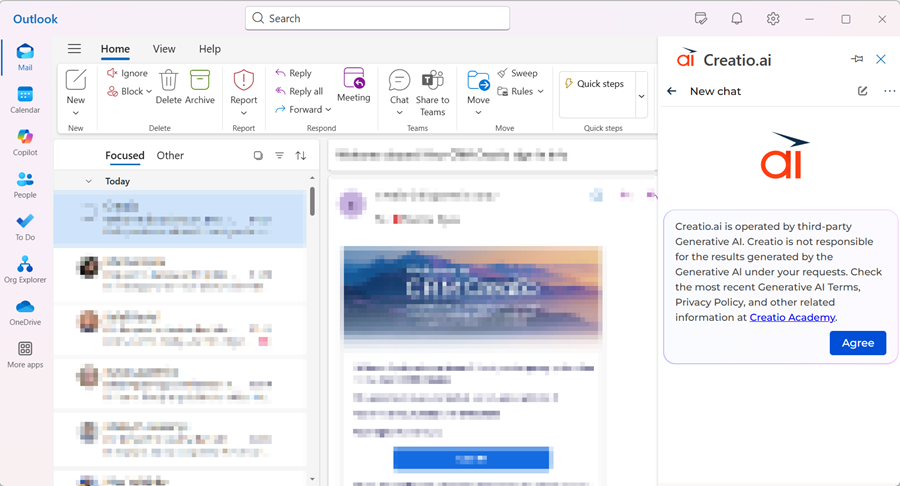
As a result, Outlook will be connected to Creatio and you will be able to interact with Creatio.ai directly from Outlook (Fig. 15).

See also
Use Creatio.ai for emails and meetings
Set up Creatio.ai add-in for Microsoft Teams
Creatio.ai (developer documentation)