Import data from WordPress web page
This functionality is available for Creatio 8.1.1 and later.
WordPress is an open-source content management system (CMS). Together with Elementor Pro plugin it lets you create landing pages that have high conversion rates and pass data to Creatio automatically.
Before you start setting up the WordPress service integration, set up a landing page that contains a form. Learn more: official Elementor documentation.
General procedure to set up data import from WordPress langing page:
- Get your Webhook URL in Creatio. Read more >>>
- Connect your web page to Creatio. Read more >>>
- Map the Creatio object columns to the WordPress form field. Read more >>>
You can also import Google Analytics data from your landing page into Creatio. Learn more: Use Google Analytics on external landing pages.
After you set up the integration, check whether data was imported to Creatio successfully. Learn more: Check whether data was imported to Creatio successfully
Step 1. Get your Webhook URL in Creatio
The webhook URL enables third-party services like web page builder to send webhooks to Creatio. Take this step in your Creatio instance.
-
Open the needed section. For example, Contacts.
-
Click Data import → Web forms and pages in the top right (Fig. 1).
Fig. 1 Import data from web forms and pages 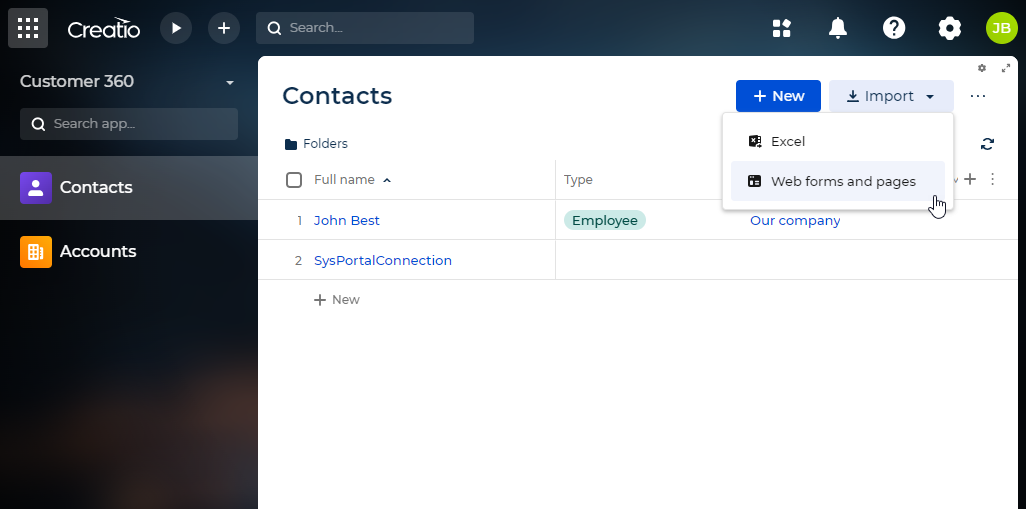
-
Click Wordpress.com → Click to get your Webhook URL (Fig. 2).
Fig. 2 Get the API key for Wordpress integration 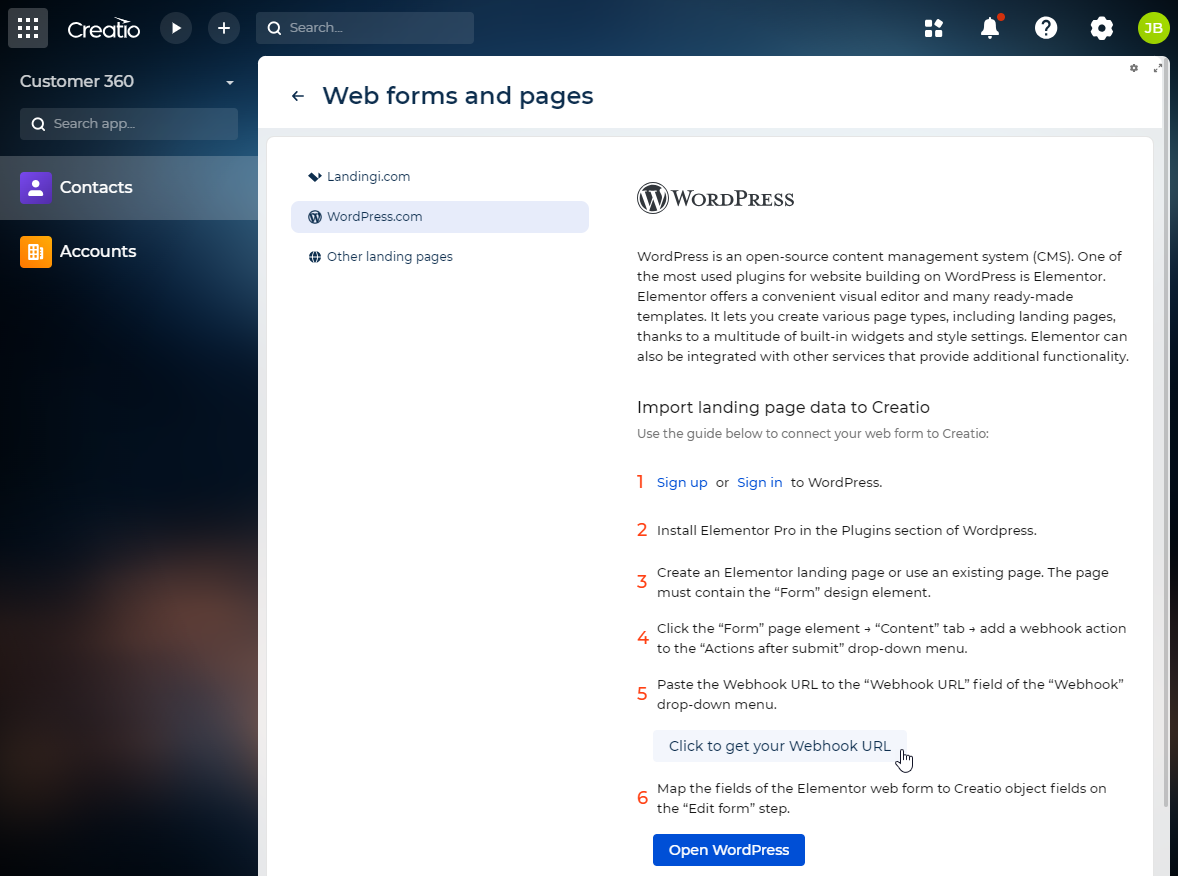
As a result, you will receive a URL to use for sending web form data from WordPress to Creatio.
We recommend storing your API key in a secure place.
Step 2. Connect your web page to Creatio
Get your Creatio object parameters
For Creatio to create records from incoming webhooks automatically, the webhook data must follow a particular structure. This structure includes:
- Entity name. This parameter specifies the code of the Creatio section (object) where the records will be created.
- Field codes. The webhook data must also include the codes of the specific fields within the section where the corresponding data from the webhook will be stored.
Essentially, the webhook acts as a data carrier, telling Creatio which section to populate and which fields to fill with the information it provides.
Take this step in Creatio.
-
Receive the code of the Creatio object to import records from the web page.
- To find the code of the Freedom UI section, open the app in the Application Designer → Data models → select needed data model → Code.
- To find the code of Classic UI section, open the Section Wizard → Code.
-
Receive the code of the Creatio object column. To find the code of the column, open the needed section in the Freedom UI Designer or Section wizard → select field → find code in the field setup area. For example, it is "Name" for the Full name field of the contact.
Connect your web page to Creatio object
Connecting web page to Creatio enables the page to send web form data to Creatio via webhooks. Take this step in your WordPress account that has Elementor tool.
-
Select the web page to connect to Creatio and click its name. This opens the admin page.
-
Click Edit in Elementor to open the web page properties.
Fig. 3 Open page properties 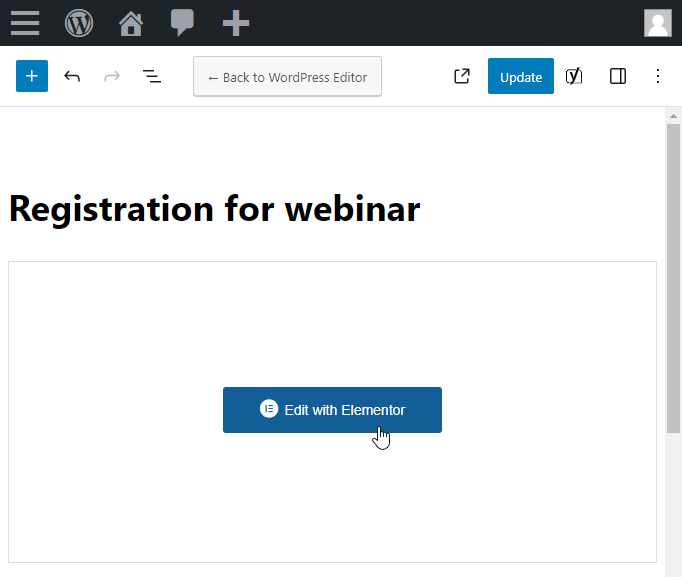
-
Click any field of the web form to open the editor menu.
-
Select Actions after submit in the editor menu.
-
Click Add action → "Webhook." After this submitting the web form triggers a webhook that contains the form data.
Fig. 4 Add webhook 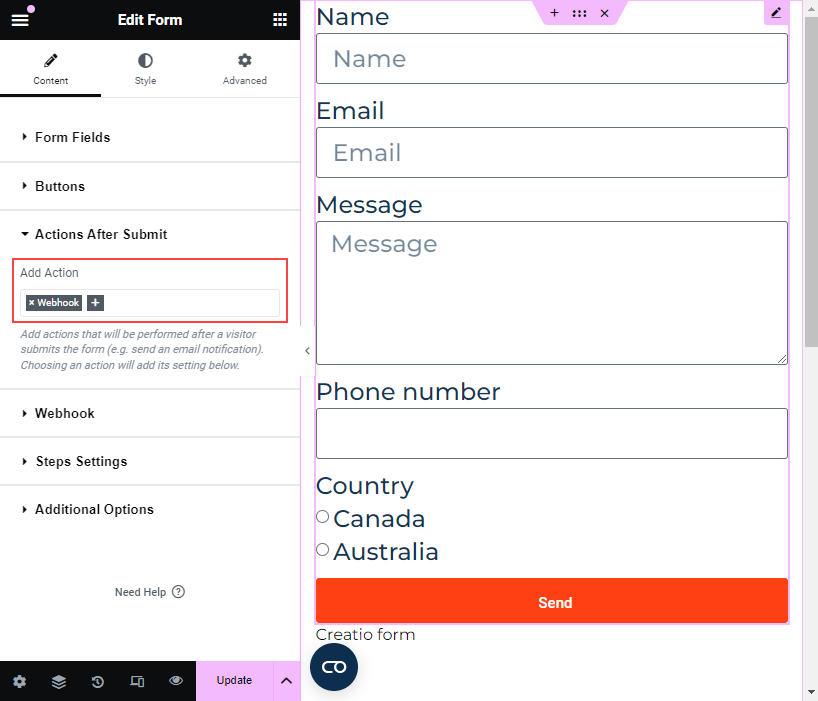
-
Select Webhook in the editor menu.
-
Add the webhook URL you got on step 1.
Fig. 5 Add webhook URL 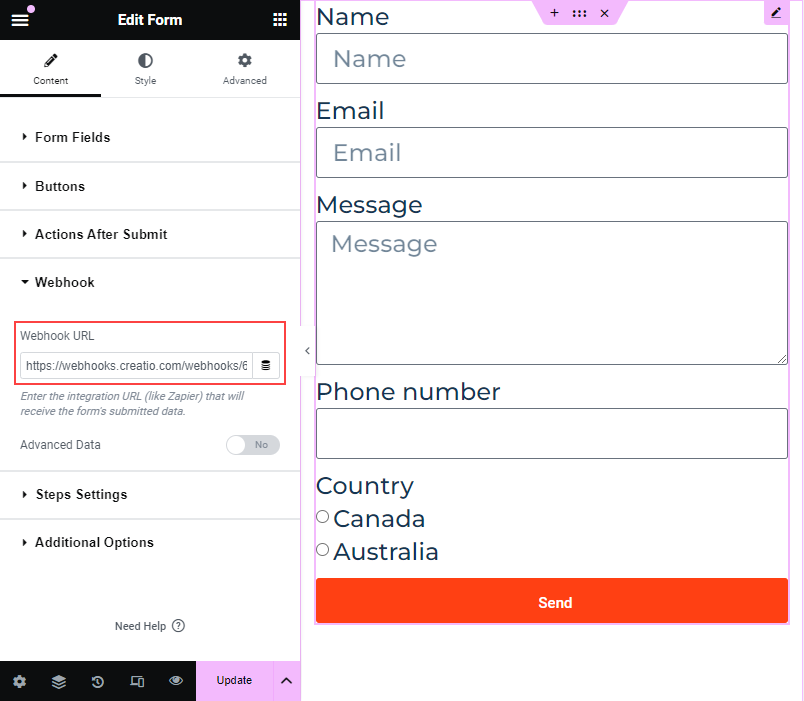
-
Connect the web form to the Creatio object.
- Add a hidden field to the web form.
- Set Label parameter to
EntityName. - Open the advanced field settings.
- Fill out the Default value field using the Creatio section code.
Fig. 6 Connect web form to Creatio object 
As a result, when you submit the web form, it will automatically trigger a webhook that sends the form data to Creatio via the webhook URL.
Step 3. Map the Creatio object columns to the WordPress form fields
Mapping the Creatio object columns to the web form fields enables Creatio to add a record to the selected section based on the incoming webhook. Take this step in your WordPress account.
-
Open your web page in WordPress and click Edit in Elementor.
-
Select Form fields in the editor menu.
-
Click the field title. This opens the field properties (Fig. 6).
Fig. 7 Field properties 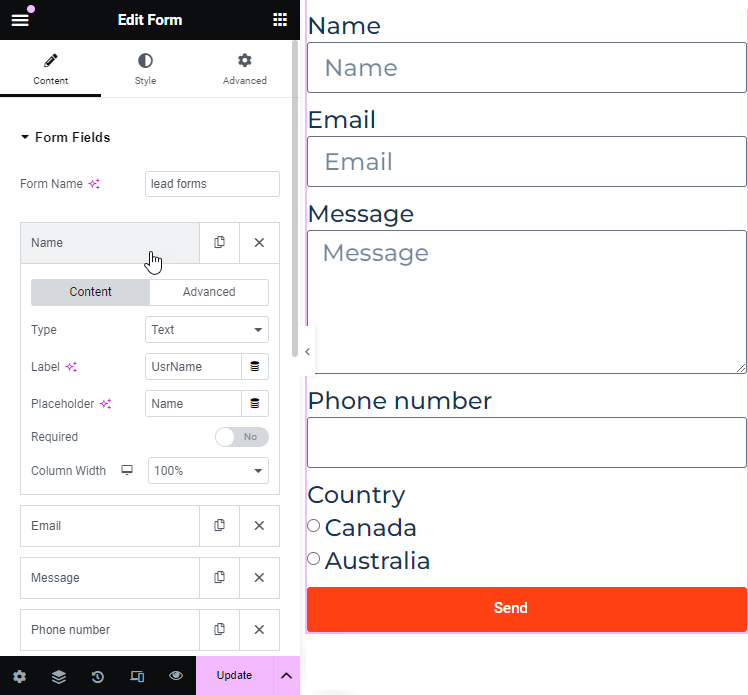
-
Fill out the code of the Creatio object column in the Label field.
-
Add selection options for dropdown or radio fields in the Options field. Enter each option in a separate line. To differentiate between label and value, separate them with a pipe character ("|").
Label
The option to show in the web form
Value
The ID of the lookup value in Creatio
For example, if you add country selection to your web form using "Canada" and "Australia" options, fill out the field as follows:
Canada|f8af0e88-f36b-1410-fa98-00155d043204Australia|82edc239-8f15-4512-ad76-690c46627ddbFig. 8 Radio field setup 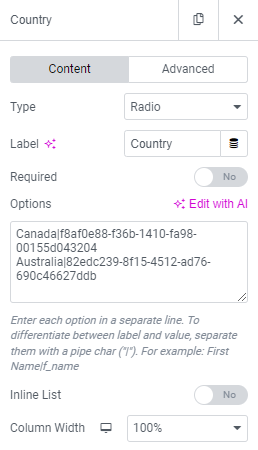
-
Repeat steps 1–6 of the current instruction for all web form fields.
As a result, when Creatio receives webhook sent by your web page the record based on its data will be created in the specified section.
Follow the recommendations in the table below when mapping the WordPress form fields to the Creatio object fields.
Web form field type | Creatio object field type |
|---|---|
Text | Text |
Email or Text | |
Txtarea | Text |
URL | Web link or Text |
Tel | Phone number or Number |
Checkbox | Text |
Radio | Dropdown |
Select (single) | Dropdown |
Select (multiple) | Text |
Acceptance | Text |
Number | Number |
Date | Date/Time |
Time | Date/Time |
File | Web link. Creatio imports only the file link. |
Hidden | Text |
Password | Text |
See also
Integrate with landing pages and web forms
Check whether data was imported to Creatio successfully