The calendar view (Fig. 1) displays activities as an electronic day planner.
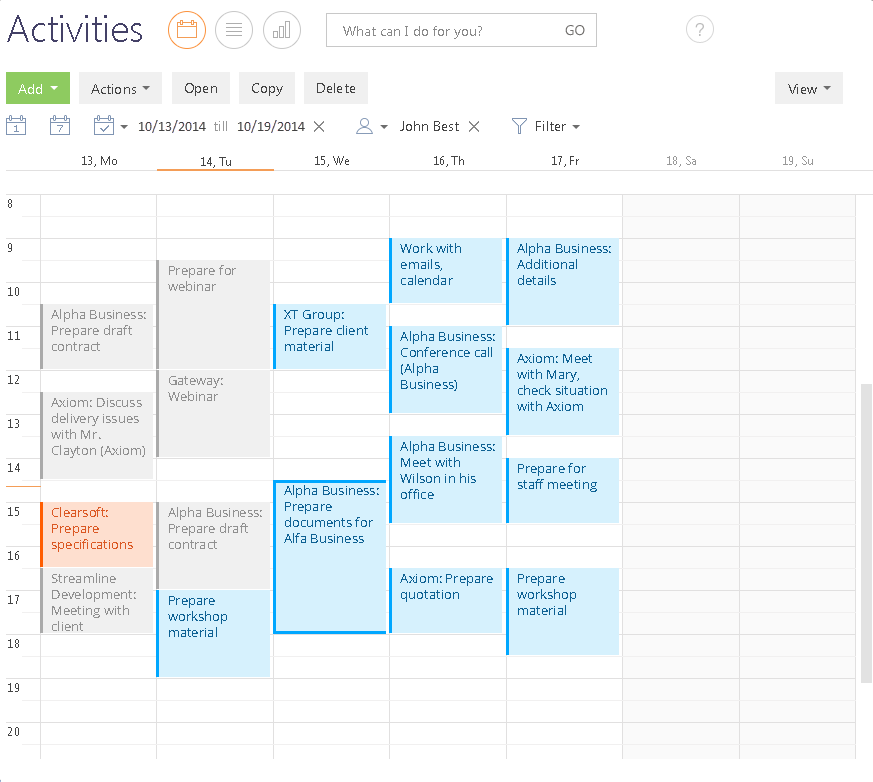
You can add, copy, delete, as well as open an activity for viewing or editing using the toolbar buttons. When you copy an activity, the list of its participants will be copied too. Activities in the calendar can be filtered in the same manner as records in the list.
The calendar area
The calendar area is divided into days. The date and day of the week are displayed in the heading of each day column. The title of the current day is highlighted.
In the calendar area activities are displayed in the form of rectangular blocks whose height corresponds to the duration of activities. The current time is highlighted with an orange line. To scroll the calendar vertically, use the scrollbar at the right of the calendar or the [Up] and [Down] keys on your keyboard.
The calendar scale
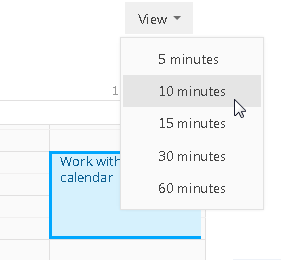
A calendar cell can display time intervals from 5 to 60 minutes. You can modify the calendar scale by selecting the corresponding command from the [View] menu (Fig. 2).
Fig. 2 Changing the calendar scale
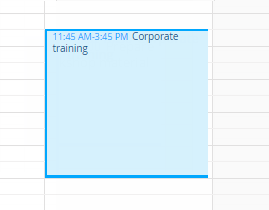
The calendar scale influences the accuracy of how activities are displayed (a calendar cell is always fully occupied). For example, if the cell is set to the interval of “60 minutes“, the activity with 1 hour 20 minutes duration occupies 2 cells. In this case, the accurate duration of the activity is displayed (Fig. 3).
Fig. 3 Activity start and due date in the calendar
Note
If the account is specified for an activity, its name will be displayed in the calendar before the activity subject.
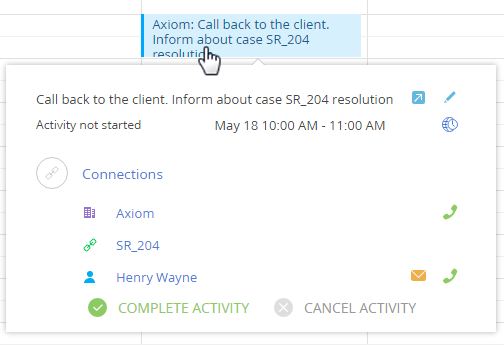
If the current calendar scale does not allow to display the accurate start and due time, you can see it on a mini page that appears when you mouse over the activity subject. In addition to timing, the mini page contains basic activity information (Fig. 4).
Fig. 4 Activity mini page in the calendar view
Note
Information displayed on a mini page depends on which fields are filled-in on the activity page. For more information on mini pages, please refer to the separate article about mini pages.
Add activities from the calendar view
You can add tasks to the section directly from the calendar. To do this:
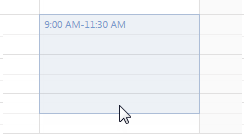
1.Use the mouse to highlight the time period required to complete the activity (Fig. 5).
Fig. 5 Highlighting a time period in the calendar view
2.Start typing the activity subject. A an activity mini page will open already containing the added text (Fig. 6).
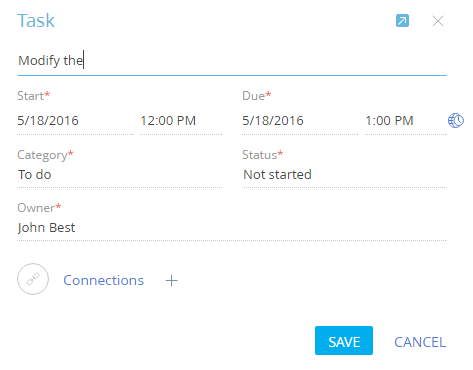
3.Enter text, connect activity to other records and save your changes.
As a result, a new task will be added to the system.
How to edit activities in the calendar
To edit an existing activity directly in the calendar view:
1.Click the subject of the needed record in the calendar area. Activity mini page will open.
2.Click the  button to switch the mini page to edit mode, then make necessary changes and save the mini page.
You can also change activity duration without opening its mini page. To do this, place the cursor at the activity time border, click the left mouse button and drag it to the desired time mark while holding down the left mouse button (Fig. 7).
Fig. 7 Changing activity duration in the calendar view
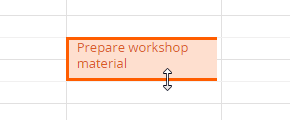
To move the activity to another date or time, drag it to the desired time in the calendar view. If some of the activities are scheduled for the same time, those activities will be displayed in the calendar view within the same time interval.
Long activities
An activity is considered as “Long“ if it lasts more than 24 hours (for example, a business trip or a vacation). Such activities are displayed above the calendar (Fig. 8).
Fig. 8 Display of long activities in the calendar view

If the start or due date can not be specified within the time period that the calendar displays, it will display either the start date or the due date of the activity (Fig. 8).
Activity colors in calendar view
Activities in the calendar view are highlighted with different colors depending on their status and due date.
-
Activities are highlighted red when their due time has already passed while those activity were not in the final state yet (overdue activities).
-
Blue is used to highlight activities that are not in the final state (not started or in progress) and have not passed their due time yet.
-
Grey is used to highlight activities that are in the final state (completed or canceled).


