How to create a new email from the communication panel
1.Click the  button on the communication panel.
2.To create an email, click the  button.
3.On the email page, populate the required fields:
a.In the [From] field select the mailbox to use for sending this email. If you configured an email signature, it will be added to the text area.
b.Specify the recipient's email.
c.If necessary, click the [Cc] and [Bcc] buttons to display the [Carbon copy] and [Blind carbon copy] fields.
d.Specify the subject of the message.
e.Enter the body of the email.
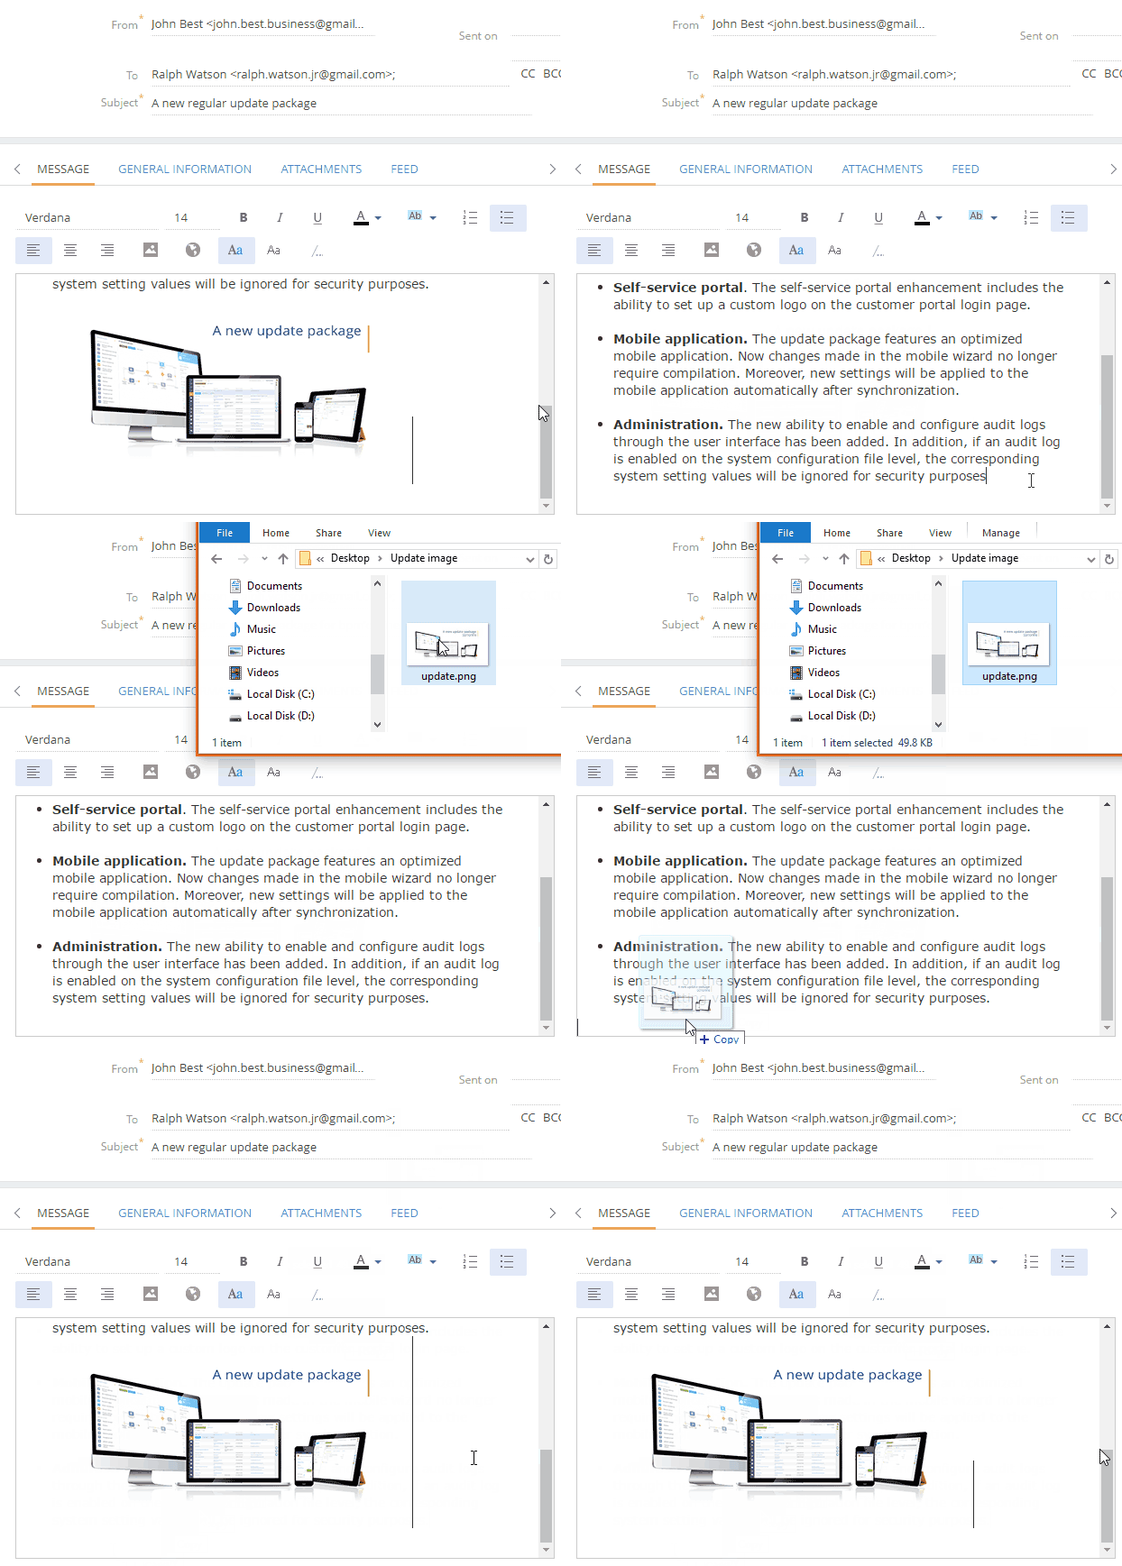
f.To add an image to the email body, paste it from the clipboard or drag-and-drop the image to the email text (Fig. 1).
Fig. 1 Using the drag&drop feature to add an image

4.Click the [General information] tab.
a.Populate the standard activity fields (such as [Show in calendar], [Start], [Due], etc.) if the email must be displayed as a calendar activity.
b.If the email is bound to other Creatio objects, such as accounts and documents, populate the corresponding fields in the [Connected to] field group.
5.To add an attachment, click the [Attachments] tab of the email page.
a.Click the [Add file] button.
b.In the opened window, select the file to attach.
Note
By default, the maximum size of an attachment is 10 MB. You can change this value in the “Attachment max size“ (MaxFileSize) system setting.
6.Click the [Send] button.
As a result, the email will be sent from the mailbox, specified in the [From] field to the addresses specified in the [To], [Cc] and [Bcc] fields. The email sending status will be changed to “Completed“.
See also
•How to create a new email based on a template


