Attach an info button to a field on a record page

Medium

Example. Attach an info button to the Full name field of the contact profile on the contact page. Add a tooltip to the info button.

Create a replacing view model schema of the contact page 

  1. Go to the Configuration section and select a custom package to add the schema.
  2. Click AddReplacing view model on the section list toolbar.

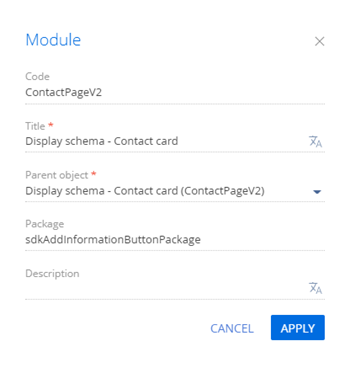
  3. Fill out the schema properties.

    • Set Code to "ContactPageV2."
    • Set Title to "Display schema - Contact card."
    • Select "ContactPageV2" in the Parent object property.
  4. Add a localizable string.

    1. Click the scr_add_button.png button in the context menu of the Localizable strings node.
    2. Fill out the localizable string properties.

      • Set Code to "InfoButtonCaption."
      • Set Value to "This is obligatory field."
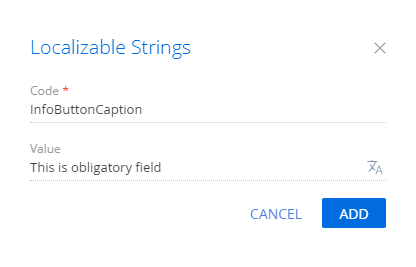
    3. Click Add to add a localizable string.
  5. Implement the info button.

    To do this, attach a configuration object with the settings that determine the info button position to the page field in the diff array of modifications.

    View the source code of the replacement view model of the contact page below.

    ContactPageV2
    define("ContactPageV2", [], function () {
        return {
            /* The name of the record page object's schema. */
            entitySchemaName: "Contact",
            /* Display the info button next to the record page field. */
            diff: /**SCHEMA_DIFF*/[
                /* The metadata to add the text of the info button. */
                {
                    /* Execute the operation that modifies the existing element. */
                    "operation": "merge",
                    /* The meta name of the parent container to add the info button. */
                    "parentName": "ProfileContainer",
                    /* Add the info button to the element collection of the parent element. */
                    "propertyName": "items",
                    /* The meta name of the field to change. */
                    "name": "AccountName",
                    /* The properties to pass to the element's constructor. */
                    "values": {
                        /* Set up the info button layout. */
                        "layout": { 
                            /* The column number. */
                            "column": 0, 
                            /* The row number. */
                            "row": 1, 
                            /* The column span. */
                            "colSpan": 22, 
                            /* The row span. */
                            "rowSpan": 1 
                        }
                    }
                },
                {
                    /* Add the element to the page. */
                    "operation": "insert",
                    "parentName": "ProfileContainer",
                    "propertyName": "items",
                    "name": "SimpleInfoButton",
                    "values": {
                        "layout": { 
                            "column": 22, 
                            "row": 1, 
                            "colSpan": 1, 
                            "rowSpan": 1 
                        },
                        /* Set the type of the added element to the information button. */
                        "itemType": Terrasoft.ViewItemType.INFORMATION_BUTTON,
                        /* The tooltip text. */
                        "content": { "bindTo": "Resources.Strings.InfoButtonCaption" }
                    }
                }
            ]/**SCHEMA_DIFF*/
        };
    });
    
  6. Click Save on the Designer's toolbar.

Outcome of the example 

To view the outcome of the example, refresh the Contacts section page.

As a result, Creatio will attach an info button to the Full name field of the contact profile on the contact page.