Communication panel is a tool that lets you talk to customers and coworkers, as well as receive Creatio notifications. Creatio displays the panel on the right.
Communication panel structure
The communication panel tabs are as follows:
- Operation single window. Enables bank tellers to consult with customers. Available in Financial Services Creatio, customer journey edition. Tellers can search for bank customers by various criteria, initiate consultations, and postpone consultations.
- CTI panel. Lets you accept incoming and initiate outgoing calls directly in Creatio. One of Creatio phone integration tools. Learn more about the phone integration in the user documentation: Phone integration connectors, Manage calls.
- Email. Lets you send and receive emails. You can link emails to other Creatio objects. Learn more about managing emails in the user documentation: Work with emails.
- Feed. Displays messages of the Feed section. Lets you view messages from the channels you follow, as well as add new messages and comments. The functionality of the tab is identical to the functionality of the Feed section.
- Notification center. Displays notifications about various Creatio events. Learn more about managing notifications in the user documentation: Check notifications and process tasks.
- Business process tasks. Displays incomplete steps of running business processes. Learn more about managing running business processes in the user documentation: Check notifications and process tasks.
Communication panel containers
Creatio stores the UI elements related to the communication panel in the corresponding containers. Configure the communication panel containers in the CommunicationPanel base schema of the Uiv2 package. Configure the CTI panel tab in the CtiPanel child schema of the CTIBase package.
View the main communication panel containers in the figure below.
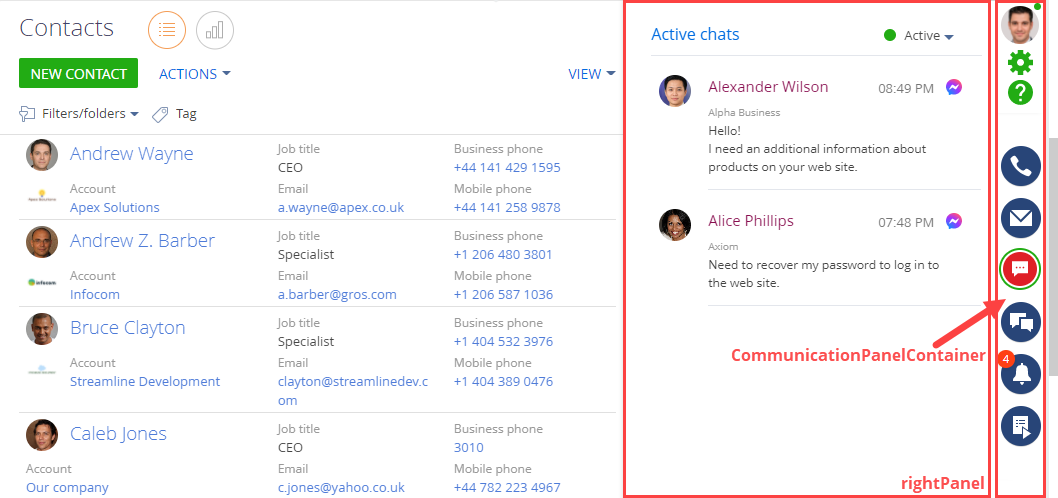
- The button container of the communication panel (CommunicationPanelContainer) includes buttons that open communication panel tabs.
- The tab container of the communication panel (rightPanel) includes the content of the communication panel’s current tab.
Create a custom reminder or notification
Creatio lets you display notifications in the following ways:
- immediately
- at the specified time
To create a custom reminder or notification:
-
Implement the reminder text and dialog.
Create a Source code type schema. To do this, follow the guide in a separate article: Source code (C#).
- Create a class that generates the reminder text and dialog.
- Implement the IRemindingTextFormer interface of the Base package's IRemindingTextFormer schema in the class.
-
Implement the mechanism that sends the reminder.
- Create a replacing object on which to send the reminder. To do this, follow the guide in a separate article: Object.
-
Create an object event. To do this, go to the Events node and select the After record added checkbox in the Adding block.

-
Set up the parameter the business process uses to generate the reminder in the object schema.
-
Add a parameter.
-
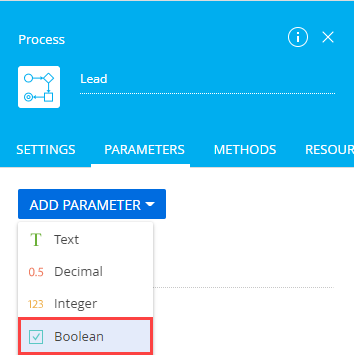
Open the Parameters tab in the setup area and click Add parameter → Boolean.
- Fill out the parameter properties in the Object Designer.
-
-
Overload the methods.
-
Overload the method called after the object is saved. To do this, open the Methods tab of the setup area and add the source code of the overloaded method.
Creatio can display the notification in the following ways:
- The reminder tab of the notification center. To set this up, assign RemindingConsts.NotificationTypeRemindingId to the remindingConfig.NotificationTypeId constant.
- The service message tab of the notification center. To set this up, assign RemindingConsts.NotificationTypeNotificationId to the remindingConfig.NotificationTypeId constant.
- Overload the method called before the object is saved. To do this, open the Methods tab of the setup area and add the source code of the overloaded method.
-
-
-
Implement the mechanism that displays the reminder.
Create a replacing view model. To do this, follow the guide in a separate article: Client module. Select ReminderNotificationsSchema as the parent object.
Create a replacing view model schema of the case page
- Go to the Configuration section and select a custom package to add the schema.
-
Click Add → Replacing view model on the section list toolbar.
/scr_add_replacing_module.png)
-
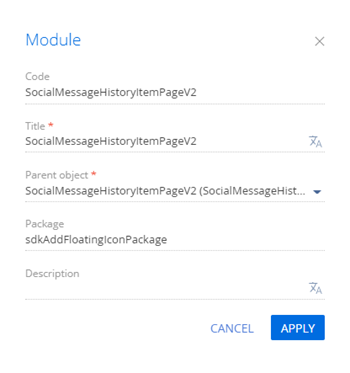
Fill out the schema properties.
- Set Code to "SocialMessageHistoryItemPageV2."
- Set Title to "SocialMessageHistoryItemPageV2."
- Select "SocialMessageHistoryItemPageV2" in the Parent object property.
-
Implement the pop-up button logic.
-
Implement the following methods in the methods property:
- onSelectedTextChanged(). Passes the selected text to the HighlightedHistoryMessage attribute. Triggered on text selection.
- onSelectedTextButtonClick(). Creates a case, retrieves the case subject from the HighlightedHistoryMessage attribute. The BaseMessageHistory parent schema defines the case creation logic. Triggered on pop-up button click.
- getMessageFromHistory(). An overloaded parent schema method that retrieves the subject of the selected message.
- Add a configuration object that contains the settings of the the Message package's SelectionHandlerMultiLineLabel element to the diff array of modifications. The element implements the mechanism that creates a new case based on selected text.
View the source code of the replacing view model schema of the case page below.
-
- Click Save on the Designer's toolbar.
Outcome of the example
To view the outcome of the example:
- Refresh the Cases section page.
- Open a case page.
As a result, Creatio will add a pop-up button to the Processing tab of the case page. The button appears when you select text from emails and self-service portal messages sent from the internal case feed. Click the button to create a new case. Creatio populates the Subject and Description fields automatically. The field values are set to selected text.
Create a schema of the replacing section view model
- Go to the Configuration section and select a custom package to add the schema.
-
Click Add → Replacing view model on the section list toolbar.
/scr_add_replacing_module.png)
-
Fill out the schema properties.
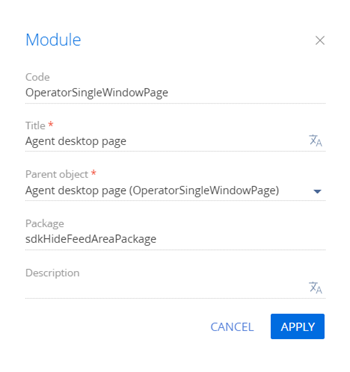
- Set Code to "OperatorSingleWindowPage."
- Set Title to "Agent desktop page."
- Select "OperatorSingleWindowPage" in the Parent object property.
-
Implement the mechanism that hides the feed area.
- Implement the loadContent() method in the methods property. This is an overloaded base method that excludes the ESNFeedModule feed module from the index of loaded modules.
- Add a configuration object that deletes the element from the page to the diff array of modifications.
View the source code of the replacing view model schema of the section below.
- Click Save on the Designer's toolbar.
Outcome of the example
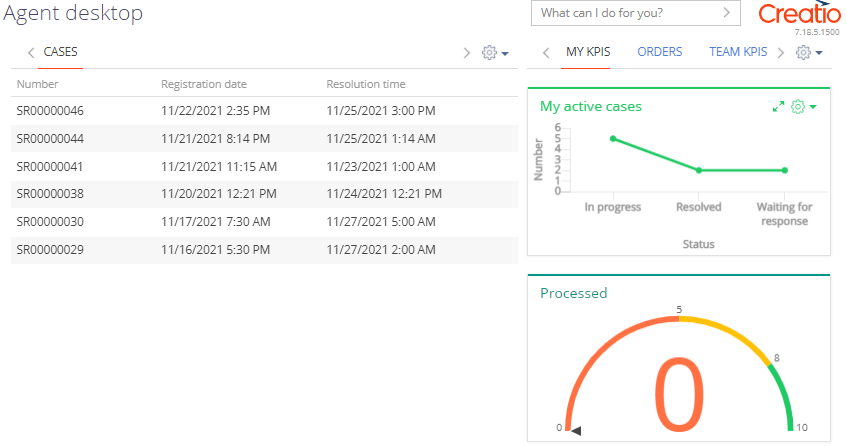
To view the outcome of the example, refresh the Agent desktop section page.
As a result, Creatio will hide the feed area from the Agent desktop section.
1. Create a replacing view model schema of the page for found subscribers
- Go to the Configuration section and select a custom package to add the schema.
-
Click Add → Replacing view model on the section list toolbar.
/scr_add_replacing_module.png)
-
Fill out the schema properties.
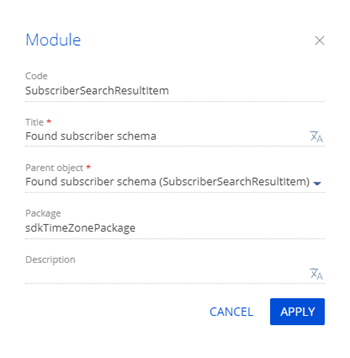
- Set Code to "SubscriberSearchResultItem."
- Set Title to "Found subscriber schema."
- Select "SubscriberSearchResultItem" in the Parent object property.
- Add the TimezoneGenerator and TimezoneMixin modules as dependencies to the declaration of the view model class. The TimezoneGenerator module creates an element that displays the time zone of the contact. The TimezoneMixin module searches for the time zone of the contact.
-
Implement a mechanism that displays the time zone.
- Add the IsShowTimeZone attribute to the attributes property. The attribute determines the visibility of the time zone element.
-
Add the TimezoneMixin mixin to the mixins property. To run the search for the contact time zone, pass the contact ID to the init method of the TimezoneMixin mixin. As a result, Creatio will set the following attributes:
- TimeZoneCaption. The name of the contact's time zone and current time.
- TimeZoneCity. The name of the city in the time zone.
-
Implement the following methods in the methods property:
- constructor(). The class constructor.
- isContactType(). Returns the flag that indicates that the subscriber is a contact.
-
Add a configuration object with the display settings of the contact's time zone to the diff array of modifications.
-
index property. Configures the element layout.
SubscriberSearchResultItemContainer container elements:
- 0 index: subscriber photo.
- 1 index: subscriber info.
- 2 index: subscriber phones.
Assign 2 to the index property of the array of modifications to display the contact time zone between the subscriber info and the index of phone numbers.
- wrapClass property. Controls the styles. An element generator. Use the subscriber-data CSS class to define styles for text elements in the schema.
-
View the source code of the replacing view model schema of the page for found subscribers below.
- Click Save on the Designer's toolbar.
As a result, Creatio will display the current time and city of the contact.
2. Add display styles of the time zone
The view model schema of a page for found subscribers does not support visual styles. As such, take the following steps to add the styles:
- Create a module schema. Define the styles in it.
- Add the style module to the dependencies of the page for found subscribers.
1. Create a module schema
- Go to the Configuration section and select a custom package to add the schema.
-
Click Add → Module on the section list toolbar.
/scr_add_module.png)
-
Fill out the schema properties:
- Set Code to "UsrSubscriberSearchResultItemCSS."
- Set Title to "SubscriberSearchResultItemCSS."

Click Apply to apply the properties.
-
Go to the LESS node of the object structure and set up the needed visual styles of the time zone.
-
Go to the JS node of the object structure and add the module code.
- Click Save on the Designer's toolbar.
2. Edit the view model schema of the page for found subscribers
To use the module and its styles in the schema of the page for found subscribers:
- Open the SubscriberSearchResultItem view model schema of the page for found subscribers.
-
Add the UsrSubscriberSearchResultItemCSS module to the dependencies of the SubscriberSearchResultItem schema.
View the source code of the edited schema of the page for found subscribers.
- Click Save on the Designer's toolbar.
Outcome of the example
To view the outcome of the example:
- Open the CTI panel tab of the communication panel.
- Search for a subscriber.
As a result, when you search for a contact, Creatio will display their time zone on the CTI panel tab of the communication panel. The current time of the contact will be used.

1. Implement the reminder text and dialog
- Go to the Configuration section and select a custom package to add the schema.
-
Click Add → Source code on the section list toolbar.

-
Fill out the schema properties in the Source Code Designer:
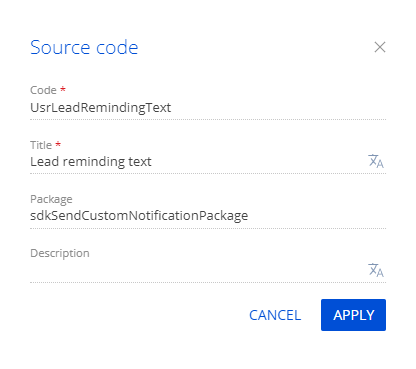
- Set Code to "UsrLeadRemindingText."
- Set Title to "Lead reminding text."
Click Apply to apply the properties.
-
Add a localizable string that contains the reminder dialog caption.
- Click the
/scr_add_button.png) button in the context menu of the Localizable strings node.
button in the context menu of the Localizable strings node. -
Fill out the localizable string properties:
- Set Code to "TitleTemplate."
- Set Value to "You need to update the sale."
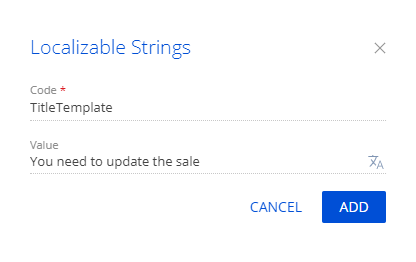
- Click Add to add a localizable string.
- Click the
-
Add a localizable string that contains the reminder text similarly.
View the properties of the localizable string to add in the table below.
Localizable string propertiesCode Value "BodyTemplate" "Lead {0} requires update of sales information" -
Implement the reminder text and dialog.
View the source code of the source code schema below.
- Click Save on the Source Code Designer's toolbar to save the changes to Creatio metadata temporarily.
- Click Publish on the Source Code Designer's toolbar to apply the changes to the database level.
2. Implement the mechanism that sends the reminder
- Go to the Configuration section and select a custom package to add the schema.
-
Click Add → Replacing object on the section list toolbar.

-
Select "Lead" in the Parent object property of the Object Designer.

-
Create an object event.
- Open the Events node.
- Go to the Adding block → select the After record added checkbox.

-
Set up the parameter the business process uses to generate the reminder in the object schema.
- Click Save on the Object Designer's toolbar.
- Click Open process on the Object Designer's toolbar.
-
Add a parameter.
-
Open the Parameters tab in the setup area and click Add parameter → Boolean.

-
Fill out the parameter properties in the Object Designer.
- Set Title to "Generate reminding."
- Set Code to "GenerateReminding."
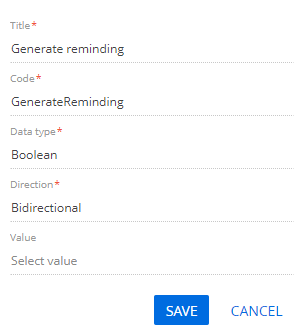
- Click Save.
-
-
Overload the methods.
-
Overload the method called after the object is saved. To do this, open the Methods tab of the setup area and add the source code of the overloaded LeadSaved() method.
The RemindingConsts.NotificationTypeRemindingId value of the remindingConfig.NotificationTypeId constant lets you display the notification on the reminder tab of the notification center. If you set the constant to RemindingConsts.NotificationTypeNotificationId, Creatio displays the reminder on the service message tab of the notification center.
-
Overload the method called before the object is saved. To do this, open the Methods tab and add the source code of the overloaded LeadSavingMethod() method.
Complete source code of the object's embedded process -
- Click Save then Publish on the Object Designer's toolbar.
- Click Cancel on the Object Designer's toolbar.
- Click Publish to create a corresponding database table.
3. Implement the mechanism that displays the reminder
- Go to the Configuration section and select a custom package to add the schema.
-
Click Add → Replacing view model on the section list toolbar.
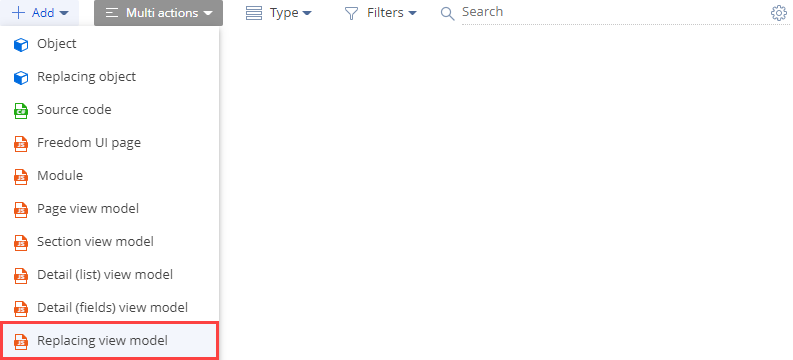
-
Select "ReminderNotificationsSchema" in the Parent object schema property of the Module Designer.

Click Apply to apply the properties.
-
Implement the mechanism that displays the reminder.
-
Implement the following methods in the methods property:
- getIsLeadNotification(). Determines whether the reminder is connected to the lead.
- getNotificationSubjectCaption(). Returns the reminder caption.
-
Add configuration objects with the settings that determine layouts of the following elements to the diff array of modifications:
- container on the page
- caption container
- image
- date
- reminder text
View the source code of the replacing view model schema below.
-
- Click Save on the Module Designer's toolbar.
Outcome of the example
To view the outcome of the example:
- Refresh the Leads section page.
- Open the lead page → the Opportunity info tab.
- Select the needed date and time of the opportunity update in the Next actualization date field.
- Select your user contact in the Owner field.

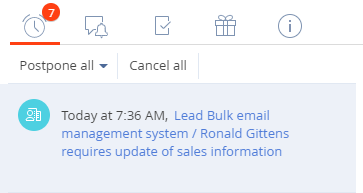
As a result, Creatio will display the reminder for the opportunity update date in the lead on the reminder tab of the notification center.
