
This article covers how to get started with Git in Creatio. The article starts with explaining the basics of Git, then moves on to the specifics of Git use in Creatio and Git setup. After you read the article, you will know what Git is, and have your Creatio instance set up and ready to go.
Git is a distributed version control system. The major difference between Git and other version control system is the approach to data management. Git stores data similar to a series of file system snapshots. Each time you commit changes, i. e., save the state of your project, Git creates a snapshot of your files at the moment and saves a link to the snapshot. If the files were not changed, Git does not save them again but creates a link to the previously saved identical file version. Git stores data as a stream of snapshots. CVS, Subversion, Perforce, Bazaar, and other version control systems store data as a set of files and index of individual file changes over time. This approach is usually called delta-based version control.
The file statuses in Git are as follows:
- committed. The file has already been saved to the local repository.
- modified. The file was changed, but is yet to be committed to the local repository.
- staged. The file was changed and marked to be included in the next commit.
View the instructions for installing and working with the Git version control system in the official Git documentation.
You can also work with Git using any convenient GUI, such as Sourcetree.
Special features of working with Git in Creatio
Creatio IDE lets you work with the Subversion (SVN) version control system using built-in development tools. However, the built-in SVN integration mechanism is disabled when file system development mode is enabled. In this case, you can use any version control system. We recommend using Git.
The Git version control system is recommended for the following Creatio apps:
- Apps whose functionality is developed in the file system.
- Creatio on-site.
We recommend using SVN for Creatio in the cloud. Learn more about working with SVN in a separate article: Version control in Subversion.
General workflow in Git
1. Create a package
- Click the
 button to open the System Designer.
 - Click Advanced settings in the Admin area block.
- Click
 in the package workspace.
 - Fill out the package properties:
- Set Name to "sdkPackageInFileSystem."
Create a package without binding it to the repository.
/scr_git_package.png)
- Click Create and add dependencies and add the package dependencies.
- Create the configuration elements in the custom package.
2. Export the package to the file system
- Configure Creatio to work in the file system. Learn more in a separate article: External IDEs.
- Select Download packages to file system in the File system development mode group of the action menu.
/scr_download_to_fs.png)
As a result, the packages will be downloaded along the ..\Terrasoft.WebApp\Terrasoft.Configuration\Pkg path to the directory whose name matches the package name.
3. Add the source code
Use an external IDE to work with the source code of client or server schemas.
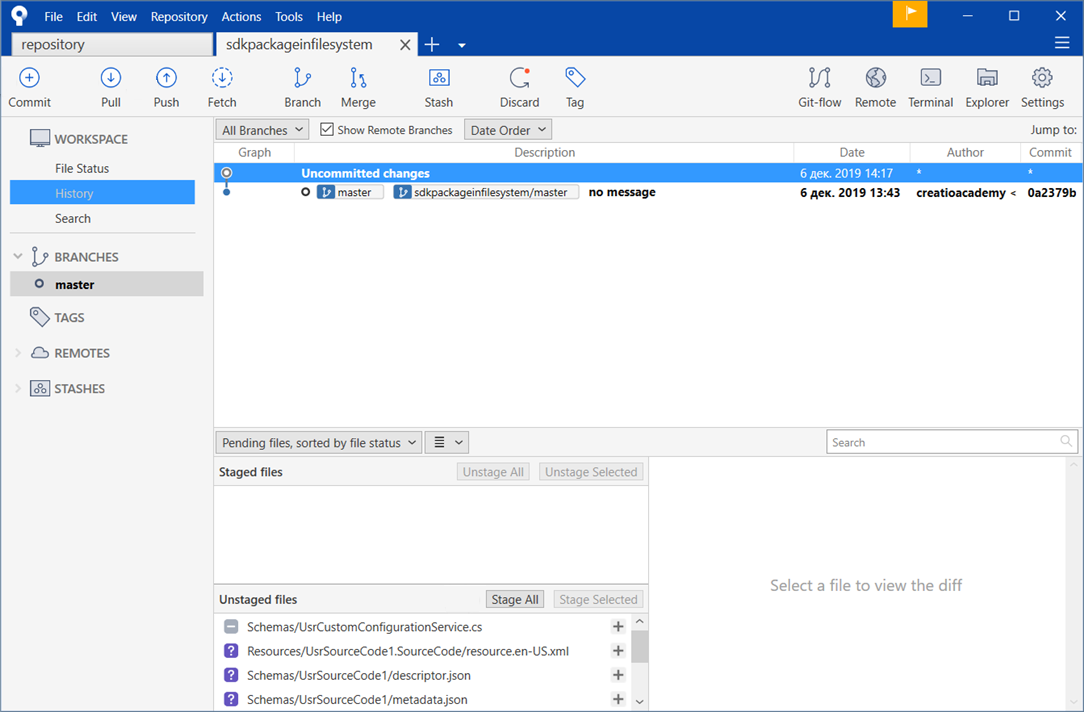
4. Commit changes to the Git repository
- Click Stage All and select the files to commit.
- Click Pull and download changes made by other users from the global repository.
- Click Commit and commit the changes to the local repository.
- Click Push and commit the changes to the global repository.
5. Install the package into Creatio
- Click the button to open the System Designer.
- Click Advanced settings in the Admin area block.
- Select Update packages from file system in the File system development mode group of the action menu.
/scr_updating.png)
As a result, the package will be added to Creatio.
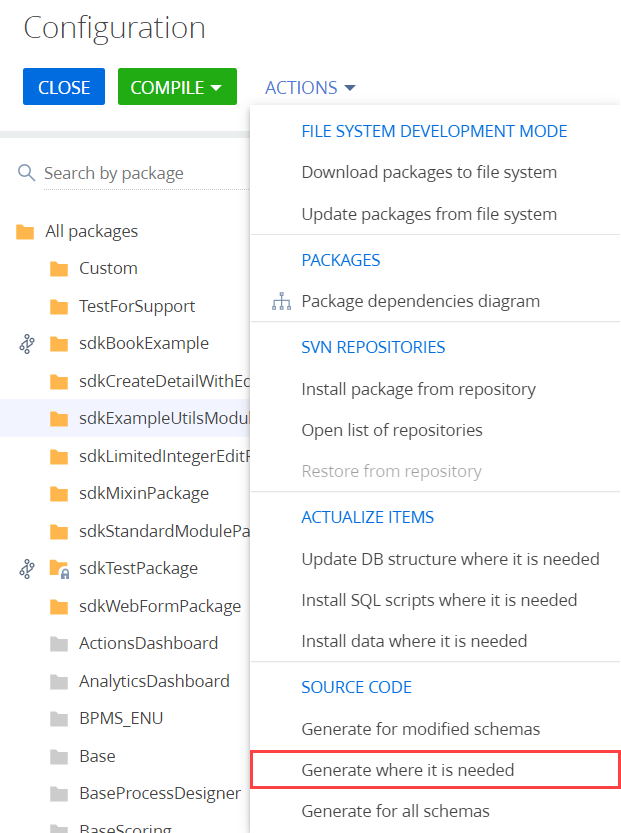
6. Generate source codes
To generate source codes, select Generate where it is needed in the Source code group of the action menu.
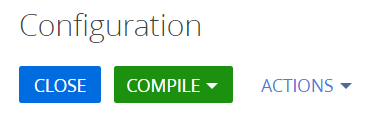
7. Compile the changes
To compile the changes, click Compile on the toolbar.
You can check whether you need to update the database structure, install SQL scripts, and bind data in the Status column of the Configuration section workspace.
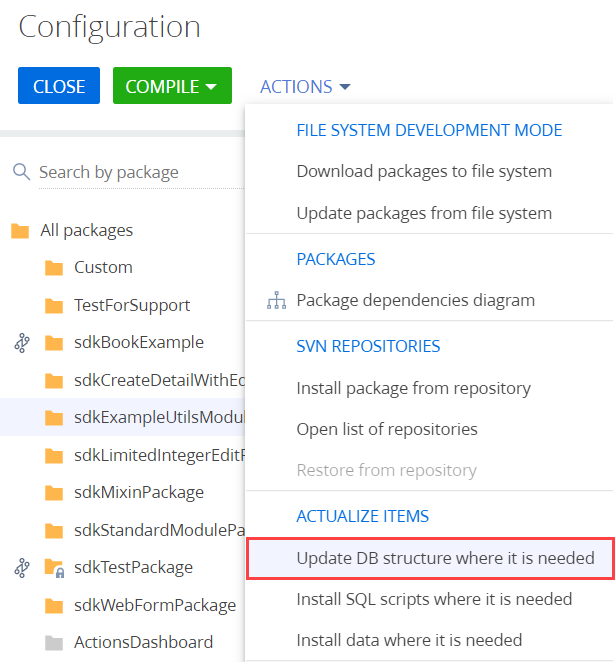
8. Update the database structure
To update the database structure, select Update DB structure where it is needed in the Actualize items group of the action menu.
9. Install SQL scripts and bound data (optional)
If the package contains bound SQL scripts or data, take appropriate steps to execute or install them.
After the installation, the implemented package functionality will become available in Creatio.
Users might need to clear the browser cache and refresh the page to apply the changes.