Landingi service integration
This functionality is available for Creatio 8.0.5 and later.
Landingi is a no-code landing page and pop-up builder. It lets you create landing pages that have high conversion rates and pass lead data to Creatio automatically. You can browse an extensive library of fully customizable templates or create your own design from scratch. Creatio Marketplace includes a Landingi connector that streamlines field mapping for landing pages. The connector enables no-code developers to easily map landing page fields directly to a Creatio object.
Integration with Landingi is based on the webhook functionality. After a webhook is received, Creatio starts processing it. The processing mechanism works similarly for all webhook-based services. Learn more in a separate article: Process webhooks in Creatio.
General setup procedure
Before you start setting up the Landingi service integration, sign up for Landingi and set up a landing page that contains a form. Learn more about creating a page in Landingi documentation.
The general procedure to integrate Creatio with Landingi includes the following steps:
-
Get your API key. This step differs based on your Creatio version.
For Creatio version 8.0.7 and later
- Open the Contacts section or any Freedom UI section that uses the "Records and business processes" template.
- Click Data import → Web forms and pages in the top right.
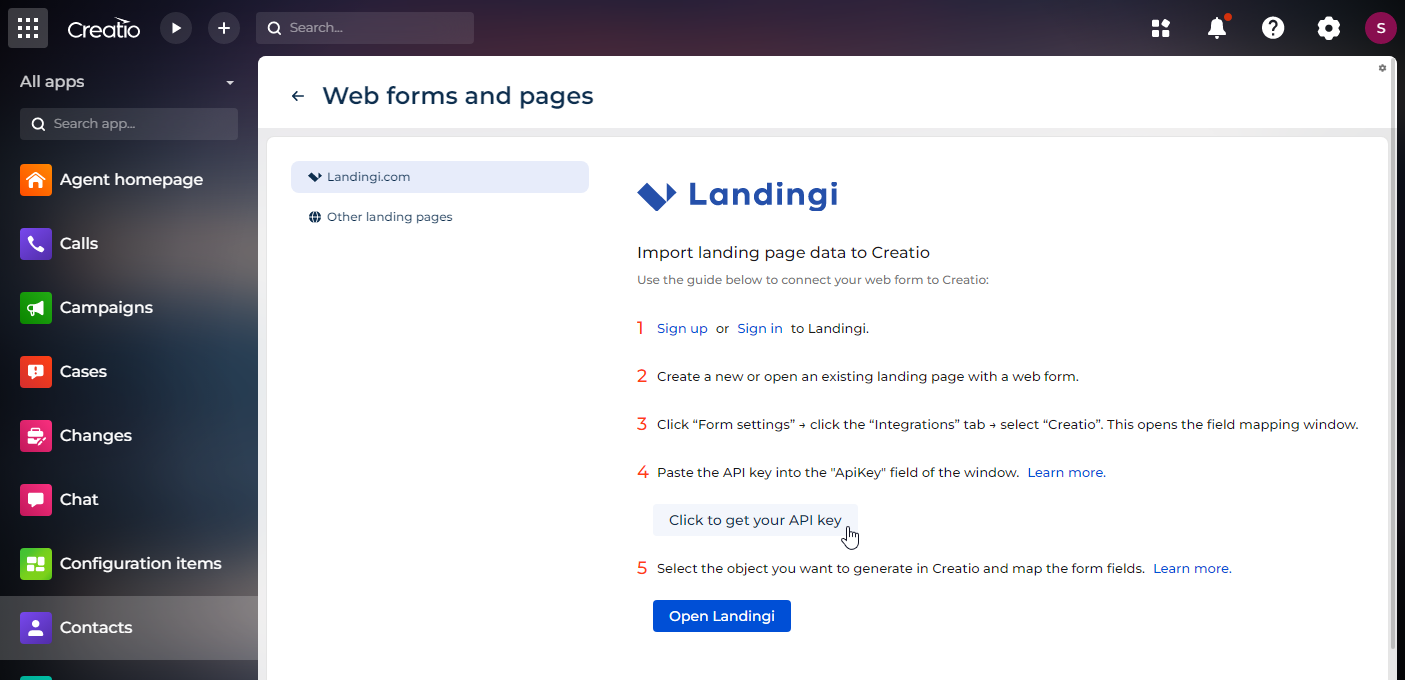
- Click Click to get your API key (Fig. 1).
Fig. 1 Get an API key for Landingi integration 
For Creatio version 8.0.5-8.0.6
Contact Creatio support (support@creatio.com) to receive an API key.
-
Connect the landing page to Creatio and set up the field mapping between the page and Creatio object. Learn more in the add-on documentation: Landingi connector for Creatio.
-
Test the integration by submitting the form on the landing page.
If you use Creatio on-site, set up OAuth authentication to enable secure connection for webhook service. To do this follow the instructions in a separate article: Set up OAuth 2.0 authorization for integrated applications. Use the following parameters for article and create the record in the OAuth 2.0 integrated applications section:
- Name: Webhook Account Service Identity
- Application URL: https://webhooks.creatio.com
These parameters are not localizable.
This is a one-time procedure.
You can set up tracking using Matomo to enrich the customer profile with website events.
Mapping features
To ensure the webhook service works as intended, configure the field mapping in Landingi. View the example that configures field mapping for the Contact object in Landingi below (Fig. 2).

You map the form to Contact, Lead, Order, and Submitted form Creatio objects out of the box. These objects are listed in the Webhook entities lookup. To map another Creatio object, add it to the lookup.
Follow the recommendations in the table below when mapping the Landingi form fields to the Creatio object fields.
Recommendations for mapping the Landingi form fields to the Creatio object fields
Landingi form field type | Creatio object field type |
|---|---|
Name | Text |
Email address or Text | |
Phone | Phone number or Text |
Checkbox | Boolean |
Radio button | Text |
Website | Web link or Text |
Title | Text |
Company | Text |
PESEL | Text |
Address | Text |
Single line text | Text |
Multi line text | Multiline text |
Numbers | Integer |
Drop-down list | Dropdown If you want to map the Landingi form field to a Creatio lookup, use the lookup item ID as the field value of the Creatio object. For example, if you want to map the Landingi form field to the City lookup, use the city ID from the lookup as the field value of the Creatio object. |
Country select | Text |
Date | Date |
File | Text. Creatio imports only the file link. |
Hidden field | Text |
See also
Integrate with landing pages and web forms
Set up external webhook service integration