Set up Facebook Messenger integration to let contact center agents process messages sent via your Facebook Page chat in Creatio.
- Set up chat processing in Creatio. Read more >>>
- Add the Facebook Messenger channel. Read more >>>
Before you start setting up the Facebook messenger channel, make sure the “Identity server Url” (“IdentityServerUrl” code), “Identity server client id” (“IdentityServerClientId” code), and “Identity server client secret” (“IdentityServerClientSecret” code) system settings are populated. If the values of these system settings are not populated, contact Creatio support.
- Set up a third-party chatbot for message processing (optional). Read more >>>
Step 1. Add Facebook Messenger channel
Add the channel to let Creatio send and receive messages on behalf of your Facebook Page. Perform the setup in the Chat settings section of the System Designer.
- Click the
 button to open the System Designer.
 - Click Chat settings.
- Click the
 button in the Channels area. Select “Facebook messenger” in the pop-up menu. This will open the Facebook login window.
 - In the opened Facebook window:
- Log in to Facebook.
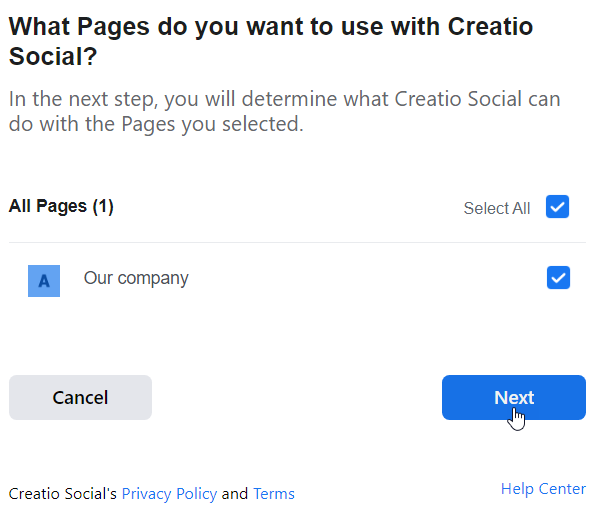
- Select the checkboxes for the pages you would like to synchronize with Creatio. Note that you can only set up synchronization for Facebook Pages and not for personal profiles.
- Click Next.
Fig. 1 Selecting a Facebook Page to synchronize with Creatio
- Allow Creatio to manage your Facebook Page. This will let Creatio send and receive messages using the Facebook Messenger channel on behalf of your brand. If you restrict Creatio from managing the page, the chat functionality may not work properly.
-
Click Done.
Creatio will add a separate channel for each of the selected pages. The channel name will match the name of the corresponding Facebook page.
Fig. 2 Setting up access to page management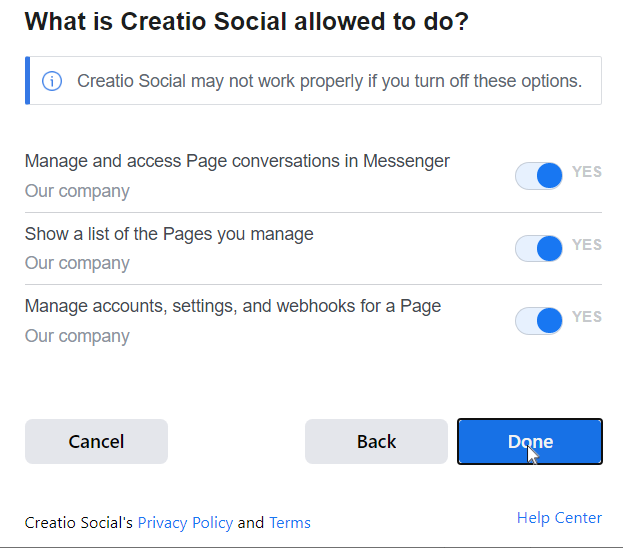
- To process messages from the new channel in the communication panel, activate the channel and link it to a queue.
- Click the channel name in the Channels detail list.
- In the mini page that opens:
- Set the switch to “Active.”
- Select the chat queue that will process the messages that come via this channel.
- Select the expected channel message language. This will let the agents use quick reply templates in the customer language.
- Click Apply.
- Repeat step 5 for all other channels if needed.
Step 2. Set up third-party chatbot integration (optional)
Creatio allows you to integrate third-party chatbots that will process common user requests, reducing the load on the agents. This option is only available for Facebook Messenger chats. The chatbot setup and Facebook integration procedure depend on the bot platform. These instructions are usually available in the bot platform's vendor documentation.
This functionality requires:
- A Facebook Page.
- A working Creatio Facebook Messenger channel.
- A third-party bot platform that supports the Handover Protocol and is integrated with your Facebook Page.
To integrate Creatio with the chatbot:
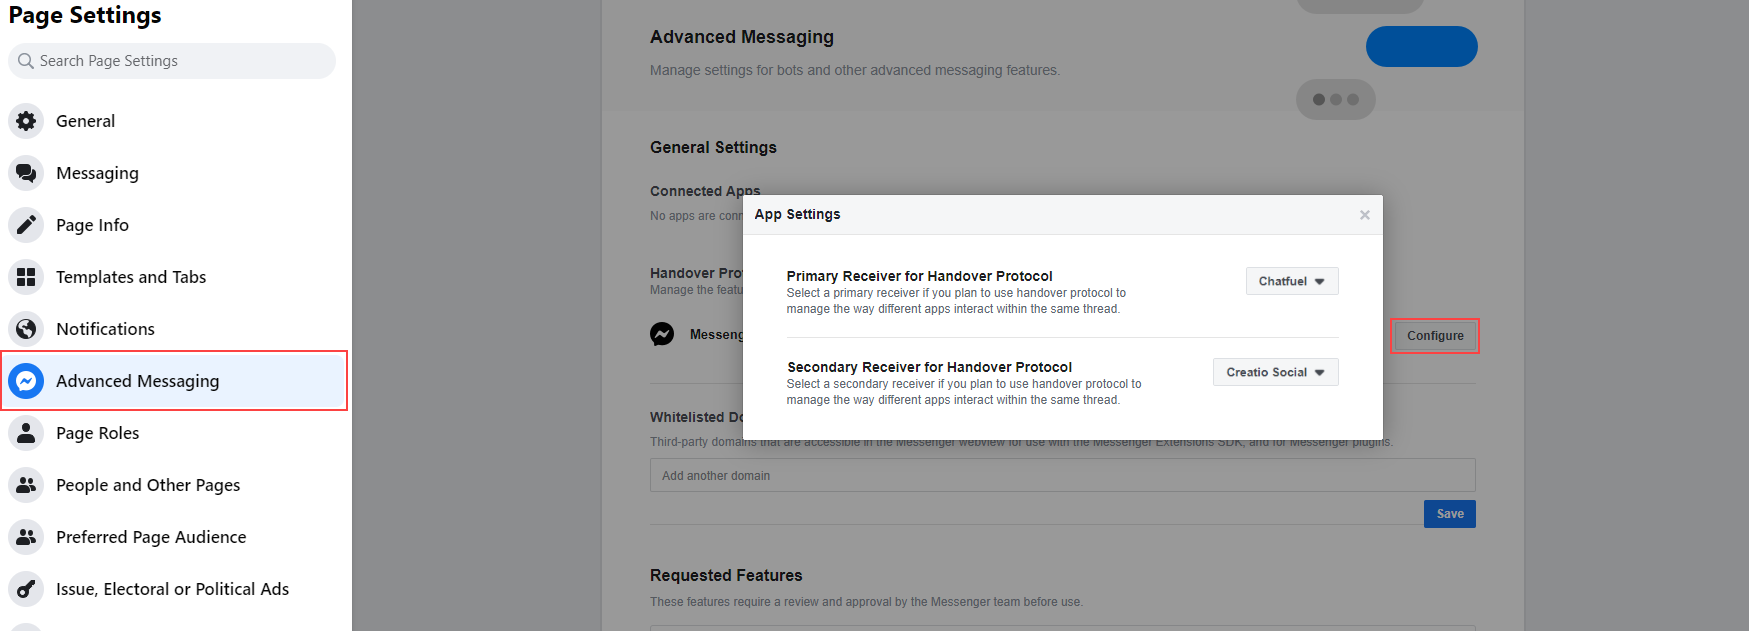
- Go to the “Settings” section of your Facebook page → “Advanced Messaging.”
- Configure the “Messenger receiver” parameters in the “Connected Apps” block:
- Primary Receiver for Handover Protocol – your bot platform
- Secondary Receiver for Handover Protocol – Creatio Social application
Fig. 3 Configuring the Messenger receiver
As a result, the chatbot will process messages sent to your Facebook Page. Creatio will display them in the Chats section. The Agent field will be left empty for bot-processed chats.