There are two types of details in the mobile application:
-
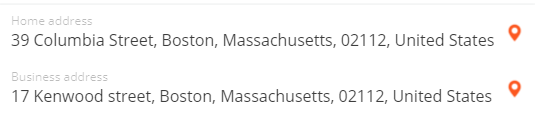
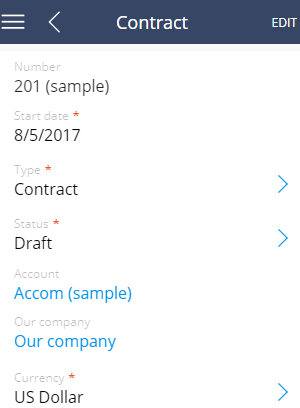
embedded details display all their records on the section record page regardless of the amount of data on the detail (Fig. 1);
-
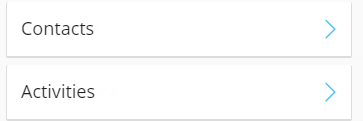
standard details do not display their records on the section page (Fig. 2). Tap a standard detail to view its records on a separate page.
You can add new details and configure the existing ones via the mobile application wizard.
Add detail
To add an embedded detail:
-
Open the System Designer by clicking
 .
. -
Click Mobile application wizard in the “System setup” block.
-
Select the workplace to edit and click Open .
-
Click the Set up sections button.
-
Select a section in the list and click Page setup ().
-
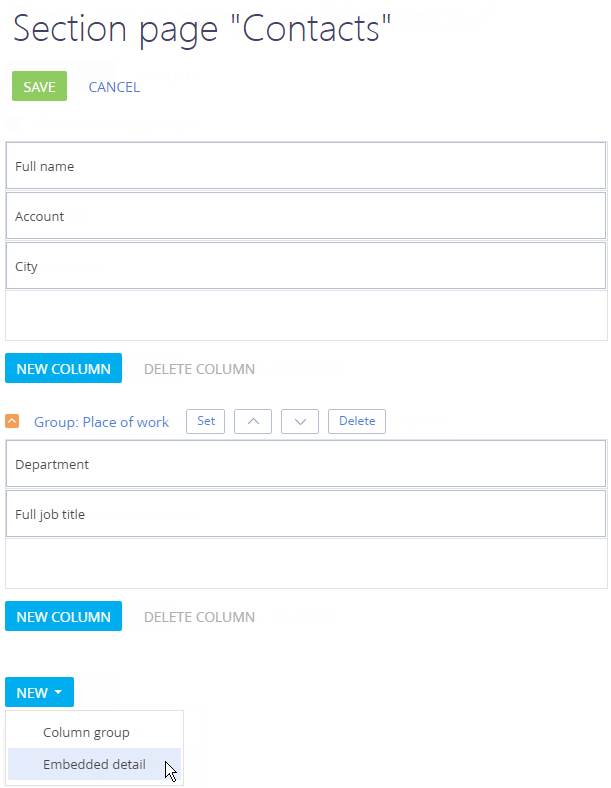
On the section page, select the Embedded detail in the New button menu (Fig. 1).
-
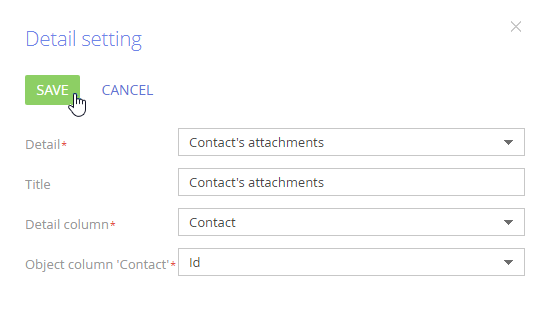
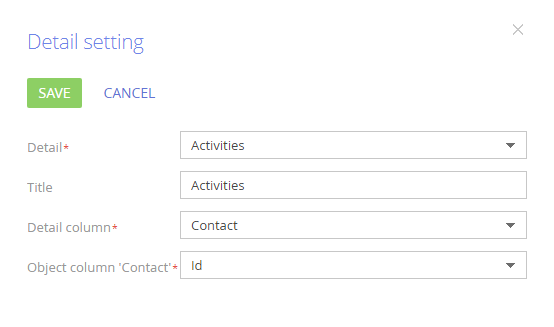
In the detail setting window:
-
Select a detail to add.
Some of the existing details are designed for specific sections. Be sure to select the version of a detail whose name specifically indicates that the detail was designed for this particular section. For example, when adding the Attachments detail to the Contacts section page, select the “Contact’s attachments” detail. -
Specify the detail title.
-
In the Detail column field, select the column that connects detail records to the current record in the section. For example, records on the Attachments detail in the Contacts section are connected to the Contacts section by the Contact column.
-
In the Object column... field, specify the column – section identifier. By default, it is “Id”.
-
Save the detail setup parameters.
As a result, a new detail will be added to the section page. For some details, the default columns may not be configured. In this case, you must add the displayed columns manually. Adding columns to a detail is similar to adding columns to a section page.
-
-
Save the detail (Fig. 2).
To add a standard detail:
To display data correctly on the standard detail, add the corresponding section in the mobile application. For example, to display data on the Documents detail of the contact’s page, add the Documents section in the mobile application.
To add a standard detail:
-
Open the mobile wizard and open the section page for editing (perform steps 1-4 listed in the “To add an embedded detail:” block).
-
On the page that opens, click Set up details.
-
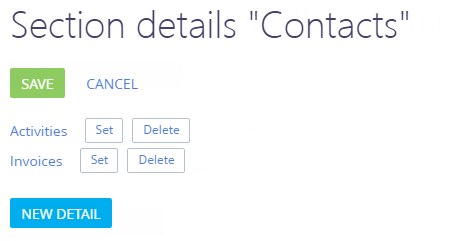
On the section detail setup page (Fig. 1), click the New detail button.
-
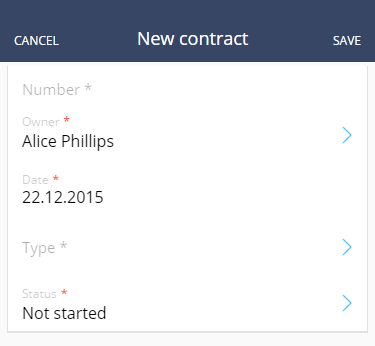
The page of a newly added standard detail will contain only required fields (Fig. 2).
Thus, if you add the Documents standard detail to any of the sections in the mobile application, the detail page will contain only required fields (Fig. 3).
-
Add the corresponding section to mobile application and configure it for the correct operation and display of details.
For example, add the Documents section in the mobile application wizard to display additional fields on the Documents detail page And set up fields on the edit page.
Edit detail
Edit an embedded detail
To edit embedded details, use the buttons next to the detail name (Fig. 1).
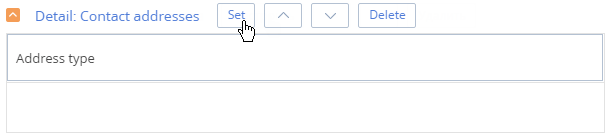
Click the Set button to edit the detail. In the Detail setting window (Fig. 2), make your changes and click Save.
Use the  and
and  buttons to modify the location of the detail on the section page.
To delete the embedded detail from the section page, click the Delete button.
Edit standard detail
To do this, move to the detail configuration page (Fig. 1).

To delete a standard detail from a section page, click the Delete button next to the detail name.
To modify the parameters of existing standard details, click the Set button next to the detail name. Setting up parameters of the standard detail is identical to setting up parameters described in the “” (Fig. 2) block.
You can specify a column of a connected object detail and configure data filtering by this object. For example, on the activity page, you can display the contacts connected to the account, which is specified in the activity. To do this, add the Contacts detail to the activity record page and specify “Account” in both the Detail column and Object column fields