
The mobile application manifest describes the structure of the mobile app, its objects and connections between them. The base version of the Mobile Creatio app is described in the manifest located in the MobileApplicationManifestDefaultWorkplace schema of the Mobile package.
In the process of the mobile app development, the users can add new sections and pages. All of them must be registered in the manifest for the application to be able to work with a new functionality. Since third-party developers have no ability to make changes to the manifest of the base app, the system automatically creates a new updated manifest each time a new section or page is added from the mobile application wizard. The manifest schema name is generated according to the following mask: MobileApplicationManifest[Workplace name]. For example, if the Field sales workplace is added to the mobile app, the system generates a new manifest schema with the name MobileApplicationManifestFieldForceWorkplace.
Mobile application manifest structure
The mobile application manifest is a configuration object whose properties describe the structure of the mobile app. Table contains names and descriptions of the mobile application manifest.
| Property | Purpose |
|---|---|
| ModuleGroups | Describes the properties of the mobile app modules. |
| Modules | Describes the properties of the mobile app modules. |
| SyncOptions | Describes data synchronization parameters. |
| Models | Contains configuration of the imported application models. |
| PreferedFilterFuncType | Determines the operation that will be used to search and filter data. |
| CustomSchemas | Connects additional schemas to the mobile app. |
| Icons | Enables adding custom images to the app. |
| DefaultModuleImageId | Sets default image for UI V1. |
| DefaultModuleImageIdV2 | Sets default image for UI V2. |
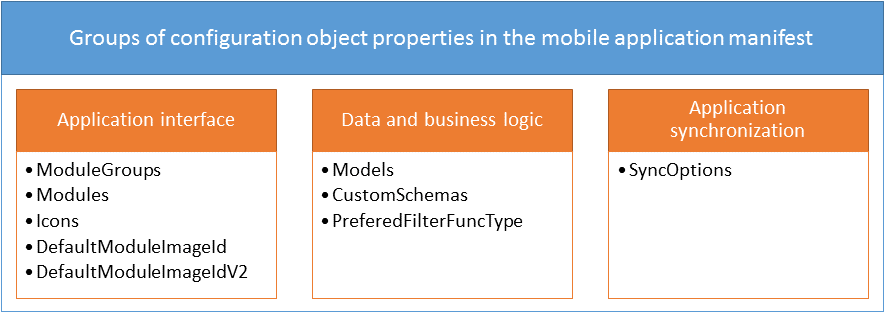
All properties of a configuration object in the manifest can be split into three general groups:
- Application interface properties contain properties that implement the mobile app interface. By using the properties in this group, the application sections and main menu are shaped and custom images are configured.
- Data and business logic properties contain properties where imported data and custom logic is described.
- Application synchronization properties contain a single property for synchronization with the primary application.
Application interface
The conditional property group of the configuration object manifest contains properties that form the mobile application interface. By using the properties of this group, you can form application sections, main menus, custom images, etc.
Access modifiers of a page
The mobile application version 7.11.0 or higher has the ability to configure access modificators of section or standard detail. For example, you can disable modifying, adding and deleting records for all users in the section.
To set the access in the read only mode, add the code to the schema which name contains ModuleConfig:
Or for the standard detail:
As a result the adding button will be disabled on the list page and the modifying button will be disabled on the view page. The Add, Delete, Add record to the embedded detail, etc. buttons will be also disabled on the view page.
Access modificators could be combined. For example, the code could be used to disable deleting and enable creating and modifying the records:
All access modificators are given in the Terrasoft.ChangeModes enumeration.
Control elements
You can add the following control elements to the section page:
- Terrasoft.ColumnSet column groups;
- Terrasoft.EmbeddedDetail embedded details;
- standard details;
- inheritor components of the Terrasoft.RecordPanelItem class.
Use the mobile application wizard to add the first three types of control elements.
To add an inheritor component of the Terrasoft.RecordPanelItem class to the section page:
- Extend the Terrasoft.RecordPanelItem class with a custom class. Define the component configuration object and the functionality methods in the custom class.
- Create a section settings schema (Mobile[Section]ModuleConfig). Using the addPanelItem() method of the Terrasoft.sdk.RecordPage class in the schema, implement adding the created component to the section page.
- Add the new custom schemas to the mobile application manifest.
Application data and business logic
The group of properties of a configuration object in the mobile app manifest. contains properties that describe imported data, as well as custom business logic for processing data in the mobile app.
Application synchronization
The conditional property group of the manifest configuration object contains a single property used to synchronize data with the main application.

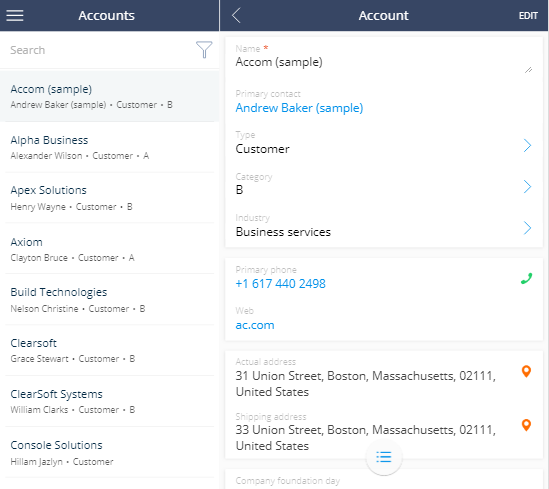
If you view Creatio mobile application's section page on a tablet, the section list will be displayed on the left by default.
Implement the example
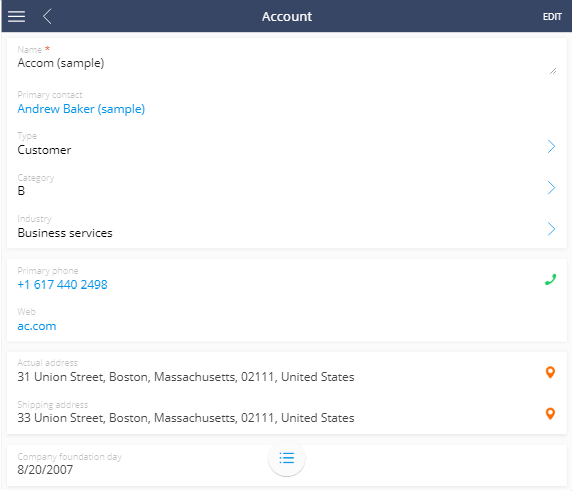
Add the TabletViewMode property with the “SinglePage” value to the mobile application manifest to display the section page in full screen mode.
After you save the schema and restart the mobile application, the tablet will display the section page in full screen mode.
Use the Mobile application wizard to add a detail to the section of mobile application.
If the detail object is not a section object of the Mobile Creatio application, the detail will display the id of the connected section record instead of record values. Configure the schema of the detail page to display values.
Example implementation algorithm
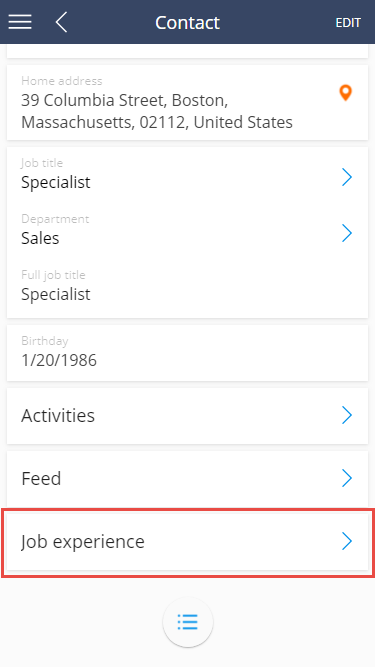
1. Add the Job experience detail via the mobile application wizard
Use the mobile application wizard to add a detail on the record edit page. To do this:
- Open the necessary workplace (for example Main workplace) and click the Set up sections.
- Select the Contacts section and click the Details setup button.
- Set up the Job experience detail.
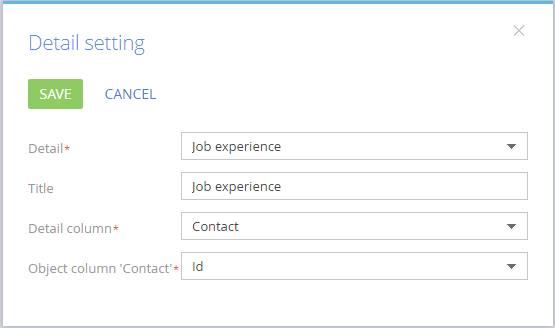
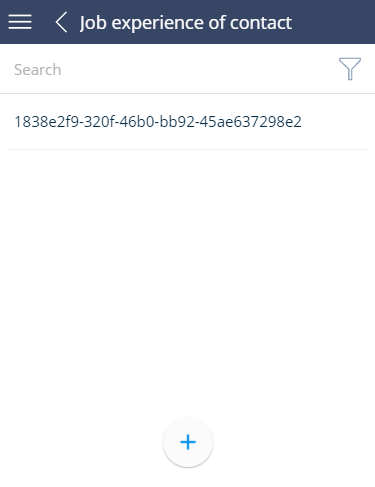
After saving the setup of detail, section and workplace, the Job experience detail will be displayed in the mobile application.
If the Job experience detail object is not a section object of the Mobile Creatio application, the detail will display the value of the Contact primary column (id of the connected record of the contact).
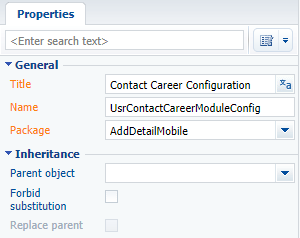
2. Create module schema in which to configure the detail list
Use the Configuration section to create custom module in the custom package with following properties:
- Title – "Contact Career Configuration”.
- Name – “UsrContactCareerModuleConfig”.
Add the source code to the module schema:
In this code:
- ContactCareer – name of the table that corresponds to the detail (as a rule it matches the name of the detail object).
- Job Title – name of the column that shoul be displayed on the page.
3. Connect the module schema in the mobile application manifest
To apply list settings performed in the UsrContactCareerModuleConfig module, perform following:
- Open the schema of the mobile application manifest (MobileApplicationManifestDefaultWorkplace) in the custom module designer. This schema is created in the custom package by the mobile application wizard.
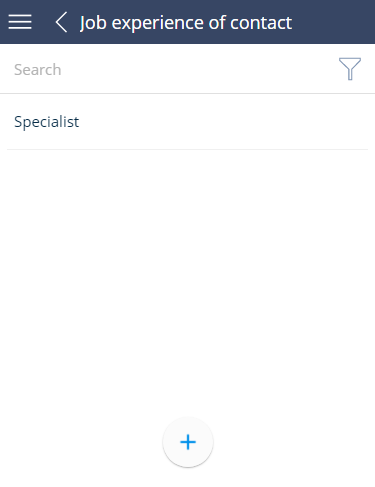
- Add the UsrContactCareerModuleConfig module to the PagesExtensions section of the ContactCareer model.
- Save the schema of the mobile application manifest.
As a result, the Job experience detail will display records by the Job title column.
The Mobile Creatio application supports dashboards since version 7.10.3 (version 7.10.5 of the mobile application). To receive settings and data for a dashboard, use the AnalyticsService service. The following widget types are supported: “Chart”, “Indicator”, “List” and “Gauge”.
To add a custom widget to the mobile application:
- Implement a widget setup interface in the Creatio application.
- Add the instance of the implemented custom widget to the application.
- Configure the display of the widget in the mobile application.
To display a custom widget in the mobile application:
- Implement the data receiving process of a custom widget.
- Add the implementation of displaying the widget in the mobile application.
Example implementation algorithm
1. Implementation of the data receiving process of a custom widget
To receive data of each custom widget type, create a class that will implement the IDashboardItemData interface or will be inherited from the BaseDashboardItemData base class. To do this, the class must be decoded by the DashboardItemData attribute. To implement the class, add the Source code schema to the custom package.
The class implementation to the CustomDashboardItem custom widget type.
2. Implementation of displaying a custom type of a widget.
2.1. Add a data displaying class
To do this, create a client module in a custom package (for example, UsrMobileCustomDashboardItem). In the created module, implement a class that extends the Terrasoft.configuration.controls.BaseDashboardItem base class.
2.2. Add a new type and a class that implements this type to the Terrasoft.DashboardItemClassName enumeration
Add the source code to the module created on a previous step.
2.3. Add a name of a new custom schema to the mobile application manifest
In the mobile application manifest file, add the name of the created module schema to the CustomSchemas array.
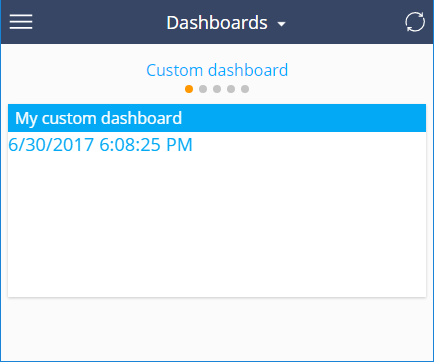
After saving all changes, the widget will be displayed in the Dashboars section of the mobile application.
Example implementation algorithm
1. Create a custom Terrasoft.RecordPanelItem inheritor class
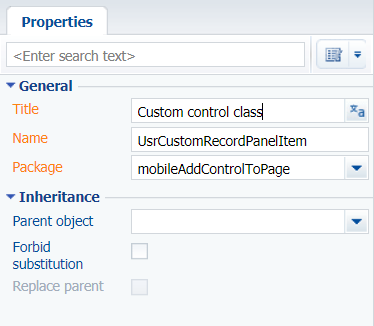
Use the Configuration section to create a custom module in the custom package with the following properties:
- Title – “Custom control class”.
- Name – “UsrCustomRecordPanelItem”.
Add the source code to the method:
The class defines a configuration object for the created control element and two following methods:
- initialize() – button click event handler method.
- onClickMeButtonClick() – the method initializes the created element and binds button click events to the handler method.
2. Create module schema in which to configure the section page
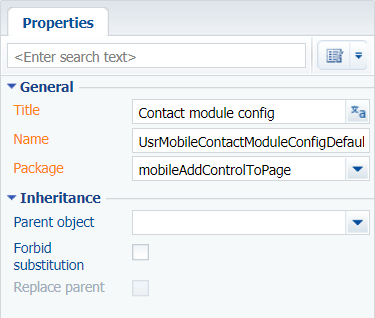
Use the Configuration section to create a custom module in the custom package with the following properties:
- Title – “Contact module config”.
- Name – “UsrMobileContactModuleConfigDefaultWorkplace”.
Add the source code to the module schema:
The addPanelItem() method of the Terrasoft.sdk.RecordPage class is called at this point. The method adds the created control element to the section page.
3. Connect the module schemas in the mobile application manifest
To apply section page settings implemented in the UsrMobileContactModuleConfigDefaultWorkplace module:
- Open the schema of the mobile application manifest (MobileApplicationManifestDefaultWorkplace) in the custom module designer. This schema is created in the custom package by the mobile application wizard.
- Add the UsrCustomRecordPanelItem module to the CustomSchemas section, and the UsrContactCareerModuleConfig module to the PagesExtensions section of the Contact model:
- Save the schema of the mobile application manifest.
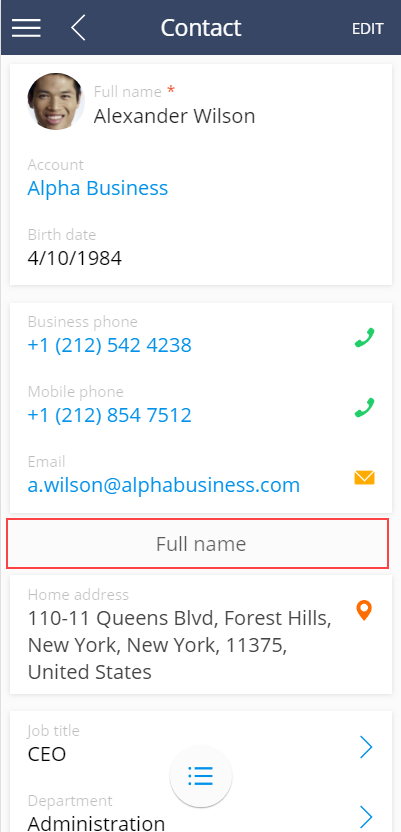
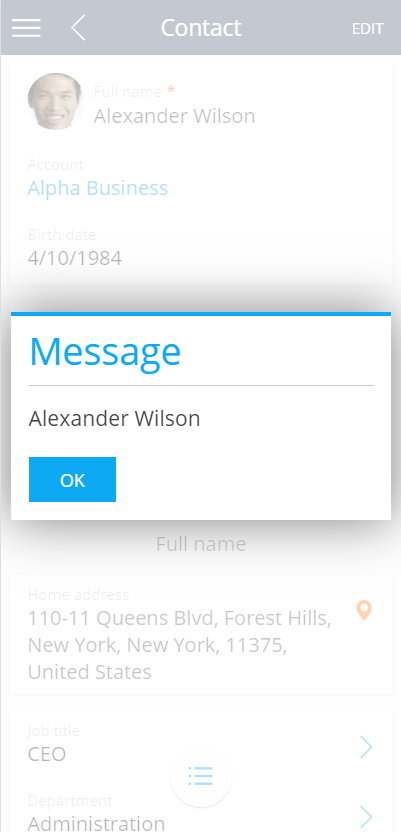
As a result, the contact page will have a control element. A click on the element will trigger a message with the full name of the contact.
Application module groups. Uses for for the menu group setup. Describes the upper-level group setting of the mobile application main menu. The ModuleGroups property sets a list of named configuration objects for each menu group with the only possible Position property.
A mobile application module is an application section. Each module in the Modules configuration object manifest describes a configuration object with properties given in table. The name of the configuration section object must match the name of the model that provides section data.
Configuration object properties
The application menu group that contains the section. Set by the string containing the menu section name from the ModuleGroups property of the manifest configuration object.
Model name that contains the section data. Set by the string containing the name of one of the models included in the Models property of the manifest configuration object.
Section position in the main menu group. Set by a numeric value starting with 0.
Section title. String with the section title localized value name. Section title localized value name should be added to the LocalizableStrings manifest schema block.
This property designed to import custom images to the version 1 user interface menu section.
This property designed to import custom images to the version 2 user interface menu section.
Checkbox that defines a section is displayed in the menu (true — hidden, false — displayed). Optional property. By default — false.
Properties are designed to set unique default image IDs for newly created sections or sections that don't contain IDs of the images in the Icon or IconV2 properties of the Modules property of the configuration object manifest.
The Models property contains imported application models. Each model in a property is described by a configuration object with a corresponding name. The model configuration object properties are listed in table.
Configuration object properties
Model list page schema name. The page will be generated automatically with the following name: Mobile[Model_name][Page_type]Page.
Preview page schema name for model element. The page will be generated automatically with the following name: Mobile[Model_name][Page_type]Page.
Edit page schema name for model element. The page will be generated automatically with the following name: Mobile[Model_name][Page_type]Page.
Names of the models that the current model depends on. All models, whose columns are added to the current model, as well as columns for which the current model has external keys.
Model extensions. An array of schemas, where additional model settings are implemented (adding business rules, events, default values, etc.).
Model page extensions. An array of schemas where additional settings for various page types are implemented (adding details, setting titles, etc.).
The property defines the operation used for searching and filtering data in the section, detail and lookup lists. The value for the property is specified in the Terrasoft.FilterFunctions enumeration. The list of filtering functions is available in table.
Filtering functions (Terrasoft.FilterFunctions)
Determines whether a string passed as an argument, is a substring of the property string.
Returns values of the column specified in the property in relation to upper list.
Verifies if the property column value ends with a value passed as argument.
Verifies if the property column value starts with a value passed as argument.
Returns year based on the property column value.
Returns month based on the property column value.
Returns day based on the property column value.
Checks if the property column value is within the value range passed as the function argument.
Checks in the property column value is outside the value range passed as the function argument.
Determines if the property column value matches the specified template.
If the current property is not explicitly initialized on the manifest, then by default the Terrasoft.FilterFunctions.StartWith function is used for search and filtering, as this ensures the proper indexes are used in the SQLite database tables.
The CustomSchemas property is designed for connecting additional schemas to the mobile app (custom schemas with source code in JavaScript) that expand the functionality. This can be additional classes implemented by developers as part of a project, or utility classes that implement functions to simplify development, etc.
The value of the property is an array with the names of connected custom schemas.
Describes the options for configuring data synchronization. Contains the configuration object with properties presented in table.
The configuration object properties for the synchronization setup
The number of pages imported in the same thread.
The number of import threads.
Imported system settings array.
Imported system lookups array.
An array of models that will load the data during synchronization.
In the ModelDataImportConfig model array, you can specify additional synchronization parameters, the list of available columns and filter conditions for each model. If you need to load a full model during synchronization, specify the object with the model name in the array. If the model needs to apply additional conditions for synchronization, the configuration object with properties given in table is added to the ModelDataImportConfig array.
The configuration object properties for the synchronization model setup
Model name (see Models property of the manifest configuration object).
The column models array for which data is imported. In addition to the listed columns, the system columns (CreatedOn, CreatedBy, ModifiedOn, ModifiedBy) and primary displayed columns will also be imported during synchronization.
The filter applied to the model during import.
The SyncFilter is applied to the model during import is a configuration object with properties given in table.
Filter model configuration object properties
Filter type. Set by the enumeration value Terrasoft.FilterTypes. Optional property. By default Terrasoft.FilterTypes.Simple.
| Simple | filter with one condition |
| Group | group filter with multiple conditions |
The logical operation for combining a collection of filters (for filters with Terrasoft.FilterTypes.Group type). Set by the enumeration value Terrasoft.FilterLogicalOperations. By default - Terrasoft.FilterLogicalOperations.And.
| Or | logical operation OR |
| And | logical operation AND |
A collection of filters applied to a model. Obligatory property for the filter type Terrasoft.FilterTypes.Group. The filters are interconnected by the logical operation set in the logicalOperation property. Each filter is a configuration filter object.
Filtered column model name. Obligatory property for the filter type Terrasoft.FilterTypes.Simple.
The checkbox that defines whether the filtered value is a macro. Optional property can be: true if the filter uses a macro, and false if it doesn't.
Value of the column filtration set in the property property. Obligatory property for the filter type Terrasoft.FilterTypes.Simple. Can be set directly by the filter value (including null) or a macro (the valueIsMacrosType property must be set to true). Macros that can be used as the property value are contained in the Terrasoft.ValueMacros enumeration.
| CurrentUserContactId | current user ID |
| CurrentDate | current date |
| CurrentDateTime | current date and time |
| CurrentDateEnd | current date end |
| CurrentUserContactName | current contact name |
| CurrentUserContact | current contact name and ID |
| SysSettings | system setting value. The system setting name is included in the macrosParams property |
| CurrentTime | current time |
| CurrentUserAccount | current account name and ID |
| GenerateUId | generated ID |
Values transitioned to macros as parameters. Optional property. This property is now used only for the Terrasoft.ValueMacros.SysSettings macro.
Applied to the negation operator filter. Optional property. Takes the true value if the the negation operator is applied to the filter, otherwise — false.
Function type applied to the model column set in the property property. Optional property. Takes values from the Terrasoft.FilterFunctions enumeration. Argument values for the filtration functions are set in the funcArgs property. The value to compare the result of the function is specified by the value property.
| SubStringOf | determines whether the string passed in as an argument is a substring of the property column |
| ToUpper | changes the column value set in the property to uppercase |
| EndsWith | checks whether the value in the property column ends with the value set as an argument |
| StartsWith | checks if the value of the property column starts with the value set as an argument |
| Year | returns the year value according to the property column |
| Month | returns the month value according to the property column |
| Day | returns the day value according to the property column |
| In | checks the occurrence of the value of the column property in the range of values that is passed as argument to the function |
| NotIn | checks for the absence of the value of the column property in the range of values that is passed as an argument to the function |
| Like | determines whether the value of the column property with the specified template |
An array of argument values for the function filter defined in the funcType property. The order of the values in the array funcArgs must match the order of parameters of the funcType function.
The name of a filter or group of filters. Optional property.
Filtered model name. Optional property Specifies whether the filtering is performed by the columns of the connected model.
Connected model column by which the main model is connected. The primary column serves as a connecting column of the main model.
Filtration operation type. Optional parameter. Takes values from the Terrasoft.FilterOperation enumeration. By default — Terrasoft.FilterOperation.General.
| General | standard filtration |
| Any | filtration by the exists filter |
Filter comparison operation type. Optional parameter. Takes values from the Terrasoft.ComparisonType enumeration. By default — Terrasoft.ComparisonType.Equal.
| Equal | equal |
| LessOrEqual | less or equal |
| NotEqual | not equal |
| Greater | greater |
| GreaterOrEqual | greater or equal |
| Less | less |
The SyncOptions.ModelDataImportConfig.QueryFilter property
Available in the application starting with version 7.12.1 and in the mobile application starting with version 7.12.3.
The QueryFilter synchronization property enables to configure data filtering of the specific model when importing via the DataService service. Previously, the SyncFilter property was used to filter data and the import was performed via the OData service.
The QueryFilter filter is a set of parameters in the form of JSON object that are sent in the request to the DataService service.