The preinstalled OmnichannelMessaging package contains the basic chat management functionality.
Learn more about setting up messenger integration in the user documentation guide: Chat setup.
Integrate a messenger
The following libraries contain the core of the messenger integration functionality:
- OmnichannelMessaging.dll
- OmnichannelProviders.dll
The MessageManager class enables the messenger integration.
The primary methods of the MessageManager class are as follows:
- Receive. Receives incoming messages in the unified format (UnifiedMessage, a unified message class) or as a string, which is then converted into the unified format. If the conversion is required, the method uses a class that implements the IIncomeMessageWorker interface. The interface is implemented differently for each messenger. The method also saves messages in Creatio.
- Send. Sends outgoing messages. Creatio selects the relevant message sender class. The class must implement the IOutcomeMessageWorker interface. The method also saves messages in Creatio.
- Register. Adds a channel when setting up Facebook Messenger integration. The method uses the class that implements the IMessengerRegistrationWorker interface. Required for messengers that need additional actions upon registration. For example, retrieve a token.
- GetMessagesByChatId. Retrieves messages of a specific chat in the IEnumerable<UnifiedMessage> format. Pass the chat in method parameters
Receive messages
The messenger specific message reception services are as follows:
- FacebookOmnichannelMessagingService. Receives Facebook Messenger messages.
- TelegramOmnichannelMessagingService. Receives Telegram messages.
Both services are based on the OmnichannelMessagingService service that contains the set methods that are common for both messengers.
InternalReceive is the primary method of the OmnichannelMessagingService service. Receives messages.
Manage chats in Creatio
Creatio includes the following chat management services:
- OmnichannelChatService. Lets you retrieve history, chats of a specific agent, etc.
- OmnichannelOperatorService. Lets you retrieve and change the agent status.
The primary methods of the OmnichannelChatService service are as follows:
- AcceptChat. Assigns the chat to the current user.
- GetUnreadChatsCount. Retrieves the number of unread chats.
- MarkChatAsRead. Marks all messages in the chat as read.
- GetConversation. Retrieves chat messages to display them in the communication panel.
- CloseActiveChat. Closes the chat.
- GetChats. Retrieves all chats of the agent.
- GetChatActions. Retrieves the list of actions available for the chat’s queue.
- GetUnreadMessagesCount. Retrieves the number of unread messages in all chats of the agent.
Add a new channel provider
- Add a new provider to the Channel provider lookup.
- Implement the database storage of the new channel’s data.
- Register the new channel in the database.
- Create a web service that receives messages.
- Implement the conversion of incoming messages to the unified Creatio format.
- Implement retrieval of data in a class that implements the IProfileDataProvider interface.
- Implement the download of attachments.
- Implement the sending of messages in a class that implements the IOutcomeMessageWorker interface.
- Link the interfaces.

1. Add a custom channel provider to Creatio
- Click
 to open the System Designer.
 - Go to the System setup block → Lookups.
- Open the Channel provider lookup and add the "Test" value.
2. Set up storage of custom channel data
-
Create a database table and define its structure. The table structure depends on the provider and contains data to send and receive messages. Generally, providers use an authorization token to send messages. To do this, execute the SQL query below.
SQL query that creates the [TestMsgSettings] tableMSSQLPostgreSQL[TestMsgSettings] is a table that stores the custom channel data. Name the table based on the [SomeChannelProviderNameMsgSettings] template, where SomeChannelProviderName is the channel provider name.
-
Register the custom channel in the database. To do this, add a record to the [Channel] table. View the fields to fill out in the table below.
[Channel] table fieldsField Description [Name] The channel name. [ProviderId] The custom provider ID. [MsgSettingsId] The record ID in the [TestMsgSettings] table. [Source] The channel ID in the messenger, such as the Facebook page ID or Telegram client ID. Lets you identify the recipient by a messenger message.
3. Create a web service that receives messages
-
Create a Source code schema.
- Open the Configuration section and select a custom package to add the schema.
-
Click Add → Source code on the section list toolbar.

-
Fill out the schema properties in the Source Code Designer.
- Set Code to "UsrTestOmnichannelMessagingService."
- Set Title to "TestOmnichannelMessagingService."
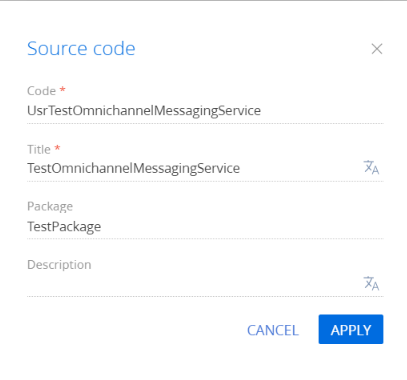
Click Apply to apply the changes.
-
Create a web service class.
- Go to the Schema Designer and add the Terrasoft.Configuration.Omnichannel.Messaging namespace.
- Use the using directive to import the namespaces whose data types are utilized in the class.
- Add a class name to match the schema name (the Code property).
- Specify the OmnichannelMessagingService class that contains the basic methods as a parent class.
- Add the [ServiceContract] and [AspNetCompatibilityRequirements(RequirementsMode = AspNetCompatibilityRequirementsMode.Required)] attributes to the class.
-
Implement a method (i. e., endpoint) of the web service class. To do this, add the public void ReceiveMessage(TestIncomingMessage message) method to the class in the Source Code Designer. The messenger sends a message to the receive endpoint.
View the source code of the TestOmnichannelMessagingService custom web service below.
- Click Publish on the Source Code Designer’s toolbar to apply the changes to the database level.
4. Implement the conversion of an incoming message
To handle an incoming message, implement the TestIncomingMessageConverter class that converts a message with the TestIncomingMessage type (messenger format message) to the unified Creatio format (the MessagingMessage class).
To create a converter class:
- Open the Configuration section and select a custom package to add the schema.
- Click Add → Source code on the section list toolbar.
-
Fill out the schema properties in the Source Code Designer.
- Set Code to "UsrTestIncomingMessageConverter."
- Set Title to "TestIncomingMessageConverter."

Click Apply to apply the changes.
-
Add the source code in the Source Code Designer. View the source code of the TestIncomingMessageConverter converter class below.
- Click Publish on the Source Code Designer’s toolbar to apply the changes to the database level.
5. Implement retrieval of user profile data
Messengers provide an API to retrieve data from clients that send messages. To retrieve user profile data, create a class that implements the IProfileDataProvider interface.
To create a class that retrieves user profile data:
- Open the Configuration section and select a custom package to add the schema.
- Click Add → Source code on the section list toolbar.
-
Fill out the schema properties in the Source Code Designer.
- Set Code to "UsrTestProfileDataProvider."
- Set Title to "TestProfileDataProvider."
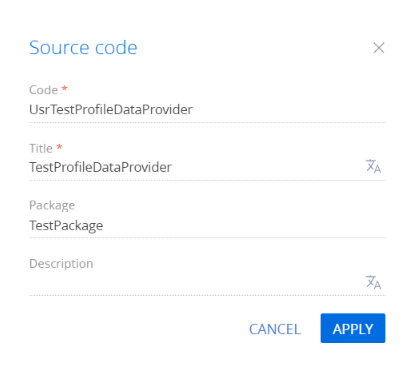
Click Apply to apply the changes.
-
Add the source code in the Source Code Designer.
- The class sends a request to the https://graph.test.com/ address to retrieve data in the TestProfileData format (a hypothetical messenger format).
- The class converts the received response into the internal ProfileData format.
- The class adds the retrieved data, for example, first name, last name, and photo, to the internal format when creating a contact. If the request is unsuccessful or data is invalid, the class creates a contact named [New Contact][Channel Name]-[Messenger Client ID].
View the source code of the TestProfileDataProvider class below.
- Click Publish on the Source Code Designer’s toolbar to apply the changes to the database level.
6. Implement ability to download attachments
To download attachments, create the class that implements the IAttachmentsLoadWorker interface:
- Open the Configuration section and select a custom package to add the schema.
- Click Add → Source code on the section list toolbar.
-
Fill out the schema properties in the Source Code Designer.
- Set Code to "UsrTestAttachmentLoadWorker."
- Set Title to "TestAttachmentLoadWorker."

Click Apply to apply the changes.
-
Add the source code in the Source Code Designer. The AttachmentsDownloader internal class downloads the attachment via a link and saves the attachment to the [OmnichannelMessageFile] database table.
View the source code of the TestAttachmentLoadWorker class below.
- Click Publish on the Source Code Designer’s toolbar to apply the changes to the database level.
7. Implement message sending
To send messages, create a class that implements the IOutcomeMessageWorker interface:
- Open the Configuration section and select a custom package to add the schema.
- Click Add → Source code on the section list toolbar.
-
Fill out the schema properties in the Source Code Designer.
- Set Code to "UsrTestOutcomeMessageWorker."
- Set Title to "TestOutcomeMessageWorker."
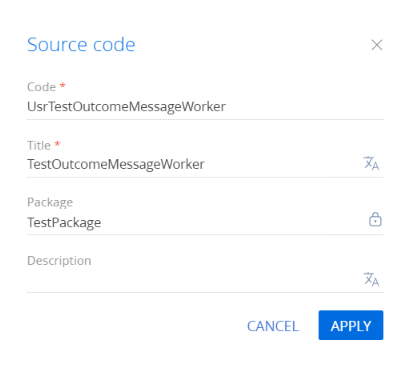
Click Apply to apply the changes.
-
Add the source code in the Source Code Designer. The TestOutcomeMessageWorker class converts the message to messenger format and sends it using the messenger API. The class can send the message using a token. Store the token in the [TestMsgSettings] database table. UserConnection passed in the constructor provides access to the table. The class sends a message to the https://graph.test.com/ address using the internal HttpRequestSender class.
View the source code of the TestOutcomeMessageWorker class below.
- Click Publish on the Source Code Designer’s toolbar to apply the changes to the database level.
8. Link the interfaces
To link the interfaces, create a class.
To create a class:
- Open the Configuration section and select a custom package to add the schema.
- Click Add → Source code on the section list toolbar.
-
Fill out the schema properties in the Source Code Designer.
- Set Code to "UsrTestAppEventListener."
- Set Title to "TestAppEventListener."
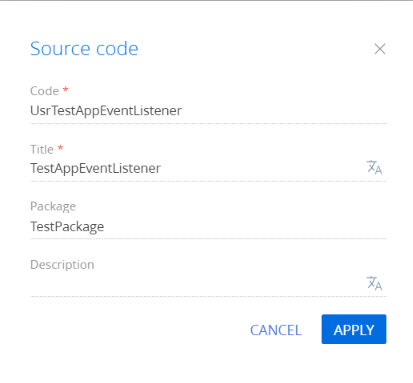
Click Apply to apply the changes.
-
Add the source code in the Source Code Designer. Specify the AppEventListenerBase class as a parent class. The Test tag links the created classes. Specify the tag in the ChannelName field on step 4. Creatio uses a tag to identify the files required to retrieve profile data, upload attachments, and send messages.
View the source code of the TestAppEventListener class below.
- Click Publish on the Source Code Designer’s toolbar to apply the changes to the database level.
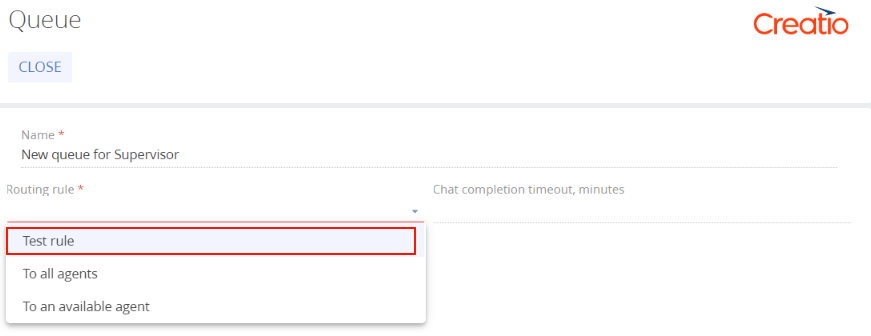
To set up chat routing, select a routing rule from the drop-down list in the queue settings. This determines the mechanism that distributes chats to agents.
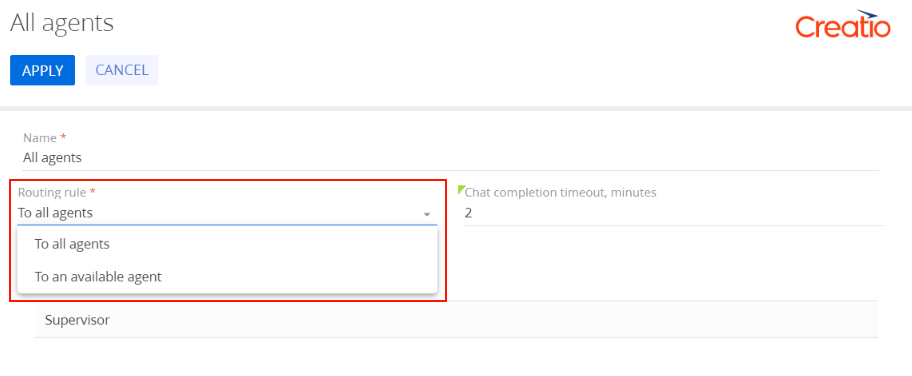
View an example that adds a custom distribution mechanism below.
1. Add a new chat routing rule
- Click the button to open the System Designer.
- Go to the System setup block → Lookups.
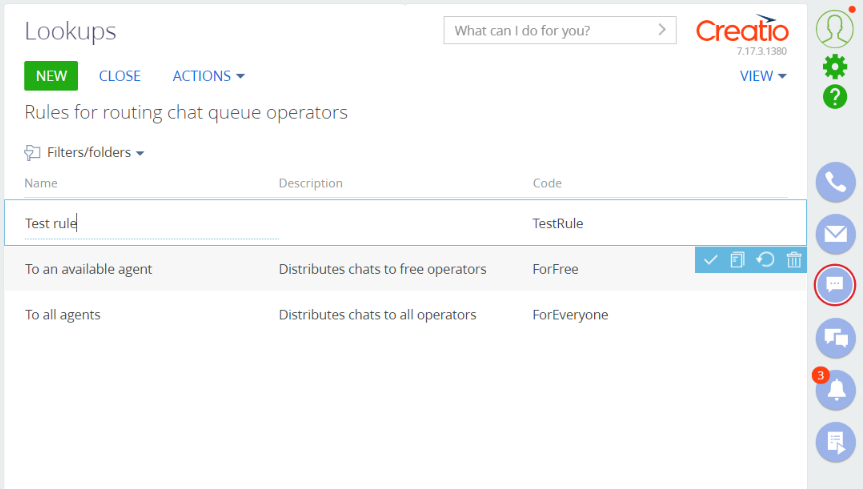
- Use the filter at the top to find the "Rules for routing chat queue operators" lookup.
- Open the lookup content and add a new rule:
- Set Name to "Test rule."
- Set Code to "TestRule."
2. Create a class that implements the IOperatorRoutingRule interface
On this step, you can create a class that inherits from the BaseOperatorRoutingRule class or new class that implements the IOperatorRoutingRule interface.
The BaseOperatorRoutingRule class contains abstract PickUpFreeQueueOperators and GetChatOperator methods you must implement.
Moreover, the BaseOperatorRoutingRule already contains the implementation of the IOperatorRoutingRule interface. View the implementation logic below.
If the chat is already assigned to an agent (the user ID is specified in the [OperatorId] column), select the agent. If the chat is not assigned to an agent, retrieve the agent or agents as List<Guid> using the PickUpFreeQueueOperators method. In this case, Guid are agent IDs in the [SysAdminUnit] table. The agents that have the corresponding IDs receive new chat notifications and can access the chat in the communication panel.
Create a TestOperatorRoutingRule class that implements the basic logic that routes the chat to the system user (Supervisor).
To create a class:
- Go to the Configuration section and select a custom package to add the schema.
- Click Add → Source code on the section list toolbar.
-
Go to the Schema Designer and fill out the schema properties:
- Set Code to "UsrTestOperatorRoutingRule."
- Set Title to "TestOperatorRoutingRule."
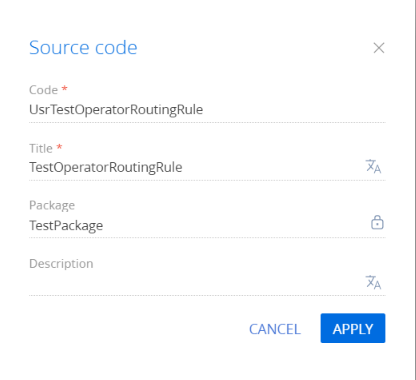
Click Apply to apply the properties.
-
Add the source code in the Schema Designer.
3. Link the interface and lookup rule code
To link the interface implementation and alphabetic code of the rule you specified in the lookup on step 1, create a TestAppEventListener class (inherit the class from the AppEventListenerBase class) and link the interfaces in it.
To create a class:
- Go to the Configuration section and select a custom package to add the schema.
- Click Add → Source code on the section list toolbar.
-
Go to the Schema Designer and fill out the schema properties:
- Set Code to "UsrTestAppEventListener."
- Set Title to "TestAppEventListener."
Click Apply to apply the properties.
-
Add the source code in the Schema Designer.
4. Restart Creatio in IIS
Restart Creatio in IIS to apply the changes. After you restart Creatio and select "Test rule" in the queue settings, Creatio will distribute chats based on the specified conditions.