Set up user authentication through LDAP on .NET Framework
To enable user authentication through LDAP, modify the Web.config file in the Creatio root folder. Active Directory and OpenLDAP settings are different.
-
Specify “Ldap” and “SspLdapProvider” in the list of available authentication providers. The step is the same for Active Directory and OpenLDAP.
-
Specify the server IP or URL, as well as user domain parameters in the “Ldap” section. Active Directory and OpenLDAP parameters are different.
- ServerPath – the LDAP server domain name. It must be a URL, not an IP address.
- KeyDistributionCenter – the domain name. It must be a URL, not an IP address.
-
Specify the server IP or URL, as well as portal user domain parameters in the “SspLdapProvider” section. The step is the same for Active Directory and OpenLDAP:
-
Save the changes in the Web.config file.
-
Additional step for OpenLDAP: before you synchronize with the OpenLDAP server, specify the “true” value for “UseLoginUserLDAPEntryDN” in the Web.config file of Terrasoft.WebApp.
This setting ensures that Creatio does not us an empty LDAPEntryDN field in the SysAdminUnit table to synchronize the users. An empty LDAPEntryDN field is known to cause authentication issues.
Set up user authentication through LDAP on .NET Core or .NET 6
To enable user authentication through LDAP, modify the Terrasoft.WebHost.dll.config file in the Creatio root folder. Active Directory and OpenLDAP settings are the same.
-
Specify “Ldap” in the list of available authentication providers. Add the “SspLdapProvider” provider to allow portal users to log in to Creatio:
- Specify the “Ldap” authentication provider settings:
- ServerPath is the LDAP server domain name. It must be a URL address, not an IP address.
- KeyDistributionCenter is the domain name. It must be a URL address, not an IP address.
To use the secure LDAPS protocol, specify the following parameters in the authentication provider settings:
- SecureSocketLayer is the flag that enables LDAPS.
- CertificateFileName is the name of the SSL certificate that validates the LDAPS connection. The certificate must be located in the Creatio root folder. This is a requried parameter if “SecureSocketLayer=true” is specified. For instance:
- Specify the server IP or URL, as well as portal user domain parameters in the “SspLdapProvider” section.
- Save the changes in the Terrasoft.WebHost.dll.config file.
Set up the authentication providers
The authentication provider setup is the same for Creatio .NET Framework, Creatio .NET 6 and Creatio .NET Core. Modify the following files in the Creatio root directory:
- Web.config for Creatio .NET Framework.
- Terrasoft.WebHost.dll.config for Creatio .NET Core or .NET 6.
Open the file in a text editor and specify the authentication providers:
-
InternalUserPassword – the default provider. If you would like to provide NTLM authentication only to the users not synchronized with LDAP, do not specify additional values for the providerNames parameter.
-
Ldap – add this provider to the providerNames parameter value to provide NTLM authentication to the users synchronized with LDAP.
-
SSPLdapProvider – add this provider to the providerNames parameter value to provide NTLM authentication to the self-service portal's users synchronized with LDAP.
-
NtlmUser – add this provider to the autoLoginProviderNames parameter value to provide NTLM authentication to the main application's users regardless of their LDAP synchronization status and the authentication type configured for the users in Creatio.
-
SSPNtlmUser – add this provider to the autoLoginProviderNames parameter value to provide NTLM authentication to the self-service portal's users regardless of their LDAP synchronization status and the authentication type configured for the Creatio users.
-
The order of records in the autoLoginProviderNames parameter defines the order in which Creatio checks if its users are available in the main application's user list (NtlmUser) or the self-service portal's user list (SSPNtlmUser). For example, if you would like Creatio to check the main application's user list first, put the NtlmUser provider at the head of the list of autoLoginProviderNames parameter values.
Set up the domain authentication
If you would like to activate the pass-through authentication that lets users authenticate in Creatio without visiting the login page, specify the “true” value for the UsePathThroughAuthentication parameter of the <appSettings> element:
If you would like to display the login page with the available Log in as domain user link, specify the “false” value for the UsePathThroughAuthentication parameter. The pass-through authentication will be performed only when accessing the main Creatio page. Add “/Login/NuiLogin.aspx” to the Creatio website address to display the login page.
As a result, users will be able to log in to Creatio as domain users. They may still be required to enter their credentials in a domain authentication window, which will pop up on a login attempt. Modify Windows settings to prevent the domain authentication window from being displayed:
-
Click “Start” → “Settings” → “Control Panel” → “Network and Internet” menu. Select “Internet options” (Fig. 1).
Fig. 1 Modifying Windows settings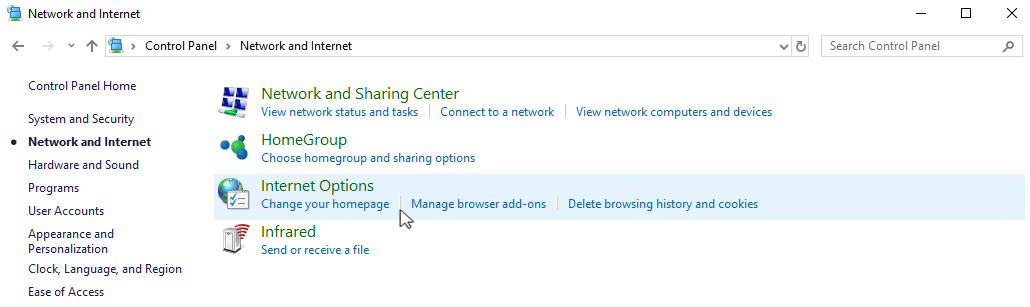
-
This will open a new window. Select the “Security” tab and click “Custom level” to go to security settings (Fig. 2).
Fig. 2 Security settings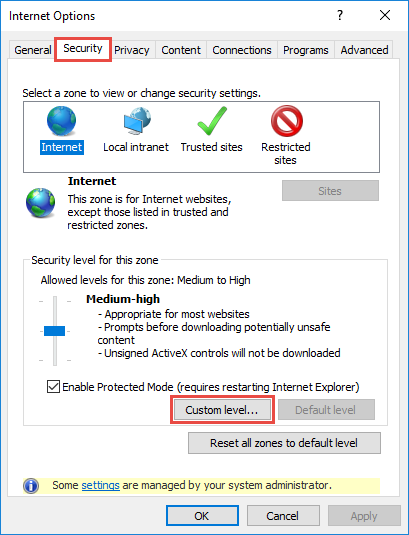
-
Select the “Automatic logon with current user name and password” authentication methods in the “User authentication” settings group (Fig. 3).
Fig. 3 Selecting the authentication method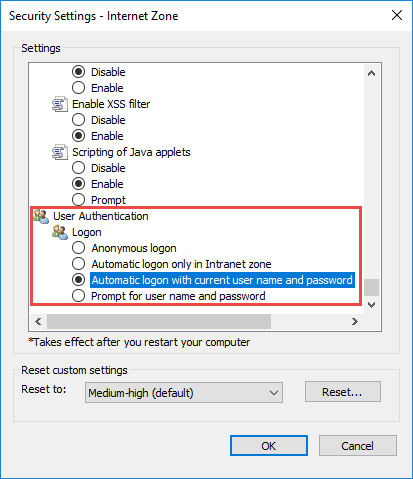
- Click “OK.”
As a result, the domain authentication window will not pop up and the users will not have to re-enter their domain credentials each time they access Creatio.