Restrict the types of files uploaded to Creatio to improve application security. The security restrictions apply to both users and integrations such as third-party web services.
With the secure file upload enabled, Creatio checks the type of the files uploaded via the Attachments and notes detail. If the file type is not restricted, the file will be uploaded successfully. Otherwise, the file will not be uploaded, and the user will receive a notification that uploading the file is not allowed for security reasons. The security restrictions do not apply to files that have been added to Creatio earlier.
The restrictions only apply to the upload of new files to Creatio. Any users can download a file of a restricted type if they have sufficient permissions to access the file.
Creatio supports the following file security modes:
-
File extensions AllowList. Only files with explicitly specified extensions are allowed for upload.
-
File extensions DenyList. Files with any extensions not explicitly restricted are allowed for upload.
-
Unknown file types are restricted. Allow or disallow uploading files without an extension when the type of the file cannot be determined by its content.
Secure file upload is managed by system administrators. The general procedure for secure file upload is as follows:
-
Select the preferable file security mode for uploading files.
-
Set up the file extensions allow list or deny list.
-
Define Creatio behavior upon uploading a file of an unknown type.
-
Set up security exceptions for web services if required.
Select file security mode
-
Click
 to open the System Designer.
 -
Open the System settings section.
-
Open the File Security Mode (FileSecurityMode) system setting.
-
Select the required restriction type in the Default value field:
-
“Disable file security” – disable all restrictions on file upload.
-
“File extensions DenyList” – disallow uploading files with specific file types.
-
“File extensions AllowList” – only allow uploading files with specific file types.
-
-
Click Save.
Set up the file type list
-
Click
 to open the System Designer.
 -
Open the System settings section.
-
Open one of the following system settings:
-
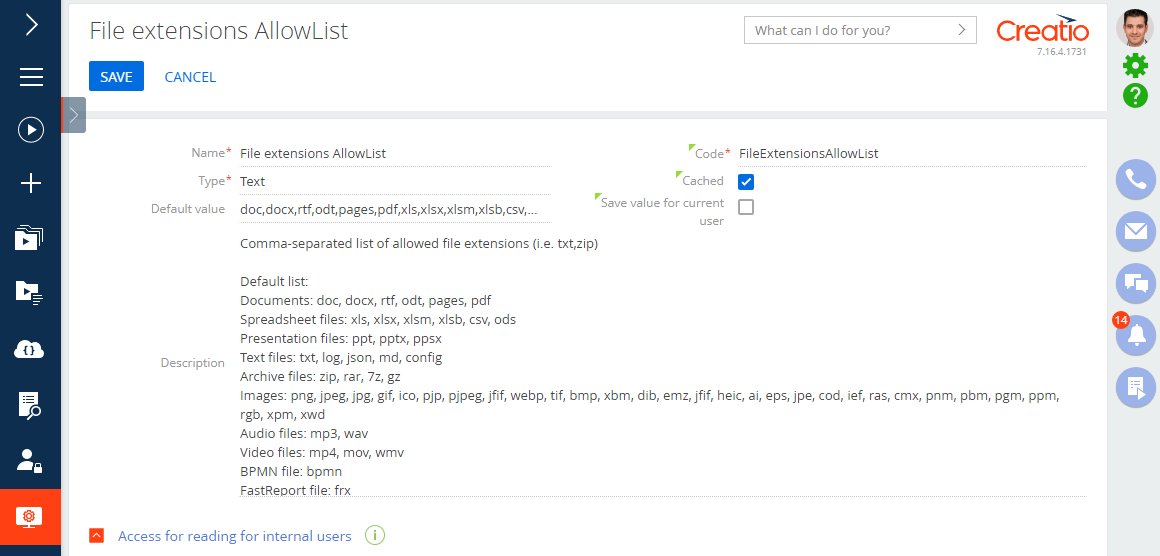
File extensions AllowList (FileExtensionsAllowList) – to set up a list of allowed file extensions. By default, this setting contains the most frequently used file extensions.
-
File extensions DenyList (FileExtensionsDenyList) – to set up a list of restricted file extensions. By default, this setting contains extensions associated with potentially malicious file types.
-
-
Enter file extensions as a comma-separated list without whitespace characters in the Default value field (Fig. 1) and verify the entered data.
-
Click Save.
Set up restrictions for files of unknown types
Creatio determines the type of a file type by its extension. If the file extension is not available, Creatio uses the content of the file to determine the file type. By default, uploading files of unknown types is allowed. Denying such files from uploading will make working with Creatio more secure. However, this mode requires setting up a file extension allow list or deny list.
To deny uploading files of unknown types to Creatio:
-
Click
 to open the System Designer.
 -
Open the System settings section.
-
Open the Allow processing files of unknown type (AllowFilesWithUnknownType) system setting.
-
Clear the Default value checkbox.
-
Click Save.
Set up web services excluded from file security
File security restrictions apply to all Creatio web services, including services added during customization, in project solutions, and Marketplace applications. Add web services to the list of file security exclusions to allow them to upload files of the restricted file types. To do this:
-
Click
 to open the System Designer.
 -
Open the Lookups section.
-
Open the List of file security excluded Uris lookup.
-
Click New.
-
In the Name field, specify the URI of the web service to exclude from restrictions. The record will be saved automatically.
-
A .NET Framework example: /0/rest/Custom service name/Custom service endpoint, without specifying the application domain.
-
A .NET Core and NET 6 example: /rest/Custom service name/Custom service endpoint, without specifying the application domain.
-
-
Repeat for other web services to enable them to upload files to the application without restrictions.