Install Microsoft SQL Server Management Studio on the database server. Installation instructions are available in the Microsoft SQL Server documentation.
In Microsoft SQL Server Management Studio, create two database users.
-
A user with the “sysadmin” role, who has maximum access privileges on the database server level. This user will restore the Creatio database from a backup file and assign access permissions.
-
A user with the “public” role, whose permissions are limited. You will need this user to set up a secure connection to the restored Creatio database using Microsoft SQL authentication.
For more on creating users and access permissions on the database server, see Microsoft SQL Server documentation.
To restore a database:
-
Authenticate in Microsoft SQL Server Management Studio as a “sysadmin” user.
-
Click the Databases catalog and select the Restore Database option from the context menu (Fig. 1).
-
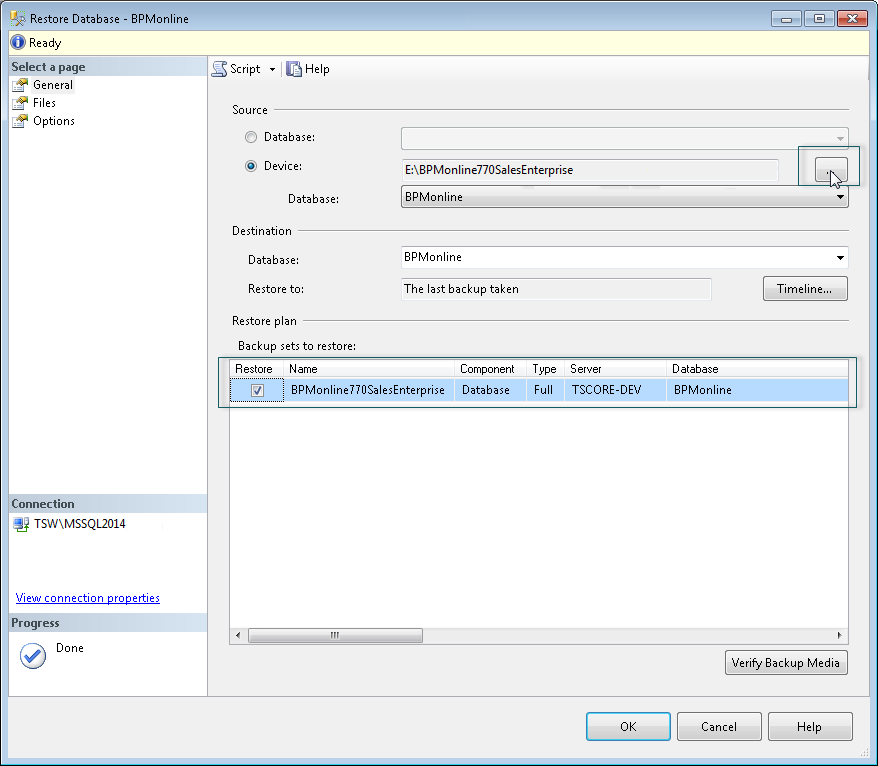
In the Restore Database window:
-
Specify the name of the database in the Database field;
-
Specify the Device checkbox and specify the path to the database backup copy file. The database backup file is supplied together with executable files and is located in the ~\db folder (Fig. 2).
-
-
Specify a folder on the database server where the Creatio database will be restored. Creating a folder to restore database files is required beforehand, as the SQL Server is not permitted to create directories.
-
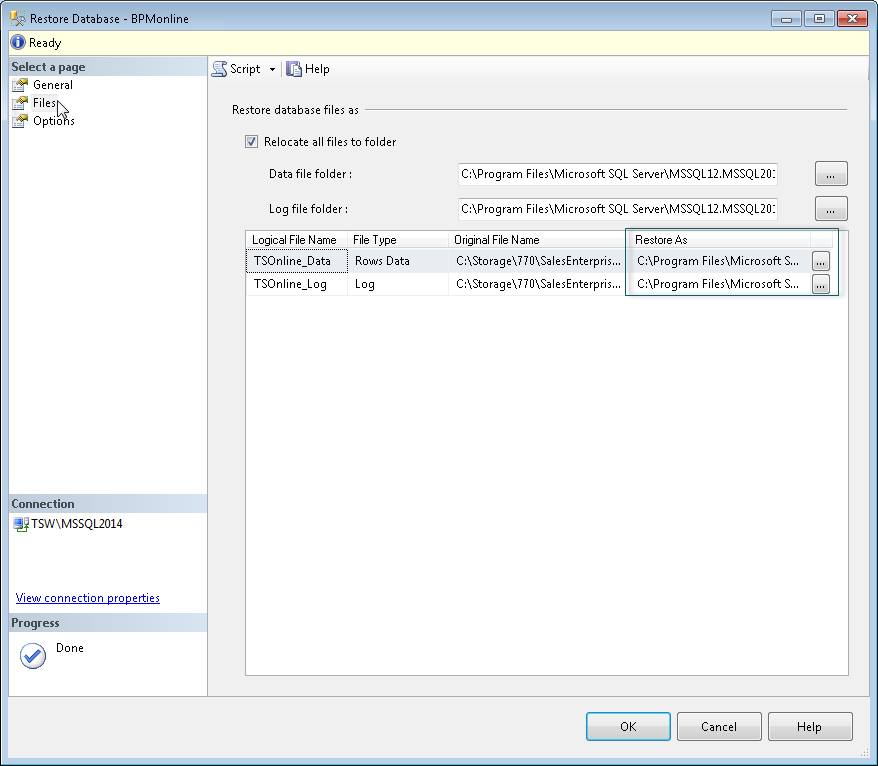
Go to the Files tab.
-
In the Restore the database files as area, select the Relocate all files and folders checkbox.
-
Specify paths to the folders where SQL Management Studio will save the TS_Data.mdf and TS_Log.ldf files (Fig. 3).
-
-
Click the OK button and wait for the database restore process to be finished.
-
Enable connection for the public Microsoft SQL user who Creatio will use to access the database.
-
Locate the restored Creatio database in Microsoft SQL Server Management Studio.
-
Click the Security tab.
-
Add the user to the Users list.
-
Click Membership and specify the db_owner, which will grant the user full access to the restored Creatio database.
-