This article covers how a portal administrator can manage portal users and their access permissions. Primary Creatio application administrators can manage users and access permissions on the portal as well. Learn more: Manage Creatio Portal in the main application.
Add portal users
To add new portal users:
-
Click your profile picture in the top right → Organization profile.
-
Go to the Portal users detail → click
 → enter the emails of the users to invite. Creatio validates any entered email automatically. Click Create portal users (Fig. 1).
If Creatio matches the entered emails to any existing contacts, it will add portal users linked to those contacts. If Creatio finds no matching contacts, they will be created automatically, based on the emails. For any new contacts, the Full name field will contain the email local part, i. e. the text before “@.”
Fig. 1 Adding portal users as a portal administrator
-
Creatio will prompt you to send email invitations to the new portal users. You can close the prompt and send the invitations later.
As a result, new portal users will be added to the portal. The users will need to click the link in the invitation email to log in to the portal for the first time. Once on the portal, each user will be able to set a password.
Send invitations to portal users
You can invite new users to the portal. Potential users receive an email invitation with a one-time link they can use to access the portal for the first time and set up their password.
If a new portal user forgets to set their password after the first login, you will need to re-send the invite. To do this:
-
Select the needed users in the Portal users detail.
-
Click
 and select Send invites (Fig. 2):Fig. 2 Send a portal invitation
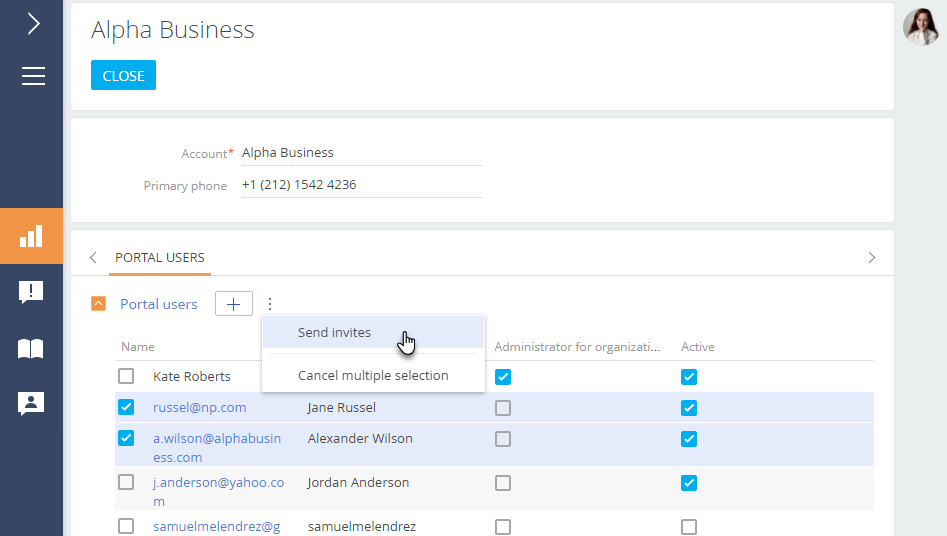
Set up access permissions for portal users
You can grant permissions to other portal users within your organization.
To assign the invited user all functional roles available to the organization:
-
Click your profile picture in the top right → Organization profile.
-
Go to the Portal users detail → click
 → enter the emails of the users to invite.
 -
In the user registration window, select the roles to assign to the invited users (Fig. 3). Click Create portal users.
In this example, the users will obtain all permissions of the portal administrator, as well as permissions assigned to the “Portal managers” role.
Fig. 3 Assign permissions to the new portal users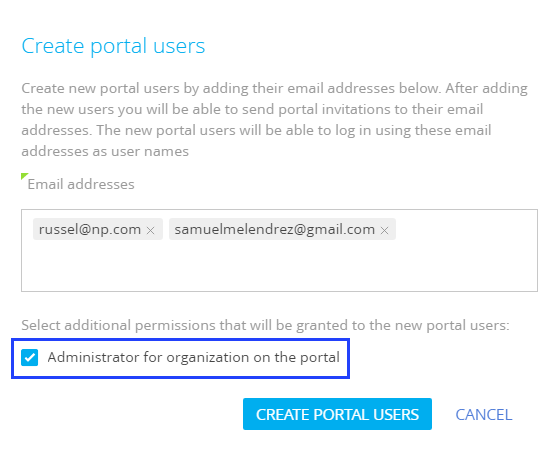
You can assign roles to the existing users as well. The list of available roles is shown on the Portal users detail (Fig. 4).
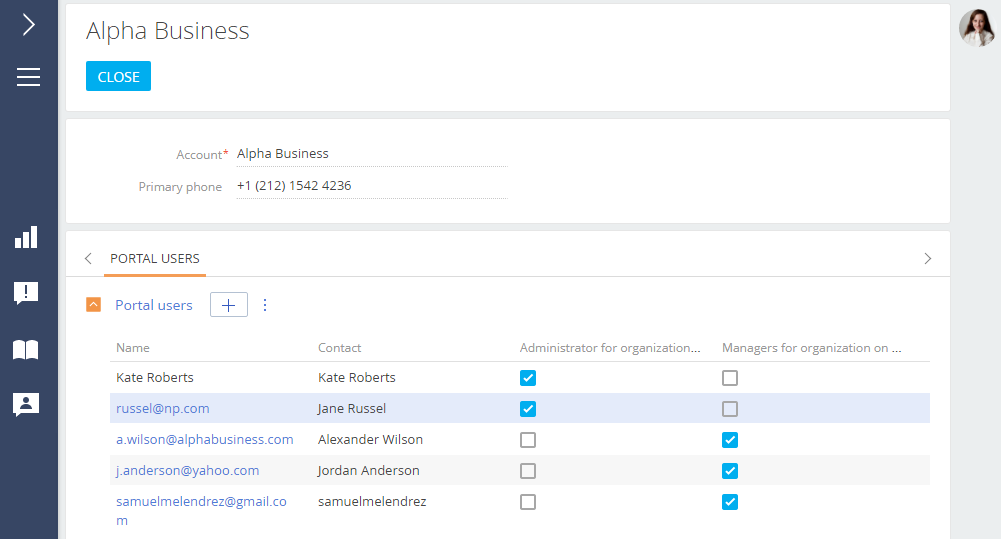
Promote a portal user to an administrator
You can grant portal administrator privileges to any user within your organization. To do this:
-
Click your profile picture in the top right → Organization profile.
-
Go to the Portal users detail and select Administrator for organization on the portal checkbox (Fig. 5) for the users you want to assign administrator privileges.
Fig. 5 Assign the portal administrator privileges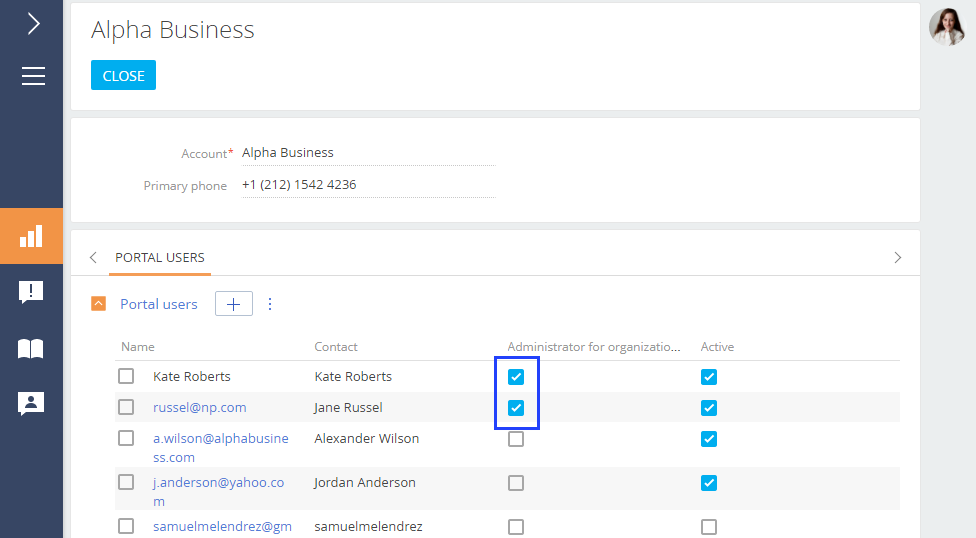
Deactivate portal users
Deactivate a portal user account to restrict the corresponding user from accessing the portal. To do this:
-
Click your profile picture in the top right → Organization profile.
-
Go to the Portal users detail → clear the Active checkbox next to the users whom you want to deactivate (Fig. 6).
Fig. 6 Deactivate the portal users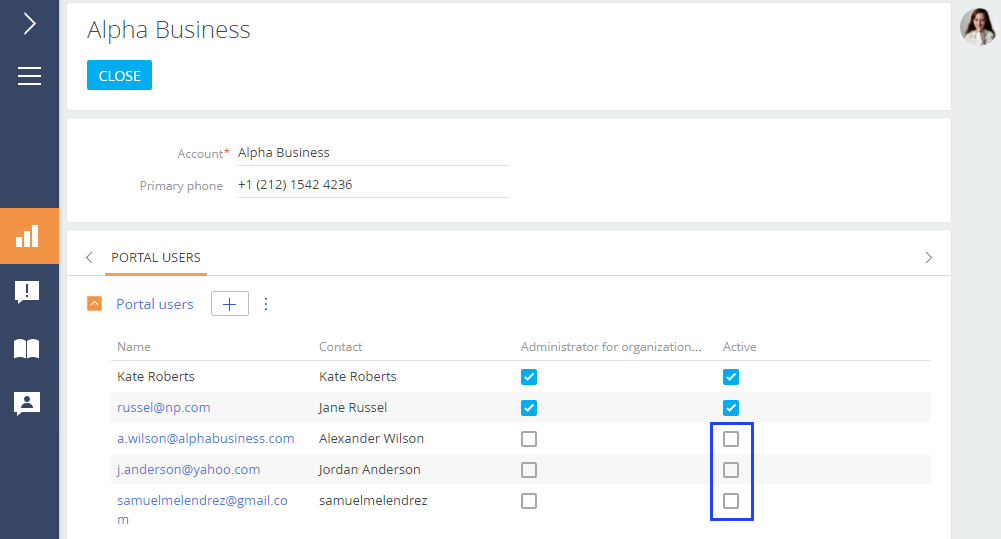
As a result, the user will be suspended and will not be able to access the portal. You can reactivate a user at any time.
Change the service information on the portal
The portal in Service Creatio, enterprise edition, lets you view all service agreements of your company. To do this, click your profile picture in the top right → Organization profile → Maintenance (Fig. 7).

You can add, modify and delete your company’s addresses (actual, legal and shipping) as well. All changes must be saved.