Creatio sends trigger emails automatically when new participants are added as part of a campaign.
For example, send a trigger email when a visitor signs up with your site. Use trigger emails to send interest-based messages tailored to a specific customer at a given moment: welcome emails, order confirmations, birthday wishes, sale end date reminders, etc.
Fill out the trigger email data
-
Go to the Email section.
-
Click New and select Trigger email.
-
Fill out the Name field – specify the name of the new trigger email. The name will be displayed in the Email section list only, the recipients will not see it (Fig. 1).
Fig. 1 Create a trigger email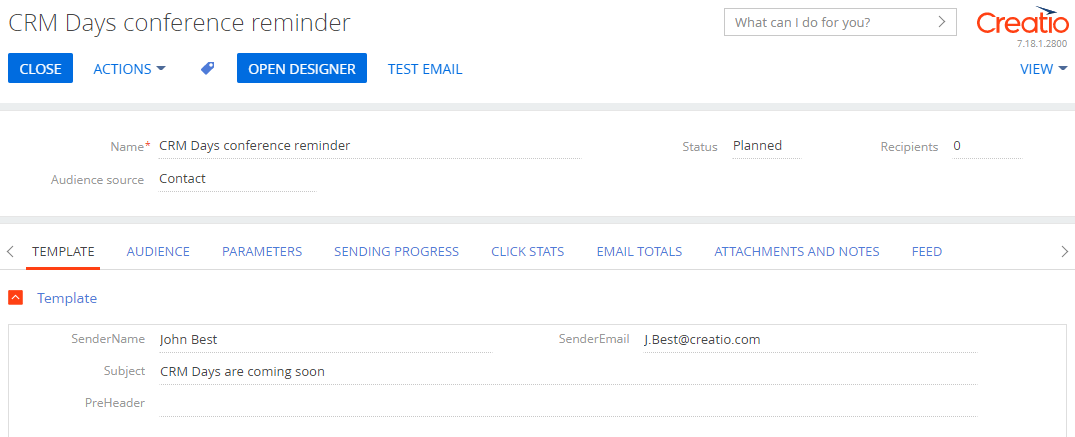
-
Set up the email template in the content designer. Learn more: Create an email template.
-
Select the email type on the Parameters tab. The email type is used when performing a subscription to a specific type of content.
We recommend sending test emails before you start your email. This enables checking of macro values and contents display in the email. Learn more: Send a test email.
Add a trigger email audience
In Creatio, the audience of a trigger email is formed automatically based on the campaign audience and participant responses at a campaign step. The audience of a trigger email is formed when a participant moves to a campaign element that is connected to the corresponding trigger email. The campaign element adds participants based on the conditions you specify while setting it up. Learn more: Campaign element reference.
In this case, the recipient's email is checked for validity. This is necessary to ensure that trigger emails are sent to only those contacts who are interested and to minimize the number of delivery errors. Learn more: Start sending trigger emails.
Set up tracking of clicks from a trigger email
Add the UTM tracking codes to the email to receive information about the number of clicks from the email. For instance, you can track the number of leads received from the email.
-
Go to the Parameters tab on the email page.
-
Select the Use UTM tracking codes checkbox in the Email-to-website click tracking block. Specify the UTM tracking codes: “utm_source,” “utm_campaign,” and “utm_medium.”
-
In the “List of domains” filed, specify the list of domains for which the tracking codes will be applied when generating the click link. You can specify multiple domains using commas (,).
-
Save the changes.