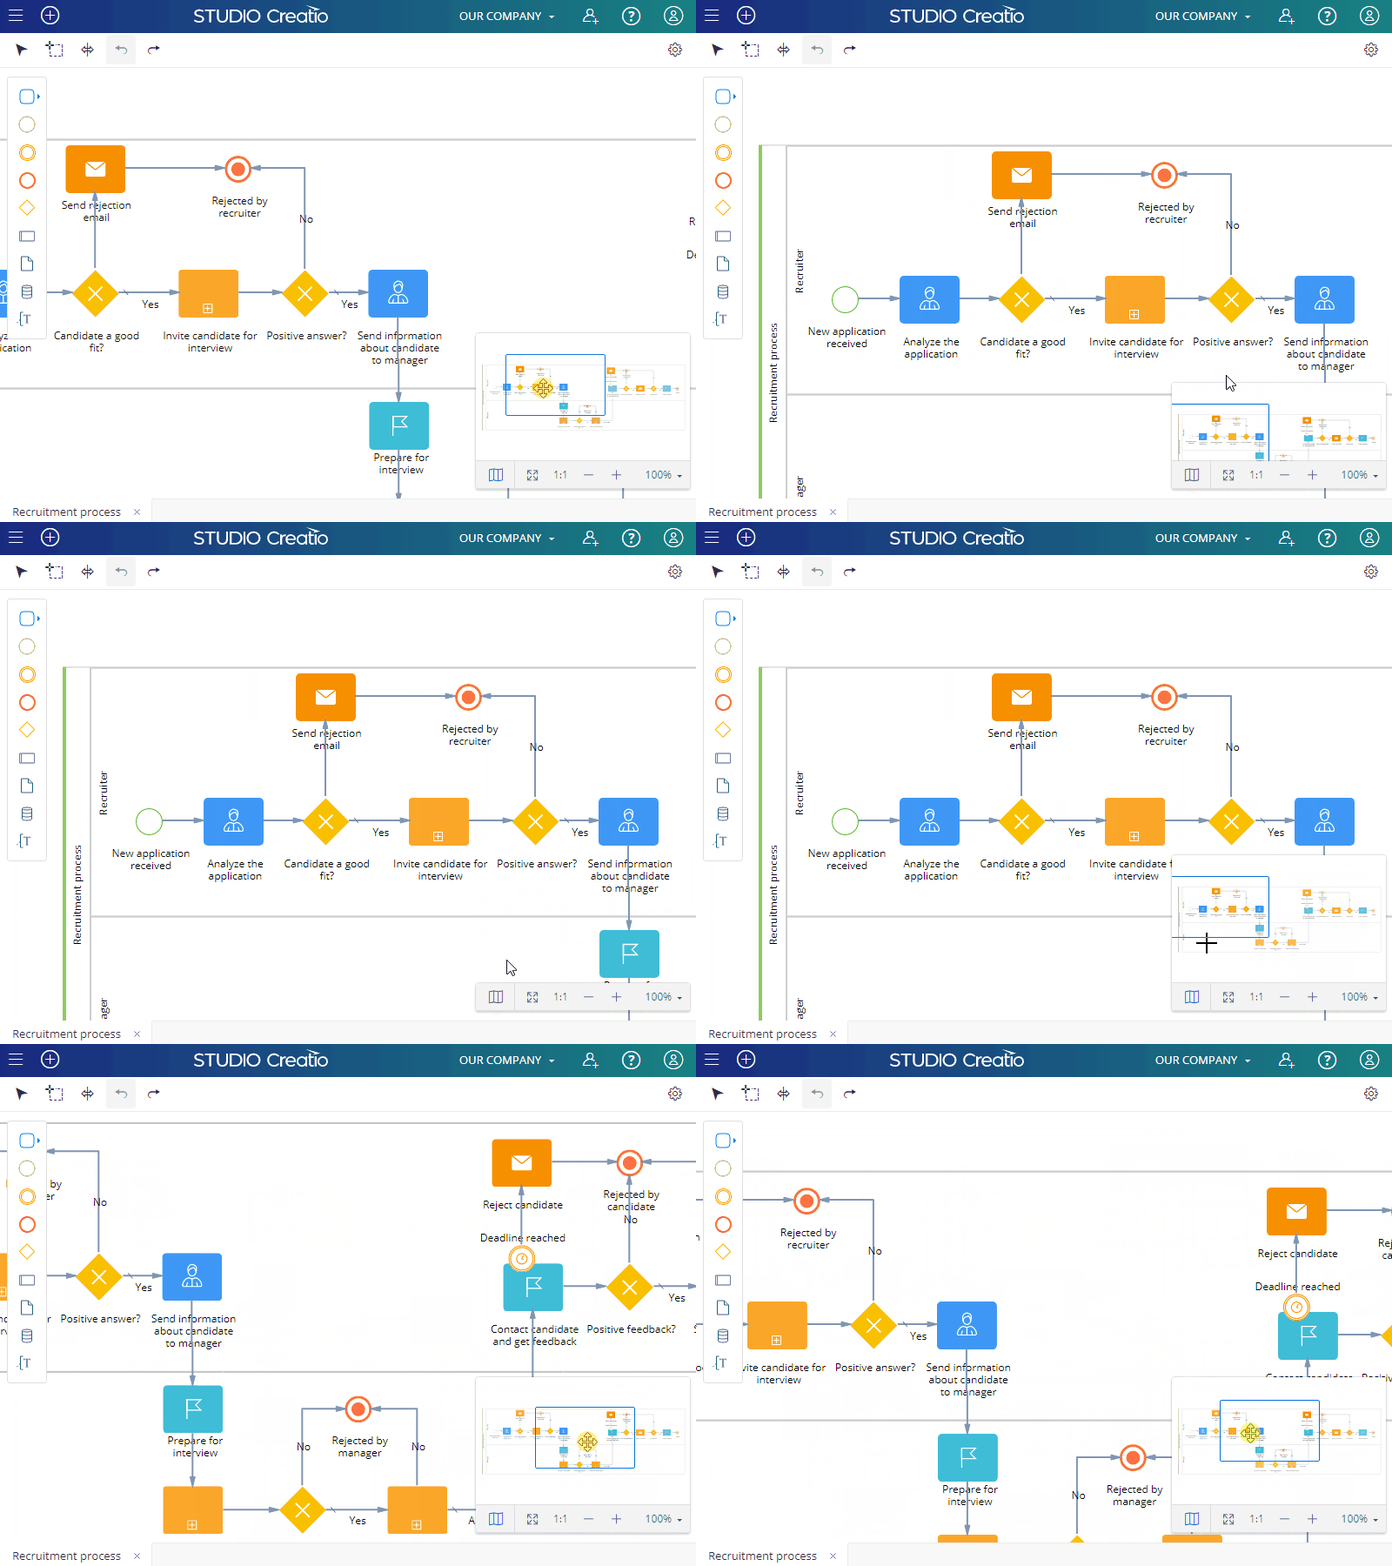
You design a business process by adding elements to the working area, arranging them, connecting, and adding their descriptions.
Create a new process
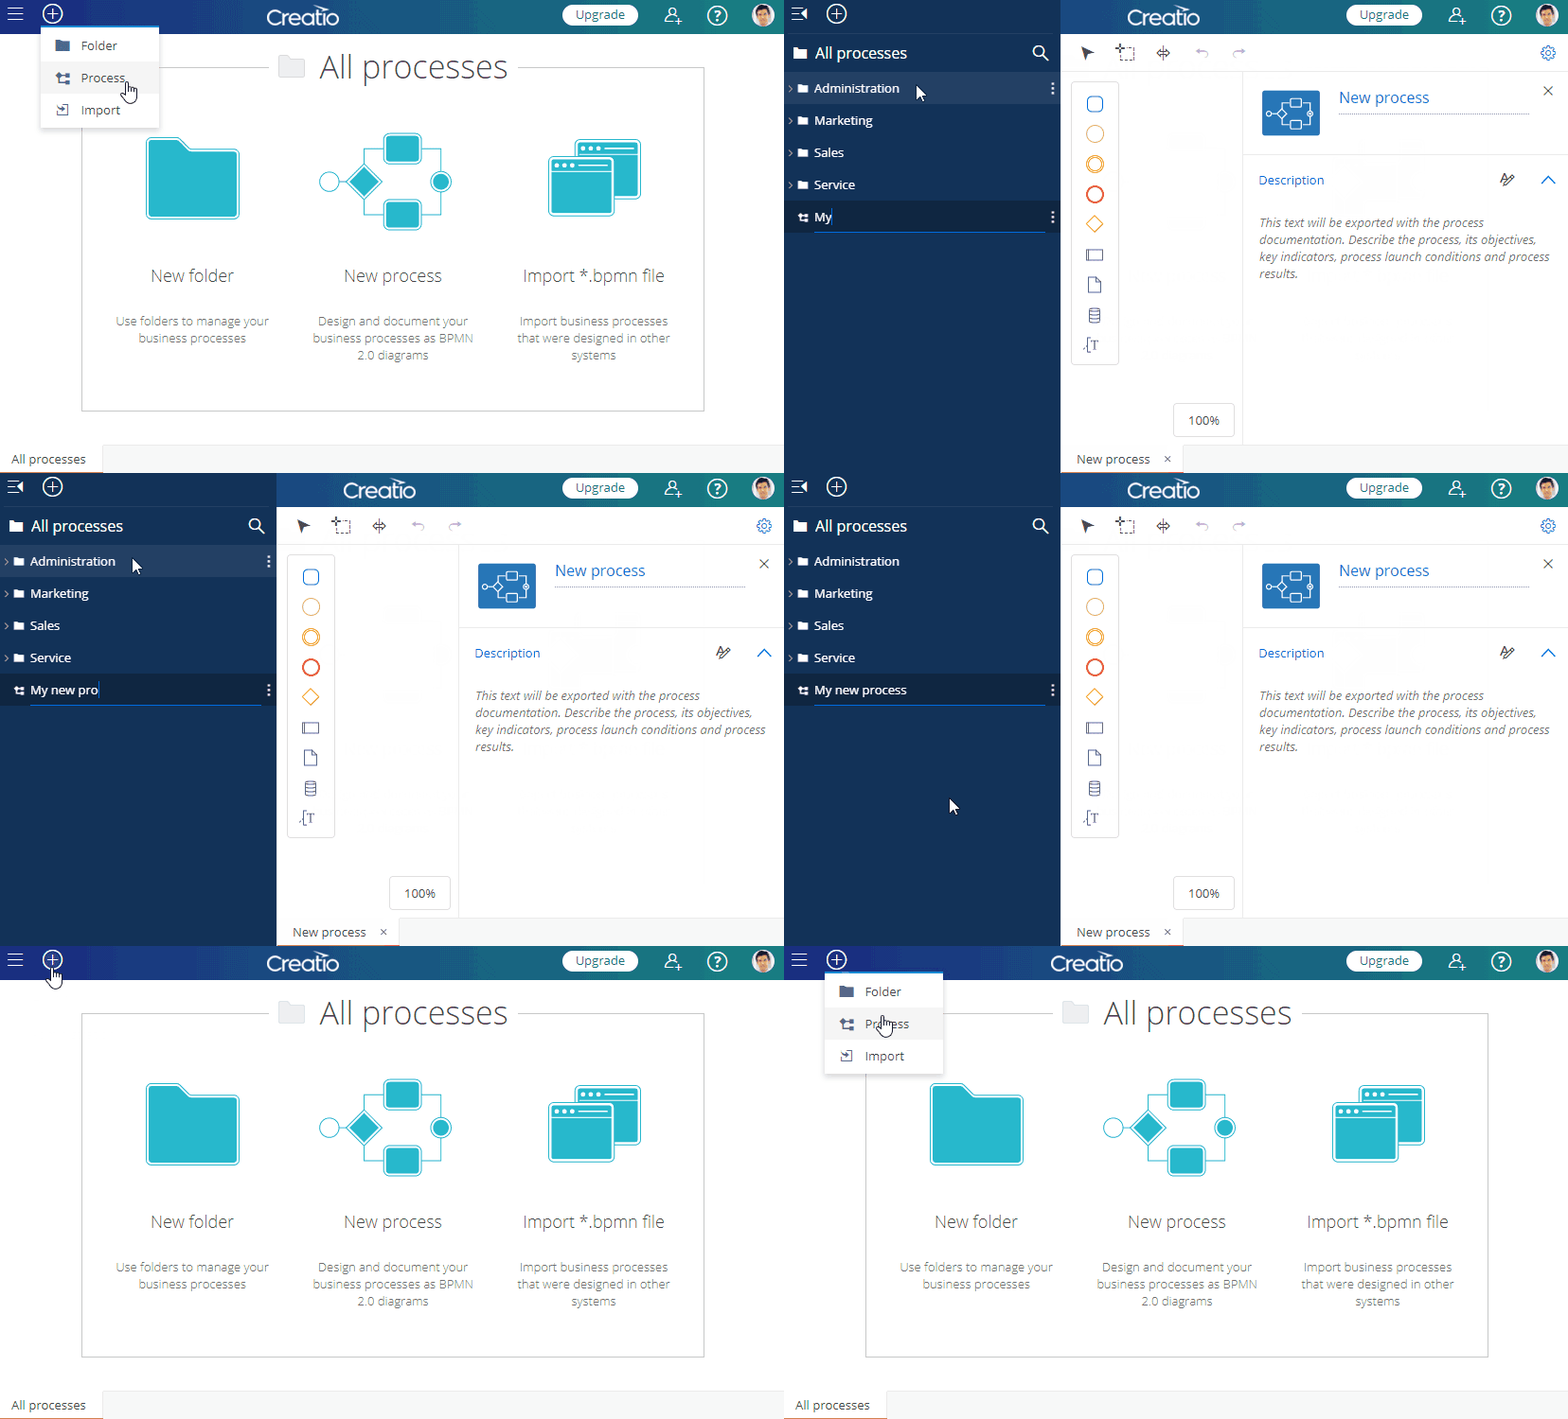
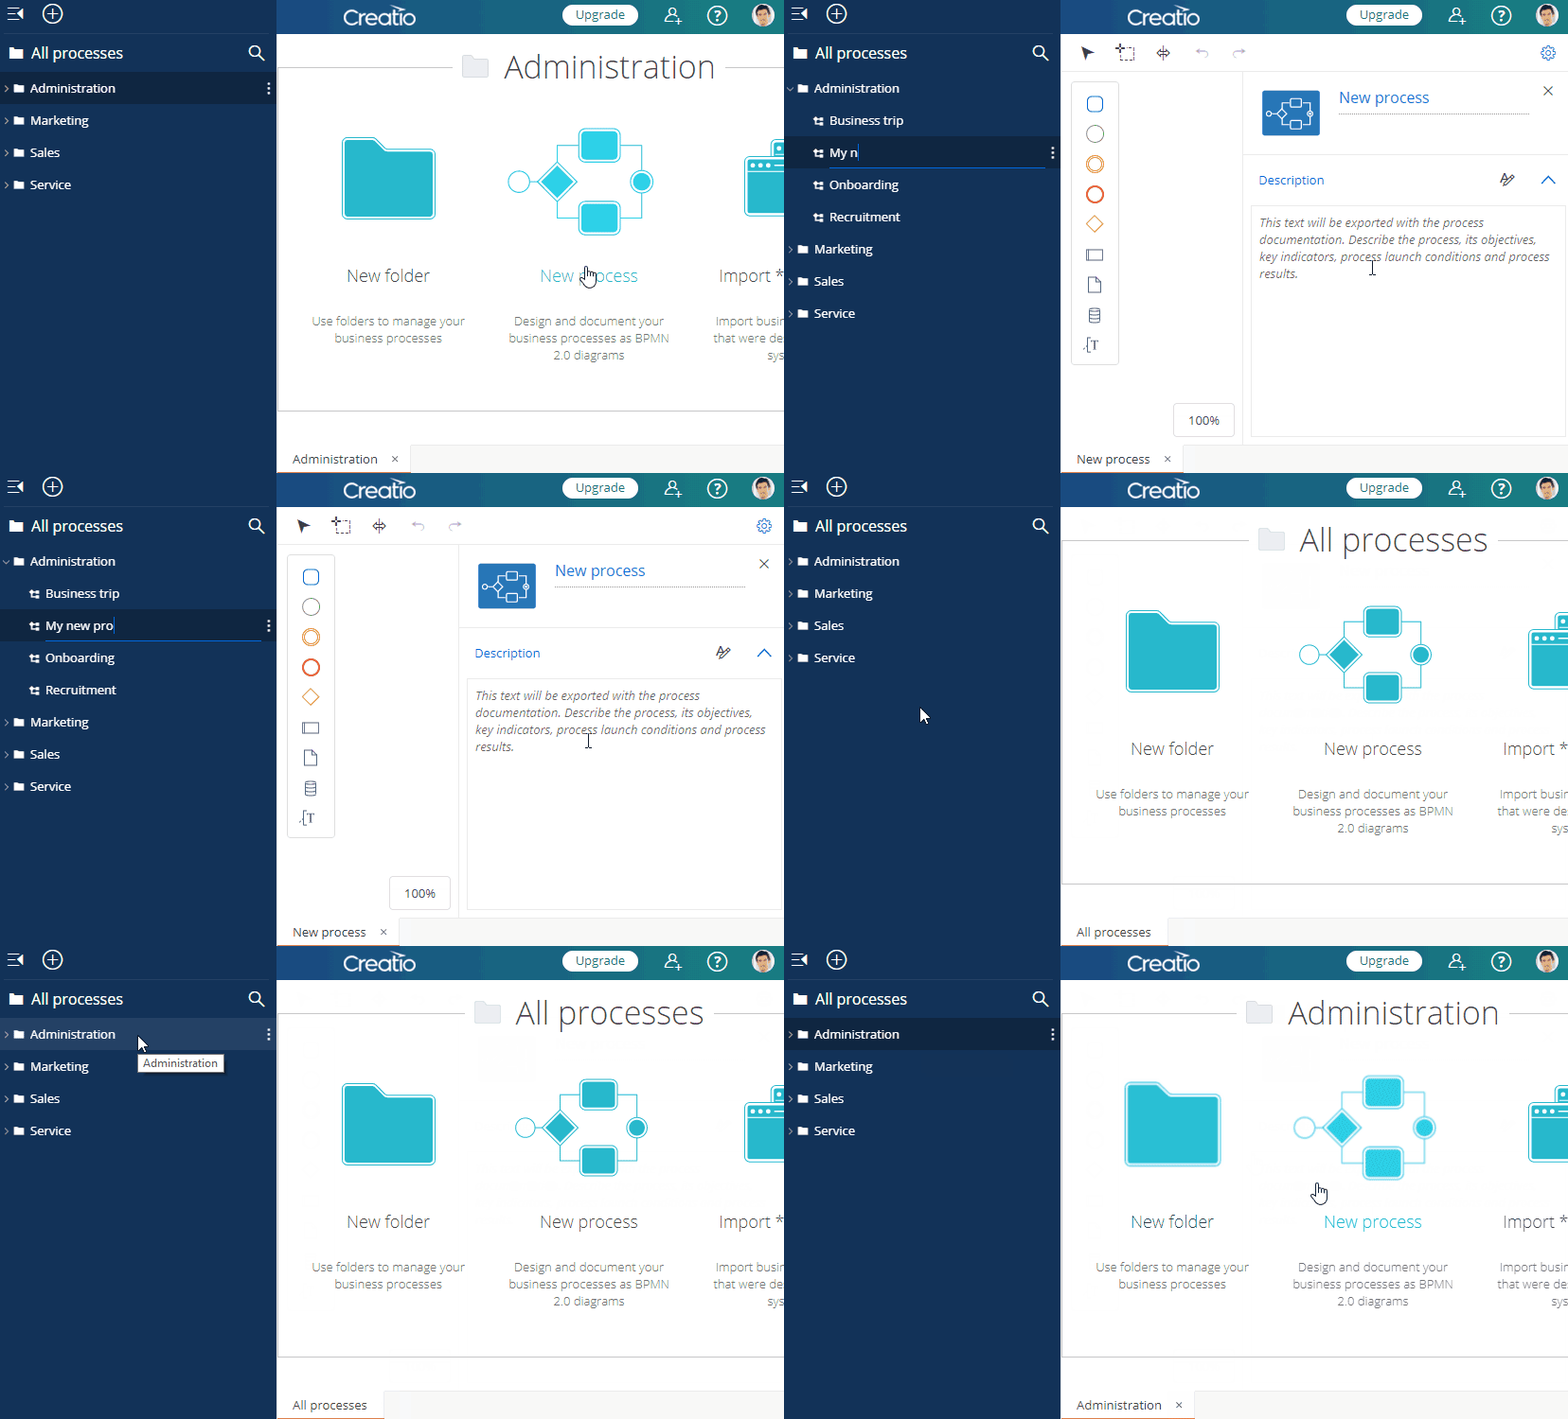
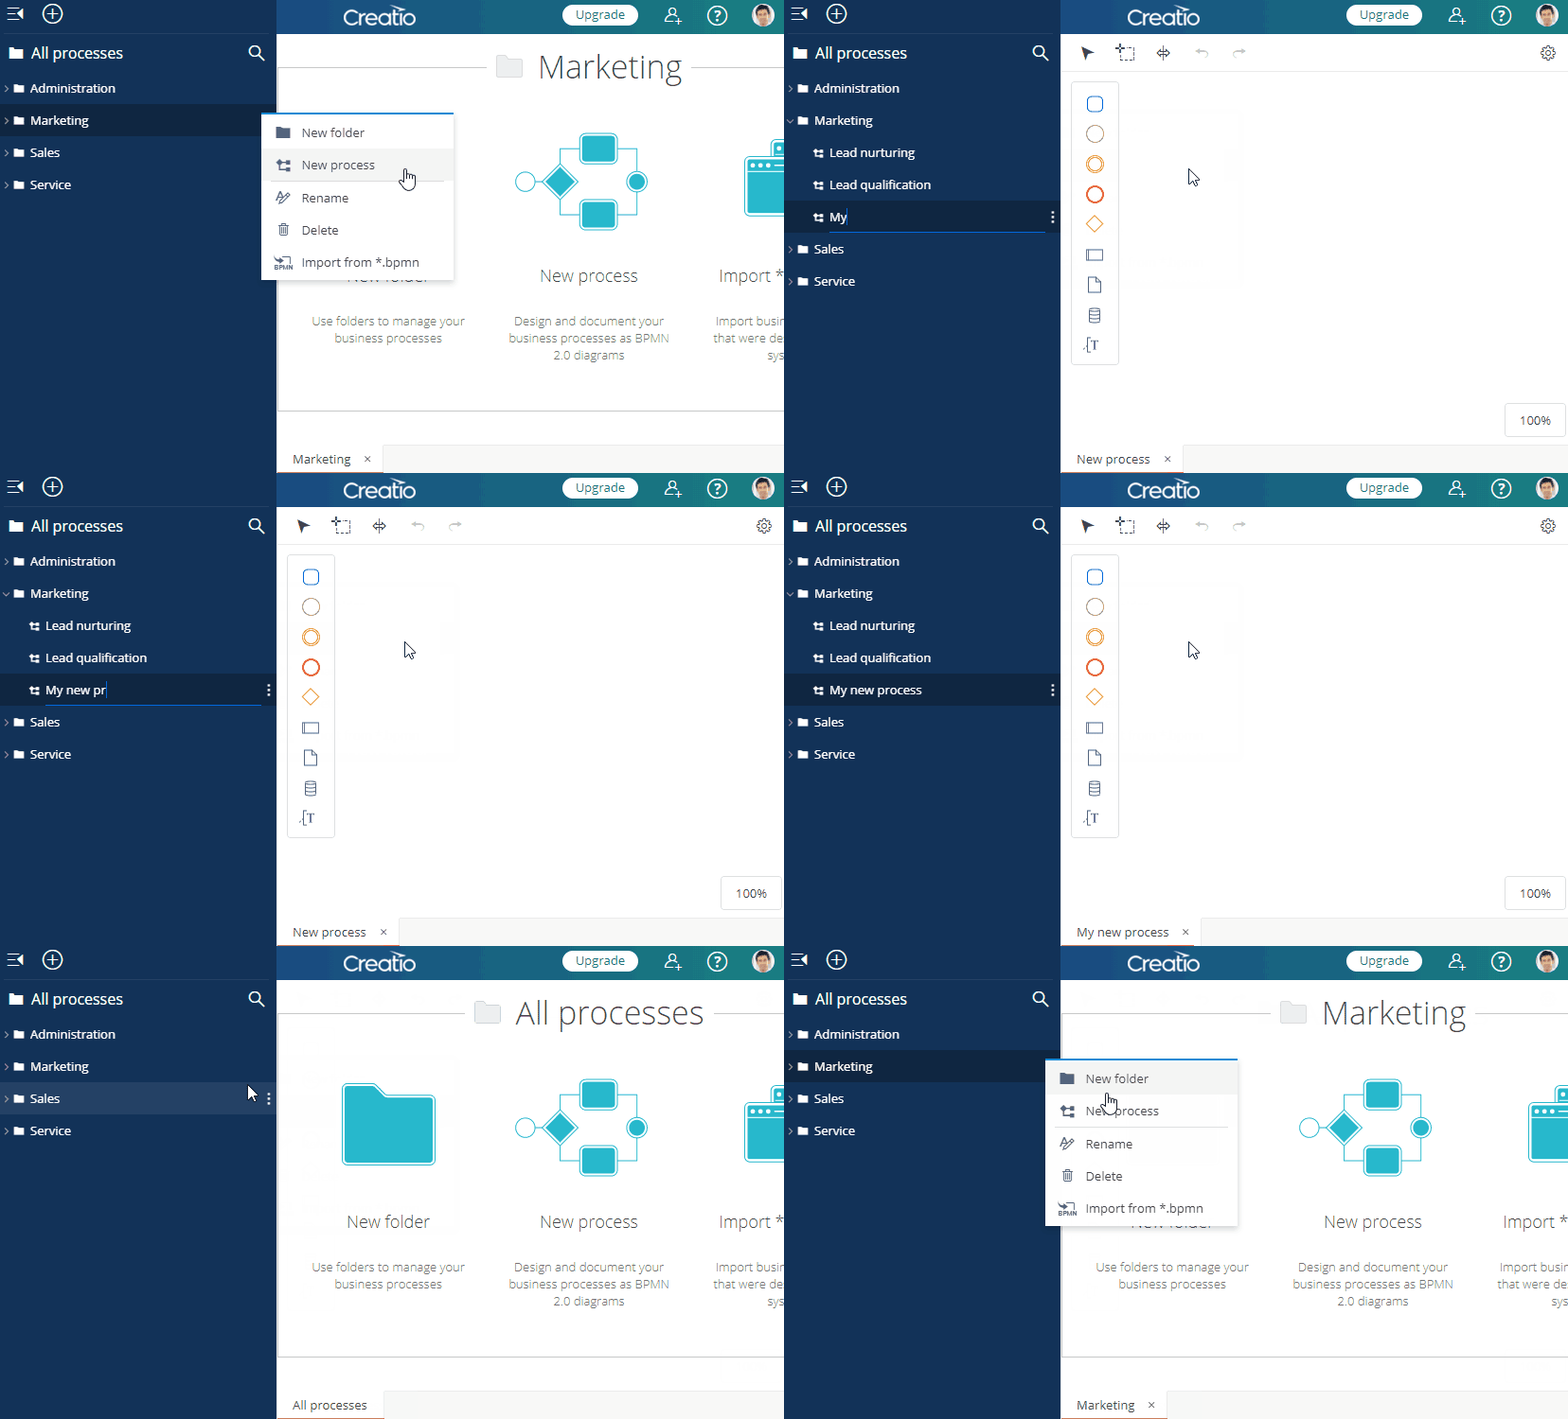
Add a new business process in the following ways:
- Click
 in the Studio toolbar and select Process. A new process will be added to the currently selected process library folder.
- Select a process library folder and click New process.
- In a process library folder menu, click
 and select New process.
Add elements to a business process
There are two ways of adding process elements in Creatio:
- Drag&drop an element from the element toolbar.
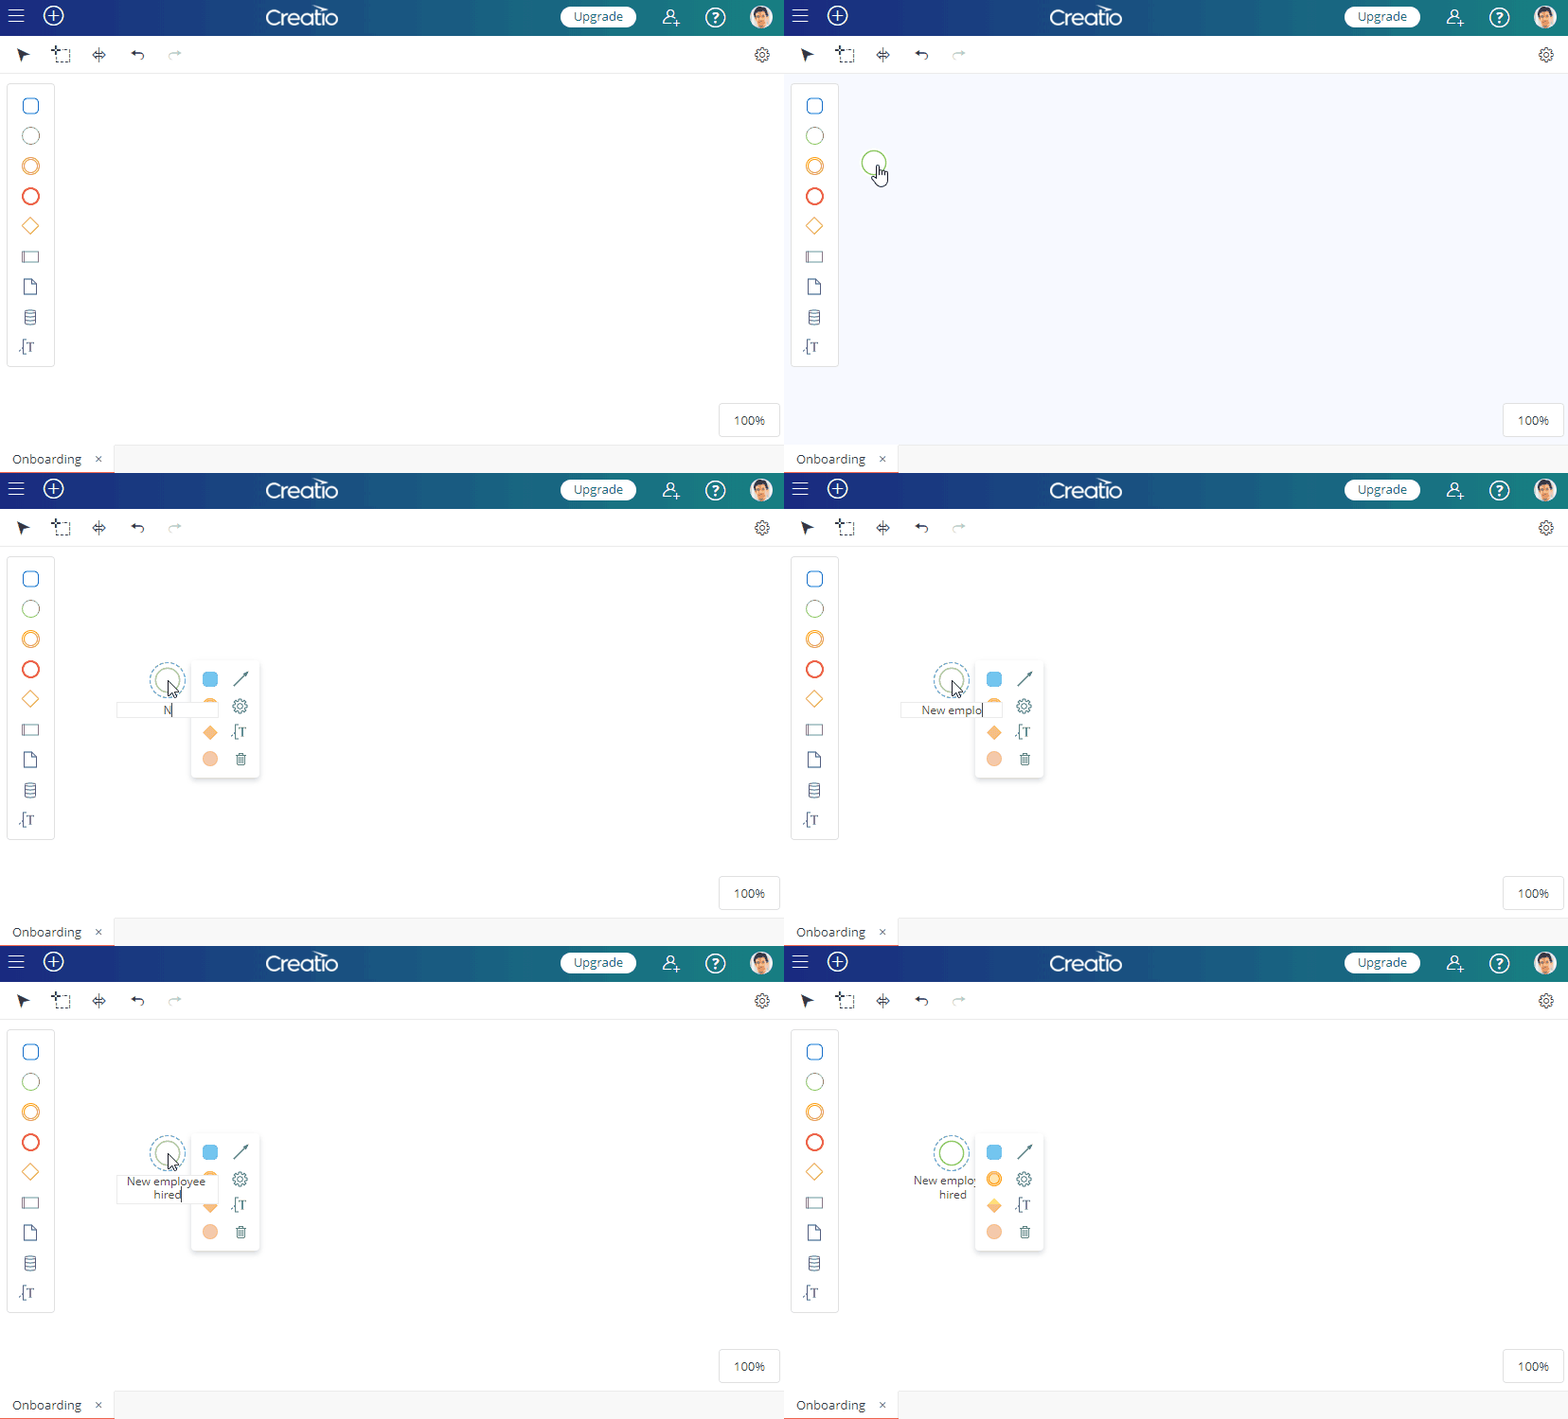
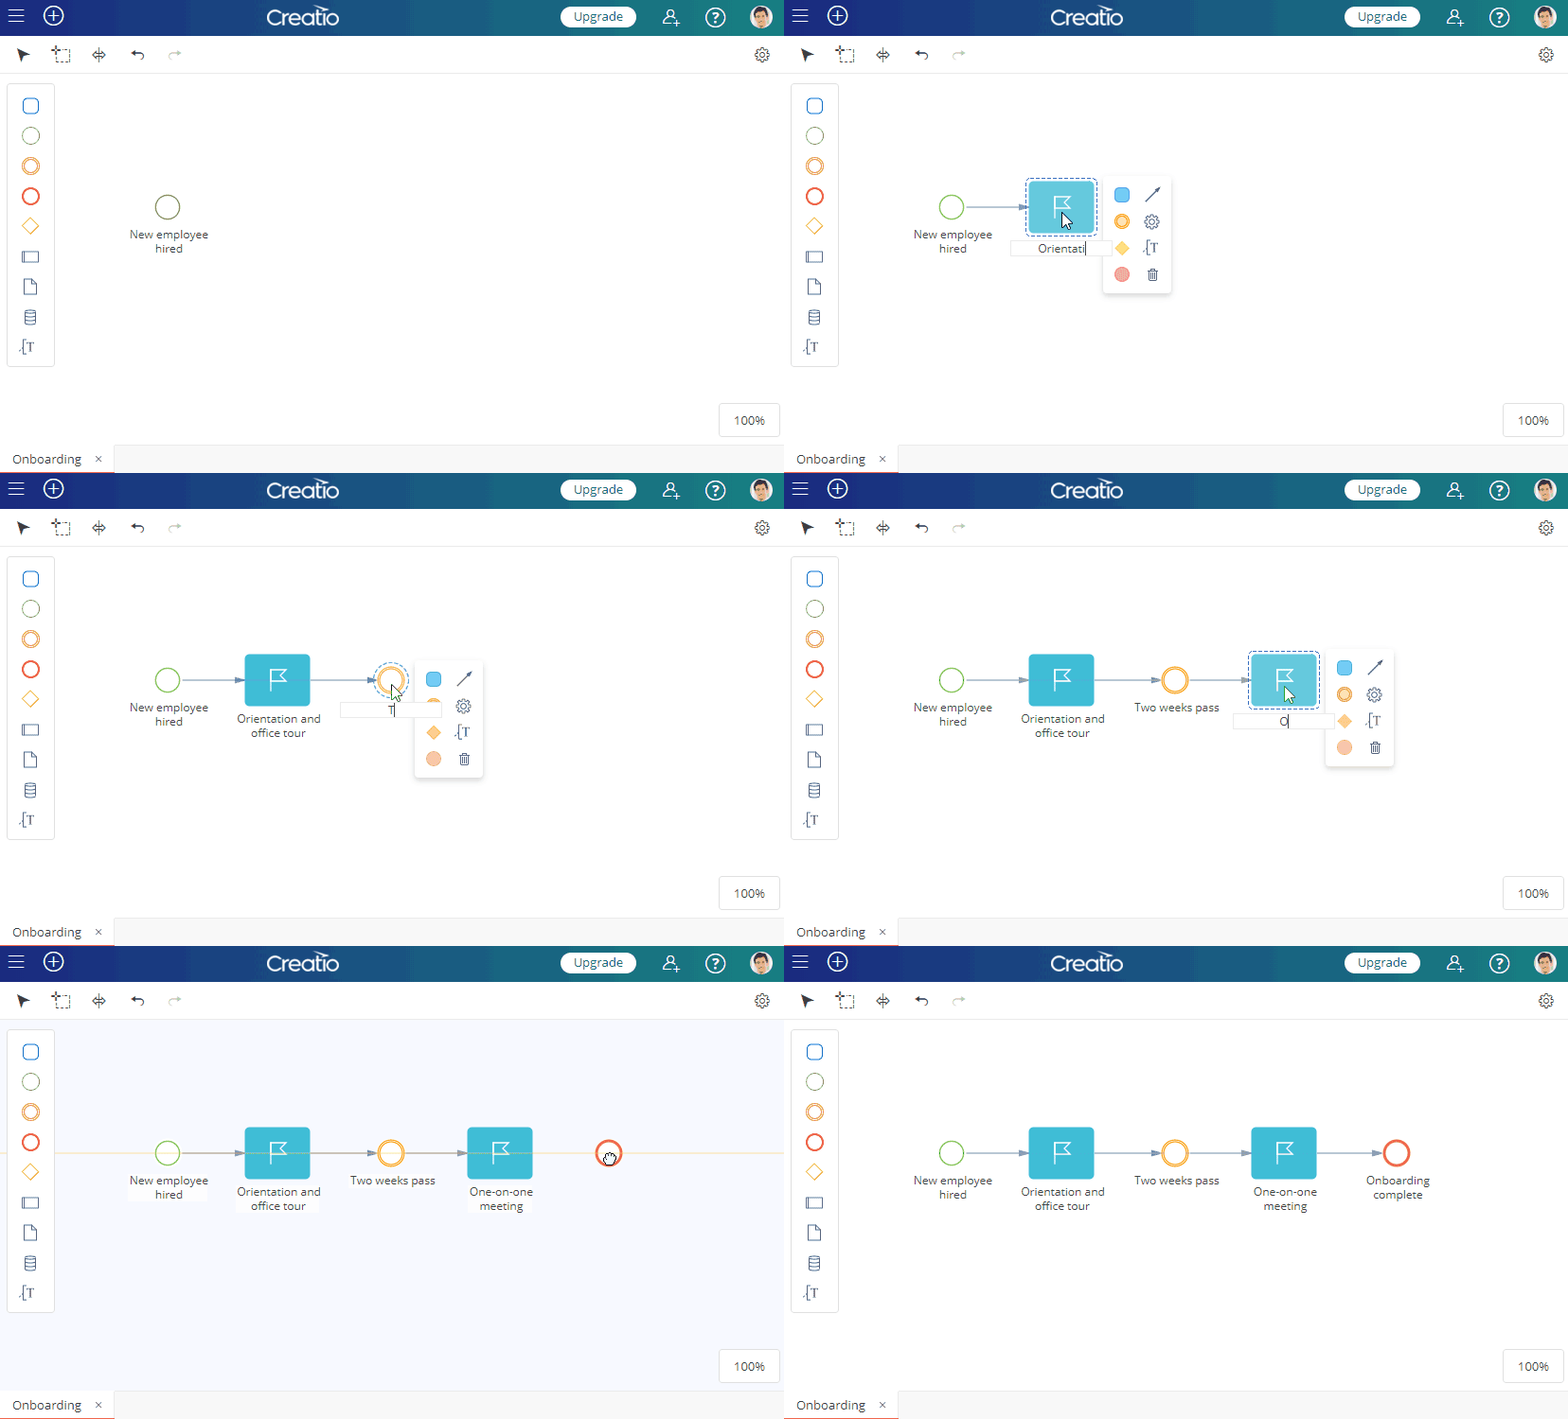
- Drag an element from any element on the diagram. This will add the corresponding new element, connected to the previously selected element with a sequence flow.
Add flows
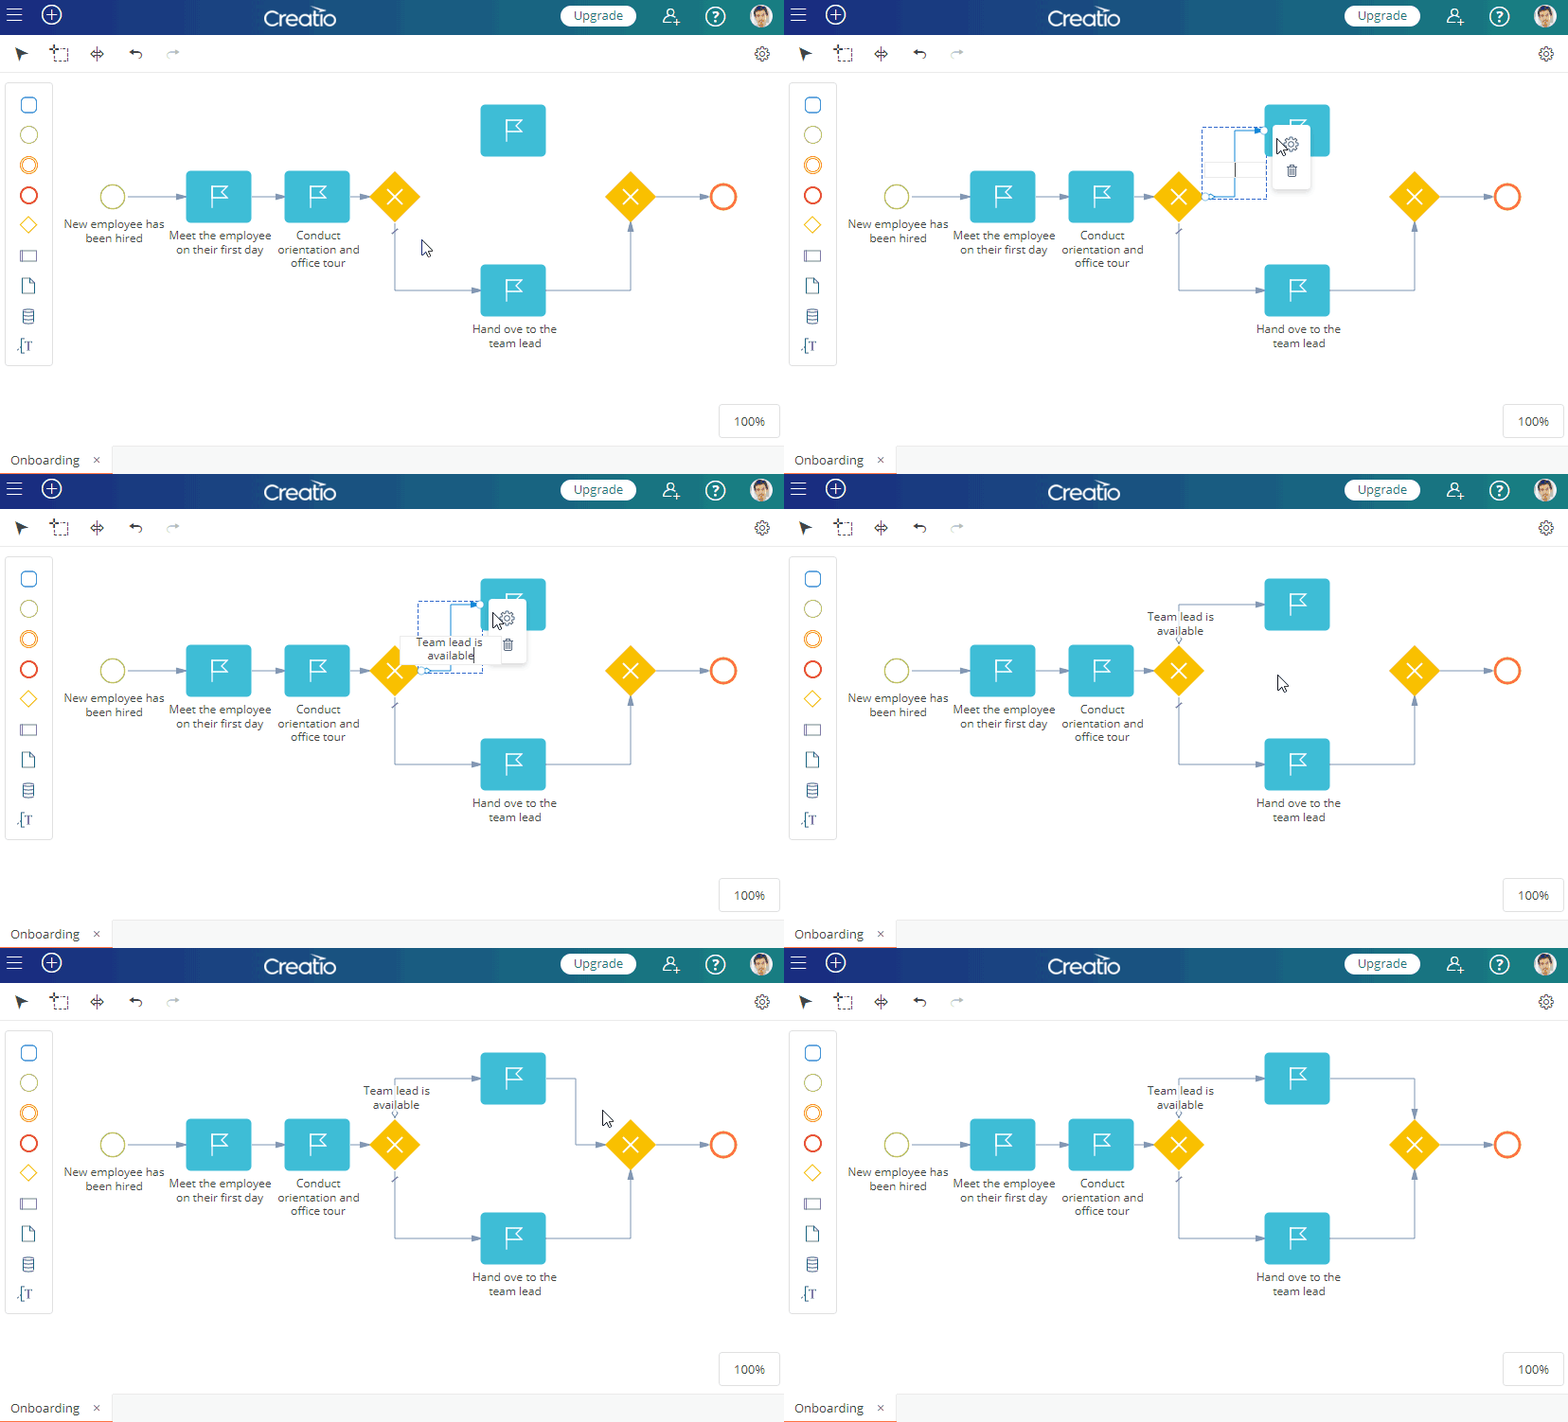
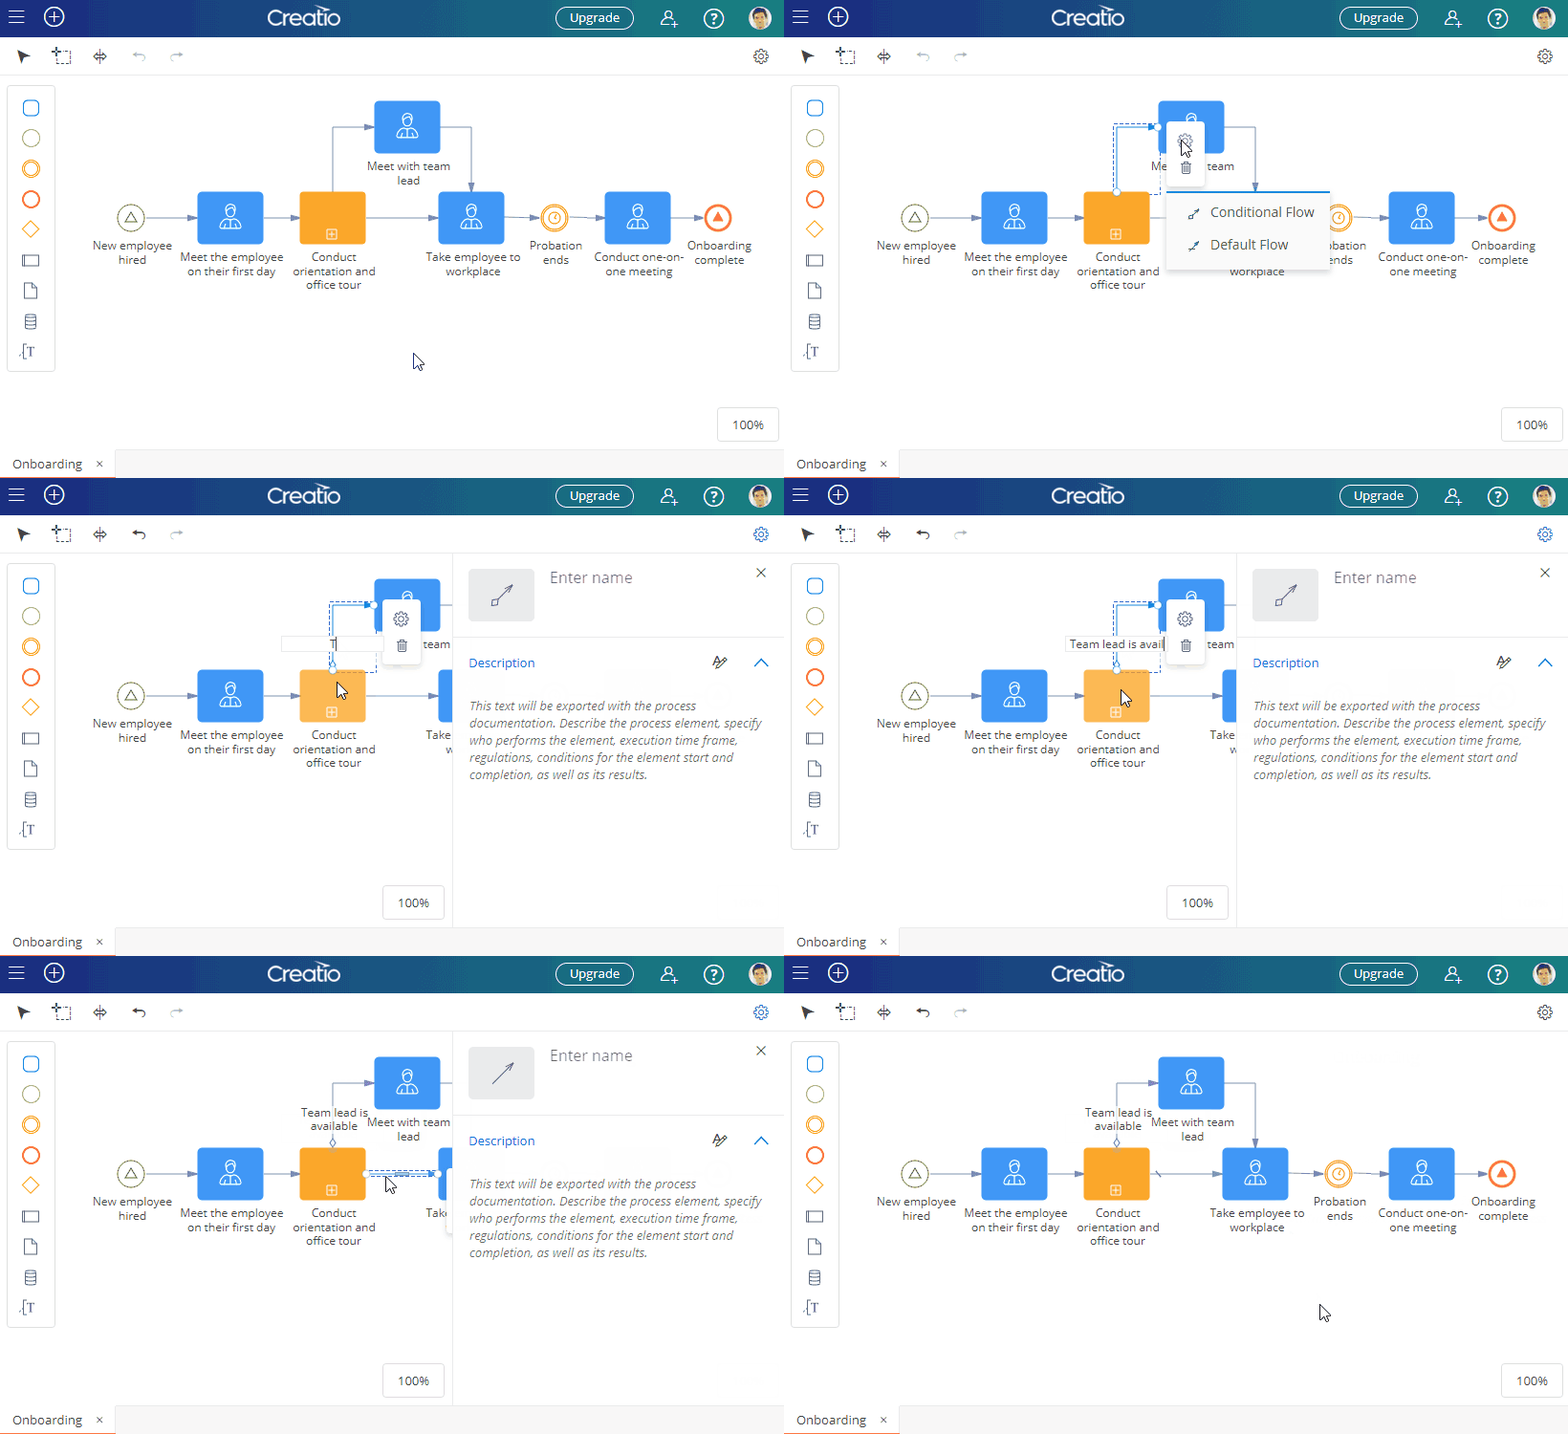
To connect two elements on the diagram with a flow, click the first element, click  flow in the element context menu, then drag the flow to the second element. After the new flow has been added, you can change its position on the diagram, and the flow type (conditional or default).
Change the element type
The process element toolbar and process element context menu contain general categories of elements: action, start/intermediate/end event, gateway, flow.
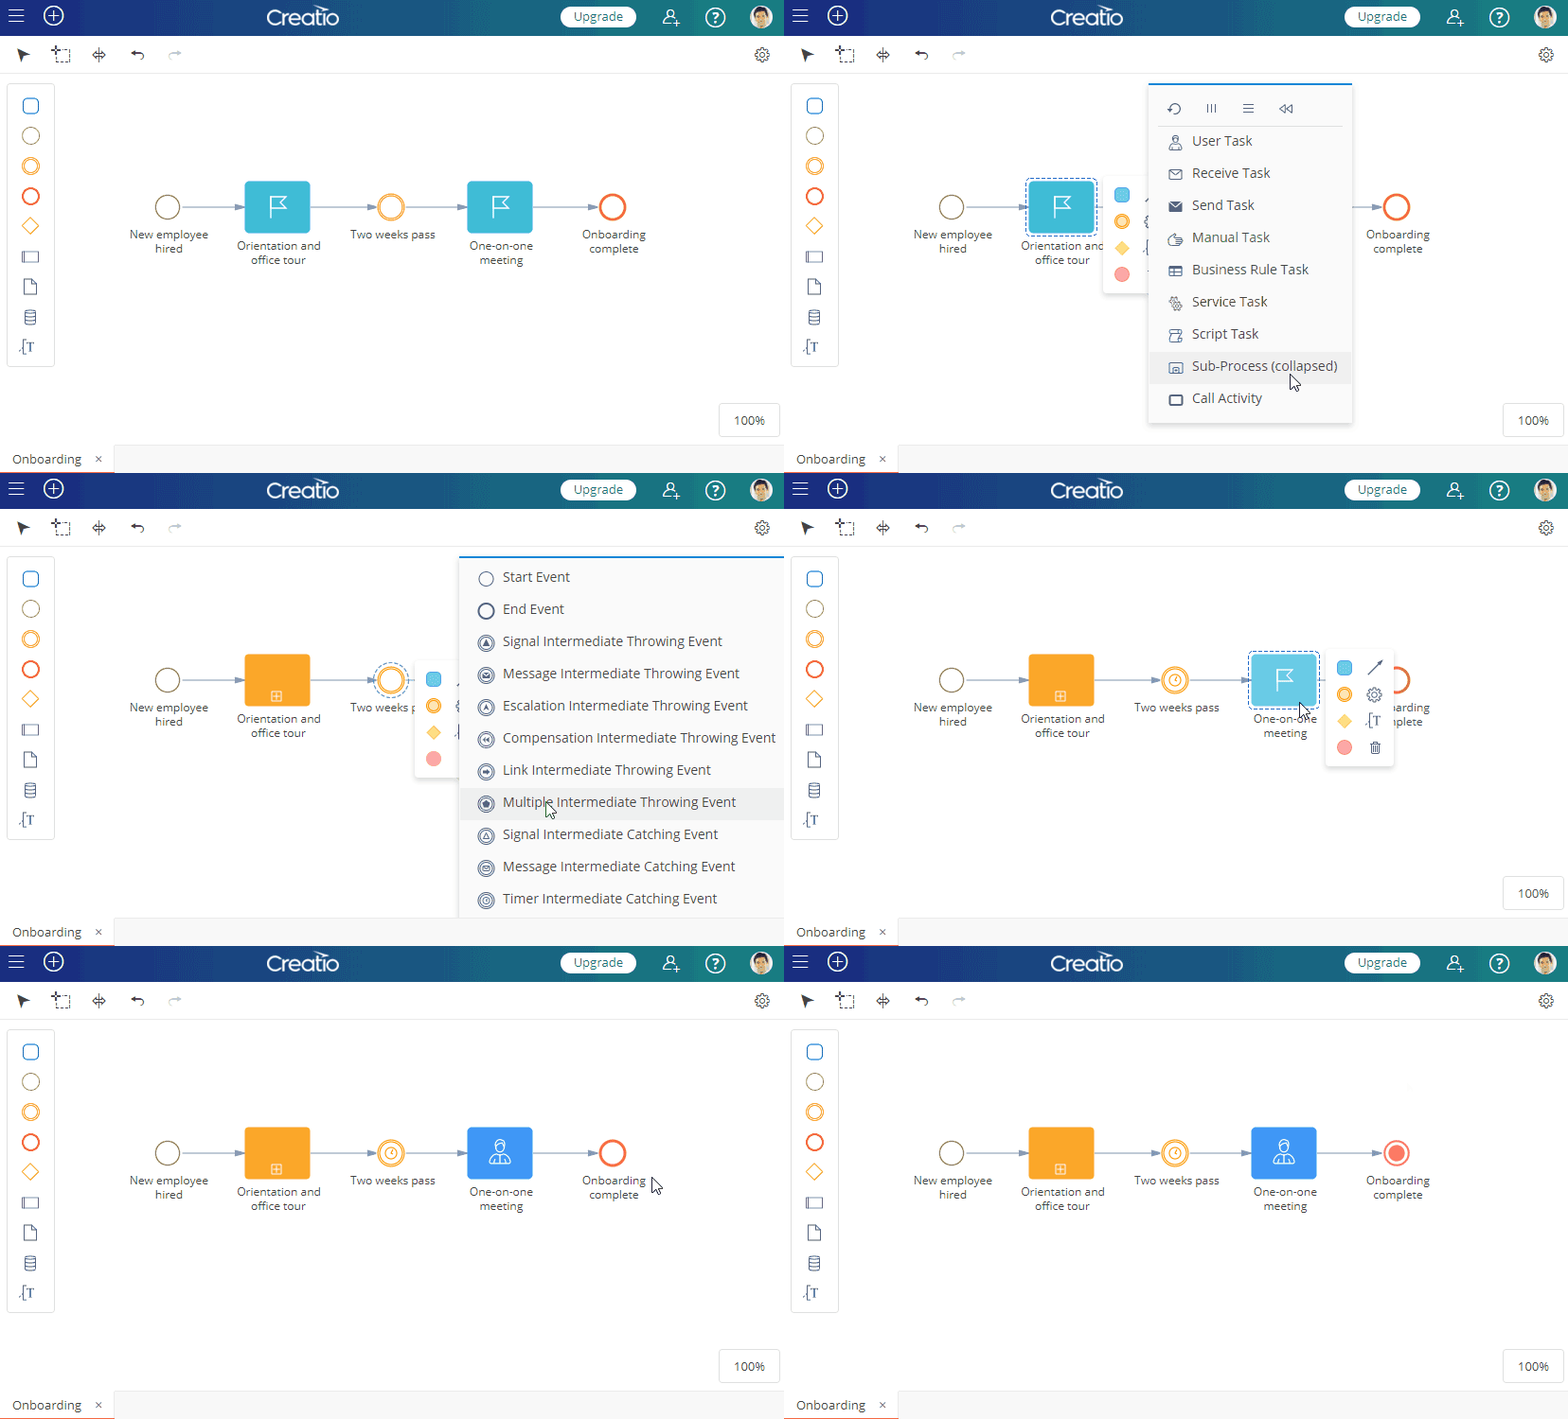
To add a specific process element first add an element of the corresponding category (e.g., “action”), and then set its type (e.g., “User action”).
To change an element type:
- Select the element.
- Click
 in its context menu.
 - Select the needed type from the menu that appears.
Similarly, you can change types of other elements:
- To add a loop,
 parallel,
  sequential, or
  compensation marker to an activity – select it, click
  in its context menu, and select the needed marker.
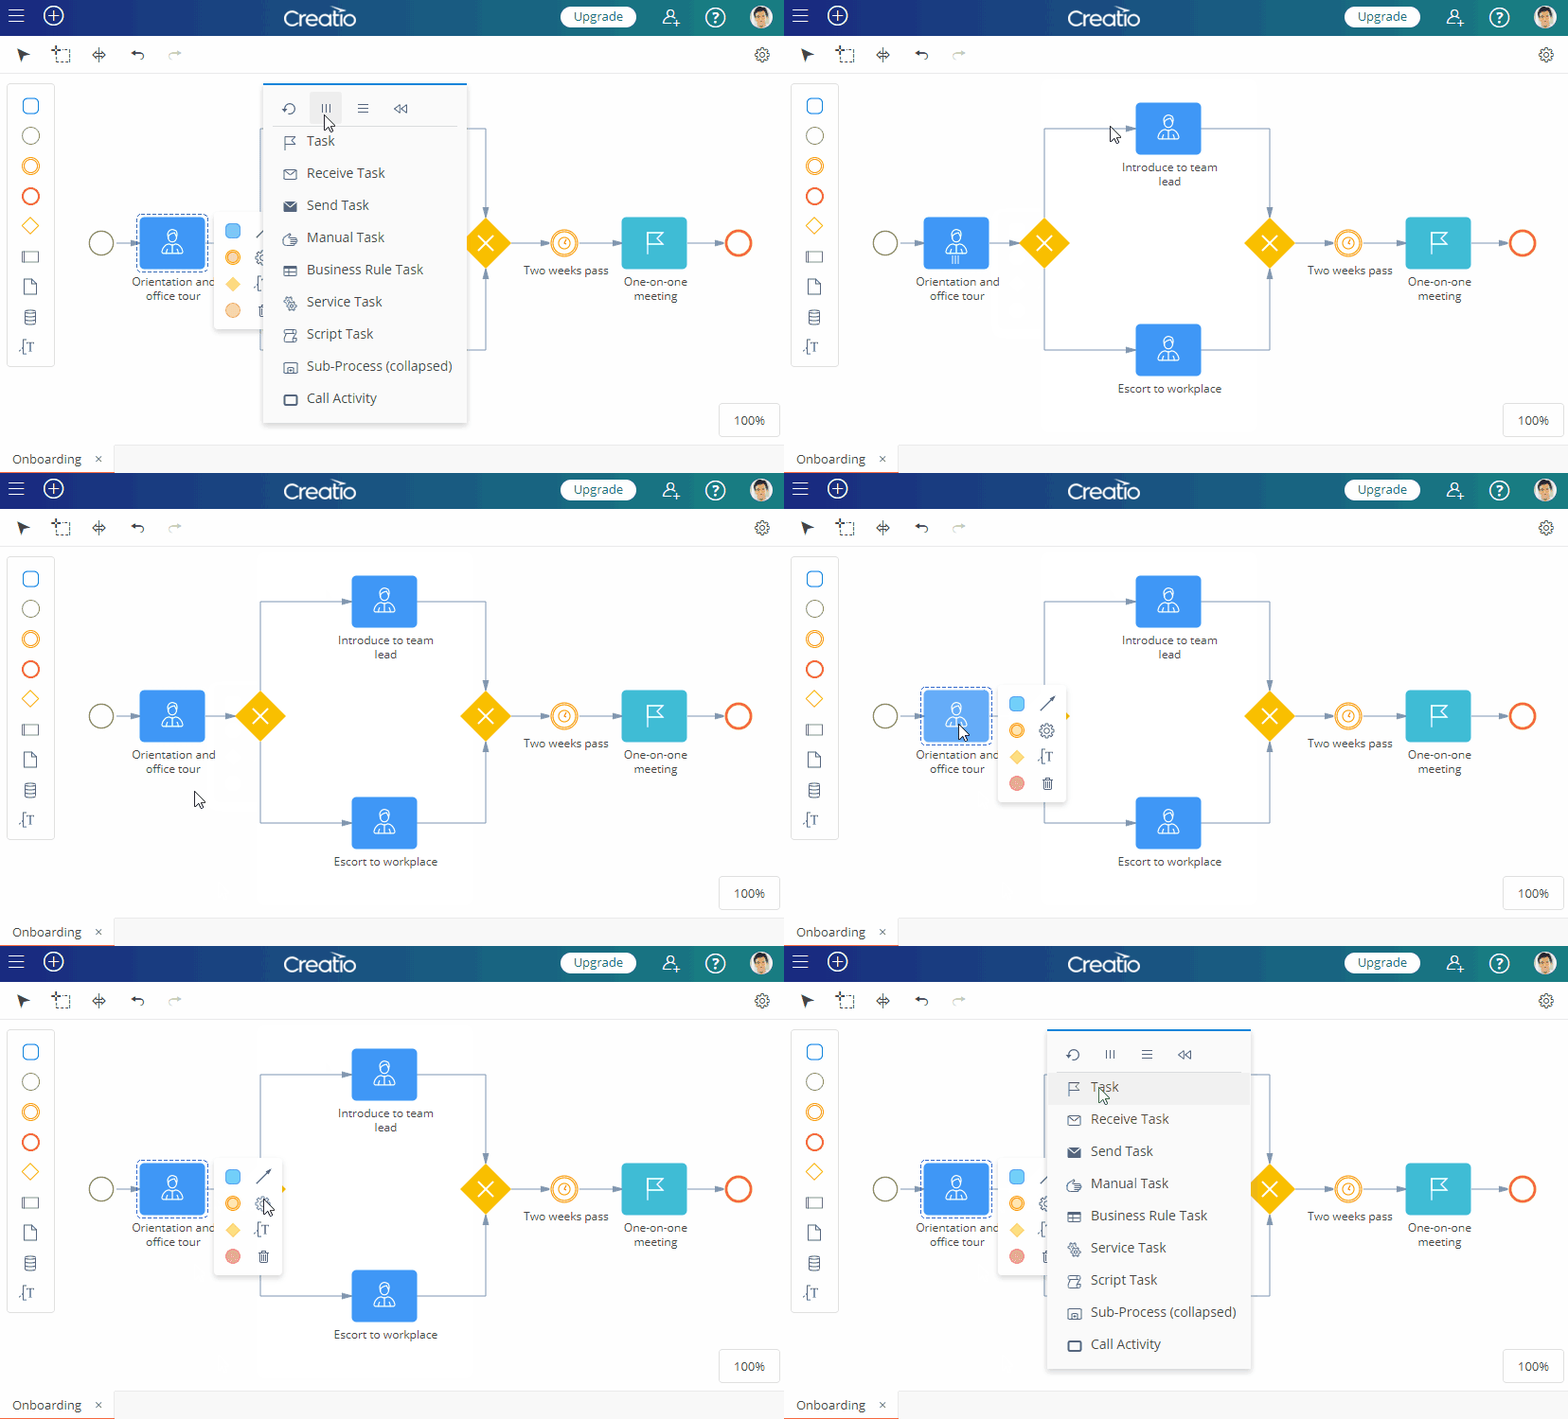
- To add a
 conditional flow or
  default flow, add a
  sequence flow, select it, click
  in its context menu, and change its type to the needed one.
Add description
Use the setup area of the Process Designer to change the process or element name and add a description, which is vital for documenting business processes.
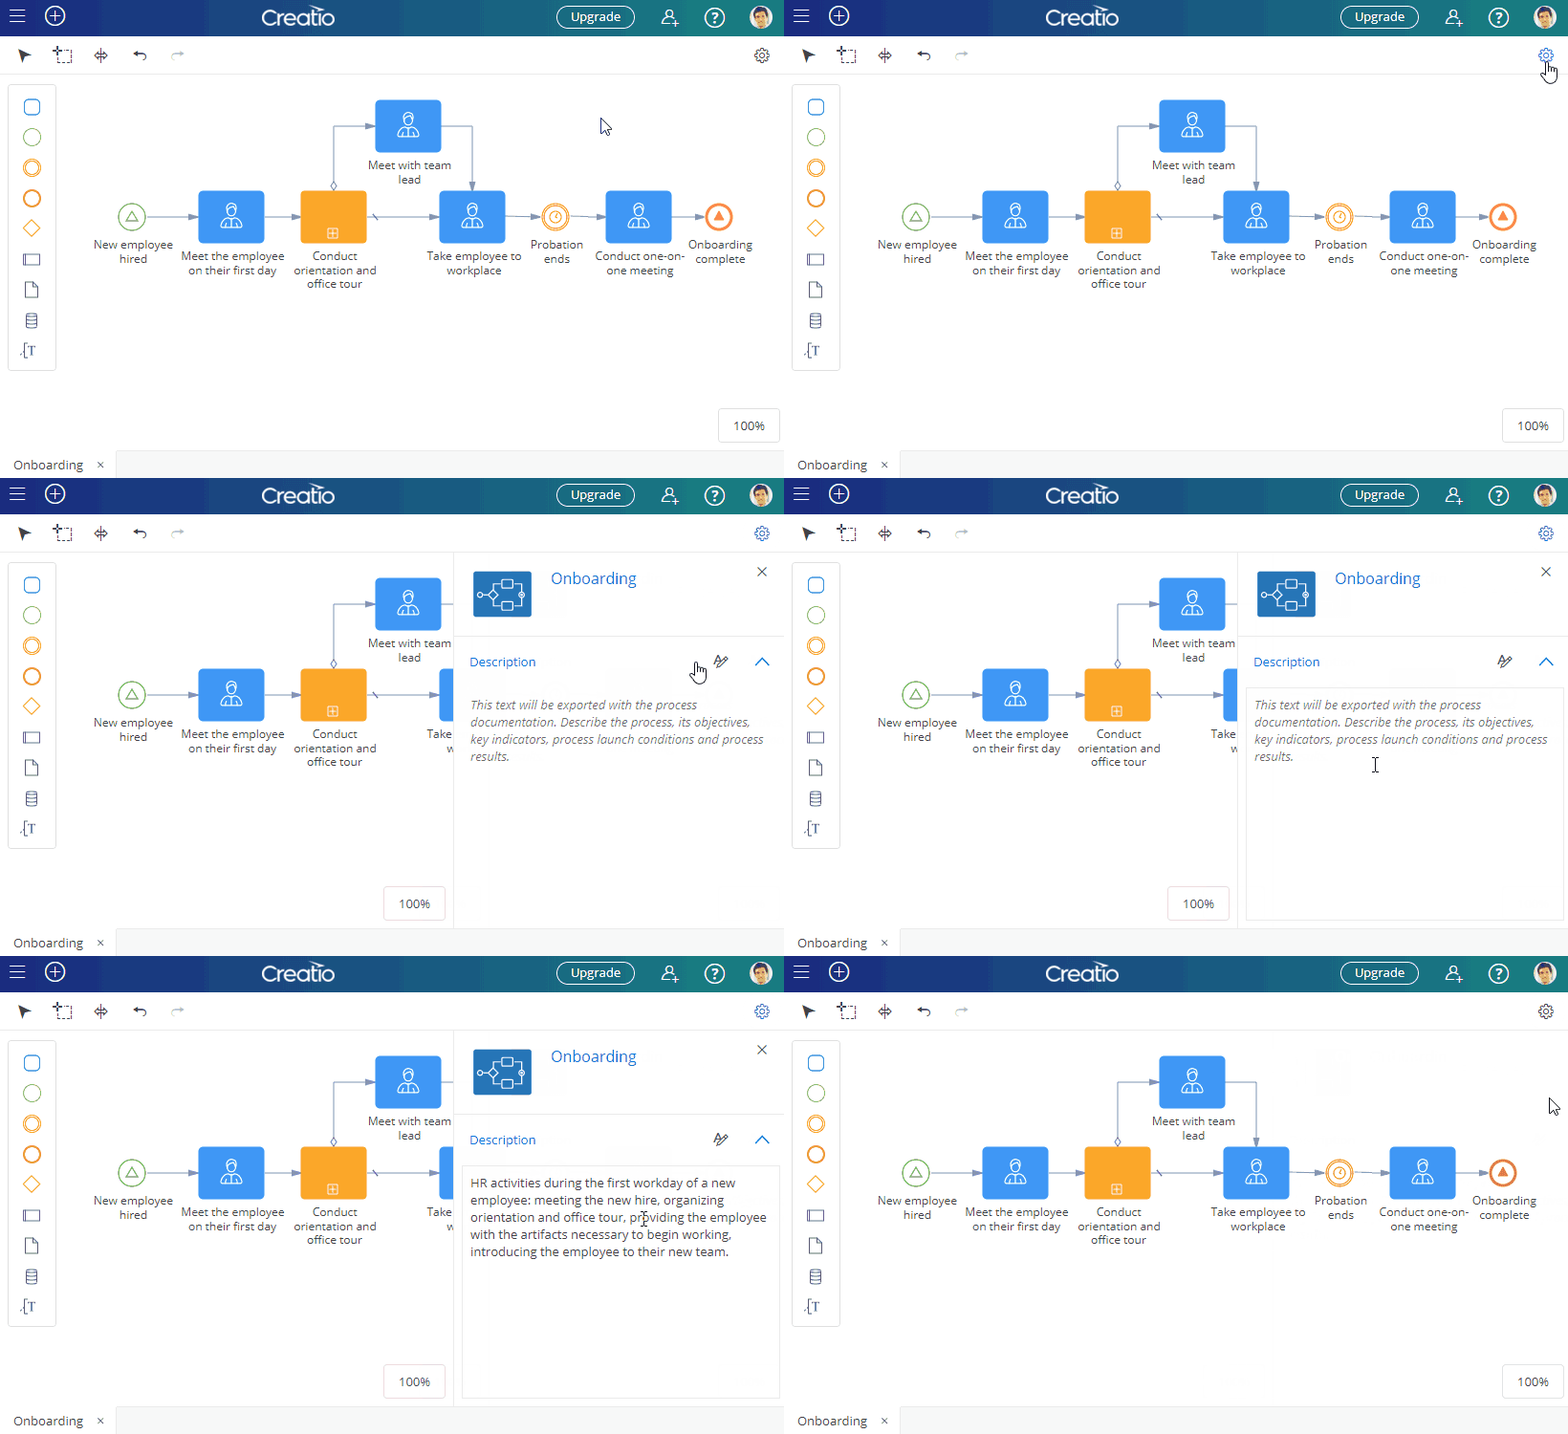
Make sure that you populate a description for the process and each of its elements. Description normally explains what happens when the element is executed as part of the process flow.
You can open the settings toolbar in the following ways:
- Double-click an element to open its setup area. If you double-click the empty process designer working area, the process setup area will open.
- Click on the top right side of the Process Designer window to open the setup area of the currently selected element. If no elements are selected, the process setup area will open.
Add lanes
Swimlanes are a means of organizing elements on the diagram. They usually denote different process participants, as well as organize and categorize activities. You can add swimlanes at any time, but it is generally recommended to map them first and add other elements on the needed pool/lane, to exclude rearranging existing process steps.
- To add a
 pool, drag it to the designer working area from the element toolbar.
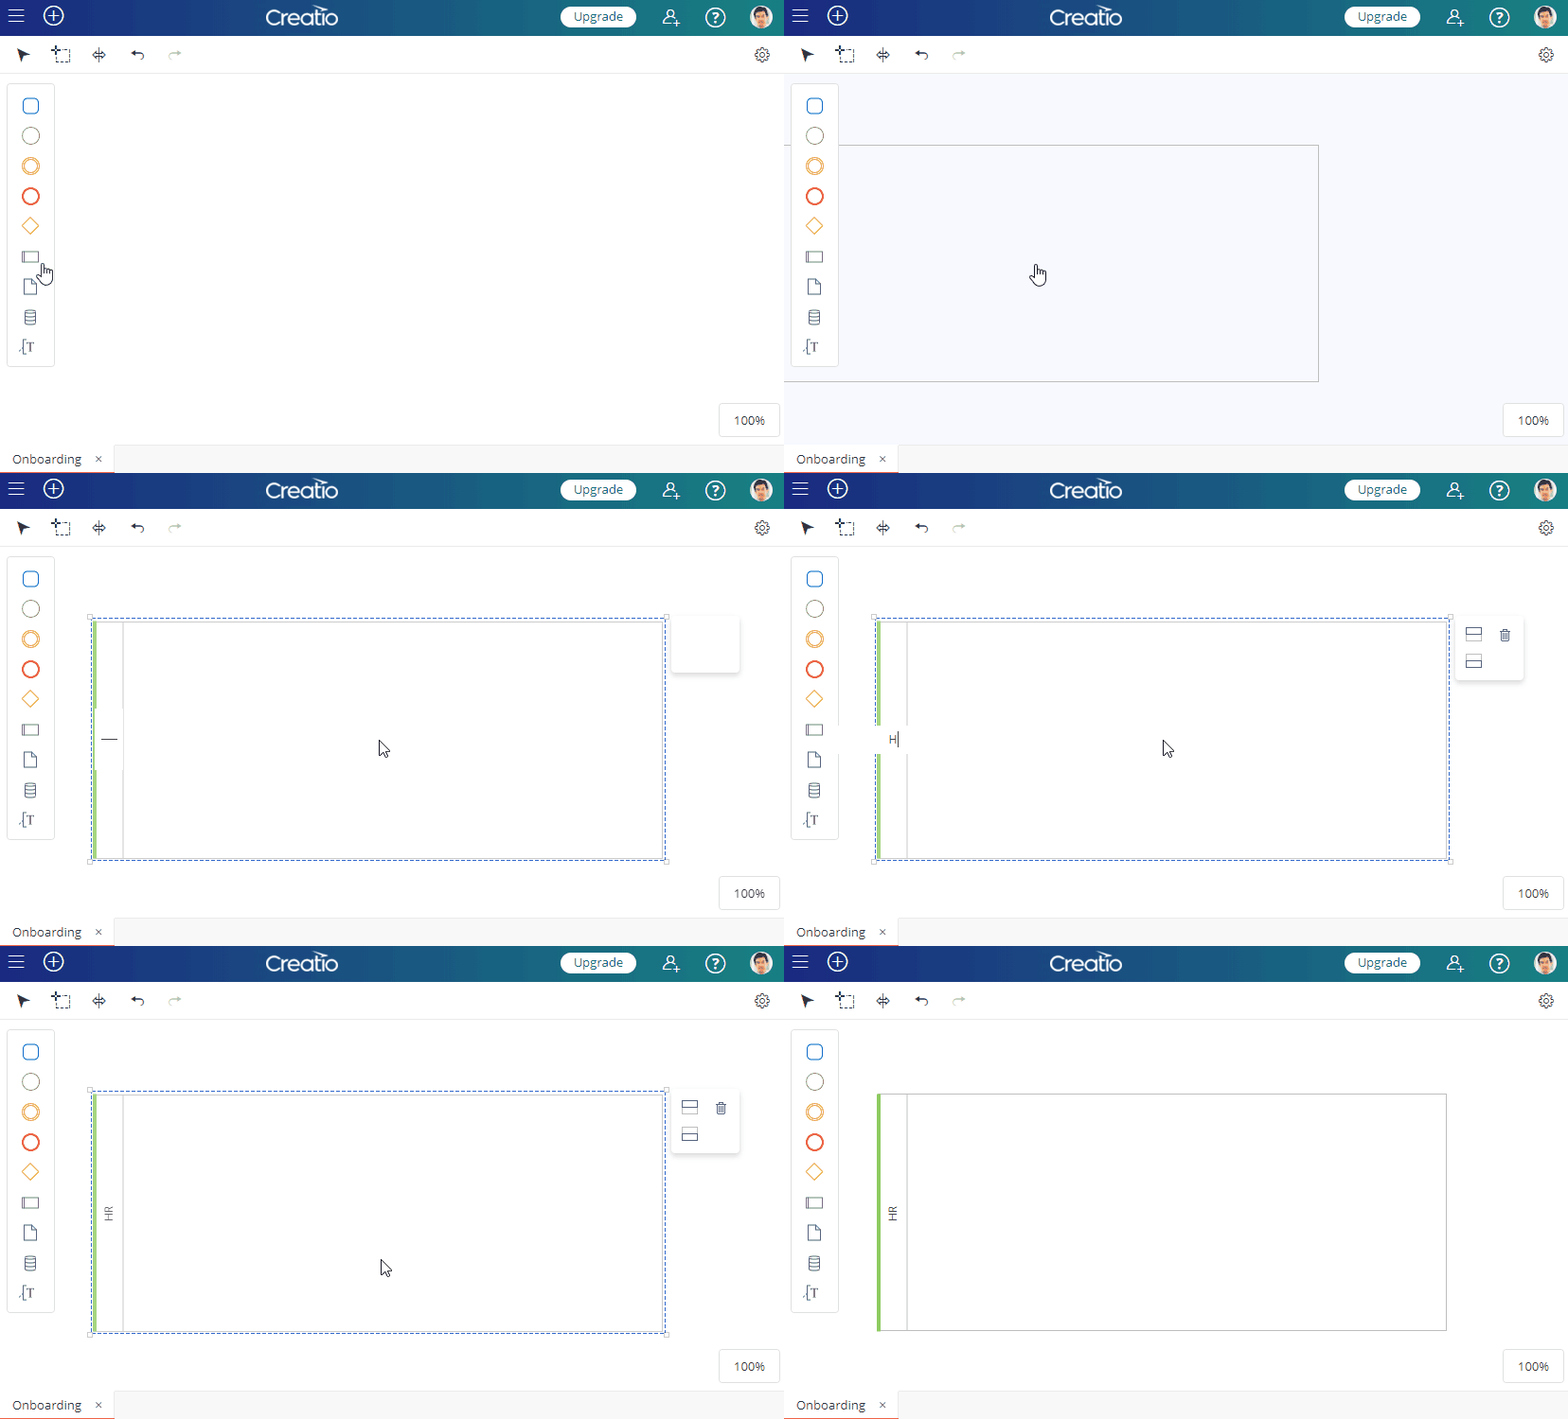
- To add a lane, select a pool on the diagram and click
 or
or  . A lane will be added to the selected pool in the corresponding position.
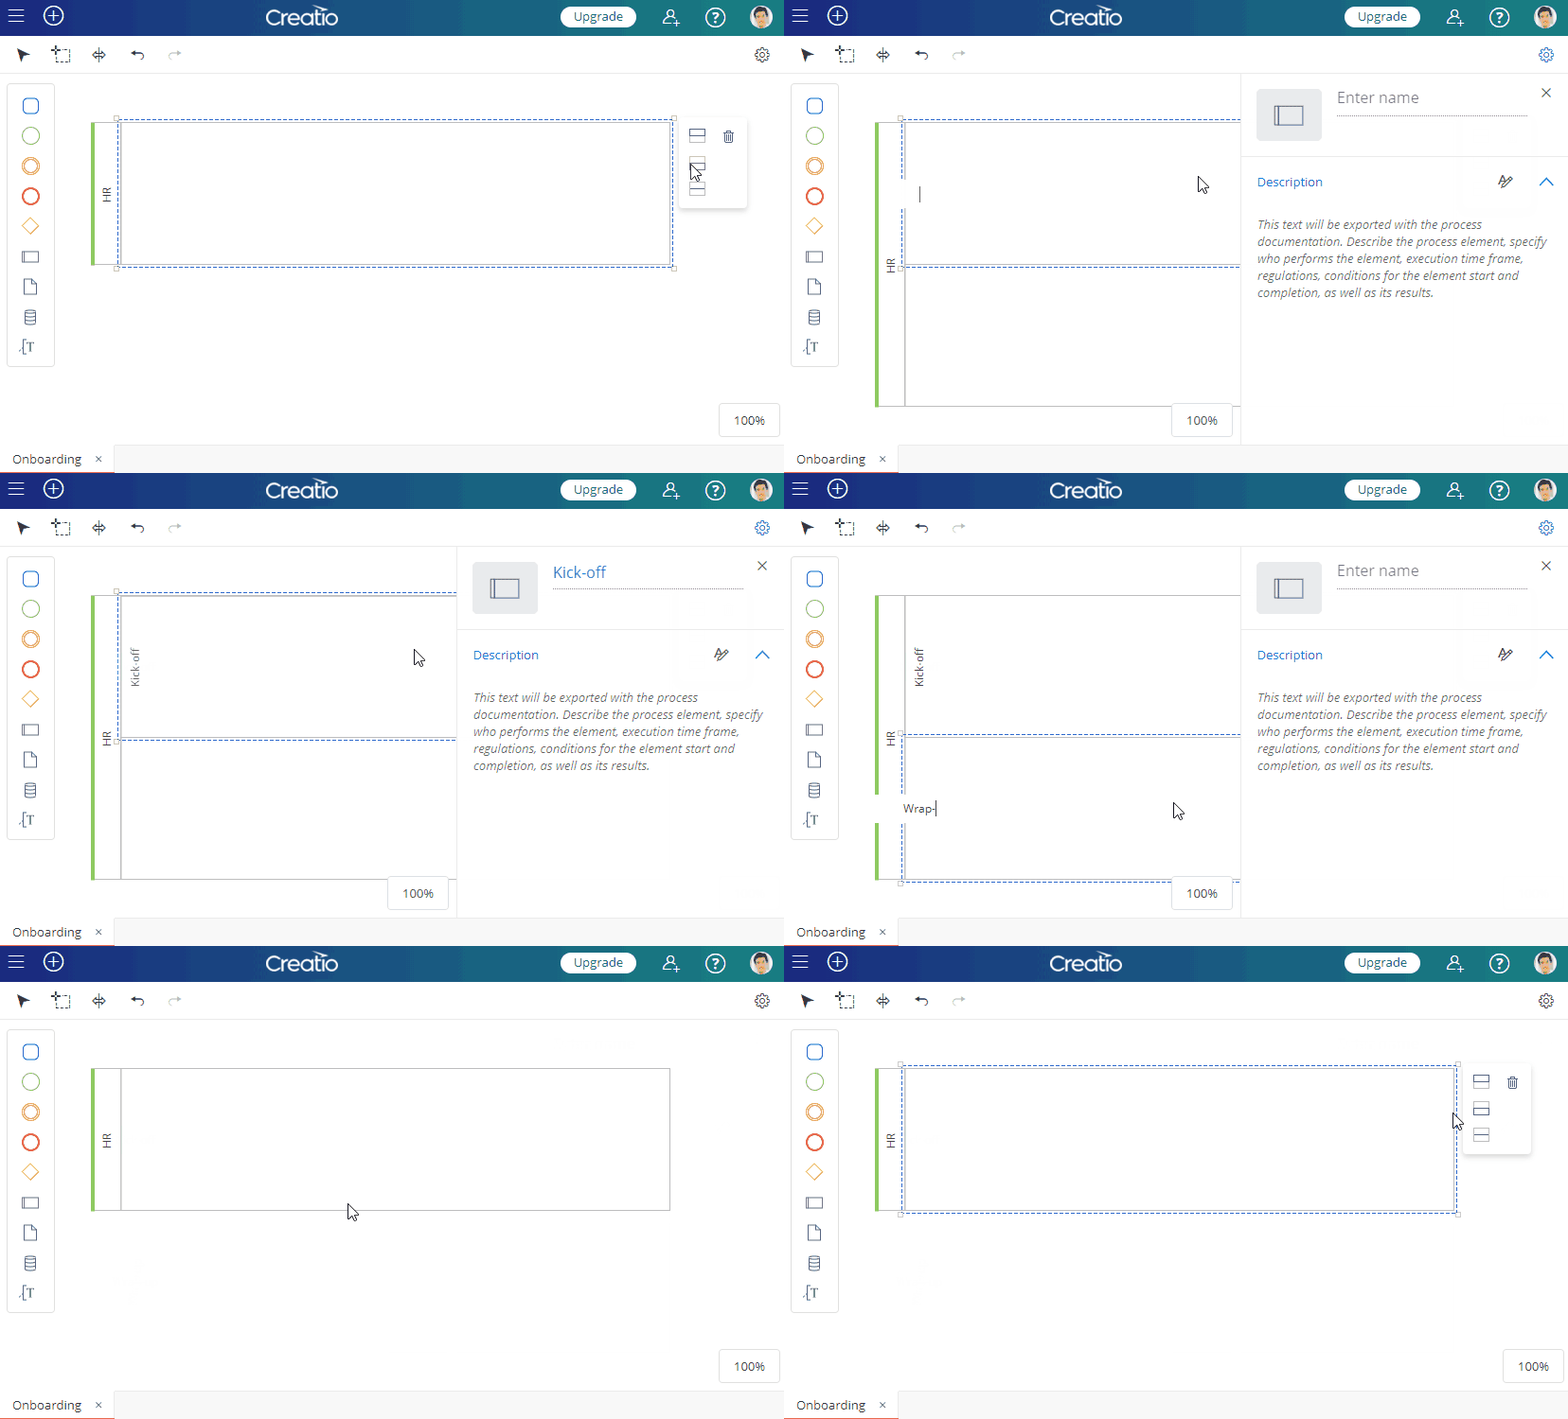
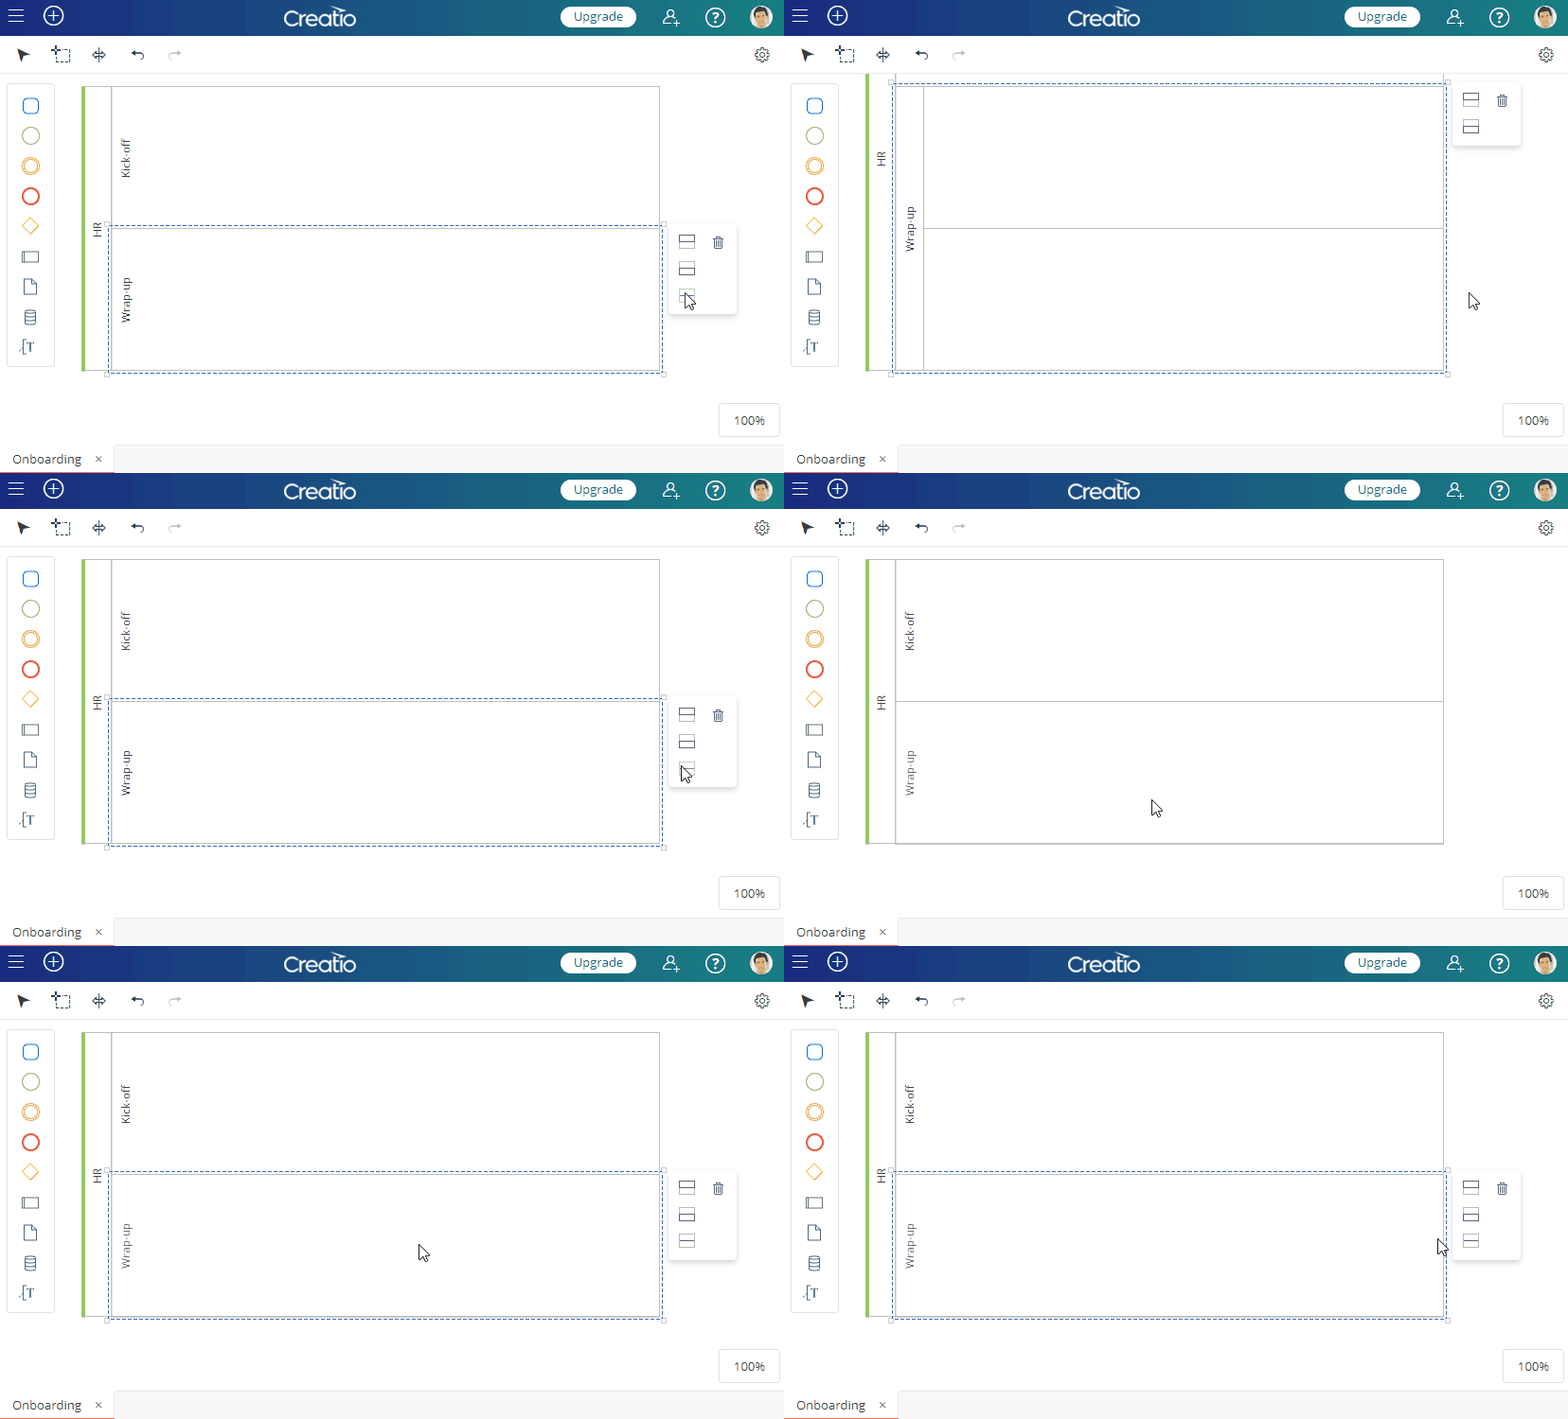
- To split a lane in two, select the lane and click
 .
.
Select and move elements
Use the  Lasso tool to select several elements at once. Selected elements can be moved, copied (Ctrl + C), or deleted (Del).

Use  Space tool to shift all elements on the diagram left/right or up/down. This tool applies to all elements to the right or left from the cursor – when shifting elements horizontally. Likewise, when shifting elements vertically, the tool will apply to all elements above the cursor (when shifting upwards) and all elements below the cursor (when shifting the elements downward).

The  Arrow tool is the default mode in which you work with the elements on the working area. Use the toolbar to switch the cursor back to Arrow after using Lasso or Space tool.

Drag&drop the working area canvas to navigate large diagrams. Use the mouse wheel while holding down the Ctrl key to zoom. Use the zoom menu to restore default zoom and alignment.

Use the mini-map for fast diagram navigation.
