Setting up page details and field groups
Using the page designer, you can add new details on the page, edit or delete the existing ones, define the order of display.
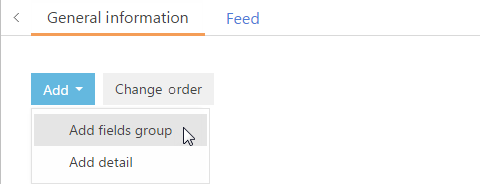
To add a detail or a field group on the page, open the tab where the detail should be located, and from the [Add] button menu select the option to add a detail or a field group (Fig. 199).
Fig. 199 Adding a field group on a tab
Adding a field group on the page
To make working with page information easier, the page fields can be combined into groups. For example, the record of the [Accounts] section contains the [Categorization] field group used to categorize companies by various parameters.
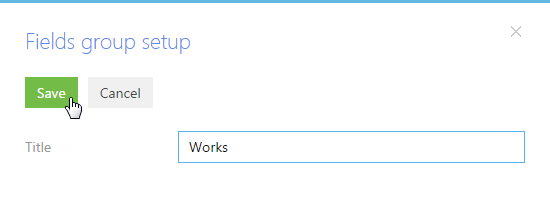
From the [Add] button menu of the needed tab, select the [Add fields group] option (Fig. 199). In the opened fields group setup window, enter the name for the group of fields and click the [Save] button (Fig. 200).
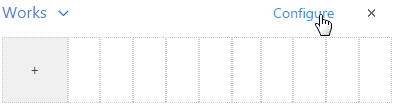
As a result, the empty fields setup area will be added on the tab. Use the  button menu to add the needed fields.
To rename the field group, click the [Configure] button (Fig. 201). In the opened window, enter a new caption and save changes.
Fig. 201 Renaming a field group
To delete a field group, click the [x] button of the detail toolbar. You can also delete a field group by clicking the [x] button in front of the needed field group in the field group order setup window.
Adding details to a page
To add and customize details, use the detail wizard.
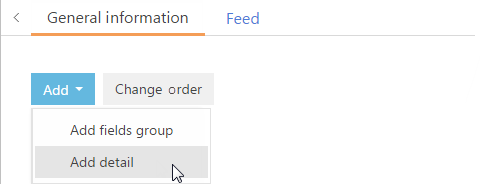
To display a detail on the page, open the tab where the detail should be located, and from the [Add] button menu, select the [Add detail] option (Fig. 202).
Fig. 202 Adding a detail to the page tab
The detail setup window will open (Fig. 203).
Fig. 203 The detail setup window
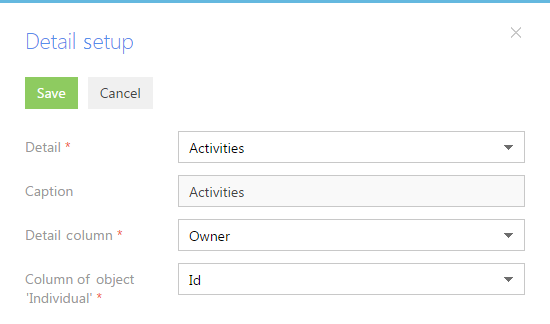
[Detail] – from the list of available details, select the detail you want to add on the page.
[Caption] – detail name. This is a non-editable field.
[Detail column] – column of the object by which it is connected to the object of the current section. For example, the [Activity] object can be connected to the [Contact] object by the [Author], [Owner], and [Contact] columns. If the object can be connected to the object of the current section only by one field, the field is filled in automatically with this column.
[Column of object...] – column of the section object by which it is connected to the detail object. For example, the [Id] column is specified for the [Contact] object.
As a result, a new detail will be added to the page. This detail will display the list of records of the object specified in the [Detail] field. The list will display only the records whose values in the column specified in the [Detail column] field correspond to the values of the section object column specified in the [Column of object...] field.
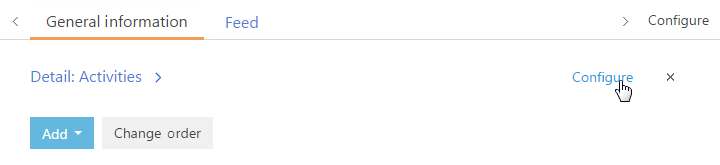
To change the settings of the current detail, click the [Configure] button of the detail toolbar (Fig. 204).
Fig. 204 Setting up parameters of the existing detail
To delete a field group, click the [x] button of the detail toolbar. You can also delete the detail by clicking the [x] button in front of the needed detail in the detail order setup window.
Changing display order for field groups and details
To change the display order of details on a page, click the [Change order] button of the detail setup area. A window will open, where you can set up the display the order for details and field groups. It will display the list of all details and field groups added on the tab. The window functionality is identical to that of the tabs setup window.
See also