Domain verification for the SendGrid provider
If you use SendGrid for sending marketing emails, you will need to verify your email address and your corporate domain to allow the provider to send emails on your behalf.
If your recipients use Microsoft Outlook, Hotmail, Gmail, and other common mailing services, they can see that an email was sent from your provider's server on your behalf (this information is available in the "From" field). For example, if you are sending emails via SendGrid, the "From" field of the emails may contain the following text: "Your Manager <info@creatio.com> via sendgrid.net".
The procedure for domain verification for SendGrid consists of several stages:
- Add your corporate domain on the Bulk email settings page. Read more >>>
- Obtain MX-, SPF-, and DKIM records. Read more >>>
- Create a DMARC record. Read more >>>
- Specify the needed records in the DNS area of your domain Read more >>>
Only custom email domains can be verified. Public domains (for example, gmail.com, yahoo.com, etc.) cannot be verified. We do not recommend using public domains for bulk emails. Such emails have a high risk of being marked as spam and ruining the reputation of the sender IP address.
Add your corporate domain on the Bulk email settings page
SendGrid users need to add their corporate domain to Creatio before starting their emails. To do this:
-
In the Emails section, select Bulk email settings in the Actions menu (Fig. 1)
Fig. 1 Opening the bulk email settings page 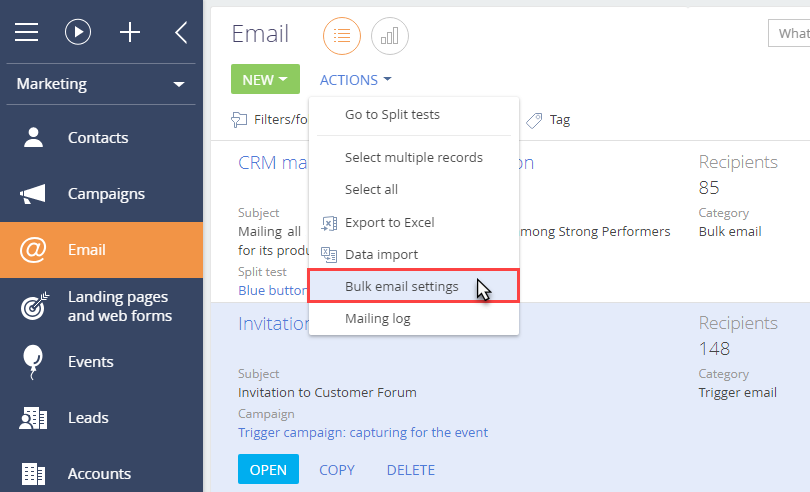
-
On the Bulk email settings page, specify the domain of the necessary email address in the Sender domain area, i.e., "mycompany.com" (Fig. 2).
Fig. 2 The Sender domains tab 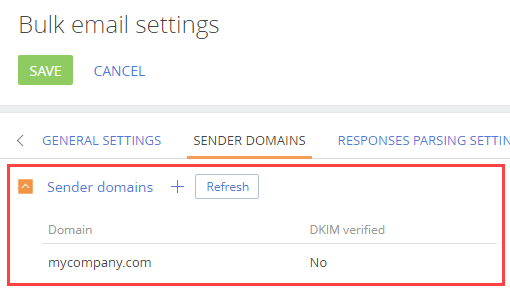
Get setup keys for your domain
MX-, SPF- and DKIM records are generated automatically in the Email section once the domain is added to the email settings page. To obtain these records, in the Email section, select Email settings in the Actions menu.
The SPF and DKIM records will be generated automatically in the DKIM/SPF setup instructions area on the Bulk email settings page (Fig. 3) for your specified domain once your email is verified.
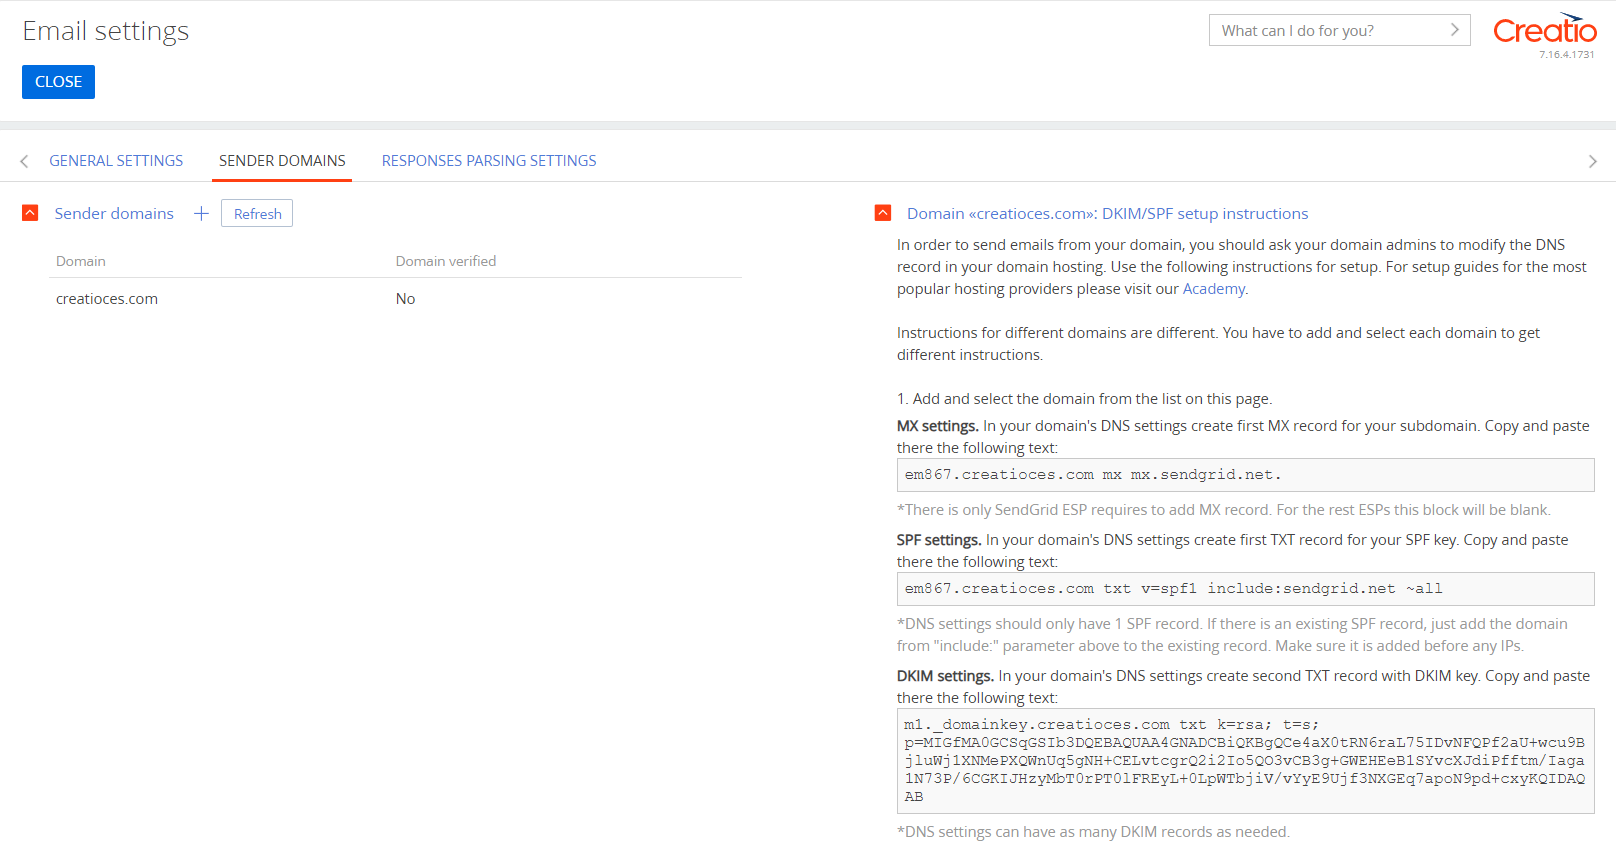
MX-, SPF- and DKIM records of the SendGrid provider are different for different domains.
Create a DMARC record
Since February 2024, Google and Yahoo implemented new email authentication requirements for all email senders to improve deliverability and prevent spam. Besides SPF and DKIM records, DMARC record is also required.
Creatio does not require a DMARC record to validate a domain. Analyze your marketing strategy and decide whether a DMARC record is required in your case, for example, if you have a lot of recipients that use Yahoo.
A DMARC record follows this pattern:
v=DMARC1; p=quarantine; rua=mailto:user@domain.com; ruf=mailto:user@domain.com;
Configure the exact parameters based on your business goals. View them in the table below.
Parameter name | Parameter value |
v | Indicates the DMARC version used. Required. Set it to |
p | Determines how to handle messages that fail DMARC authentication. Required. The following values are available:
The exact mode to use depends on your business goals. However, if you want to use a stricter mode, we recommend using less strict modes first to ensure legitimate emails are not blocked inadvertently. |
rua | Specifies the email address to send aggregate reports that let you gain insights into the authentication status of your domain's emails. Optional. |
ruf | Specifies the email address to send forensic reports. Optional. |
Add records to the DNS area of your domain
To verify the mail domain using the SendGrid provider, you need to add the MX, SPF to the DNS area of the mail domain settings, otherwise, the domain reputation and the mail delivery quality are not guaranteed.
We recommend looking into the examples provided in the Recommendations on setting up the popular DNS providers article.
Specify MX record in the DNS area of your domain
MX record is the primary record in the domain zone; it specifies mailing host names of the domain. The email server checks if MX records are available in the DNS zone and whether they match the sender’s IP address. If the data is unavailable or the IP addresses do not match, the remote server is very likely to deny sending and receiving emails.
Unlike SPF and DKIM records, the syntax of MS records includes priorities. Priority is specified as an integer; it indicates the order in which the availability of email servers is checked. The highest possible priority is "0." You can add several MS records with equal priority.
An MX record looks like this:
Name | Priority | Type | Value |
|---|---|---|---|
subdomain.yourdomain.com | 0 | mx | mx.sendgrid.net. |
The subdomain name is unique and is generated by the provider.
Specify SPF record in the DNS area of your domain
Copy the generated SPF record from the DKIM/SPF setup instructions area on the Bulk email settings page, which will look as follows: The record will look as follows:
Name | Type | Value |
|---|---|---|
subdomain.yourdomain.com | TXT | v=spf1 a mx include:_spf.sendgrid.com ~all |
The subdomain name is unique and is generated by the provider. Add a separate record for each subdomain.
Specify DKIM record in the DNS area of your domain
After the configuration of the SPF record, you need to add DKIM records. For the SendGrid provider, the record must look like this:
Name | Type | Value |
|---|---|---|
m1._domainkey | TXT | k=rsa; t=s; p=XXXXXXXXXXXXX |
In the record above, "XXXXXXXXXXXXX" is an individual key for each domain. The key is generated automatically and is available on the Sender domains tab.
Certain DNS settings may require entering the provided subdomain in the "Host / Name" field in the following format: "m1._domainkey.yourdomain.com"
Detailed information about MX, SPF, and DKIM record setup is available in the SendGrid online guide.
Specify DMARC record in the DNS area of your domain
If your business goals require it, add the DMARC record you created. The record must look as follows:
Name | Type | Value |
|---|---|---|
_dmarc | TXT | v=DMARC1; p=quarantine; rua=mailto:user@domain.com; ruf=mailto:user@domain.com; |