Set up the mobile portal
Mobile portal (mobile application for portal users) is a mobile workplace. The purpose of the mobile portal is to enable the mobile portal users to create cases and communicate with customer support.
A mobile portal has configurable:
- mobile portal user workplace
- case list
- case page
- page that adds cases
Add base package schema to the user-made package
If you are yet to perform the setup using the Mobile application wizard, the base package schema might not be available in the user-made package.
To add base package schema to the user-made package:
- Click
 to open the System Designer.
 - Go to the System setup block → Mobile application wizard.
- Open the Portal workplace in the section list.
- Click Set up sections on the toolbar.
- Select the Cases section in the section list and click Page setup.
- Save the settings of the Cases section page.
- Save the settings of the Mobile application wizard section.
Set up the workplace of a mobile portal user
You can set up the workplace of a mobile portal user in the following ways:
- Add a new workplace.
- Hide a workplace.
- Delete a workplace.
Add a workplace of a mobile portal user
To check if the Portal workplace is available:
- Click to open the System Designer.
- Go to the System setup block → Mobile application wizard.
The Portal workplace is in the Mobile application wizard section. By default, all mobile portal users can access the workplace.
If the Portal workplace is not available in the Mobile application wizard section, add the workplace.
To add a workplace of a mobile portal user:
-
Make sure that your Creatio application includes the mobile portal functionality.
-
Click
to open the System Designer. -
Go to the System setup block → Mobile application wizard.
-
Click New workplace in the Mobile application wizard section toolbar.
-
Fill out the workplace properties.
- Set Name to the workplace name.
- Set Code to "Portal."
-
Configure the access permissions to the workplace for users or user groups on the Roles detail. Learn more: Object operation permissions.
-
Click Set up sections on the toolbar. By default, the workplace of a mobile portal user includes the Cases section.
-
Save the settings of the Mobile application wizard section.
As a result, Creatio will add a workplace of a mobile portal user.
Learn more about adding a workplace to a mobile application: Set up mobile app workplaces.
Hide the workplace of a mobile portal user
- Click to open the System Designer.
- Go to the System setup block → Mobile application wizard.
- Open the Portal workplace in the section list.
- Delete users or user groups of the Portal workplace. To do this, click
 and select Delete on the Roles detail.
As a result, Creatio will hide the workplace of a mobile portal user.
Delete the workplace of a mobile portal user
- Click to open the System Designer.
- Go to the System setup block → Mobile application wizard.
- Select the Portal workplace in the section list and click Delete.
As a result, Creatio will delete the workplace of a mobile portal user.
Set up the case list
You can set up the case list of a mobile portal in the following ways:
- Add a column to the case list.
- Make a case list column searchable.
- Hide the column title from the case list.
- Change the case sorting order in the list.
Add a column to the case list
- Click to open the System Designer.
- Go to the System setup block → Mobile application wizard.
- Open the Portal workplace in the section list.
- Click Set up sections on the toolbar.
- Select the Cases section in the section list and click List setup.
- Click the New column button in the Subtitle or Additional columns block and select the required column.
- Save the list settings in the Cases section.
- Save the settings of the Mobile application wizard section.
As a result, Creatio will add a column to the case list. However, the column will not be searchable. To make the case list column searchable, follow the instructions in different section: Add a searchable column to the case list.
Learn more about adding a column to the section list: Set up mobile application section list.
Make a case list column searchable
Number and Description columns of the case list are searchable. You can make other columns searchable as well. To do this, add the columns to the MobileCaseGridPageSettingsPortal schema.
To make a case list column searchable:
-
Open the
MobileCaseGridPageSettingsPortalschema in the user-made package. If you are yet to set up the case list using the Mobile application wizard, theMobileCaseGridPageSettingsPortalschema will not be available in the user-made package. To add theMobileCaseGridPageSettingsPortalschema to the user-made package, follow the instructions in a different section: Add a base package schema to the user-made package. -
Make a case list column searchable.
Add a
mergeoperation of thediffV2property. This will let you add any operation that modifies metadata to the property as a string.The example below makes the
[Subject]column of the case list searchable in Creatio.Example of the searchExpressions property setup[{"operation": "merge","name": "settings","values": {"diffV2":"[{\"operation\":\"insert\",\"name\":\"Case_Controller_SearchExpression_Subject\",\"parentName\":\"Case_Controller\",\"propertyName\":\"searchExpressions\",\"values\":{\"leftCondition\":\"Subject\"}}]"}}...]This example adds the
[Subject]column settings to the current search settings in thesearchExpressionsproperty. -
Click Save on the Module Designer’s toolbar.
As a result, Number, Description, and Subject columns of the case list will be searchable.
Hide the column title from the case list
-
Open the
MobileCaseGridPageSettingsPortalschema in the user-made package. If you are yet to set up the case list using the Mobile application wizard, theMobileCaseGridPageSettingsPortalschema will not be available in the user-made package. To add theMobileCaseGridPageSettingsPortalschema to the user-made package, follow the instructions in a different section: Add base package schema to the user-made package. -
Hide the column title from the case list.
Add the configuration object of the column whose title to hide to the beginning of the
diffV2array of modifications.- Specify the column in the
nameproperty. Column name template is as follows:ObjectName_ListItem_Subtitle_ColumnName. - Set the
visibleproperty tofalse. Thevisibleproperty specifies whether to display the column title.
The example below hides the
[Status]column title in Creatio.Example of the values property setup[{"operation": "merge","name": "settings","values": {"diffV2":"[{\"operation\":\"merge\",\"name\":\"Case_ListItem_Subtitle_Status\",\"values\":{\"label\":{\"visible\":false}}}]"}}...]Case_ListItem_Subtitle_Statusis the value of thenameproperty of the[Status]column in theCaseobject in Creatio. - Specify the column in the
-
Click Save on the Module Designer’s toolbar.
As a result, Creatio will hide the column title from the case list.
Change the case sorting order in the list
-
Open the
MobileCaseGridPageSettingsPortalschema in the user-made package. If you are yet to set up the case list using the Mobile application wizard, theMobileCaseGridPageSettingsPortalschema will not be available in the user-made package. To add theMobileCaseGridPageSettingsPortalschema to the user-made package, follow the instructions in a different section: Add base package schema to the user-made package. -
Change the sorting order in the case list.
Add the configuration object that contains the list display settings to the beginning of the
diffV2array of modifications.- Specify the column to use for sorting in the
nameproperty. Column name template is as follows:ObjectName_Model_Column_ColumnName. - Specify the sorting order in the
orderDirectionproperty:1for ascending,2for descending. - Use the
orderPositionproperty to specify the index of the column in the column collection to use for sorting.
The example below changes the case list sorting in Creatio. The cases in the list are sorted by the
[RegisteredOn]column in ascending order.Example of the values property setup[{"operation": "merge","name": "settings","values": {"diffV2":"[{\"operation\":\"merge\",\"name\":\"Case_Model_Column_RegisteredOn\",\"values\":{\"orderDirection\":1}}]"}}...]Case_Model_Column_RegisteredOnis the value of thenameproperty for the[RegisteredOn]column in theCaseobject in Creatio. - Specify the column to use for sorting in the
-
Click Save on the Module Designer’s toolbar.
As a result, Creatio will display cases sorted in the specified order in the list.
Set up the case page
Set up the case page to add a column to the Details tab.
To add a column to the Details tab of the case page:
- Click to open the System Designer.
- Go to the System setup block → Mobile application wizard.
- Open the Portal workplace in the section list.
- Click Set up sections on the toolbar.
- Select the Cases section in the section list and click Page setup.
- Click New column in the General information block and select the Number column.
- Save the settings of the Cases section page.
- Save the settings of the Mobile application wizard section.
Columns of the Details tab are read-only.
Set up the page that adds cases
You can add a column to the page that adds cases.
To add a column to the page that adds cases:
-
Create a schema of the case page module.
-
Open the
MobileCaseMiniPagePortalschema of theCaseMobilepackage and copy its contents. -
select a user-made package to add the schema.
-
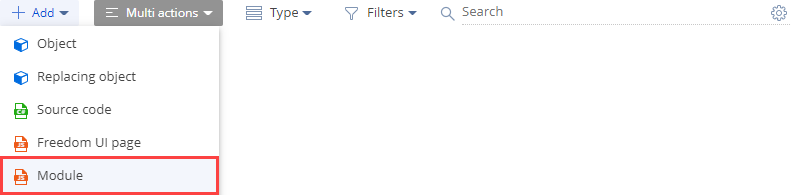
Click Add → Module on the section list toolbar.
-
Fill out the schema properties.
- Enter the schema name in the Code* property. The name must start with the prefix specified in the Prefix for object name (
SchemaNamePrefixcode) system setting,Usrby default. Can contain Latin characters and digits. When you create a schema, Creatio adds the prefix specified in the Prefix for object name (SchemaNamePrefixcode) system setting to the current field automatically. Creatio checks whether the prefix exists and matches the system setting when you save the schema properties. If the prefix does not exist or does not match, Creatio sends a corresponding user notification. - Enter the localizable schema title in the Title* property. The schema title is generated automatically and matches the value of the Code property without a prefix.
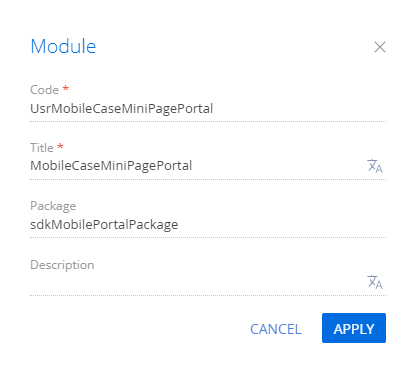
- Enter the schema name in the Code* property. The name must start with the prefix specified in the Prefix for object name (
-
Add the copied contents of the
MobileCaseMiniPagePortalschema of theCaseMobilepackage to the custom module. -
Move the localized strings of the
MobileCaseMiniPagePortalschema of theCaseMobilepackage to the custom module. -
Add a column.
-
Specify the column in the
valueproperty of theviewConfigconfiguration object. Column name template is as follows:$ColumnName.The example below adds the
[$ConfItem]column in Creatio.Example that adds the column to the viewConfig property{"operation": "insert","name": "CaseAddCardConfItem","values": {"type": "EditField", "properties": {"value": "$ConfItem"}},"parentName": "CaseAddCardBody","propertyName": "items","index": 2},$ConfItemis the column name in Creatio. -
Add the description of the required column to the
controllersproperty. Use thecolumnPathproperty to specify the name of the schema column of theCaseobject.The example below adds the description of the
[ConfItem]column in Creatio.Example that adds the column to the controllers property{"operation": "insert","name": "CaseModelConfItemColumn","values": {"expression": {"columnPath": "ConfItem", "expressionType": 0}},"parentName": "CaseModel","propertyName": "columns","index": 3},
-
-
Click Save on the Module Designer’s toolbar.
-
Register the earlier created
UsrMobileCaseMiniPagePortalcustom schema in the portal workplace manifest.-
Open the
MobileApplicationManifestPortalschema in the user-made package. If you are yet to set up the app using the Mobile application wizard, theMobileApplicationManifestPortalschema will not be available in the user-made package. To add theMobileApplicationManifestPortalschema to the user-made package, follow the instructions in a different section: Add base package schema to the user-made package. -
Register the schema.
- Specify the schema used to add the schema record of the
Caseobject in theModulesschema section. - Specify the schema used to extend the schema of the
Caseobject in theModelsschema section.
The example below registers the
UsrMobileCaseMiniPagePortalschema.Example of the Modules and Models schema sections setup{...,"Modules": {"Case": {..."screens": {..."add": {"schemaName": "UsrMobileCaseMiniPagePortal"}...}...}...},"Models": {"Case": {..."PagesExtensions": ["UsrMobileCaseMiniPagePortal"]}...},...} - Specify the schema used to add the schema record of the
-
-
Click Save on the Module Designer’s toolbar.
See also
Set up mobile application section page