Personalize email content with macros
The functionality is relevant to Classic UI.
You can use macros to add sender's and recipient's personal details (name, job title, etc.) when setting up email templates. When sending an email, the macros will be replaced with the corresponding values of the contact page fields (recipient's or sender's).
You can add macros to the email's header and preheader, sender's name and sender's email as well as the email's subject and body. It is also possible to personalize the email images with macros.
You can use:
-
Basic macros. They let you add data from the recipient's or the sender's contact profile to the template. For example, you can add their full name, job title, etc.
-
Custom macros. They let you add data from the records connected to the recipient's or the sender's contact profile. For instance, you can add an account name from the relevant contact page.
-
Linked entity macros. They let you add data from the linked object's records to the template. For example, you can add the relevant content (a link to the recorded webinar, an event location, etc.) by adding a linked entity macro based on the "Event participants" linked object.
Macro formatting guidelines
Macro formatting in Creatio might differ from external email builders. Emails that contain incorrectly formatted macros will not be sent. To ensure your macros are formatted correctly, follow these guidelines:
- Enclose macros only in square brackets. For example, [#value#].
- Divide tables and fields in macro paths only using periods. For example, [#Table.Table.Field#].
- Define the path to the required field only via linked Creatio entities.
- Use only Creatio object codes as table or column IDs.
Add a basic macro
Add a salutation for the recipient to the email text.
-
Open the email template in the Content Designer.
-
Click the template text in the area where you would like to place the macro.
-
Click
 → Basic macro in the toolbar above the text.
 -
Select the "Salutation" macro in the "Recipient" group and click Select.
-
Save the template
-
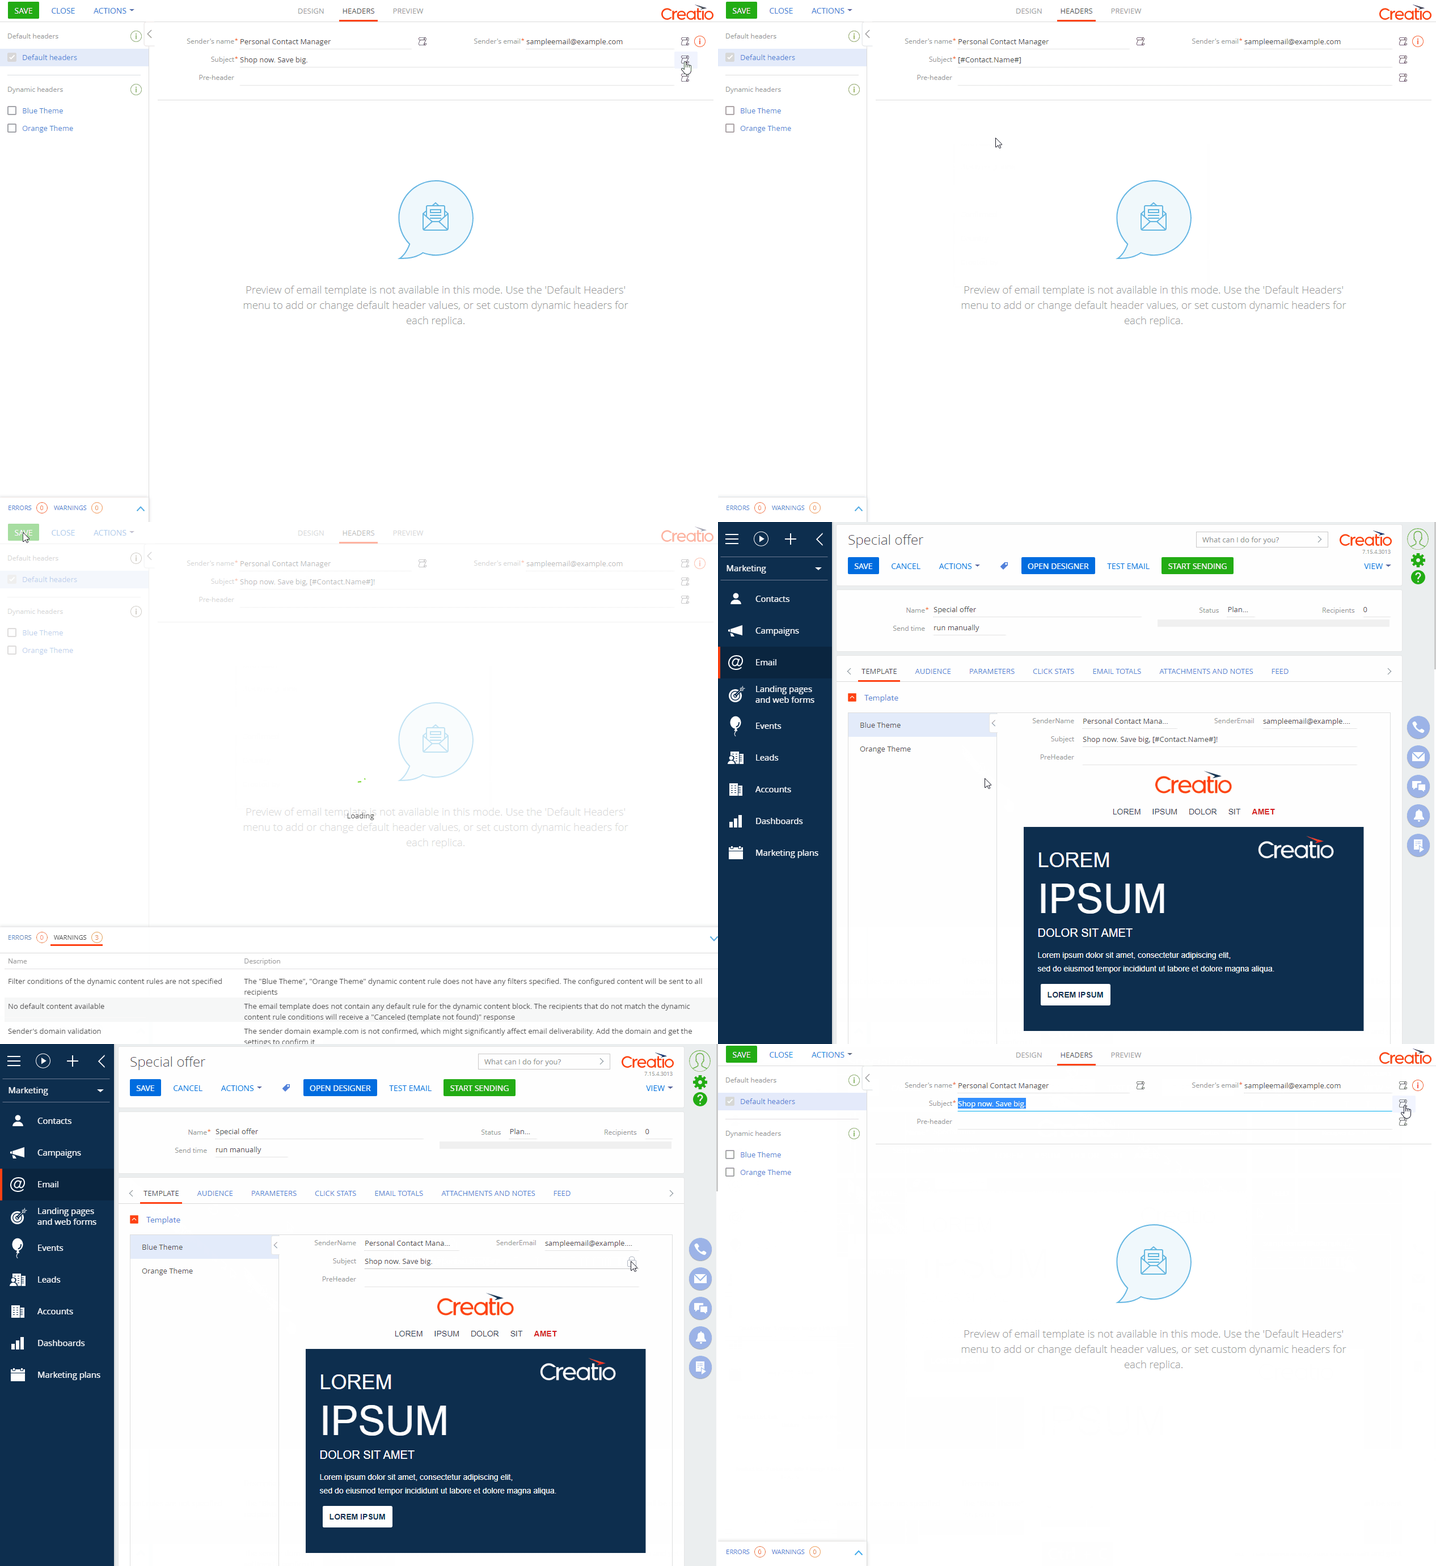
This will add #Recipient.Title# macro to the relevant area of the email. When sending the email, the macro will be replaced with the value of the Recipient’s name field on the recipient's contact page (Fig. 1).
Fig. 1 Adding macros to the email subject 
Common email template macros
Macro | Definition |
|---|---|
#Unsubscribe.URL# | Adds the unsubscribe function as a direct link (e.g., "http://www.mysite.com/act/unsubscribe") to the unsubscribe page. |
#Recipient.Contact name# | The recipient's first and last name |
#Recipient.Title# | The recipient's honorifics, for example, "Mr" or "Mrs". |
#Recipient.Salutation# | The usual way to greet the recipient, taken from the contact's Recipient's name field. For instance, "Wilson". |
#Owner.Contact name# | Last name, first name and honorific (if available) of the employee responsible for the email. |
#Owner.Salutation# | The usual way to greet the employee, taken from the contact's Recipient's name field. For example, "Wilson". |
#Owner.Business phone# | The communication options of the employee responsible the email. |
#Owner.Mobile phone# | |
#Owner.Skype# | |
#Owner.Email# | |
#Owner.Job name# | The general job title of the employee responsible for the email, for example "customer manager". |
#Owner.Job title# | The full job title of the employee responsible for the email, for example "VIP customer manager". |
#Owner.Department# | The company division where the employee responsible for the email works. |
#Owner.Account# | Your company's name. |
#Owner.Account address# | Your company's address. |
#Owner.Account primary phone# | Your company's primary phone number. |
#Owner.Account web address# | Your company's website. |
#Contact.Owner.Name# | The name of the manager of an email participant — the user specified in the Owner field of the recipient's contact. This macro is available only in the Sender's name field of the template header. It lets you send emails on behalf of the employee responsible for each email participant |
#Contact.Owner.Email# | The email of the manager of an email participant — the user specified in the Owner field of the recipient's contact. This macro is available only in the Sender's email field of the template header. It lets you send emails from the email address of the employee responsible for each email participant. |
Add a linked entity macro
Send emails on behalf of the lead's owner.
-
Open the email template in the Content Designer.
-
Click
 in the Sender’s name field. This will open the column selection window.
 -
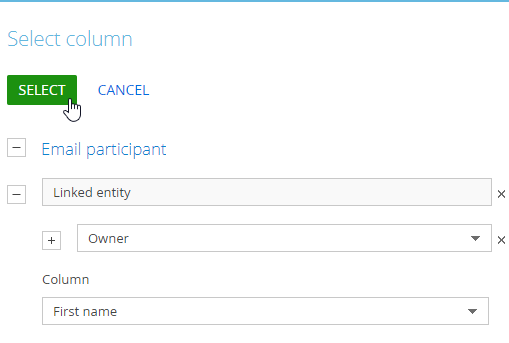
Click + to the left of Email participant field and select Linked entity in the newly-opened dropdown.
noteYou need to specify the linked entity used for email macros in the Audience source field at the top of the email page. You can read more about forming the bulk email audience in the Add bulk email audience article.
-
Click + to the left of Linked entity field and select a connected object in the newly-opened dropdown, for instance, Owner.
-
Specify the connected object's column, for example, First name.
-
Click Select (Fig. 2).
-
Save the template
Fig. 2 Creating a connected object macro 
This will add the #LinkedEntity.Owner.GivenName# macro to the Sender's name field. When sending an email, the macro will be replaced with with the value of the First name field of the connected record (the owner).
You can read more about using linked entity macros when sending test emails in the Send a test email article.