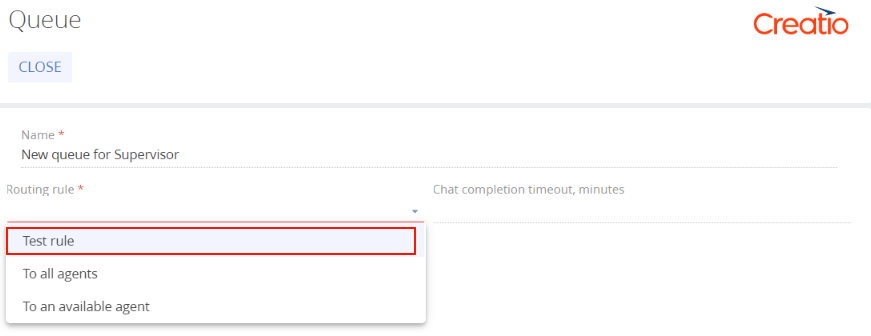
To set up chat routing, select a routing rule from the drop-down list in the queue settings. This determines the mechanism that distributes chats to agents.
View an example that adds a custom distribution mechanism below.
1. Add a new chat routing rule
- Click the
 button to open the System Designer.
 - Go to the System setup block → Lookups.
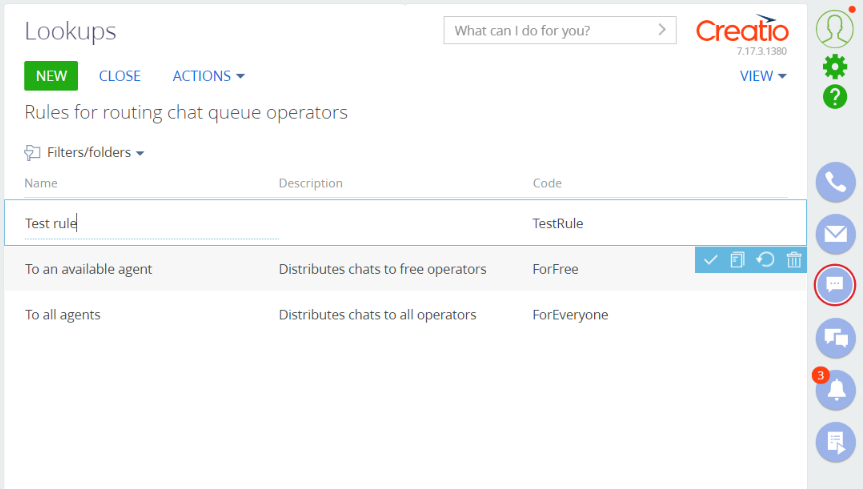
- Use the filter at the top to find the "Rules for routing chat queue operators" lookup.
- Open the lookup content and add a new rule:
- Set Name to "Test rule."
- Set Code to "TestRule."
2. Create a class that implements the IOperatorRoutingRule interface
On this step, you can create a class that inherits from the BaseOperatorRoutingRule class or new class that implements the IOperatorRoutingRule interface.
The BaseOperatorRoutingRule class contains abstract PickUpFreeQueueOperators and GetChatOperator methods you must implement.
Moreover, the BaseOperatorRoutingRule already contains the implementation of the IOperatorRoutingRule interface. View the implementation logic below.
If the chat is already assigned to an agent (the user ID is specified in the [OperatorId] column), select the agent. If the chat is not assigned to an agent, retrieve the agent or agents as List<Guid> using the PickUpFreeQueueOperators method. In this case, Guid are agent IDs in the [SysAdminUnit] table. The agents that have the corresponding IDs receive new chat notifications and can access the chat in the communication panel.
Create a TestOperatorRoutingRule class that implements the basic logic that routes the chat to the system user (Supervisor).
To create a class:
- Go to the Configuration section and select a custom package to add the schema.
- Click Add → Source code on the section list toolbar.
-
Go to the Schema Designer and fill out the schema properties:
- Set Code to "UsrTestOperatorRoutingRule."
- Set Title to "TestOperatorRoutingRule."
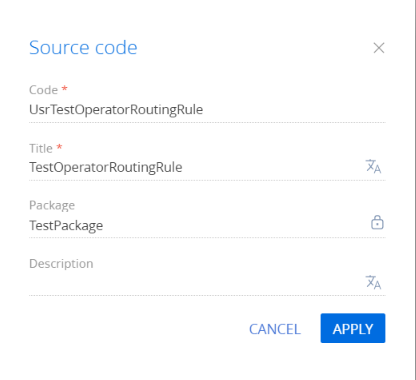
Click Apply to apply the properties.
-
Add the source code in the Schema Designer.
3. Link the interface and lookup rule code
To link the interface implementation and alphabetic code of the rule you specified in the lookup on step 1, create a TestAppEventListener class (inherit the class from the AppEventListenerBase class) and link the interfaces in it.
To create a class:
- Go to the Configuration section and select a custom package to add the schema.
- Click Add → Source code on the section list toolbar.
-
Go to the Schema Designer and fill out the schema properties:
- Set Code to "UsrTestAppEventListener."
- Set Title to "TestAppEventListener."
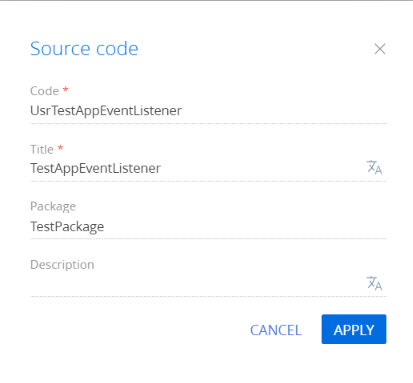
Click Apply to apply the properties.
-
Add the source code in the Schema Designer.
4. Restart Creatio in IIS
Restart Creatio in IIS to apply the changes. After you restart Creatio and select "Test rule" in the queue settings, Creatio will distribute chats based on the specified conditions.