Set up typified app pages
Typified pages is a functionality that lets you use different form pages for a single section based on a lookup value. For example, you can set different form pages for payroll calculation for employees and contractors. The button that adds records displays as many options as the number of typified pages you set up.
If your app is based on Classic UI functionality and includes Classic UI typified pages, users will see both Classic UI and Freedom UI typified pages.
Add typified pages for employees and contractors in both Payroll and Benefits sections of the "Financial benefits" app you created earlier.
Before you set up typified pages, take additional steps:
- Add an Employment type dropdown field connected to custom Employment type lookup to the Financial benefits data source. Learn more: Set up a dropdown field
- Add the following values to the Employment type lookup: "Employee," "Contractor." Learn more: Manage lookup values.
To set up typified pages:
-
Click
 to open the System Designer.
 -
Go to the Application management block → Application Hub.
-
Click the Financial benefits app tile.
-
Open the "Financial benefits list page" page.
-
Select the List component →
 .
. -
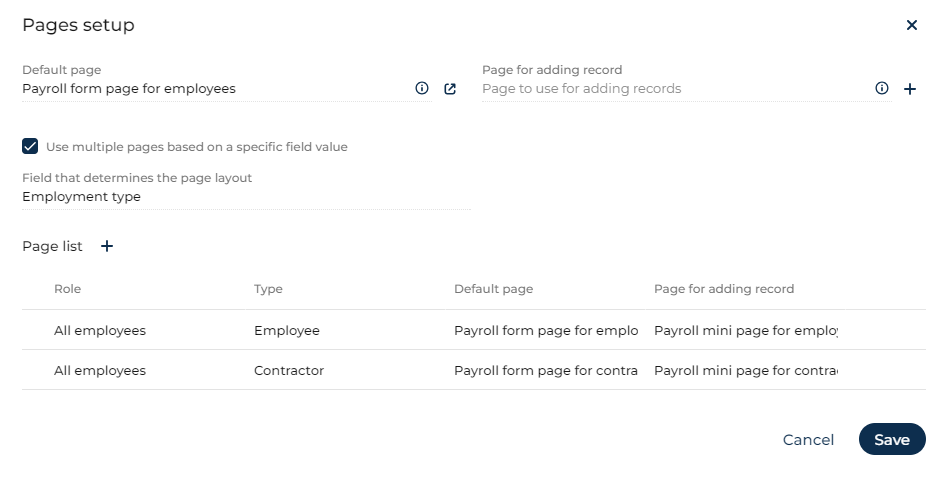
Click the
 button next to the Object field (Fig. 2). This opens a window.
Fig. 2 Add typified pages 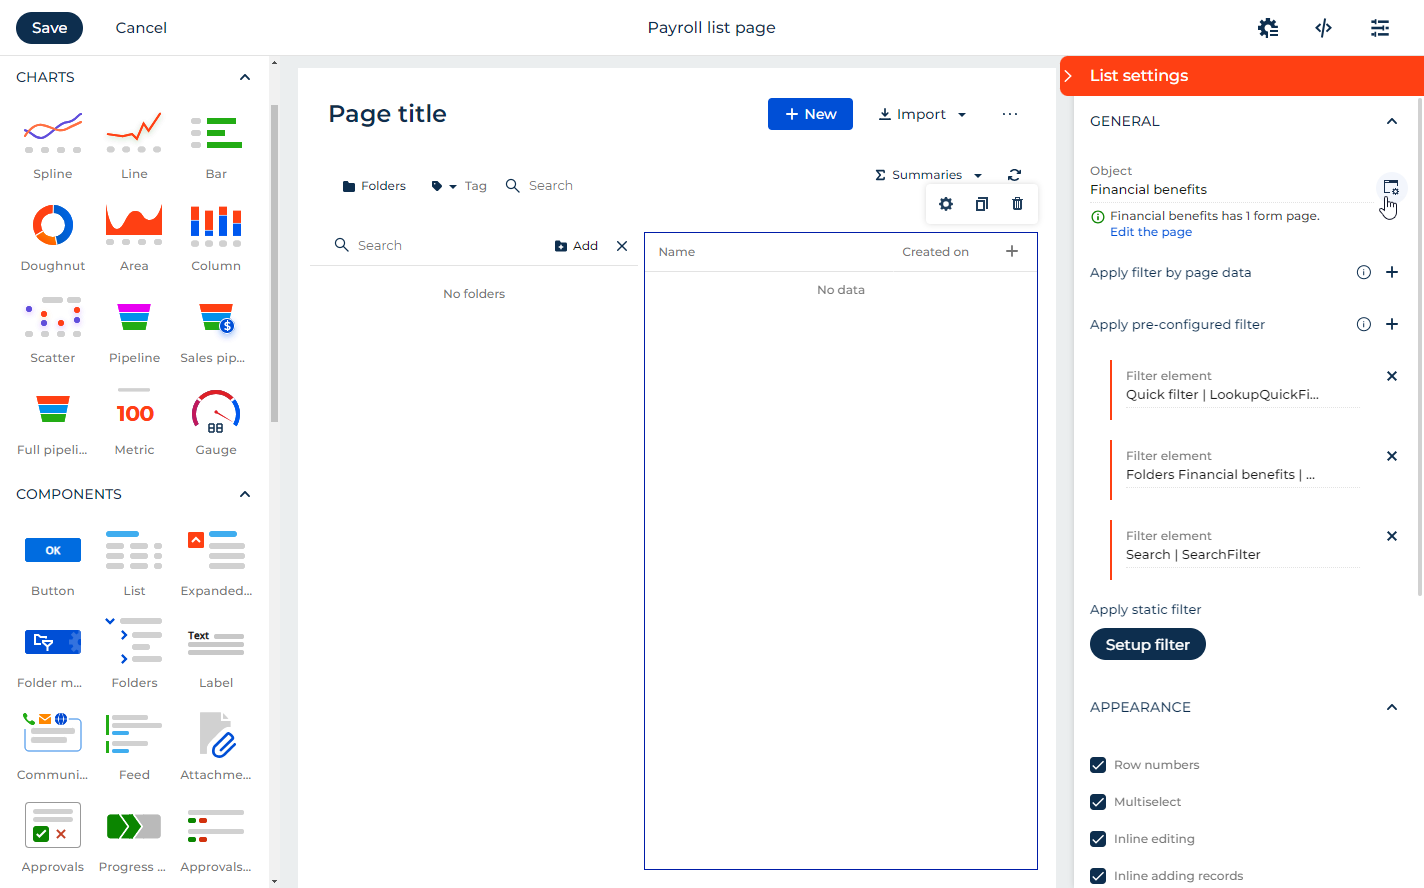
-
Select "Payroll mini page for employees" in the Page for adding record field.
-
Select the Use multiple pages based on a specific field value checkbox.
-
Select "Employment type" in the Field that determines the page layout field.
-
Add typified pages for employees.
- Click
 → All employees. This opens a window. You can also set up typified pages for external users if you select External users.
 - Select "Employee" in the Type field.
- Select "Payroll form page for employees" in the Default page field.
- Select "Payroll mini page for employees" in the Page for adding record field.
- Click Save.
- Click
-
Add typified pages for contractors.
- Click → All employees. This opens a window. You can also set up typified pages for external users if you select External users.
- Select "Contractor" in the Type field.
- Select "Payroll form page for contractors" in the Default page field.
- Select "Payroll mini page for contractors" in the Page for adding record field.
- Click Save.
- Click
-
Click Save.
-
Save the Freedom UI page.
You can set up the typified pages for the Benefits section in a similar way.
You can set up typified pages partially. Skipping the typified page for adding record, makes Creatio use default page for adding record instead. Skipping the default page for adding record makes Creatio use the default typified page instead. Skipping the typified page makes Creatio use the default page.