Set up chat processing
Set up chats to let your company's contact center agents process messages from popular chat applications in Creatio. The general chat setup procedure is as follows:
-
Add and set up a chat queue. Create a list of agents who will process chat messages, set up the message routing rules, and modify the chat completion timeout time on this step.
-
Set up the chat actions. Set up a list of actions an agent can take after talking to the customer on this step. For example, create a case, issue an order, or send an email with more information.
-
Limit the number of active chats. Specify the maximum number of active chats agents can see on the communication panel on this step.
-
Change the notification alert for new chat messages (optional). Set up a new chat message alert agents can easily recognize on this step.
-
Add the chat channels. A chat channel displays a message feed from specific sources, e. g., a Facebook Page. The following chat integrations are available as channel sources in Creatio:
-
Enable chat translation functionality (optional).
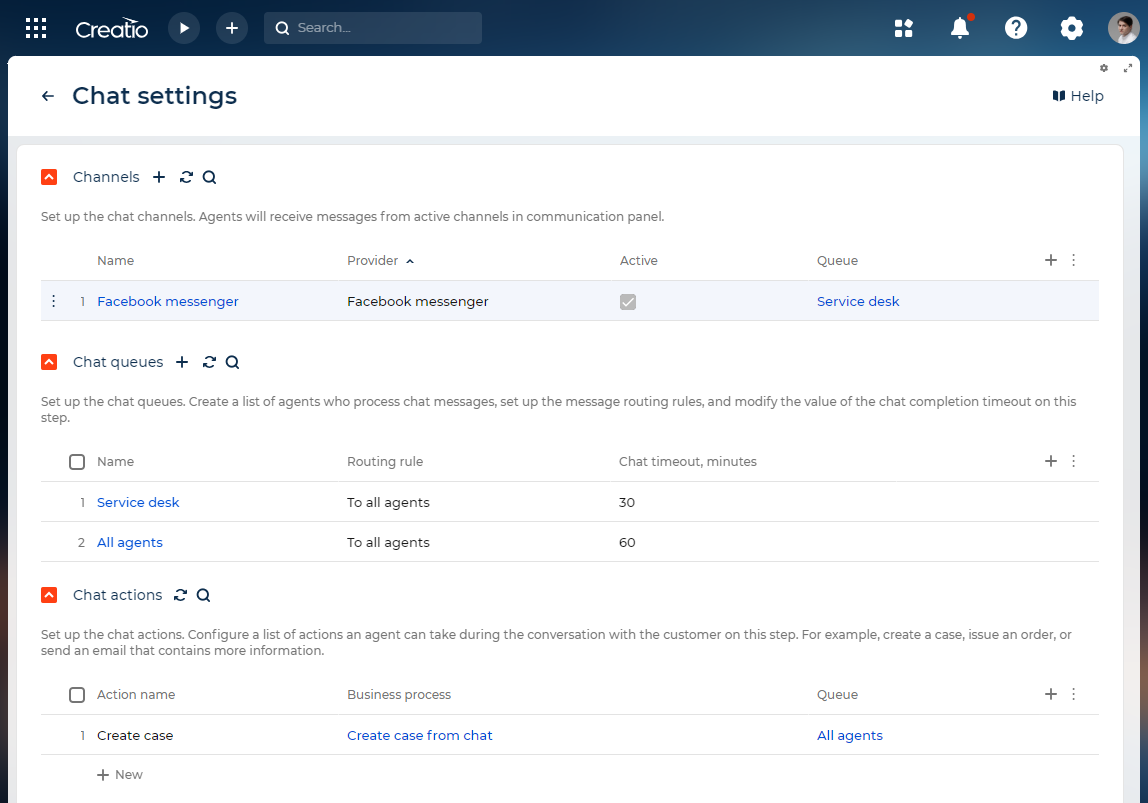
Use the Chat settings section of the System Designer to set up Creatio chat and messenger integration. Chat setup is performed by the system administrator or by a user with the "Access to "Chat settings" section" ("CanManageChats" code) operation permission.

Add a chat queue
To process chat messages, you need to set up chat queues. A chat queue determines the team of agents that will be processing the chat. The number of queues does not depend on the number of channels. For example, set up a "Support service" chat queue to process messages coming from the brand page. Set up a "Sales assistants" chat queue to process online store requests. Use the Chat settings section of the System Designer to create queues for chat agents. To add a chat queue:
-
Click the
 button to open the System Designer.
 -
Click Chat settings.
-
Click the
 button in the Chat queues expanded list. This opens a window.
 -
Fill out the parameters of the new queue.
Parameter
Value
Name
Enter a name that implies the queue purpose and the target role. For example, "1st-line support."
Routing rule
Set how to determine the agent to process the chat.
- Select To all agents to make the new chat available to all agents of the current queue.
- Select To an available agent to automatically assign the chat to an available agent. The available agent is the one with the least number of chats in progress. If several agents have the same number of chats in progress, the new chat will be assigned to the agent who has not taken any chats longer than others. If an agent does not take the chat within 5 minutes, the chat will be assigned to the next agent. The current agent will become "Inactive." You can change this time using the "Omni chat operator accept chat timeout" ("OmniChatOperatorAcceptChatTimeout" code) system setting. The agent must change their status to "Active" in the communication panel to continue processing chats.
Chat completion timeout, minutes
Set the maximum waiting time from the moment of the last chat message to automatic chat closure. When the specified time expires, the chat closes automatically. When the chat closes due to timeout, the subsequent messages are processed as new chats and redistributed to the active agents. If you do not specify any value in the field, the chat does not close.
Queue agents
Click the
 button. Specify the users and roles that will be processing chat messages. For example, you can use the "CC agents" organizational role. You can add several users or roles to the list of agents. Similarly, the same user can be added as an agent to several chat queues.
Fig. 2 Set up a chat queue 
Set up the chat actions
Chat actions streamline and automate message processing. A preconfigured "Create case" action (available for the Creatio Service products) triggers the "Create case from chat" (CreateCaseFromChat) business process. You can set up a list of actions that will be available to the agent when processing the chat, e. g., "Issue an order," "Notify a manager about invoice payment," or "Notify the system administrator." To implement this, create a corresponding process to run when working in the chat. Learn more about creating and setting up processes in the Business process setup (BPMN) block of articles. When the process is ready, add a corresponding chat action:
-
Click the
 button to open the System Designer.
 -
Click Chat settings.
-
Click New at the bottom of the Chat actions list.
-
Specify the following parameters in the new row:
Parameter
Value
Action name
Enter the action title the agent sees when working with the chat.
Business process
Select the process the chat action triggers.
Queue
Select the queue whose agents can use the action.
Fig. 3 Set up a chat action  note
noteThe business process is connected to the current chat via the incoming "ChatId" and/or "ContactId" parameters that are passed to the process when running the chat action. Learn more in a separate article: Process parameters.
Restrict the number of active chats in the communication panel
You can set up restrictions for the number of active chats that agents can process at a time. By default, the number of chats is restricted by 5. To change the active chat settings:
- Click the
 button to open the System Designer.
 - Click System settings.
- Open the "Simultaneous Chats" ("SimultaneousChats" code) system setting.
- Specify the number of chats that the agent can process at a time in the Default value field. The number is 5 by default. If an agent has a maximum number of chats in progress, they will not see any new chats until they terminate at least one of their chats. This restriction is valid for all chat channels available to the agent.
- Save changes.
Change the chat notification alert
You can change the standard notification alert about new chat messages to help the agents easily recognize them. To do this:
- Click the
 button to open the System Designer.
 - Click System settings.
- Open the "Omni chat notification sound" ("OmniChatNotificationSound" code) system setting.
- Click Clear value to delete the standard alert.
- Click Select file and upload an mp3 file from your computer.
- Save changes.
Delete channel
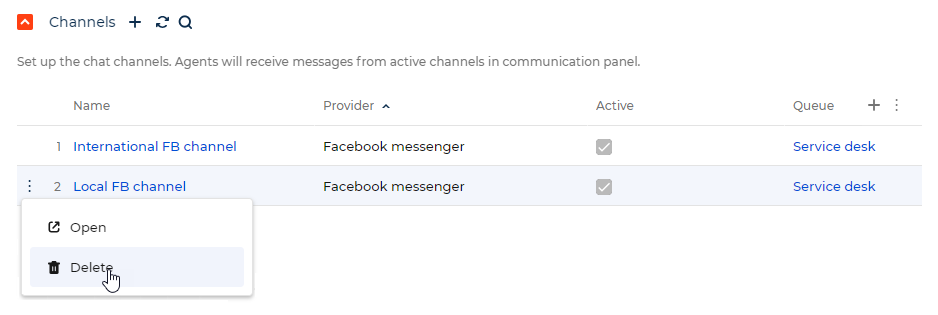
You can only delete a chat channel if it does not contain chats with "Waiting for processing" or "In progress" statuses.
To delete the channel click  to the left of the channel name → Delete.

Enable chat translation functionality
This functionality is available for Creatio version 8.3.2 and later.
The chat translation feature enables seamless communication between agents and customers who do not share a common language through automatic, real-time message translation. Language detection and translation are powered by Creatio.ai. As such, Creatio.ai must be enabled for you to take advantage of this functionality. The functionality uses the following Creatio.ai API skills:
- "Language detector" (
LanguageDetectorcode): identifies the main language of a message and returns it as a BCP-47 locale code, for example,en-USoruk-UA. - "Translate text" (
TextTranslationcode): translates input text into a target language specified by a BCP-47 locale code.
To enable chat translation functionality, turn on the "Enable chat translation" (EnableChatTranslation code) system setting. The setting is turned off out of the box. To enable the automatic translation of outgoing chat messages, turn on the "Automatically translate outgoing messages" (AutoTranslateOutgoingMessages code) system setting. The setting is turned off out of the box.
See also
Set up Facebook Messenger integration
Handle sensitive data shared by customers during chat sessions (developer documentation)