Manage apps
Use the Application Hub section to manage Creatio apps and add-ons. In Creatio, apps are function blocks that solve business problems. For example, an app can be a set of request management tools. An app can consist of one or more content packages. Packages are added automatically when you create a new app.
The Application Hub section lets you:
- View the index of installed apps.
- Create and set up a custom app manually. Read more >>>
- Create and set up a custom app using AI. Read more >>>
- Install Marketplace apps for permanent or trial use. Read more >>>
- Install previously created and configured apps from file. Read more >>>
- Download apps. Read more >>>
- Deploy apps. Read more >>>
- Uninstall apps. Read more >>>
Create an app manually
You can create apps of any complexity in a single place using the Application Hub, which lets you streamline the development process as much as possible. Apps can include:
- sections that are displayed as navigation menu items and comprise various custom UI elements
- various pages, e. g, lists, form pages, dashboards
- business processes
- custom REST and SOAP service integrations
- other schema types that are a part of Creatio configuration, e. g., objects, data bindings, SQL scripts, etc.
To create a new app manually:
-
Click
 in the top right → "Application management" → "Application Hub."
 -
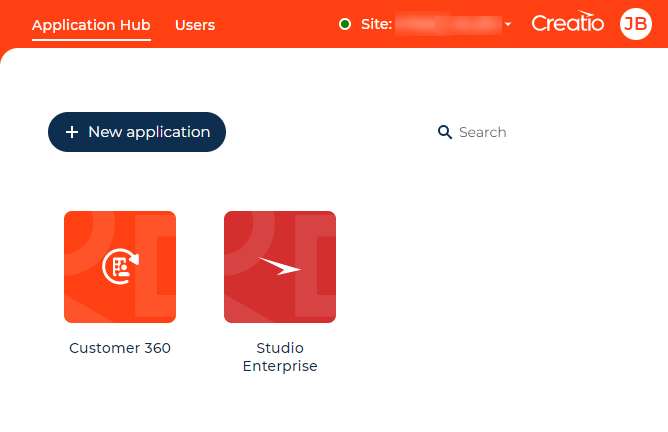
Click New application (Fig. 1). This opens a window.
Fig. 1 Add an app 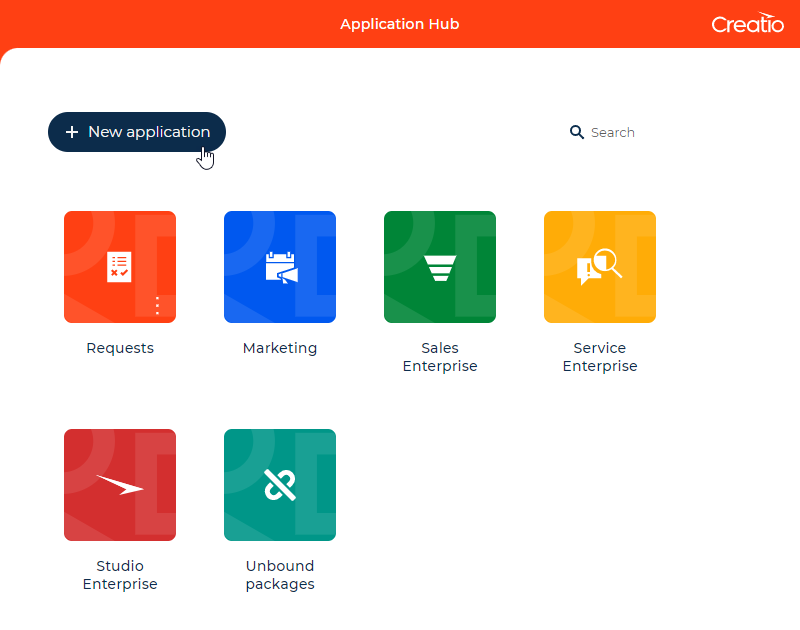
-
Select a new app template based on your business goals (Fig. 2):
- Records & Business processes. Contains Freedom UI section schemas. The Freedom UI section is displayed in a separate workplace. When you create an app with this template, it starts with one default section. Creatio generates a list page and form page for this section. When you add sections to your app, Creatio creates these pages for each new section.
- Dashboards. Contains Home Page schemas of page type. The page is displayed in a separate workplace.
- Custom. An empty template that contains a package with no configuration element schemas.
noteIf you want to install an existing app, select "Install from file" or "Marketplace powered." Also, you can select "Customer 360" and "Case Management" to install these apps quickly if you do not have them.
Fig. 2 Select an app template 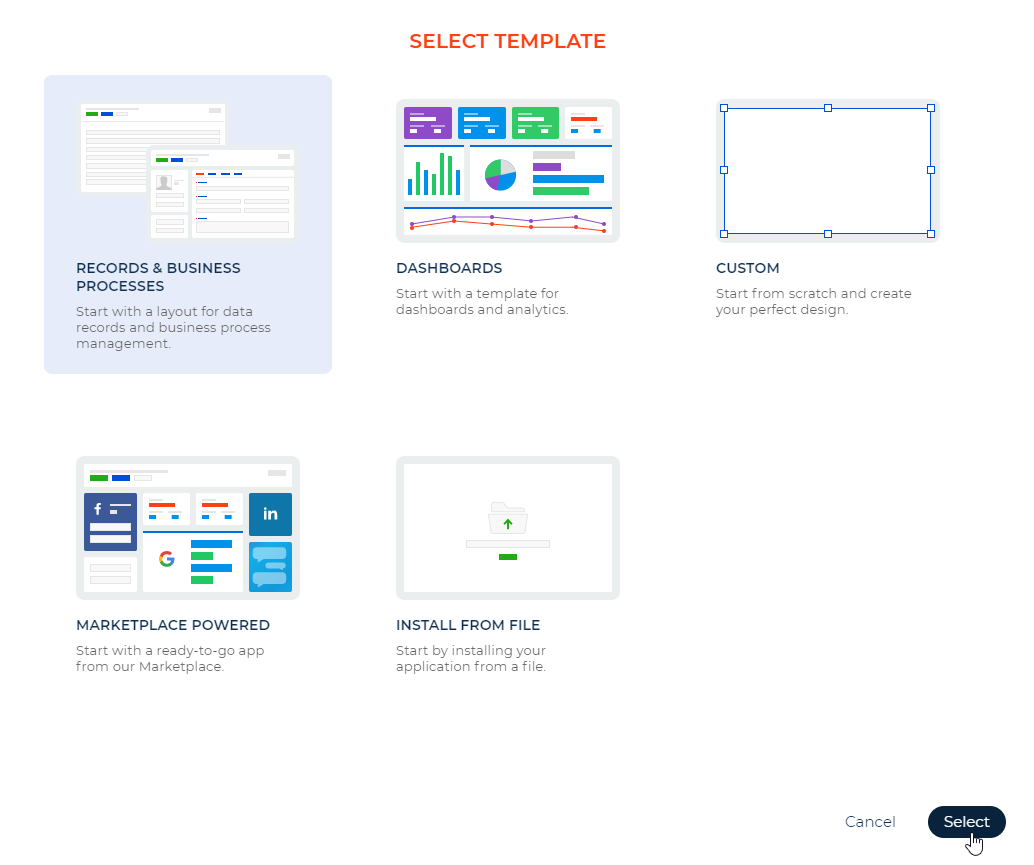
-
Click Select to confirm the template. This opens a window.
-
Specify the app properties. You can review or change it whenever you need. Learn more about the app properties in a separate article: Set up the app properties.
-
Select the app icon by clicking the arrows or using the scroll wheel.
-
Select the app icon color.
-
Enter the app name in the PLEASE NAME YOUR APPLICATION field. The app name must be unique. This is a required field.
-
Edit the app code if needed.
noteApp content includes source code that contains macros. When you create an app, Creatio sets the macros to property values.
-
-
Select Link to an existing object to use an existing object in the app and transfer your previous customizations to Freedom UI. Otherwise Creatio adds a new object for the app.
-
Click Create (Fig. 3).
Fig. 3 App properties 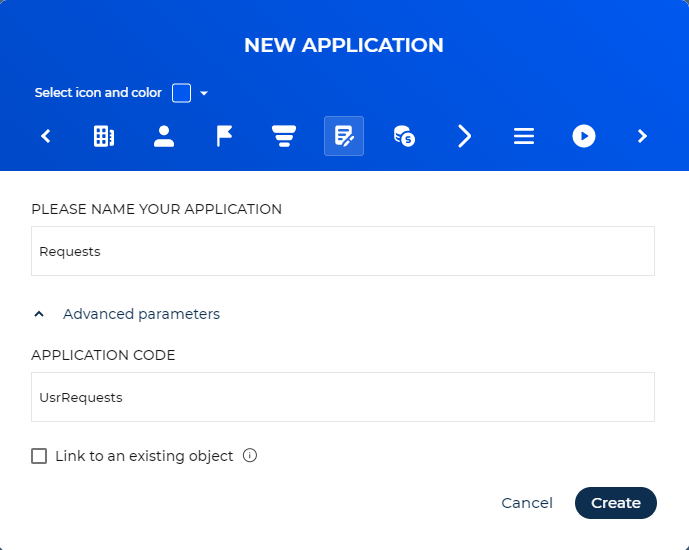
As a result, Creatio will add the app to the Application Hub section (Fig. 4). The app will contain the elements included in the template. The app starts with one default section that includes a list page and form page. You might need to add new sections to workplaces before users can start working with the app.
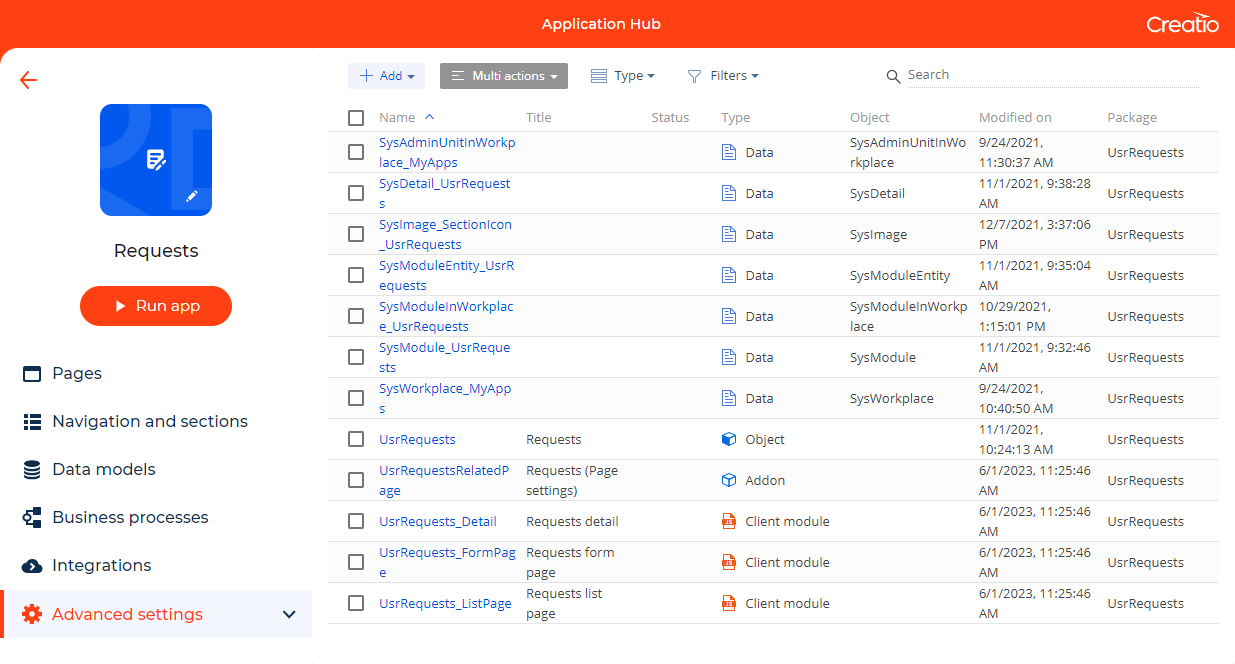
To view the results or test the app in operation, click Run app. You can also use this option to preview the improvements you make to the app.
Create an app using AI
You can accelerate Creatio app development drastically using AI. Enter the app description and the AI will create an app, including objects, pages, sections, and columns.
This functionality is available out of the box in Creatio cloud. Take the following steps to be able to use the functionality in Creatio on-site:
- Update the database enrichment service. Instructions: Database enrichment service (developer documentation).
- Turn on the "GenAIFeatures.Application" feature. Instructions: Manage an existing additional feature (developer documentation).
To create a new app using AI:
-
Click
in the top right → "Application management" → "Application Hub." -
Click New application. This opens a window.
-
Select AI generated → Select. This opens a window (Fig. 5).
Fig. 5 Create an app using AI 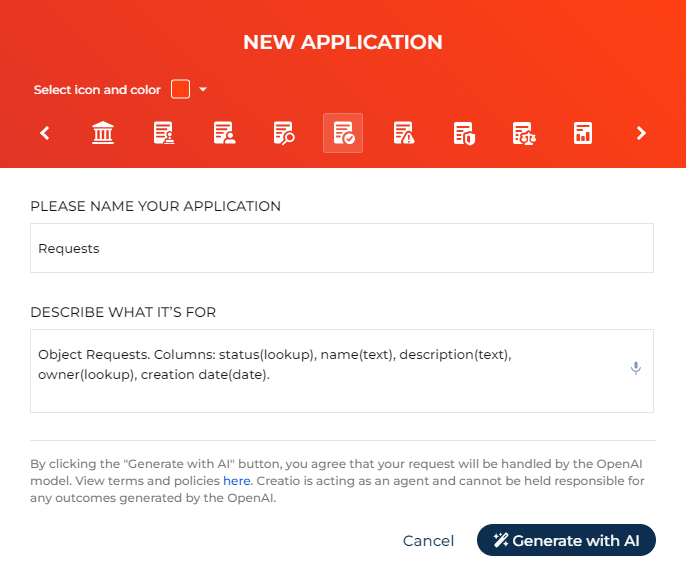
-
Specify the app properties. You can review or change it whenever you need. Learn more about the app properties in a separate article: Set up the app properties.
- Select the app icon by clicking the arrows or using the scroll wheel. OpenAI does not use the icon as part of the app generation.
- Select the app icon color. OpenAI does not use the color as part of the app generation.
- Enter the app name in the PLEASE NAME YOUR APPLICATION field. OpenAI uses this value as the name of the app and the main app section.
-
Describe the app structure in the DESCRIBE WHAT IT'S FOR field. OpenAI generates the app in the language of the prompt. Learn more about making the most effective prompts: AI prompt guidelines.
-
Click Generate with AI.
-
Wait until OpenAI finishes generating the app.
As a result, OpenAI will create a new app based on your prompts. You will be able to customize it further similarly to any other app.
AI prompt guidelines
OpenAI generates apps based on any prompt, but the results might not always be close to your business vision. Follow these guidelines to ensure the result fulfills your business goals as much as possible:
- Describe only the app structure in the prompt, i. e., objects, lookup objects, sections, pages, and fields. Avoid marketing text, internal jargon, or functionality unrelated to the app structure, for example, Jira integration.
- Describe the app structure thoroughly and explicitly if you want to get precise results. AI can add details, for example, fields, to the app if your prompt is short or vague.
- Describe the data model if you want to have the most control over the results. For example: "Object Requests. Columns: status(lookup), name(text), description(text), owner(lookup), creation date(date)."
Install an app from Marketplace
We do not recommend performing operations that require Creatio compilation (for example, installing applications or extensions, generating source code, or configuring UI or business logic) while another compilation-related operation is already in progress.
To install an app from Marketplace:
-
Click
in the top right → "Application Management" → "Application Hub." -
Click New application (Fig. 7). This opens a window.
Fig. 6 Add an app 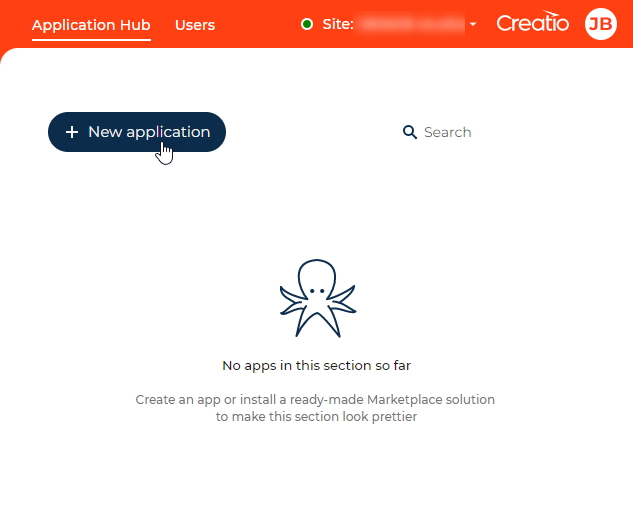
-
Select Marketplace powered → Select. You will be redirected to the Creatio Marketplace website.
-
Log in under your credentials. If you do not have an account, sign up and log in to your account.
-
Select the app to install and look through its characteristics and support conditions. Click Install if the app requirements match your Creatio configuration. This opens a new page.
-
Specify the address of the website to install the app, accept the Public offer agreement and click Install (Fig. 7). You will be redirected to the page of the Creatio App Installation Wizard.
Fig. 7 Installation page of a Creatio Marketplace app 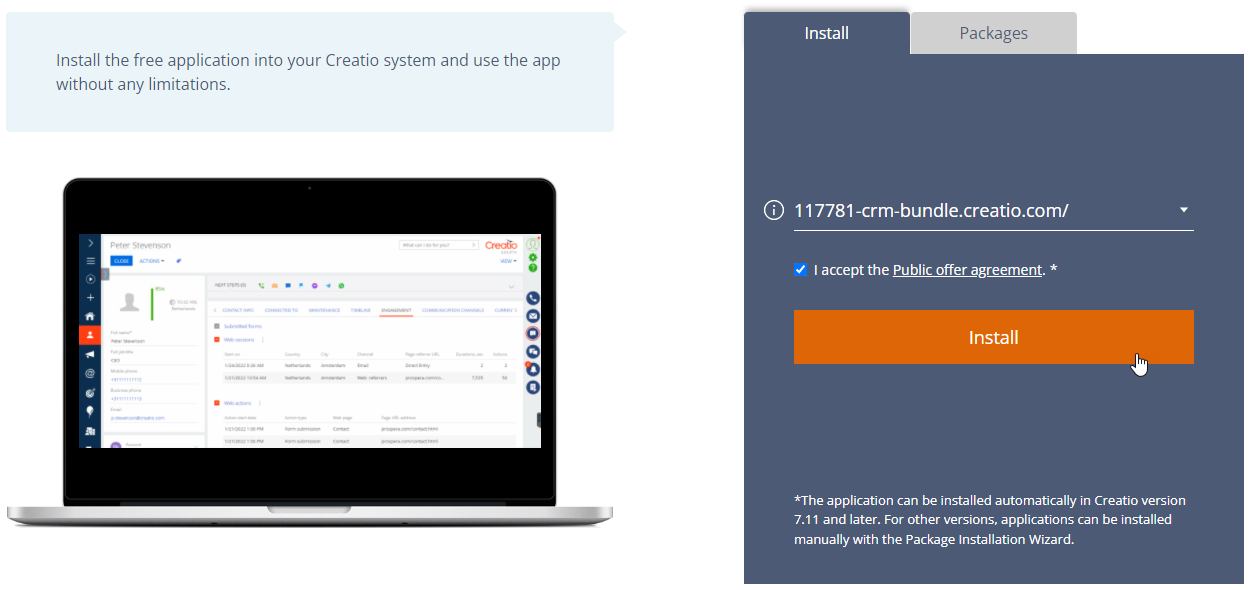
-
Click Install on the Wizard page. The installation might take several minutes to finish. Wait for the process to complete before taking any further action.
As a result, Creatio will add the app to the Application Hub section.
To view the results or test the app in operation, open the app and click Run app.
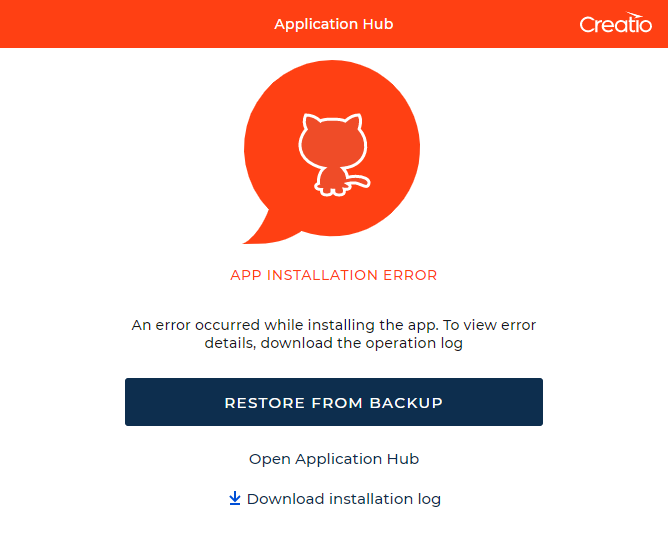
If something goes wrong during the installation, you can always download the installation log and restore your Creatio configuration to the state before the app was installed in a single click.
Install an app from a file
We do not recommend performing operations that require Creatio compilation (for example, installing applications or extensions, generating source code, or configuring UI or business logic) while another compilation-related operation is already in progress.
You can also install an app **from a .zip or .gz file. This method can be more convenient for Creatio on-site users who have limited access to external requests. To do this:
-
Open the needed app → the Packages tab → download the Marketplace app files.
-
Click
in the top right → "Application Management" → "Application Hub." -
Click New application. This opens a window.
-
Select Install from file → Select.
-
Click Select file on the page of the Marketplace App Installation Wizard and specify the app file path.
Once you select the file, the installation will run automatically.
Install an app into an environment that uses a balancer
We do not recommend performing operations that require Creatio compilation (for example, installing applications or extensions, generating source code, or configuring UI or business logic) while another compilation-related operation is already in progress.
If you use a load balancer to ensure fault tolerance of your Creatio application, the install process for apps differs. Install an app from a file into one Creatio instance, then transfer settings to other instances. Learn more in a separate article: Compile an app on a web farm.
Deploy an app
You can transfer apps between trial Creatio environments in the Application Hub without downloading apps. For example, this is useful for setting up demo websites and conducting presentations.
To transfer an app:
-
Click
in the top right → "Application Management" → "Application Hub." -
Click the
 button in the bottom right of the app icon → "Deploy" (Fig. 12).
Fig. 10 Deploy the app 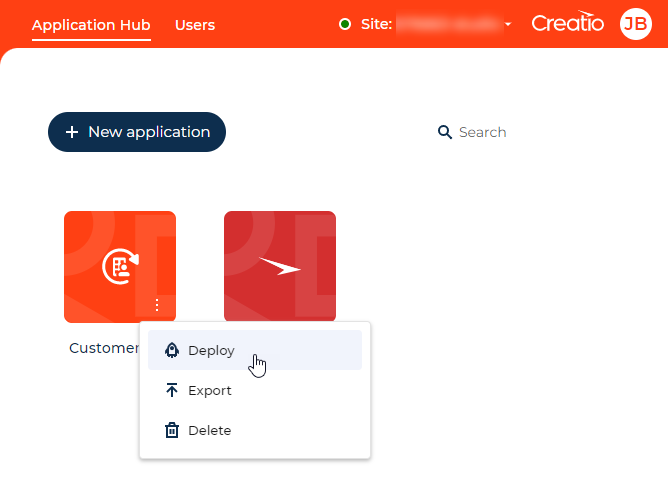
-
Select the target site → Deploy.
Fig. 11 Deployment parameters 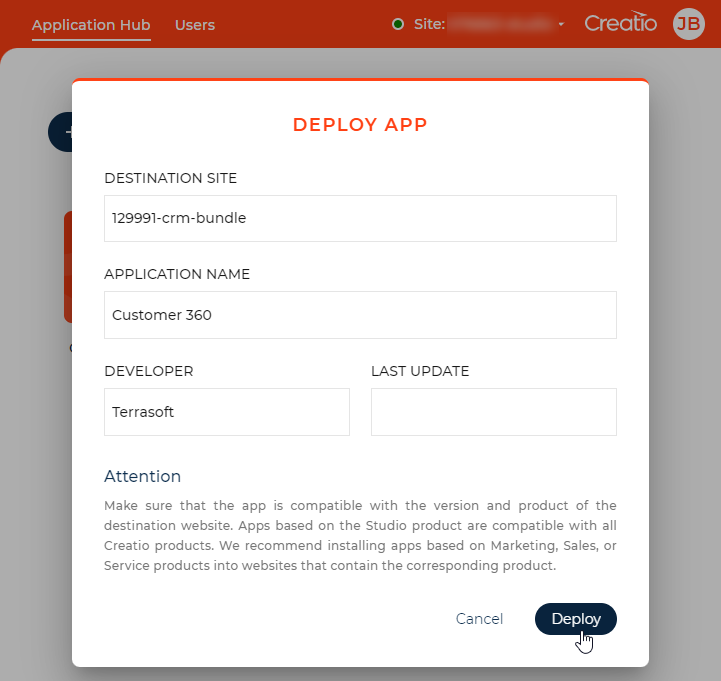
As a result, Creatio will add the app to the Application Hub section of the target website.
If something goes wrong during the installation, you can always download the installation log and restore your Creatio configuration in a single click.
Download an app
You can download custom and Marketplace apps as archives to transfer them to different environments. To download an app:
-
Click
in the top right → "Application Management" → "Application Hub." -
Click the
button in the bottom right of the app icon → "Export" (Fig. 12) and wait for the process to complete.Fig. 12 Download an app 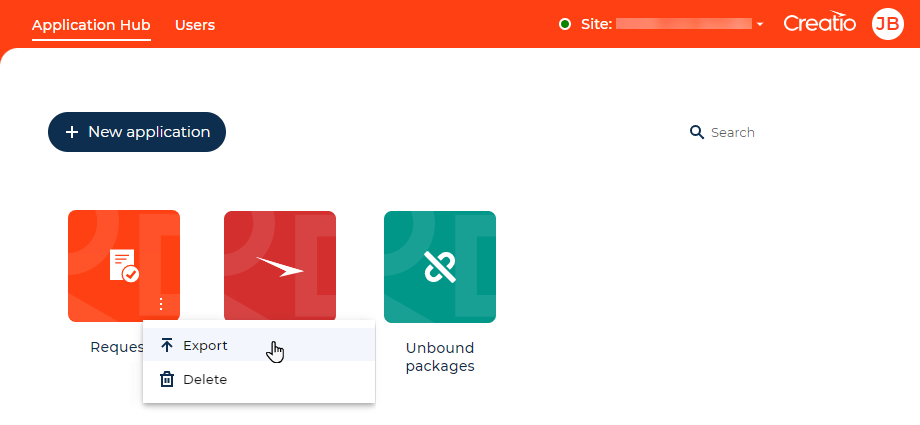
As a result, the browser will download the *.zip archive that contains all the app files to your machine.
When you download an app, Creatio saves any data you entered into the app as well as the following properties:
- icon
- color
- name
- description
Creatio applies this data when you install the app into a different environment. If you install an app from an archive, Creatio creates an app automatically. An app name and code are based on the *.zip or *.gz archive name, the date specified in the app name is the archive downloading date an
Delete an app
You can delete custom and Marketplace apps. To delete an app:
-
Click
in the top right → "Application Management" → "Application Hub." -
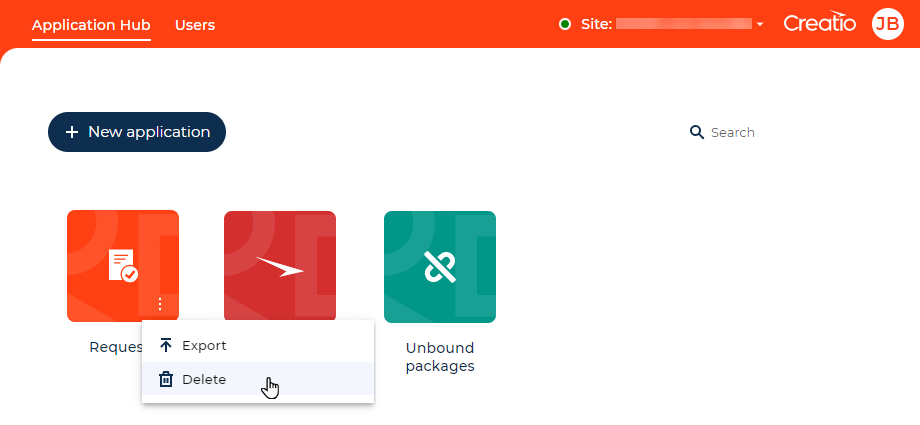
Click the
button in the bottom right of the app icon → "Delete" (Fig. 13) and wait for the process to complete.Fig. 13 Delete an app