Manage calls
In Creatio, all base telephony features, such as receiving incoming calls, making outgoing ones, putting calls on hold and transferring calls to another number, are available in the communication panel. To display the Calls tab, click the  button.
You can also set up phone integration to enable call management in Creatio, and use a headset to make and receive calls.
Make calls
Outgoing call can be made in several ways. You can either dial the number manually on the communication panel, make a call using the calls history or click the call button on the contact page.
Dial by phone number
If you know the phone number that you want to call:
-
On the Calls tab, enter the phone number in the tab field, then click the call button or press the Enter key (Fig. 1).
Fig. 1 Manual dial 
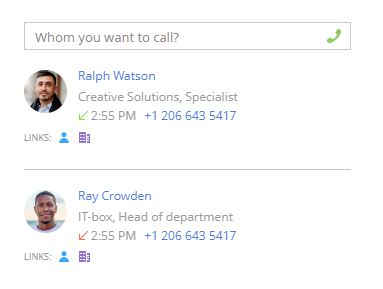
You can also make a call by clicking the call button next to the name of the intended subscriber in the calls history (Fig. 2).
Fig. 2 Dial from the calls history 
-
Wait for the connection (Fig. 3).
Fig. 3 An outgoing call 
If the connection is successful, the call will be switched to the conversation mode (Fig. 4).
Fig. 4 A successful call 
-
Click the
 button to end the call.
Dial by the contact's name
-
Enter the contact's name in the tab field on the Calls tab. If you don’t know the contact’s full name, there is an autofill functionality included. The system will search for contacts whose name contains the entered name fragment and will display those contacts on the tab.
noteTo start searching, you need to enter at least three characters.
-
Find the needed subscriber in the list and click the call button next to the phone number you want to call (Fig. 5).
Fig. 5 Search for a subscriber by name 
-
Wait for the connection.
Quick dial from record pages
You can call a contact/account from the contact/account page.
To start a call from the contact page:
-
Click the phone number or the call button next to the number you want to call on the communications detail (Fig. 6).
Fig. 6 Quick dial from the record page 
-
Wait for the connection.
Receive calls
By default, this section is hidden. It expands on the right-side panel of the screen when you receive an incoming call (Fig. 7).

-
Click the answer call button or pick up the phone if the button is unavailable to start the conversation.
-
Click the end call button to decline a call.
noteThe type of the Call Center used in Creatio determines whether the answer button is displayed for an incoming call or not. For example, the answer button is unavailable when working with Asterisk Call Center. If your telephone network supports this feature, and you would like to use it, open the Call Center's use parameters setup page and select the Enable picking up phone from application checkbox. The setup page can be opened from the user profile.
Identify the caller
In Creatio, a subscriber is identified by their phone number during any call.
-
If a subscriber (a contact or an account) is identified by the phone number while calling, their name will be displayed in the call panel (Fig. 8).
Fig. 8 Identify the subscriber 
-
If the same phone number is used for more than one contact or account, a list of those subscribers will be displayed in the call panel. To select the intended subscriber, click the subscriber's record in the list (Fig. 9).
Fig. 9 Select one of the contacts found by the phone number 
-
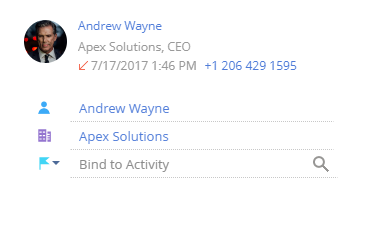
If you need to change the selected subscriber, open the additional menu next to the subscriber's name and select the Select another record option (Fig. 10).
Fig. 10 Select another subscriber 
The information about the selected subscriber will be saved in the call history in the Calls section.
If a subscriber is not identified by a phone number while calling, at the end of the call you will be able to create a contact or an account or connect a call to the existing contact or account via the calls history.
Put calls on hold
While you are in a call, you can put the call on hold so that the subscriber is still on the line but cannot hear you.
Click the  button on the call panel to put a call on hold. Click the
  button to resume conversation.
The call cannot be transferred or finished while it is on hold.
Transfer calls
While you are on a call, you can transfer the call to another phone number. When using the Avaya, Webitel, Finesse, TAPI, and Asterisk connectors, blind (unconditional) transfer is available for all calls.
To enable blind transfer, select the Use blind transfer checkbox in the user profile.
To transfer the call to another agent without interrupting the call:
-
Click the
 button on the call panel. An additional field will be displayed. Use this field to enter the phone number that you want to transfer the call to. The calls history will also become available in the tab. Use it to transfer the call to a subscriber that you recently contacted.
 -
Enter the phone number or select the needed subscriber from the calls history and click the call button (Fig. 11). You can also find the intended subscriber by name.
Fig. 11 Dial when transferring the call 
The call will be put on hold, and the system will start establishing the connection with the subscriber whom you transfer the call to. The information about subscribers will be displayed on the call panel (Fig. 12).
Fig. 12 Connect to another subscriber when transferring the call 
-
Put down the phone to quickly transfer the call. Both subscribers will be connected, and you will be disconnected from the conversation.
-
Wait for the connection with the subscriber to whom you are transferring the call to make an attempted transfer. If the connection is successful, the call panel will display additional buttons you can use to finish the transfer or to cancel it (Fig. 13).
Fig. 13 Talk to a subscriber while transferring the call 
Make and receive video calls
With Creatio, you can make video calls if Webitel integration is configured and set up. Video communication is available only for internal calls.
You can enable/disable video calls in Creatio. To manage video calls setup:
-
Open the user profile page by clicking the Profile image button on the main page of the application.
-
Click the Call Center parameters setup button.
-
Click the Use video checkbox on the displayed page to enable/disable video calls.
When video calls are enabled, during the call, you will see the video feed of the user that the connection is established with and will also share your own video feed.
In the video call mode, the communication panel also contains the video area and video call controls, such as a seek bar and timer that indicates time passed since the call's start.
Check the calls history
You can view the recent calls history in the communication panel. It is unavailable if the user is in conversation mode or searching for a subscriber. The recent calls history is also available when transferring a call to another number.
The calls history chronologically displays the recent incoming, outgoing and missed calls, on top of brief information about the accounts/contacts that a connection was established with (Fig. 14).

The number of calls displayed in the recent calls history can be configured with the "Number of records on the "Calls history" tab" system setting.
Do not close the browser window when making a call via the Creatio interface in order to properly save call history. If the window was closed during the conversation, the call's duration and end time will not be saved.
The calls history only displays information about the latest communication session with a specific subscriber. For example, if you call several numbers specified in the Communication options detail of a contact, the calls history will display one record for this contact using the number that was dialed last.
If you called a subscriber and you now need to call another of their numbers, go to the contact/account page from the calls history and make a call from the subscriber's page.
To do that, click the name of the contact/account in the call's history. It is displayed as a link (Fig. 15). The subscriber page will open. On the page, select the subscriber's number from the numbers available in the Communication options detail. You can directly call from the contact/account page by clicking either the phone number or the call button next to the number on the Communication options detail.

If the same phone number is associated with several subscribers (contacts/accounts) in the system, different subscribers will be identified when the connection is established, and the call's history will display separate records for each contact/account (Fig. 16).
In addition to viewing completed incoming and outgoing calls, you can create a contact or account, connect the call with an existing contact and display connected activities. To process a call, use the menu, which you can open by clicking the  button (Fig. 17).
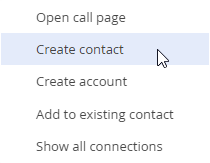
To add a contact to the call's subscriber, select Create contact. The new contact page will open. After saving the contact, the corresponding phone number will be automatically added to the Communication options detail. By default, "Mobile phone" will be set as the communication option type.
You can add an account based on the call's subscriber. To do this, select the Create account menu command. After saving the account, the corresponding phone number will be automatically added to the Communication options. By default, "Primary phone" will be set as the communication option type.
To connect a call to an existing contact or account, select the Add to existing contact menu command and select corresponding record from the lookup. The phone number from the call will be added to the Communication options detail of the selected record.
To display call connections to contacts, accounts and other records, select the Show all connections menu command. Connected account, contact and activity will be displayed below the general call information (Fig. 18).
You can connect the call to a system record by selecting a record type in the menu and clicking the  button (Fig. 19).
Record calls
Recording and the playback of calls is available in Creatio if your Call Center supports this feature. Call recording and playback rules can be set up in Webitell, for example.
Additional setup is required to enable call playback.
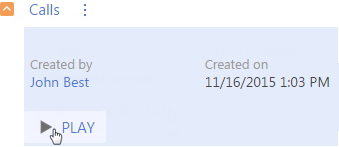
To play a call record, go to the History tab of the needed contact or account. Select the needed call record on the Calls detail and click the Play button (Fig. 20).
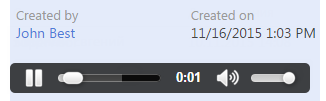
Call records are played in a web player with basic playback options (Fig. 21).
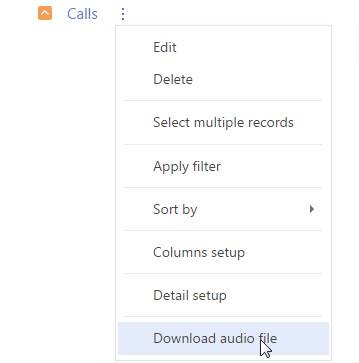
You can also download the call's record as an audio file by selecting the Download audio file menu command (Fig. 22).
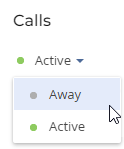
Change your agent status
The agent status menu is displayed when you click the user image located in the top right corner of the screen (Fig. 23).
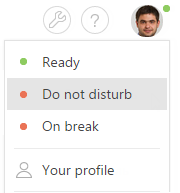
The list of available agent statuses depends on the telecommunications system that is used and can be set up in the User status for message exchange lookup.