In Creatio, you can design the message content from scratch or tailor an existing template to the recipient. Use templates to send emails as part of business processes, automatic notifications, and quick replies in chats. Configure all templates in the Message templates section. By default, the templates are created in the default application language. If you want to localize your templates, set up a template in the default language first. You can copy the base template settings to other languages when you add localizations later.
Set up a message template
Set up an email template
-
Go to the Studio workplace and click Message templates.
-
Click New and select “Email template” in the menu.
-
Specify the template name on the opened page. For example, “Date and time of the meeting.”
-
Specify the macro source. For example, “Activity.”
-
Click Edit on the Email template detail. The Content Designer will open. By default, the templates are created in the default application language. If you want to localize your template, add localizations to the template after the initial setup.
-
Fill out the email subject in the Content Designer.
-
Drag the Block element to the working area.
-
Drag the Text element to the block.
-
Replace the Text element's placeholder content with the desired message.
-
If necessary, insert macros to personalize the message with the sender or recipient's data.
-
Place the cursor where you want to insert the macro.
-
Click
 → Basic macro.
 -
In the popup, pick a macro and click Select.
-
-
Save the template.
As a result, Creatio will create a new “Date and time of the meeting” email template. Learn more about using email templates: Send a template-based email.
Set up a chat template
-
Go to the Studio workplace and click Message templates.
-
Click New and select “Chat template” in the menu.
-
Specify the template's name on the opened page. For example, “Greeting.”
-
Make sure that the macro source is “Chat.”
-
Enter the message in the Chat template detail. If you want to localize your template, add localizations to the template after the initial setup.
-
If necessary, insert macros to personalize the message with the sender or recipient's data.
-
Place the cursor where you want to insert the macro.
-
Click
→ Basic macro. -
In the popup, pick a macro and click Select.
-
-
Save the template.
As a result, Creatio will create a new chat message template. Learn more about using chat templates: Work with chats.
Set up template localization
Use localized templates to send messages to your customers in their preferred language. You can use this functionality:
- in chats
- when sending template-based emails from the action panel or communication panel
- when sending notifications about business processes
Take the following steps to set up localized messages:
-
Set up the languages to use for communication with your customers. Read more >>>
-
Create localized templates. Read more >>>
Email template language verification
To determine the language of an email sent to a customer, Creatio verifies:
-
This verification stage is only relevant to the case emails. Whether the Always use the mailbox language checkbox is selected in the List of mailboxes for case registration lookup.
-
If the checkbox is selected, Creatio will send the email in the mailbox language to the recipient.
-
If the checkbox is not selected, Creatio will switch to the next verification stage.
-
-
Whether the Preferred language field is filled out on the contact page.
-
If the field is filled out, Creatio will send the email in the specified language to the recipient.
-
If the field is not filled out, Creatio will switch to the next verification stage.
-
-
Whether the mailbox language is specified.
-
If the mailbox language is specified, Creatio will send the email in the mailbox's language to the recipient.
-
If the mailbox language is not specified, Creatio will switch to the next verification stage.
-
-
Whether the “Default language for messages” (“DefaultMessageLanguage” code) system setting is filled out.
-
If the system setting is filled out, Creatio will send the email in the specified language to the recipient.
-
If the system setting is not filled out, Creatio will send the email in the default Creatio language to the recipient.
-
Chat template language verification
To determine the language of a chat template, Creatio verifies:
- Whether the Preferred language field is filled out on the contact page. Creatio sets a new contact's Preferred language field to the language specified in the chat channel automatically.
- If the field is filled out, Creatio will send the template in the specified language to the recipient.
- If the field is not filled out, Creatio will switch to the next verification stage.
- Whether the chat channel language is specified.
- If the chat channel language is specified, Creatio will send the template in the chat channel language to the recipient.
- If the chat channel language is not specified, Creatio will switch to the next verification stage.
- Whether the “Default language for messages” (“DefaultMessageLanguage” code) system setting is filled out.
- If the system setting is filled out, Creatio will send the template in the specified language to the recipient.
- If the system setting is not filled out, Creatio will send the template in the default Creatio language to the recipient.
Set up preferred languages
Specify the preferred language on the contact page in the Contacts section. Creatio will send email notifications in this language to the contact. The preferred language does not depend on the UI languages configured for user operation or the default Creatio language.
The Customer languages lookup values are used to specify languages and generate multilingual templates.
-
Only the languages with the Is used checkbox selected in the Customer languages lookup are available for selection on the contact page.
-
By default, all languages listed in the lookup are available for use in message templates. If you add an inactive language to a template, the Active checkbox will be selected for this language in the Customer languages lookup.
The deactivated language becomes unavailable in the Preferred language field menu on the contact page but is still displayed if it was specified earlier. The chat or email template tab in such language is hidden, but messages will still be sent if this language is specified on the contact page.
If you reactivate a language, all the earlier created templates will be displayed in the lookup.
Create a localized message template
You can set up a localized chat or email message template in the Message templates lookup.
To create a localized template:
-
Go to the Studio workplace and click Message templates.
-
Select the template to which you want to add localizations.
-
Click the
 button. In the menu, you will see all languages with the Active checkbox selected in the Languages lookup. Select a template language you want to add.
If there are no active languages in Creatio yet or you want to add a tab with the language that has not been activated, select the Add language option (Fig. 1) and select the template language you want to add in the opened window. The Active checkbox for this language will be selected automatically.
Fig. 1 Add a language to the template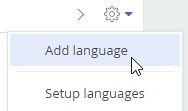
-
After you select a language, Creatio will prompt you to copy the content of an existing template to the new tab. Select this option if you need to use the configured layout for the added localization.
-
If you need to add several languages into a template, take steps 3 and 4 for each localization. As a result, several tabs for creating messages in the selected languages will be displayed on the template page (Fig. 2).
Fig. 2 A localized template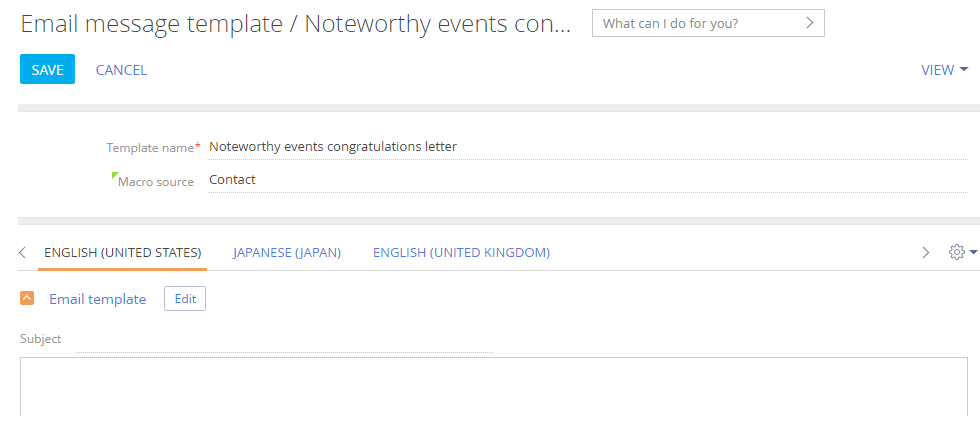
-
Select the needed tab and edit the content. Create a message in each of the languages in a similar way.
-
Save the changes.