Throttling balances the outgoing email flow in Creatio.
Use throttling to split a large email into multiple parts and send the parts to the email provider one by one during the specified time frame. This approach improves the delivery rate and prevents the emails from being flagged as spam or rejected by email providers. Use throttling when:
- Sending multiple emails during a short period.
- Sending emails to new subscribers.
-
Sending emails to subscribers you have not contacted by email for a long time.
-
Sending first emails from a new domain.
-
Sending emails after changing the sender’s IP address.
-
Sending a test email that has to be changed or canceled during the mailing process.
-
Sending emails likely to increase the activity of users.
In these situations, sending emails gradually enhances the domain’s reputation. The throttling mechanism also lets you control the outgoing email flow, which can be useful in cases like balancing the load on contact center agents who process the feedback (leads).
Creatio provides the following throttling modes:
- “Warmup cold audience” to send the emails using the pre-configured schedule. Learn more: Warm up cold audience.
- “Manual limit” – Creatio will send the emails based on the specified daily limit. Learn more: Manual limit.
Warm up cold audience
“Warmup cold audience” is a throttling mode where Creatio sends a limited number of emails daily after the email starts. There is a fixed delay before each email. The daily limit and the delay help to emulate manual emailing, which is essential to enhance the reputation of the sender’s domain.
The pre-configured warm-up schedule is based on the best throttling practices, such as emailing daily for 2 weeks and longer with a gradual increase in the number of emails per day.
To change this schedule, contact Creatio support and specify the new daily limit and delay. After the support team applies the changes, click the  button in the Delivery schedule field on the email page to view the updated schedule. We recommend that you only change this schedule for urgent reasons and with a basic understanding of warm-up strategies.
Enable the warm-up mode
Configure the warm-up cold audience parameters before starting the email.
- Go to the Email section and open the needed record.
- Go the Parameters tab.
- Select the “Warmup cold audience” value in the Throttling settings field. Click the
 button in this field to view the email delivery schedule.
 -
Select one of the shared queues in the Throttling queue field. Creatio sends all emails in a queue independent of the other throttling queues. Learn more: Set up a distribution queue and Warm-up examples. The “General” value is selected by default (Fig. 1). This is a required field.
Fig. 1 Setting up a throttling queue
- Click Save.
As a result, Creatio will send the emails using the selected throttling mode.
Set up a throttling queue
A throttling queue is a tool to segment cold contacts. Throttling queues let you group several bulk or trigger emails to segment different pools of cold contacts for individual warm-ups. For example, a part of the audience originates from social networks and another part from a webinar. In this case, we recommend dividing the audience into different segments and create a dedicated throttling queue for each segment to keep the email marketing strategies separate. Learn more: Warm-up examples. Configure the queues in the Throttling queues lookup. To add a new queue:
-
Open the system designer by clicking
 in the top right.
 -
Click the “Lookups” link in the “System setup” block.
-
Open the Throttling queues lookup.
-
Click New.
-
Enter the queue name, for example, “New queue.” Fill out the Description column if necessary.
-
Fill out the Code field with an alphanumeric code (Fig. 2). Creatio will use the code to segment bulk emails. You can use arbitrary names.
Fig. 2 Adding a new throttling queue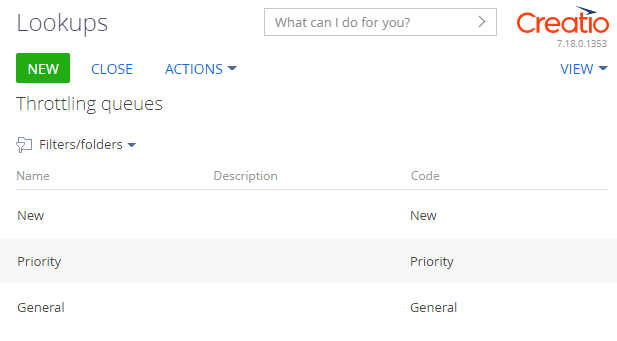
Warm-up examples
Find detailed examples of the warm-up mode in action below.
| Day | Daily email limit | The delay between emails, sec |
|---|---|---|
| 1 | 25 | 400 |
| 2 | 25 | 400 |
| 3 | 25 | 400 |
| 4 | 50 | 400 |
| 5 | 50 | 400 |
| 6 | 75 | 400 |
| 7 | 75 | 400 |
Example 1
Creatio will use a separate schedule for each sender's email address.
The bulk email will start from the Day 1 schedule for the “Warmup cold audience” mode. Emails from sender1@example.com will be sent in 3 days (25 emails per day). Emails from sender2@example.com will be sent in 1 day (25 emails per day).
Example 2
Emails to new sender addresses always start from the Day 1 schedule. If you have already used an email address for sending bulk emails, its schedule will start from the day where the previous bulk email stopped:
-
All emails from sender3@example.com will be sent in 1 day (25 emails per day) according to the schedule, starting from Day 1.
-
All emails from sender2@example.com will be sent in 1 day (25 emails per day) according to the schedule, starting from Day 2.
-
All emails from sender1@example.com will be sent in 2 days (50 emails per day) according to the schedule, starting from Day 4.
Example 3
When changing the throttling queue, the email delivery always starts from the Day 1 schedule, even if you have already used the addresses in this bulk email:
-
All emails from sender1@example.com will be sent in 3 days (25 emails per day).
-
All emails from sender2@example.com will be sent in 1 day (25 emails per day), starting from Day 1.
Manual limit
“Manual limit” is a throttling mode that lets you specify the uniformly distributed email sending parameters. Use it to balance the load on the website or your support agents who process the email’s responses (leads).
Select this mode to send the specified number of emails daily. You can limit the mode’s sending period by selecting the required values in the Delivery schedule field group. On the last delivery day, Creatio sends the rest of the messages, as long as their number is less than the Daily limit value.
Configure the manual limit parameters before starting the email.
To set up these limits:
- Go to the Email section and open the needed record.
- Go to the Parameters tab.
- Select “Manual limit” in the Throttling mode field.
- Use the Daily limit field to specify the number of email responses the agents can process daily. For example, “16.” The field is required.
- Use the Delay between emails field to set up an interval between emails based on the time an agent requires to process a lead, in seconds. For example, “1800.”
- Use the Delivery schedule detail to specify the agents’ work schedule.
- Select “Every day” in the Delivery schedule field.
- Specify the period between 9:00 AM and 6:00 PM in the Delivery time range field.
Fig. 3 Example of manual limit setup

-
Click Save.
As a result, Creatio will take 7 days to finish the email. During the first 6 days, Creatio will send 16 emails daily. The remaining 4 emails will be sent on day 7.