
On the previous step, we have fully configured the new section’s interface. On this step:
- fill out the new lookups.
- add the gym number system setting.
- attach the new data to the development package.
Fill out the lookups
The list of possible field values is configured in the Lookups section of the System Designer.
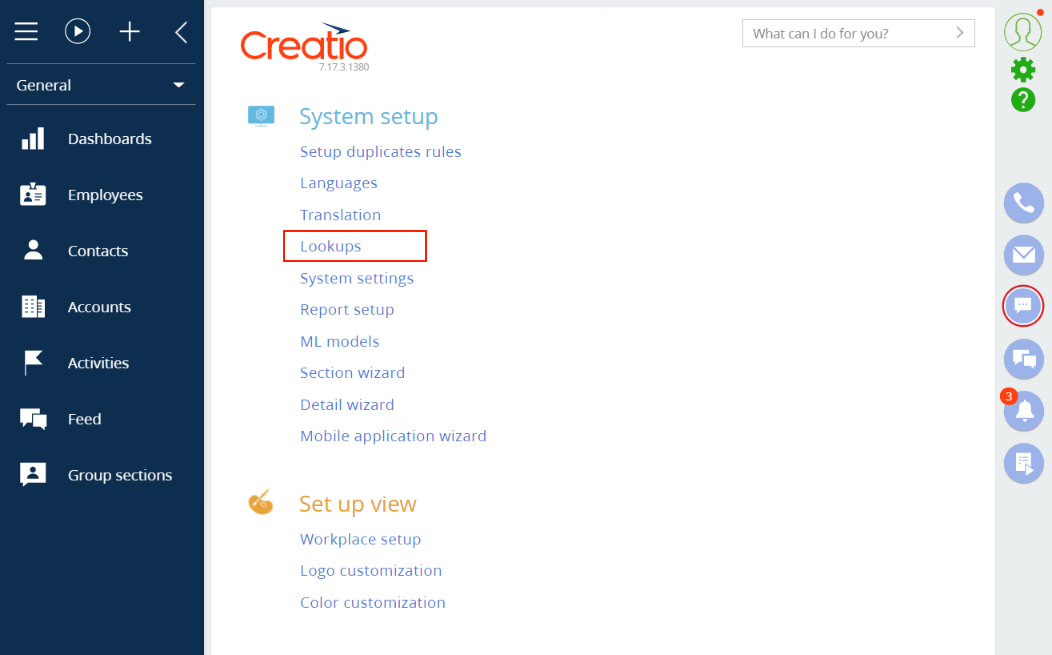
- Fill out the “Periodicity” lookup
- Click
 to open the System Designer.
 - Go to the System setup block –> click Lookups.
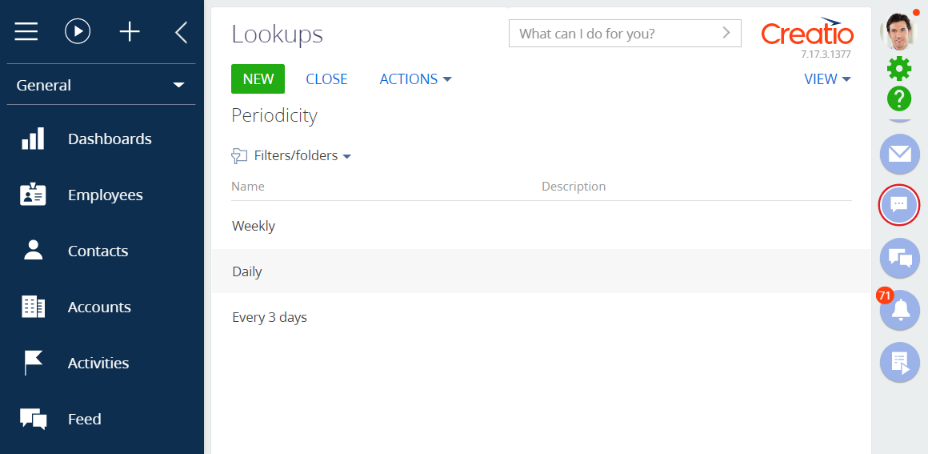
- Find the “Periodicity” lookup using the filter at the top of the page.
- Open and fill out the lookup with these values:
- Daily
- Every 3 days
- Weekly
- Click
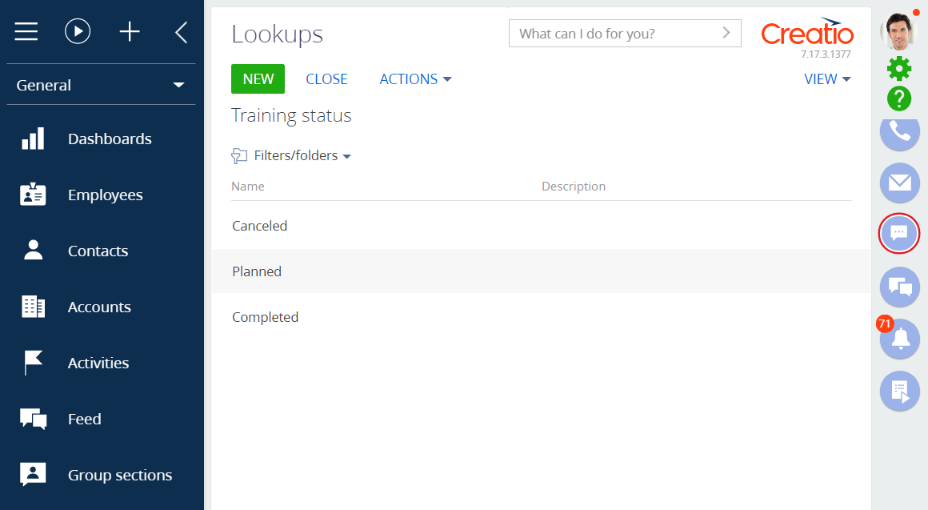
- Fill out the “Training status” lookup:
- Open the Lookups section.
- Find the “Training status” lookup using the filter at the top of the page.
- Open and fill out the lookup with these values:
- Planned
- Canceled
- Completed
Create a system setting
To implement the example, specify the number of group exercise gyms in Creatio. Use a system setting to do this.
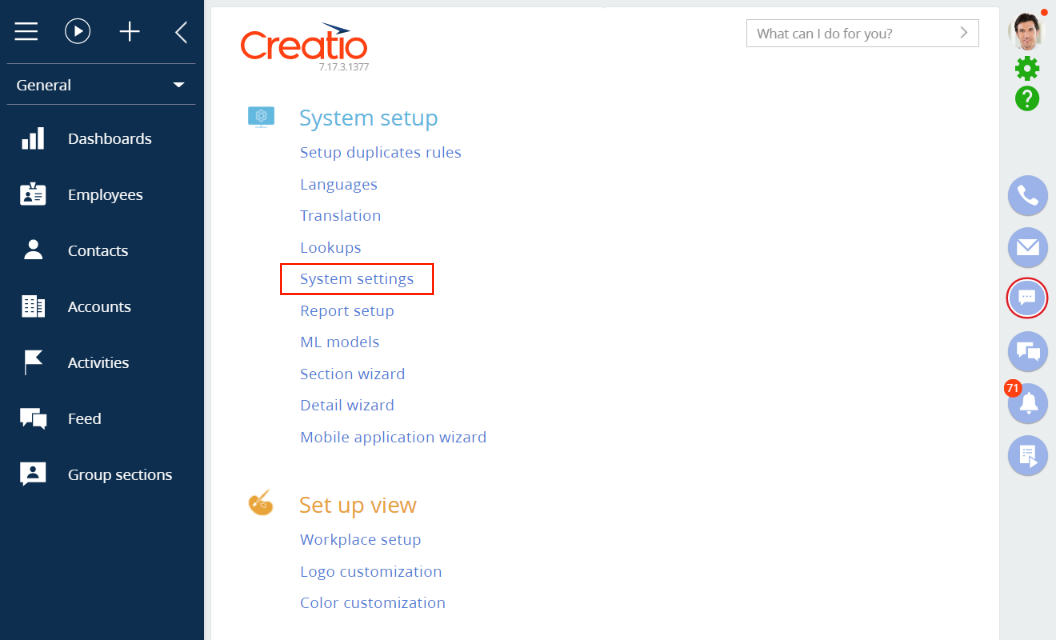
All base and custom system settings are available in the System settings section of the System Designer.
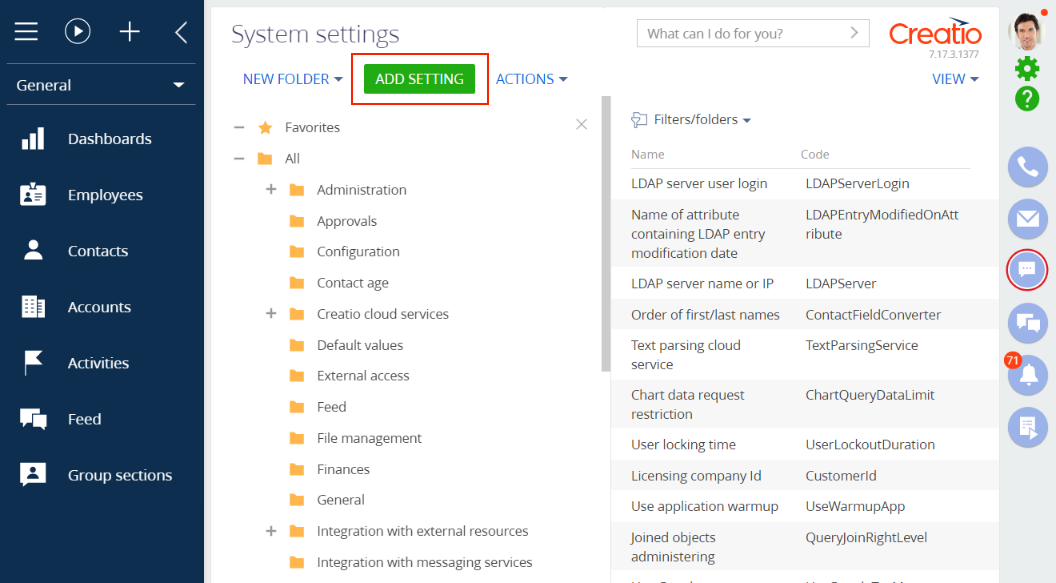
- Click to open the System Designer.
- Click System settings in the System setup block.
- Click Add settings to add a system setting.
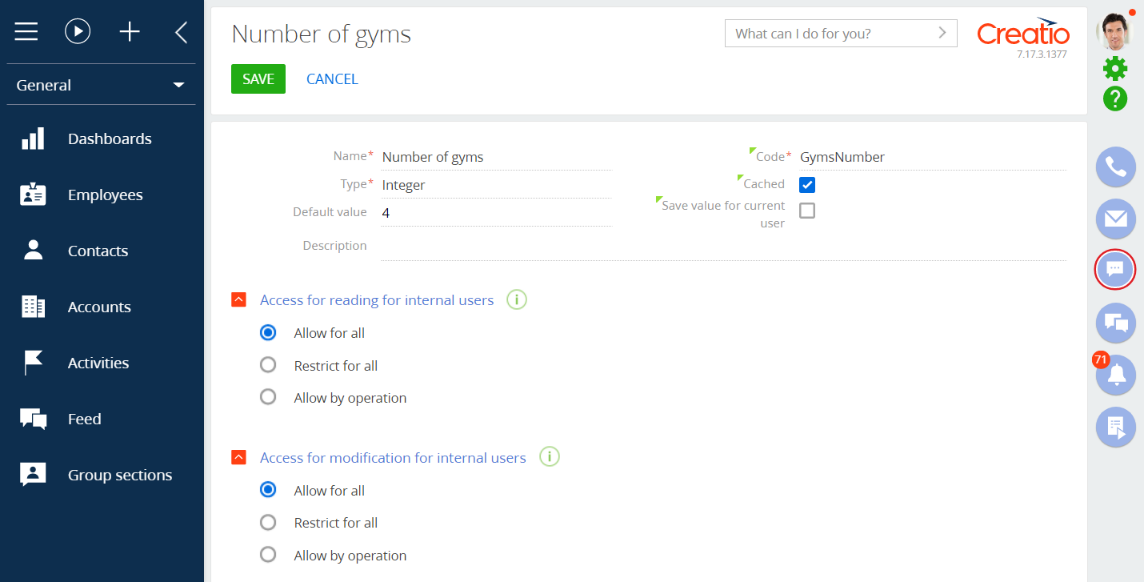
- Fill out the property fields of the system setting:
- Set Name to "Number of gyms".
- Set Code to "GymsNumber".
- Set Type to “Integer”.
- Set Default value to 4.
Bind data to the package
The new lookup and system setting data is stored in the Creatio development environment database. To enable migration of the developed functionality to the pre-production and production environments, bind the new data to the development package. Creatio uses the package data binding for this.
- Add the “Periodicity” lookup’s data to the package:
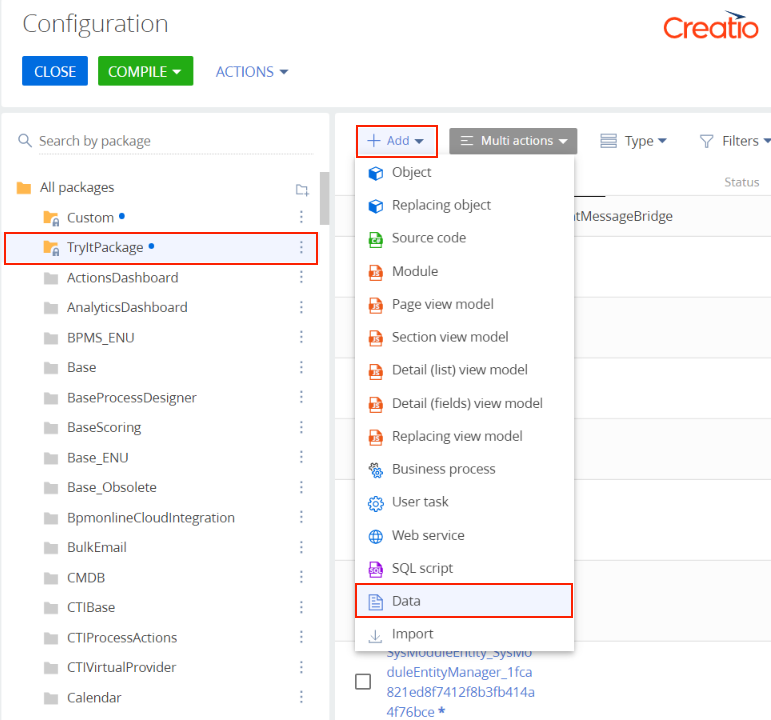
- Go to the Configuration section and select the “TryItPackage.”
- Click Add in the workspace toolbar and select the Data configuration element type.
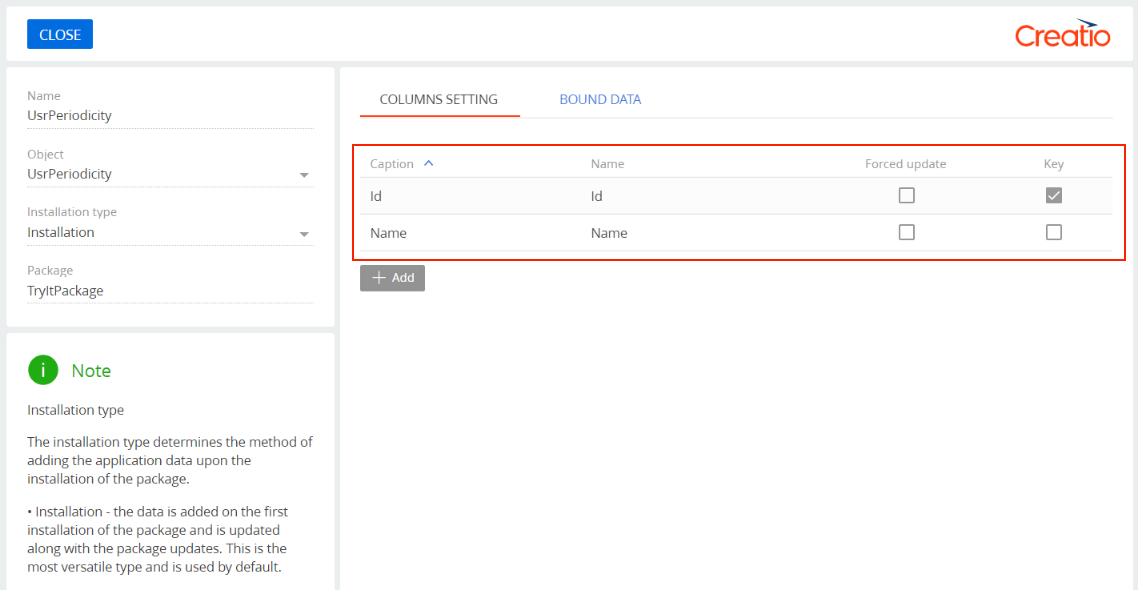
- Select the “Periodicity” lookup’s object "UsrPeriodicity" in the Object field.
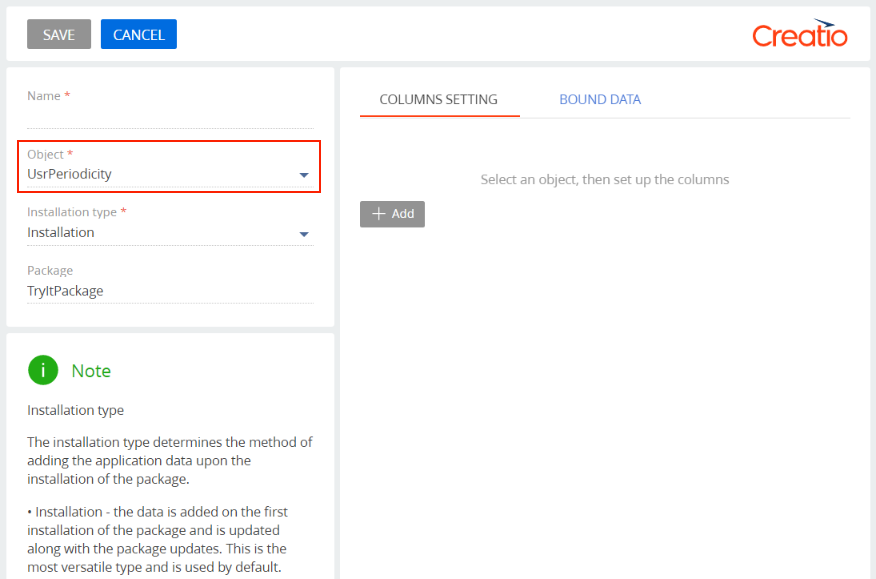
- Check if all columns with the object’s data are selected in the Columns Setting tab.
- Go to the Bound data tab and click Add.
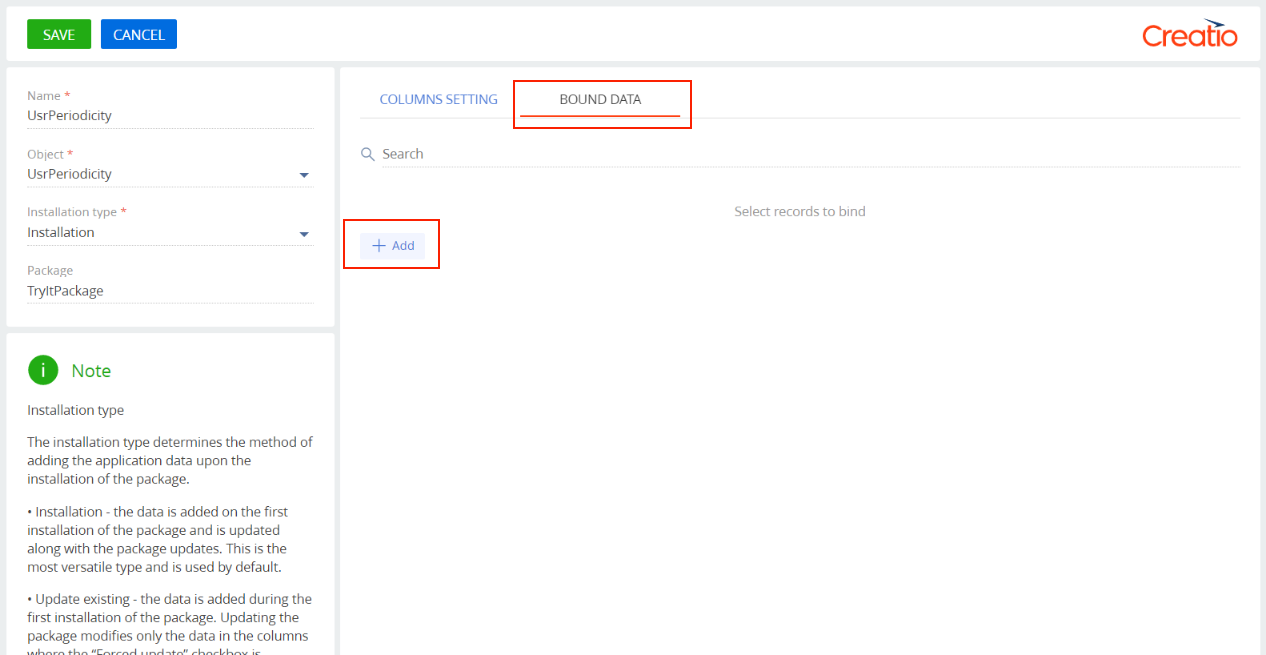
- Select all records in the newly-opened window.
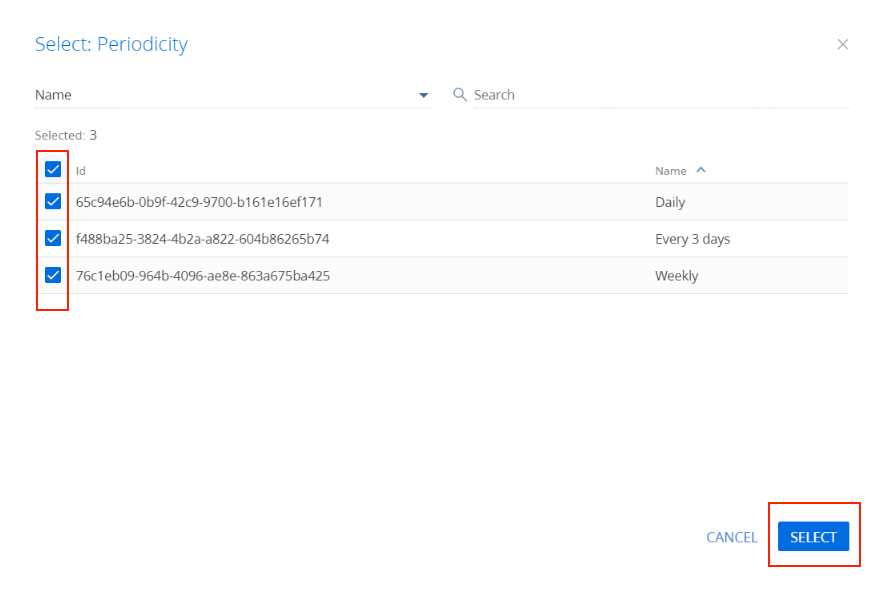
- Save the element.
- Add the “Training status” lookup’s data in a similar way. Specify "UsrTrainingStatus” as the object.
- Binding a system setting to a package involves binding the system setting’s code and value.
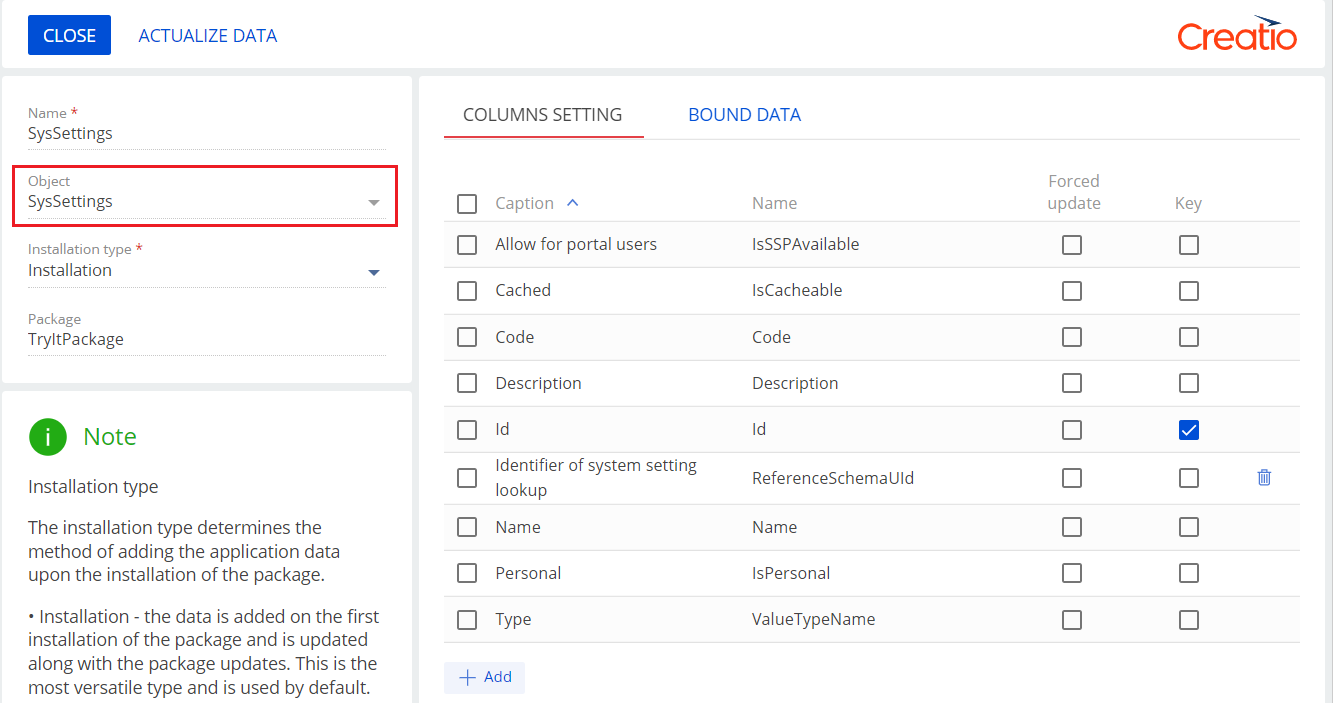
- Add a new Data type element to the package.
- Specify "SysSettings" in the Object field. This is the data table that stores codes for all Creatio system settings.
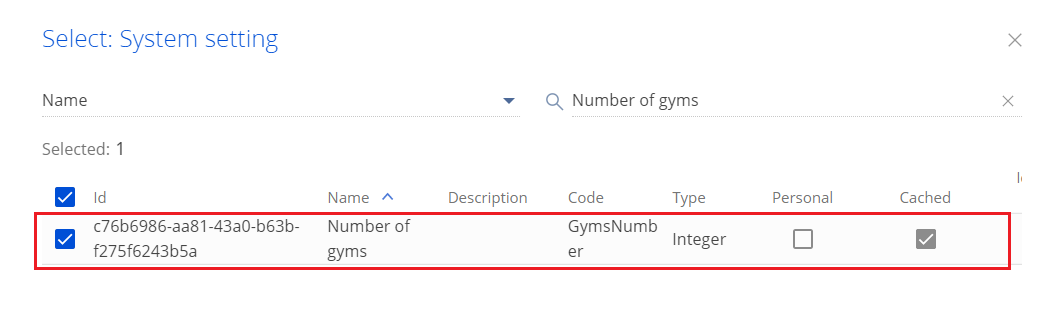
- Click Add on the Bound data tab and use the filter to find the "Number of gyms" setting in the window that opens.
- Save the element.
- Create one more Data type element and specify "SysSettingsValue" in the Object field. This is the data table that stores values for all Creatio system settings.
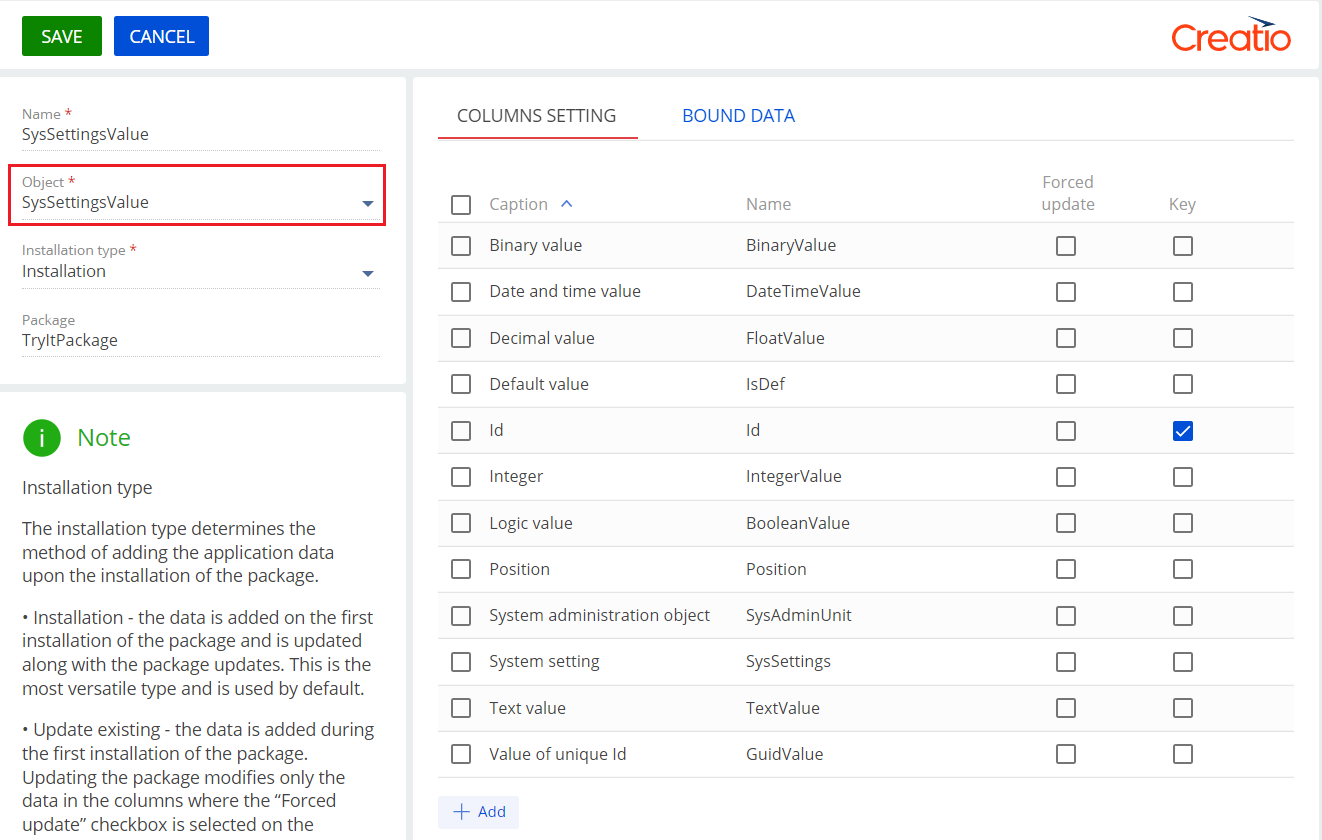
- Use the system setting filter in the Bound data tab to select the data for the "Number of gyms" system setting.

- Save the element.
As a result, we have added the example's required data to the interface and attached it to the development package. On the next step, implement the business logic of the example.