Dynamic content enables changing the email content depending on the recipients’ segment. You can use any contact-related information for configuring the dynamic content – location, purchase history, website activities, gender, age, etc. This way, the recipients will get only the relevant and personalized information, increasing the number of loyal customers and email efficiency in general while decreasing marketing email expenses targeted at separate audience segments.
Setting up an email with dynamic content involves the following steps:
-
Creating a new email record. You can use dynamic content in both bulk and trigger emails. The procedure for creating emails is covered in the “Create a bulk email” and “Create a trigger email” articles.
-
Setting up an email template. Build a template structure and add the content using regular Content Designer elements. Read more in the “Configure an email template” article.
-
Set up the dynamic content rules that will determine the conditions for segmenting email recipients. One email can have no more than 7 dynamic content rules. You can view the list of rules, add, edit, or delete them in the Content Designer.
-
Set up the dynamic content of the template. Select the blocks, whose data should differ and configure the dynamic content segments – the variants of the dynamic content block for every rule created at the previous step.
-
Use the “Preview” mode to see what your template looks like for different segments.
-
Send a test email to check the template display in different mail clients. Read more about test emails in the “Send a test email” article.
Set up dynamic content rules
After you add a new record in the Email section, populate its fields and build the email structure, configure the rules for segmenting the audience and add the dynamic content.
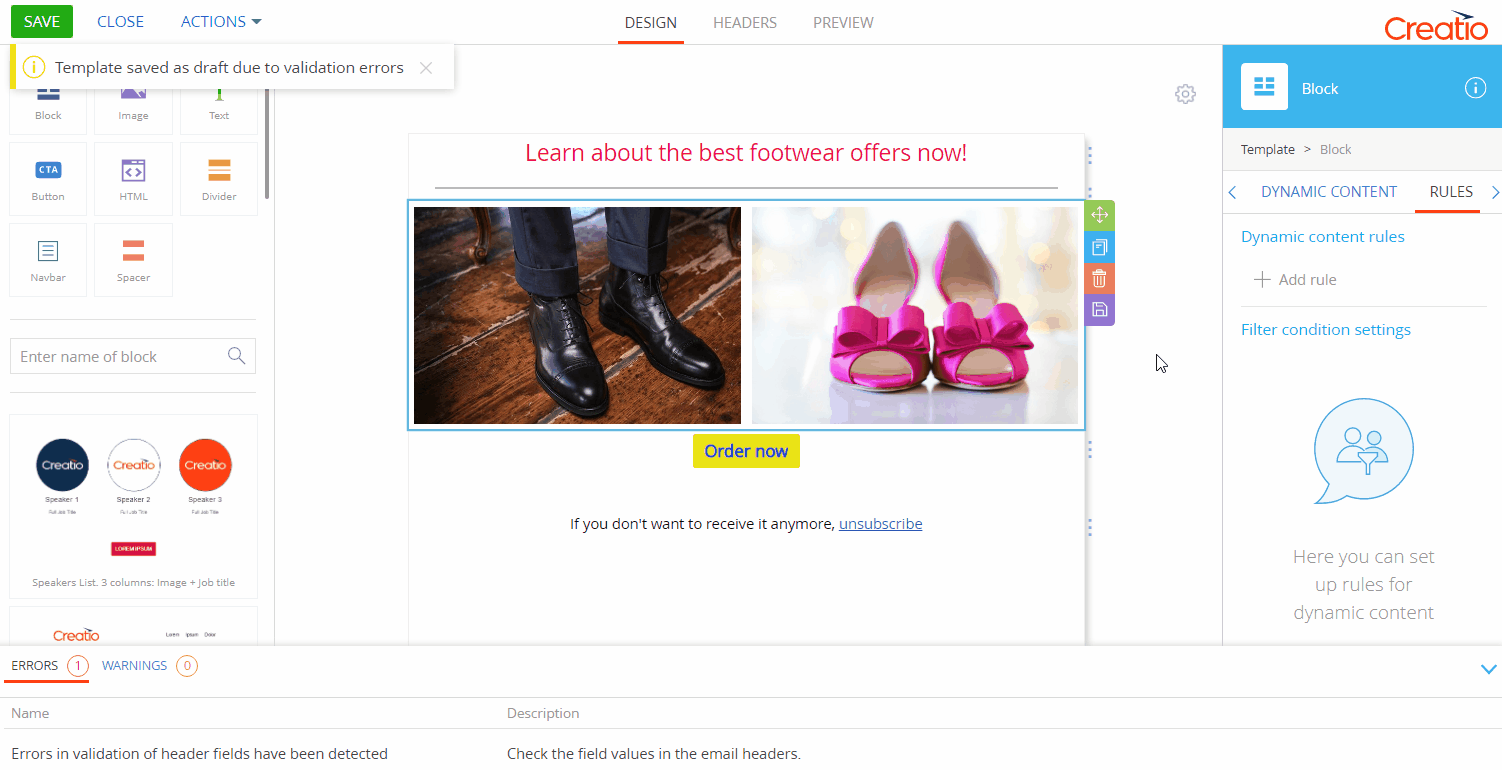
To add a new dynamic content rule, perform the following steps (Fig. 1):
-
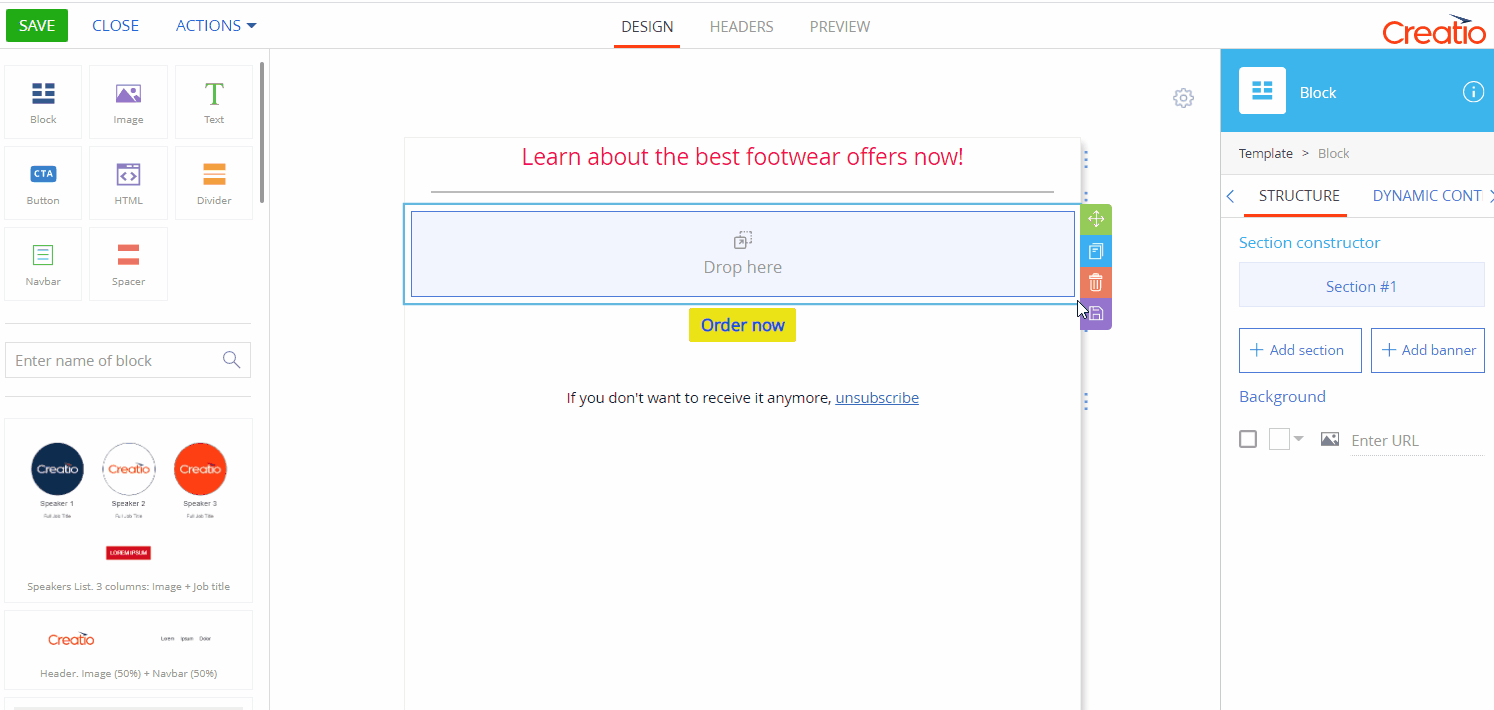
Open the template setup area. To do this, select any content block in the template and click
 on the right border of the block.
 -
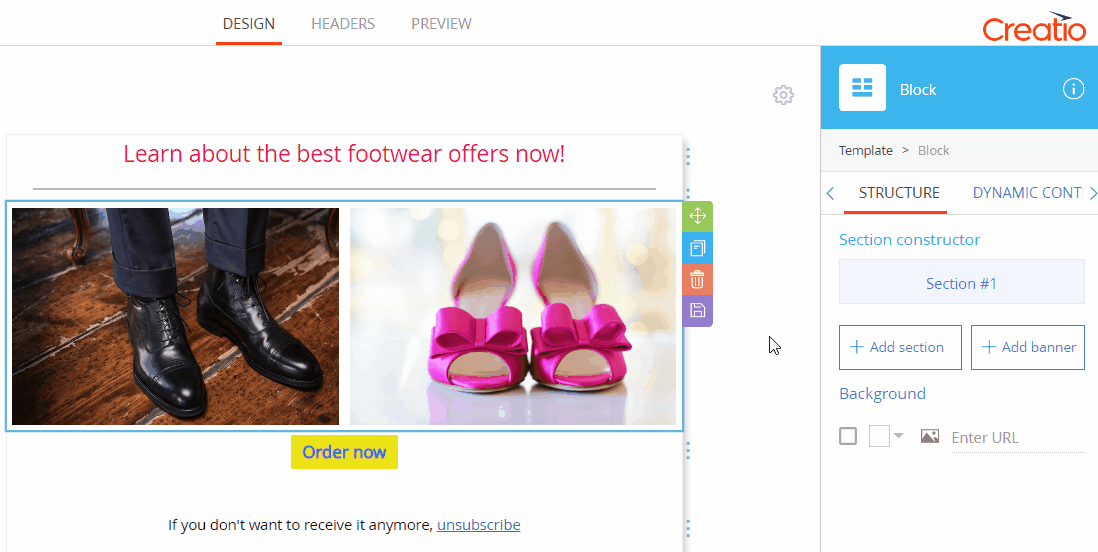
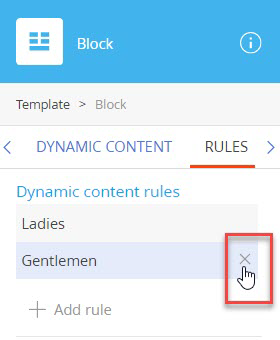
In the block setup area, open the Rules tab.
The Rules tab might be hidden in the block setup area. To open it, click next to the Dynamic content tab (Fig. 2).
 -
In the Dynamic content rules area, click Add rule.
-
In the Filter condition settings area, specify the rule name, and set up a filter to determine the group of recipients for this specific rule.
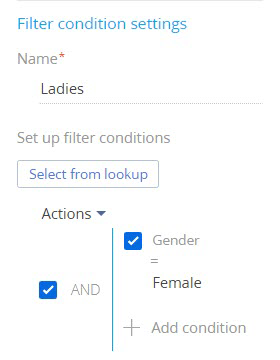
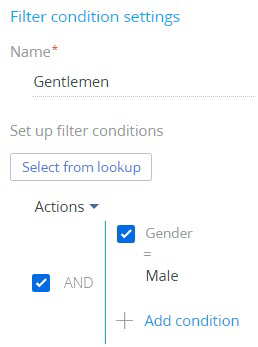
We will be using two dynamic content rules in our example: “Ladies” and “Gentlemen”. You will need to repeat steps 3-4 for each dynamic content rule. Filter conditions for the rules:
-
“Ladies”: contacts with the “Female” value in the Gender field (Fig. 3);
-
-
“Gentlemen”: contacts with the “Male” value in the Gender field (Fig. 4).
To edit a rule, select it on the Rules tab of the content block setup area and change the rule name or filter condition.
To delete a rule, select it on the Rules tab of the content block setup area and click the  button (Fig. 5).
Set up dynamic content for content blocks
After setting up the dynamic content rules, create and add content blocks to the template. In our example, the blocks with the promotion description, the button and the unsubscribe link will be the same for all recipients (static), while the block with images will be dynamic and changeable.
To set up the dynamic contents for a content block (Fig. 1):
-
Select the content block, whose contents you want to make dynamic. Click
 on its right border.
 -
In the block setup area, open the Dynamic content tab and click Add segment.
-
In the opened window, select the dynamic content rule that will determine the audience for receiving this specific content variant.
-
Repeat steps 2 and 3 for all rules that will affect the contents of the current content block. In our example, these are the “Gentlemen” and “Ladies” rules. You can apply the same rule to a content block only once.
-
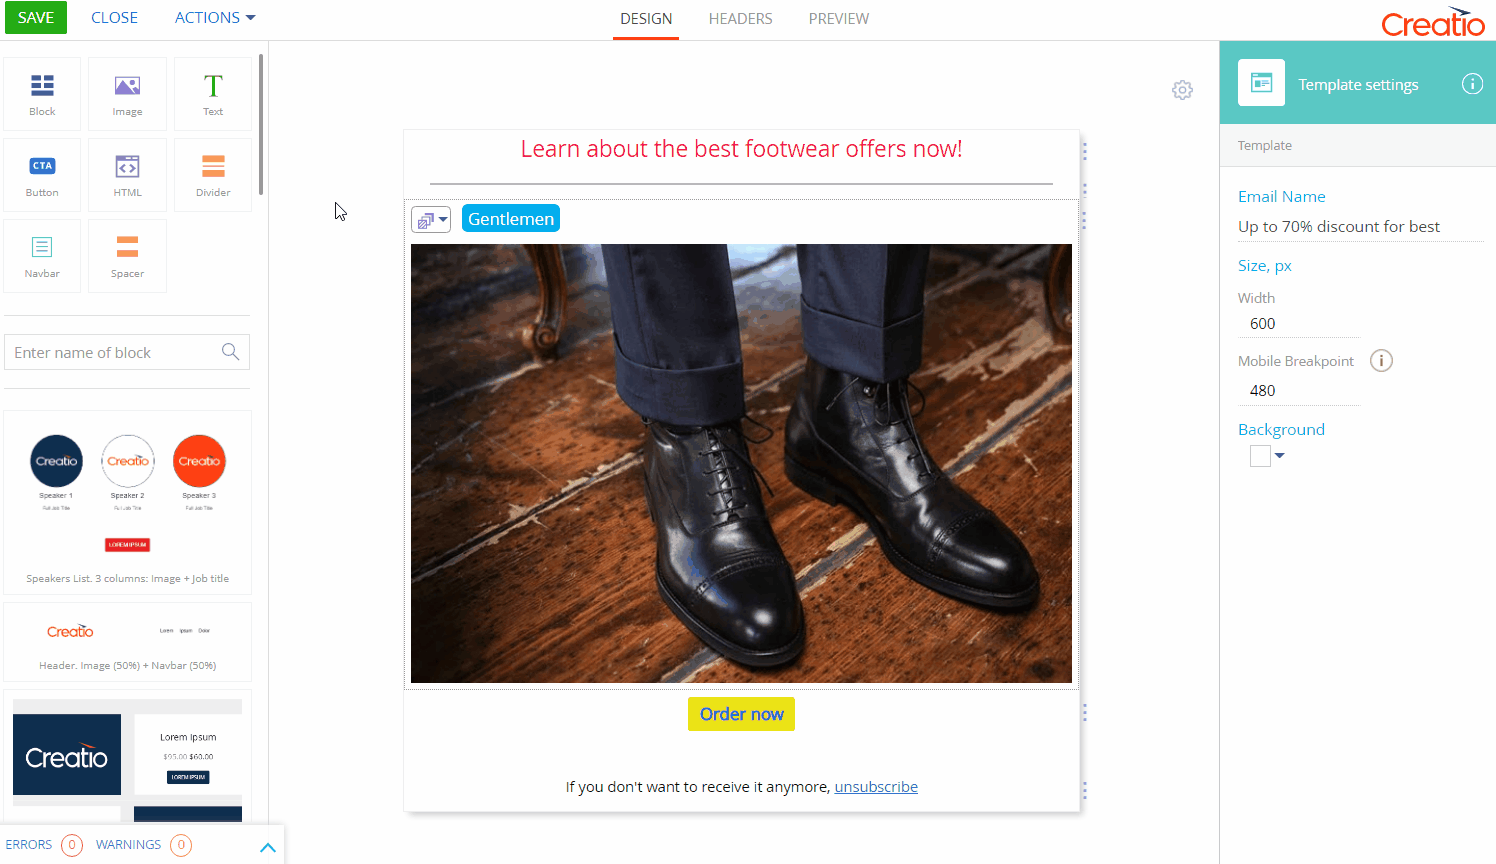
On the Dynamic content tab, click Add default content. The segments with default content will be sent to the recipients who do not correspond to any of the selected dynamic content rules. In our example, these will be the addresses of contacts whose Gender field is empty.
As a result, the content block will have three segments, for which you can set up different content.
-
If a recipient matches the conditions of two and more rules, set the priority for these rules. In this case, the recipient will only see one content variant configured for a higher priority rule. Set up the priority of dynamic content rules for each segment using the
 and
and  buttons to the right from the rule name.
 -
Click the
 button in the upper left corner of the content block and select a segment.
 -
Configure the content in the dynamic segment.
-
Repeat steps 6 through 7 for all dynamic segments of the template.
-
Save the template.
As a result, several replicas (variants of displaying the content depending on the configured rules) will be generated in the email template. You can see all the replicas in the Content Designer, in the preview mode (Fig. 2) or on the email page. Replica names are based on the names of the corresponding dynamic rules that are applied. In our example, the replicas are “Gentlemen,” “Ladies” and “Default.” If a template contains more than one dynamic block, replica names will include combinations of rules from all blocks: “Block A rule + Block B rule,” for example, “Gentlemen + New York.”
Check how your template displays in different email clients. Read more about test emails in the “Send a test email” article.
After you send your email, you will be able to estimate its efficiency as a whole and the efficiency of each replica separately. Read more in the “Analyze email sending.”