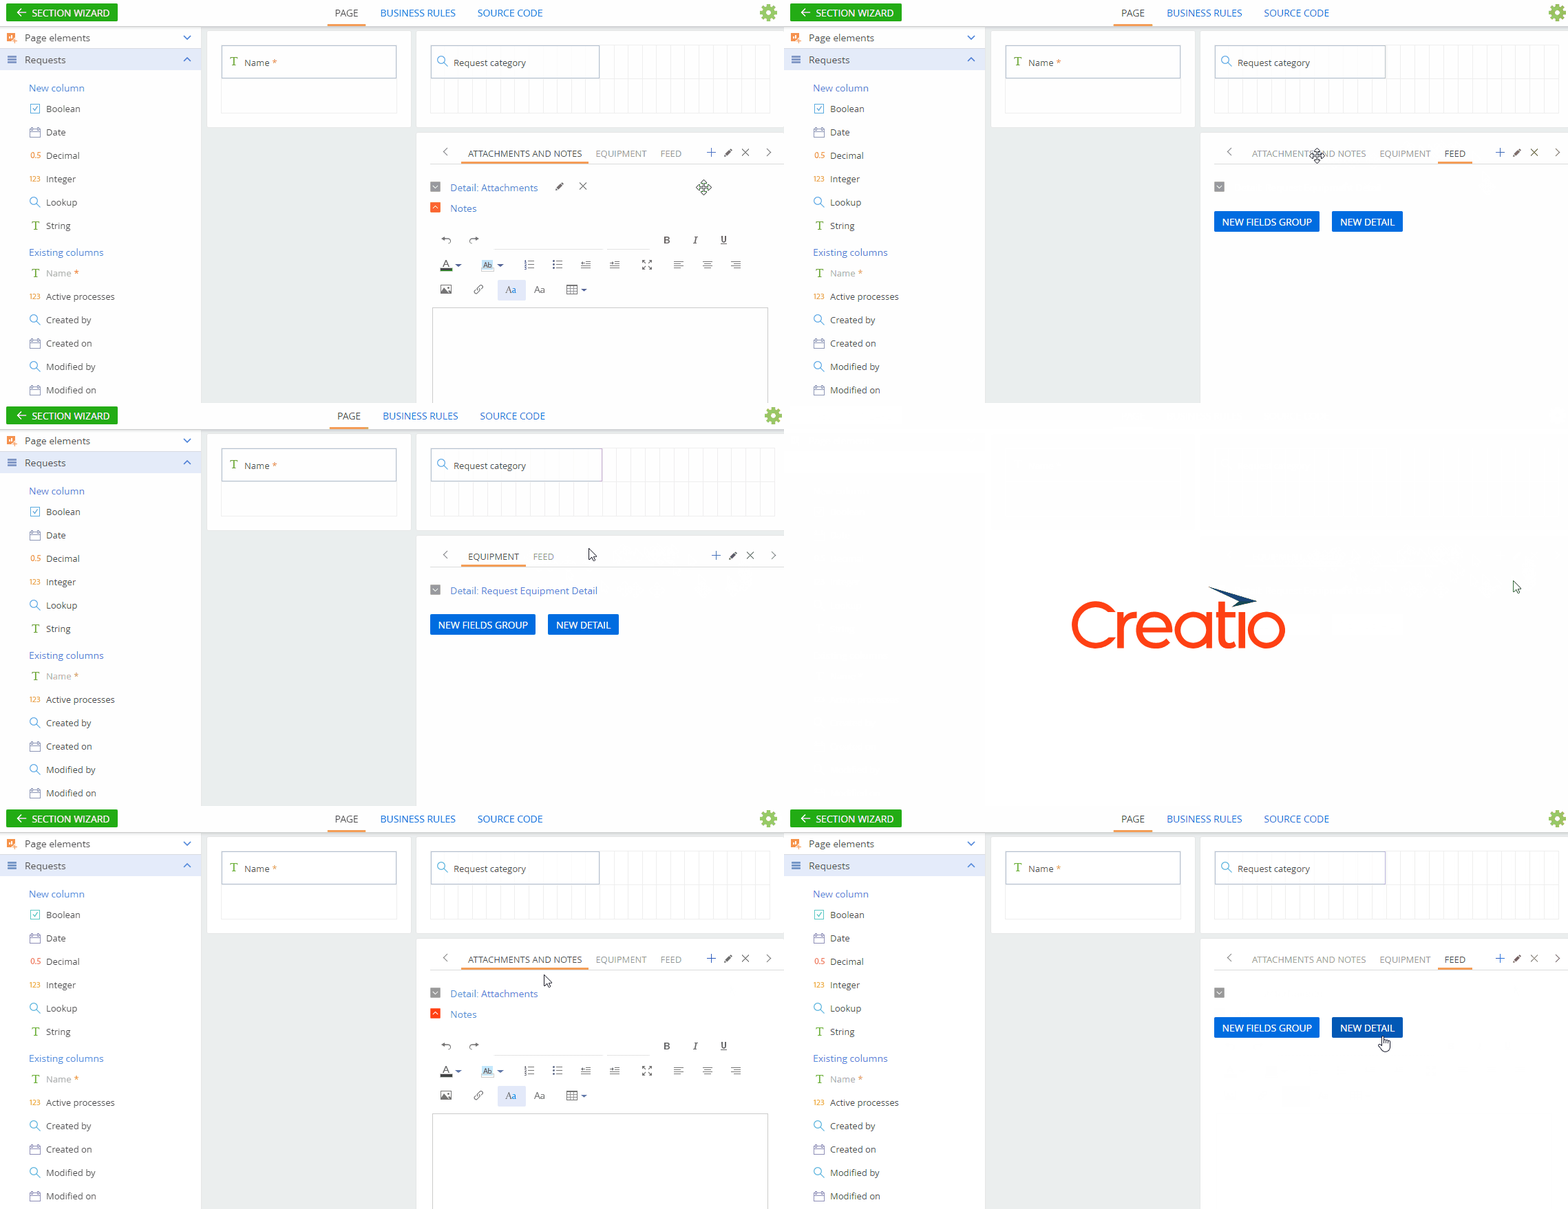
By default, each new page contains Attachments and notes and Feed tabs. You can add new tabs, edit the existing ones, as well as manage the order in which they are displayed on the page (Fig. 1).
To add a new tab on the page:
-
Open a section, e.g., Accounts.
-
Click View → Open Section Wizard.
-
In the “Section pages” block of the Section Wizard:
-
if you have only one edit page in your section, click Edit page;
-
if you have several edit pages in your section, click the link of a corresponding page in the list.
-
-
Click
 in the right part of the tab setup area.
 -
In the opened window, enter a caption for the new tab and click Save.
As a result, a new empty tab will be added. On a tab, you can add field groups, fields, and details.
To rename the currently open tab, click
 .
.To modify the tab content, add a field group and drag the required fields from the New column and Existing columns areas. You can add details on the tab in a similar way.
To change the tab position, hover the cursor over the tab title, click and drag it to the required place.
To delete a tab, select it and click  in the right part of the tab setup area. If you accidentally delete one of the default tabs, you can only restore it by discarding the current changes in the Section Wizard. There are two ways you can do it when you delete the tab:
-
Exit the Section Wizard by closing the window and open it again. You will see the accidentally deleted tab reappear in the tab setup area.
-
Refresh the page by pressing F5 as soon as you delete the tab (Fig. 2).

