Use Creatio activities to manage your working hours, create schedules, plan activities for other employees, track interconnections between activities and other Creatio sections, and keep records of completed tasks.
There are several quick filters available in the section:
-
By date (Start and Due fields) – displays activities that overlap with the specified period. For example, if the activity period is longer than the one specified in the quick filter and these periods overlap, Creatio will display the activity.
-
By employee – displays the activity records in which the selected contact is listed as a participant. The records are filtered by data in the Participants detail of an activity page.
In Creatio, a task can be:
-
added manually.
-
received through MS Exchange synchronization.
-
received through Google synchronization.
Create an activity from the section list
-
Open the Activities section.
-
Click the New task button. This will open a box.
-
Specify the main task data in the box.
Title
The goal of the activity, for example, “Prepare documents” or “Present an offer.”
Start
The date and time when the activity should be started and finished. By default, the Due field value is set to 30 days after the Start field value. Use the
 icon when planning activities for participants in different time zones.
Due
Status
Activity status. For example, “In progress” or “Completed.”
Owner
The user who is responsible for completing the activity.
Category
Activity category. For example, “Meeting” or “Paperwork.”
-
Click Save.
As a result, a new record will be added to the Activities section.
-
Open the Activities section list. Select a record in the section list and click Open. This will open a new page.
-
Provide more information about the task on the General info tab of the newly-opened page.
-
Use the Connected to detail to add information about other Creatio objects connected to the activity.
Account
Company or person connected to the activity. If you select a contact, Creatio will populate the Account field with the company specified on the contact page.
Contact
Contract
Contract connected to the activity.
Opportunity
An opportunity whose part the activity is. If you select an opportunity, Creatio will populate the Account and Contact fields with the data from the fields of the selected opportunity.
Document
Document connected to the activity.
Invoice
Invoice connected to the activity.
Order
Order connected to the activity.
Lead
A potential customer for whom you create the activity. If you select a lead, Creatio will populate the Account and Contact fields with values from the lead page.
Project
The project connected to the task. If you select a project, Creatio will populate the Contact, Account, and Opportunity fields with the data from the fields of the selected project.
-
Create activity reminders in the Reminders field group.
Remind owner
Remind the owner and/or author about the activity at a specified time. Creatio will display the information about new reminders on the owner's and/or author's communication panel.
Remind author
Remind on
The date on which the activity owner or author will receive the reminder.
-
-
Specify the list of contact persons who participate in the task/call on the Participants tab. By default, you add a participant to the detail from the contact list, the detail will display the information from the Job title and Business phone fields of the contact page. Also, the activity will appear in the activity list of all users specified in the detail.
-
Add more information about the task, as well as files and links to the web resources related to the activity on the Attachments and notes tab.
-
Click Save.
Create a connected activity
Connected activities let employees copy all connections from a given activity to a new one, saving your employees' time. To create a connected activity:
- Go to the Activities section.
- Open the record of the relevant task.
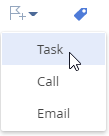
- Click
 on the toolbar and select the type of the activity to create (Fig. 1). This will open a new page.
 -
Specify the title and, if necessary, the start and due time on the newly-opened page.
-
Select the Show in calendar checkbox to make the activity appear in the Calendar view of the Activities section.
This will create a new activity with all of the source activity's data about the author, owner, and connected objects. If the source activity has the Result details field filled out, the value of the field will be copied to the title of the connected activity. Creatio does not display the connection between the source activity and the connected activity.
Create an activity from the calendar
You can add tasks to the section directly from the calendar. To do this:
-
Drag the cursor to highlight the period required to complete the activity (Fig. 2).
Fig. 2 Highlight a period in the calendar view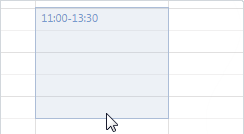
-
Start typing the activity title. An activity mini page with the text you have already entered will open (Fig. 3).
Fig. 3 Add the task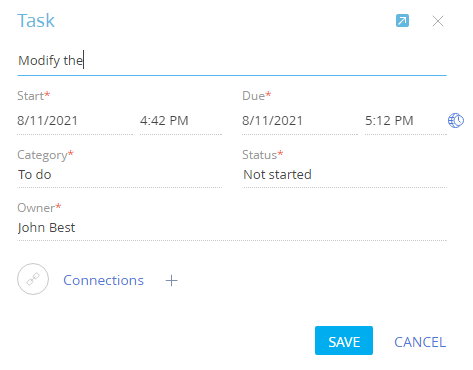
-
Enter the text, if necessary, connect the activity to other Creatio records, and save the changes.
This will add a new task to Creatio.
Edit an activity in the calendar
To edit an existing activity in the calendar view:
-
Click the title of the needed record in the calendar area. This will open the activity mini page.
-
Click the
 button to switch the mini page to edit mode, make necessary changes, e. g., duration, status, owner, and save the mini page.
You can change activity duration without opening its mini page. To do this, hover over the activity border and drag the activity to the desired time mark (Fig. 4).
Fig. 4 Change the activity duration in the calendar view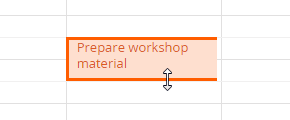
Drag the activity to the desired time in the calendar view to move the activity to another date or time. If there are several activities are scheduled for the same time, they will be displayed in the calendar view within the same period.