Creatio contacts are the contact persons of the customers and partners, individual clients, and other business contacts.
Use the Contacts section to work with contacts. Use this section to group the contacts by various parameters, analyze the history of interactions with customers, and view the resulting statistics.
Contact personal data are stored in the contact’s profile, on the Communication channels and Addresses details at the Contact info tab, and on the Job experience detail at the current employment tab. In the database, they correspond to the following tables: “Contact,” “ContactCommunication,” “ContactAddress,” and “ContactCareer.”
-
added manually
-
imported from Excel
-
imported from the landing page
-
saved manually or automatically during lead qualification (available in Sales Creatio and Marketing Creatio)
-
received through synchronization with social networks
-
received through Google synchronization
-
created with incoming mail processing
-
created with Single Sign-On authentication.
Create a contact manually
-
Open the Contacts section
-
Click the New Contact button.
-
In the opened window, fill out the contact profile:
Full name
First and last names of the contact. The field is required.
Type
Type of contact, for example, “Customer” or “Contact person.”
Account
The company whose employee the contact is.
Full job title
Contact's current position.
Department
The department of the company where the contact works.
Mobile phone
Contact's mobile phone number. The value is synchronized with the Communication options detail of the General information tab.
Email
The email address of the contact. The value is synchronized with the Communication options detail of the General information tab.
-
Click Save.
-
On the page that opens, add a photo of the contact to display on the contact page, the section list, and the feed. To add a photo, click
 and upload the photo using the standard file selection window. We recommend uploading a square image (aspect ratio: 1:1). Click on the
  button to remove the photo. If you mouse over the photo area, the buttons will become visible.
 -
On the General information tab, populate the contact data:
Type
Type: customer, supplier, contact person, or employee. If you populate this field on the previous step, the data will automatically display on the General information tab.
Owner
Name of the responsible employee.
Title
Honorific for the contact, for example, “Mr” or “Mrs.”
Gender
Gender of the contact.
Salutation
The preferred way to address the contact.
Preferred language
The language to use by default for automated communications with the contact. Affects the language of email notifications. If no preferred language is set for a contact, the notifications will be sent in English (the default language). The drop-down list of this field contains only languages whose status is set to “Active” in the Customer languages lookup.
Age
Contact age.
The field is populated automatically and is grayed out if automatic calculation of contact age is enabled. Creatio calculates a contact’s age based on the value in the Birthdate field. If the Birthdate field is empty, the value in the Age field will be “0.”
If you disable the automatic calculation of contact age, the Age field will become editable. More information about age calculation is available in the “Contact age calculation” article. -
Specify the addresses and communication options of the contact. Learn more in the “Manage contact communication options” article.
-
Add dates important for the contact on the Noteworthy events detail. The detail fields are displayed when you select the corresponding commands in the
 menu.
menu.Type
Type of the noteworthy event, such as “Birthday” or “Company day.” Defined when a record is added. You can change it afterward.
Date
Date of the noteworthy event.
-
Specify the connections between the selected contact and other contacts and accounts using the Connected to detail. Learn more in the “Create connections between companies and accounts” article.
-
Navigate to the Current employment tab and populate contact career data. Learn more in the “Manage contact career” article.
-
Go to the Communication channels tabs to restrict the usage of the communication options. Specify the communication options no to use for communicating with the contact. The Do not use email, Do not use phone, Do not use SMS, Do not use mail checkboxes signify which communication options should not be used to contact the person. These fields are non-editable. The values are filled in on the Communication options detail of the General information tab.
-
Click Save.
As a result, a new contact record will be added to Creatio. Update the contact information at any moment, for example, via data enrichment.
When you save a record, additional actions are available:
-
The contact age is calculated based on the specified birth date. The contact’s age is calculated based on the value in the Birthdate field.
-
Duplicates search when saving a record. When you save a contact, a duplicates search page might open. It means that this record might be already registered in the system. You can edit the new record or indicate that the records found are not duplicates of the newly saved record.
Add a new contact from an email
If an email is received from a contact that has not been registered in the system, the sender's data will be displayed as “unrecognized” in the emails. In this case, you can create a new contact record directly from the incoming email. To do this:
-
Open the email tab in the communication panel.
-
Select the author of the email for which you want to create a contact.
-
Click
 .
. -
Select the Create “contact name” from the data enrichment menu (Fig. 1).
Fig. 1 – Creating a new contact from the email conversation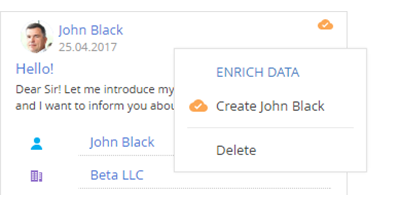
-
Select the contact data that you want to add in the opened window.
-
Save the changes.
As a result, a new contact will be added to the system. The History tab of the new contact page features all emails where the contact is either the sender or recipient over the last seven days. The email will be automatically linked to the new contact.
Create a contact from a case
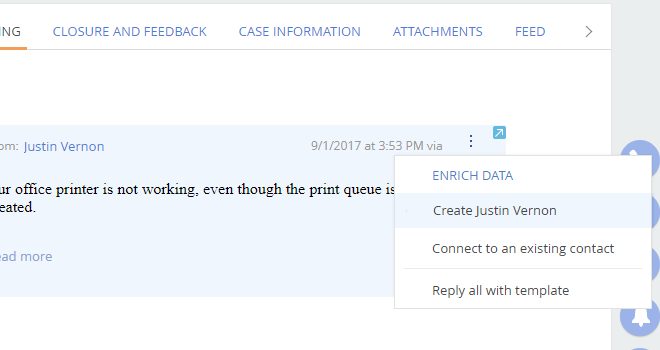
Service Creatio products enable you to create a new contact from a case page if the case was created based on an email from unknown contact. Adding a new contact that way is similar to adding a contact from an email on the communication panel (Fig. 2). Creating a new contact only requires the name and the email address of the case contact, specified in the “From” field in the email (e.g., John Best, <john.best@gmail.com>).
The email used to create a contact will be displayed on the Email detail on the contact’s page. Creatio will prompt you to select the contact as the main contact in the case.