Installing the bpm’online application on-site
To install bpm'online the following components are required:
1.MS SQL Server 2008 or higher
2.Microsoft .Net Framework 4.5
3.IIS 7 or higher
4.Redis Server
The main steps during bpm'online installment:
1.BPMonline database deployment.
2.Setting up parameters to connect to the database server and Redis Server in the ConnectionStings.confing file.
3.Copying the application files and IIS setup.
4.Setting up task planner if required.
Note
Deployment procedure of MS SQL Server, SVN server and Redis Server session storage is covered in the documentation of each product.
Contents
•BPMonline database deployment
•Setting up the ConnectionStrings.config file
•Creating and setting up application website using IIS
Deploy the bpm'online database on an SQL server by restoring it from a backup copy file that is located in the application folder.
To restore a database:
1.Log in to Microsoft SQL Server Management Studio.
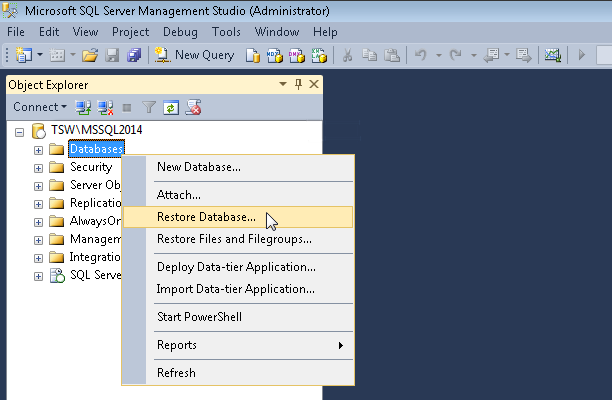
2.Click the [Databases] catalog and select the [Restore Database] option from the context menu (Fig. 309).
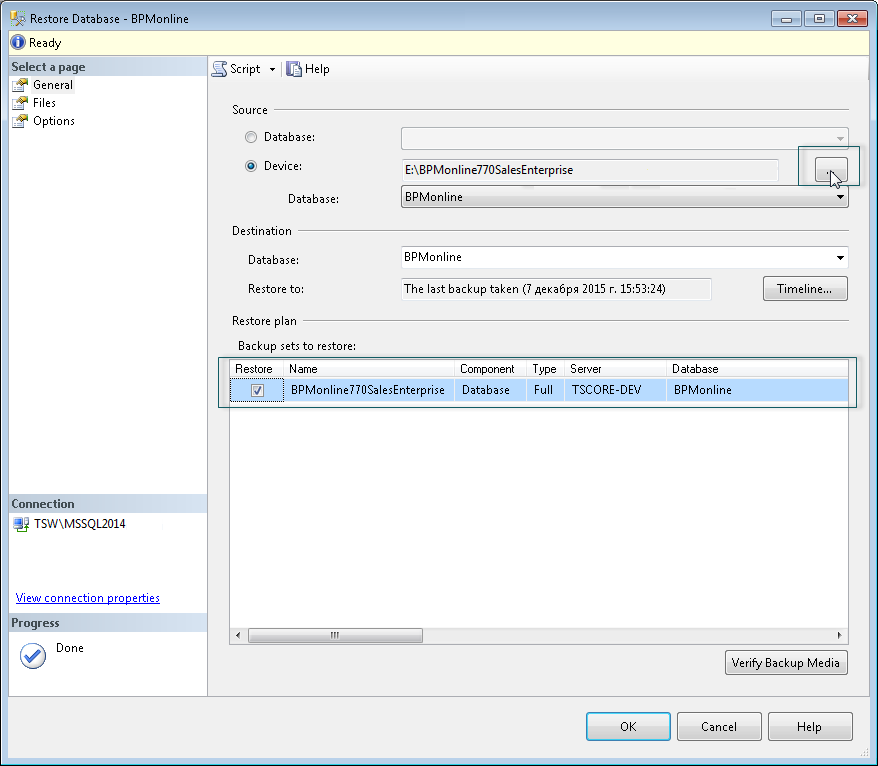
3. In the [Restore Database] window:
a.Specify the name of the database in the [Database] field;
b.Specify the [Device] checkbox and specify the path to the database backup copy file. By default, the backup file in located in the “[DB]” folder together with executable BPMonline files (Fig. 310).
Fig. 310 Entering the name of the database and selecting a file path
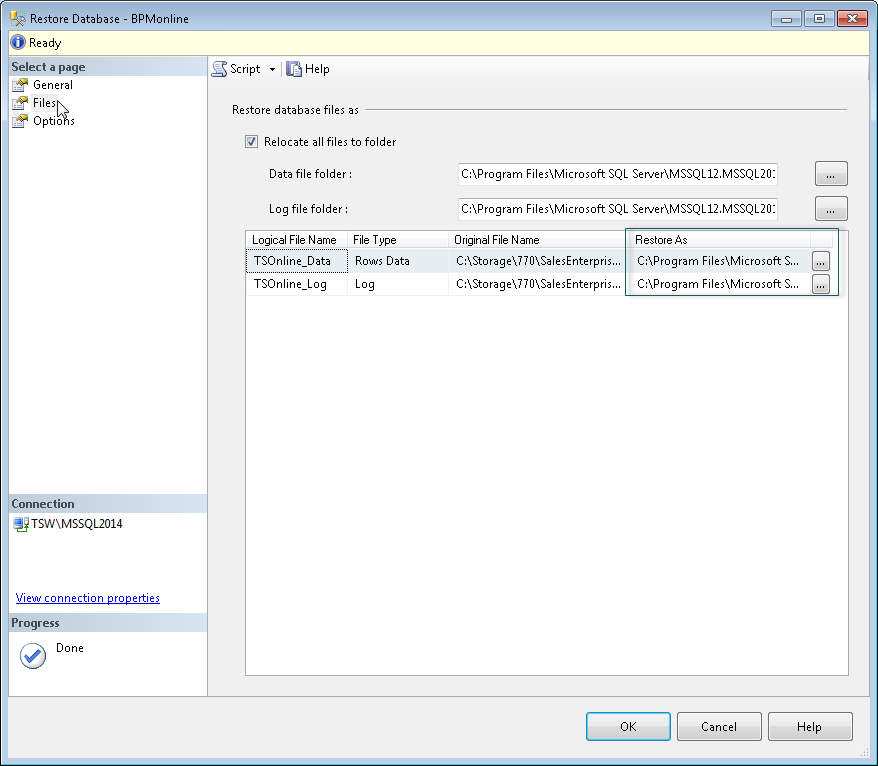
4.Go to the [Files] tab. In the [Restore the database files as] area, specify the paths and the names of the database files (Fig. 311). Specify the paths to the TS_Data.mdf and TS_Log.ldf database files.
Attention
It is required to create a folder that will be used for database files restoring beforehand, as the SQL Server may not create directories.
Fig. 311 Specifying file names and paths
5.Click the [OK] button and wait for the database restore process to be finished.
Redis Server is installed from a setup file.
Run the *.exe file to start Redis Server setup. Click the [Next] button during the process of installment.
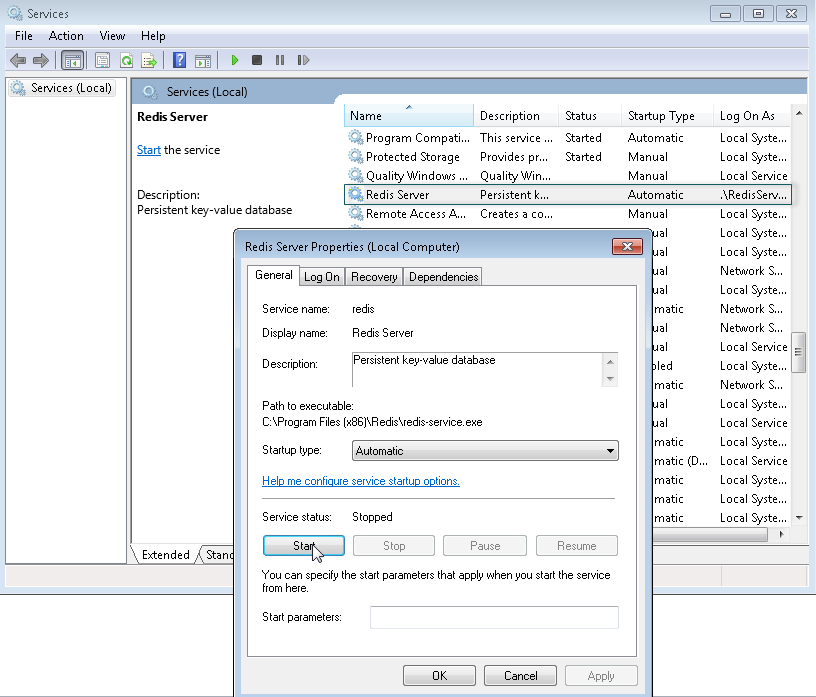
Start the Redis Server after the installment. To start the Redis Server go to the menu [Control Panel]-[Administrative Tools]-[Services] or enter "Services.msc" in the command line (Fig. 312).
Setting up the ConnectionStrings.config file
To set up the ConnectionStrings.config file:
1.Edit the ConnectionStrings.config file that is located in the root folder of bpm'online. Specify the connection parameters (connectionStrings) for the restored database (name=”db”) and Redis Server (name=”redis”).
<?xml version="1.0" encoding="utf-8"?>
<connectionStrings>
<add name="db" connectionString="Data Source=TSW\MSSQL2014; Initial Catalog=SoftkeyRUS_ESE_HOTFIXSoftkey_RUS_MSSQL_7.7.0; Persist Security Info=True; MultipleActiveResultSets=True; User ID=Sup; Pooling = true; Max Pool Size = 100; Async = true" />
<add name="redis" connectionString="host=localhost;db=1;port=6379;maxReadPoolSize=25;maxWritePoolSize=25" />
<add name="reports" connectionString="XpoProvider=MSSqlServer;Data Source=TSW\MSSQL2014;Initial Catalog=BPMonline760Solution;Integrated Security=SSPI" />
<add name="defRepositoryUri" connectionString="" />
<add name="defWorkingCopyPath" connectionString="%TEMP%\%WORKSPACE%" />
<add name="defPackagesWorkingCopyPath" connectionString="%TEMP%\%APPLICATION%\%WORKSPACE%\TerrasoftPackages" />
<add name="clientUnitContentPath" connectionString="%TEMP%\%APPLICATION%\%WORKSPACE%\ClientUnitSrc" />
<add name="sourceControlAuthPath" connectionString="%TEMP%\%APPLICATION%\%WORKSPACE%\Svn" />
</connectionStrings>
2.You can see the database server name (Data Source) in the authorization window while connecting to the server using Microsoft SQL Server Management Studio (Fig. 313).
Fig. 313 SQL server authorization
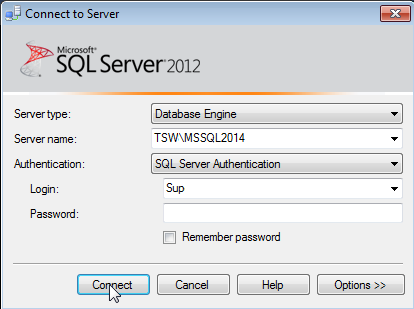
3.Specify the same database name (Initial Catalog) that you used in the [Database] field while database restoring (Fig. 310).
Checking Windows mandatory items
Make sure that Web Server IIS and Windows components are installed on the web server before creating and setting up a website.
|
Component |
Component items |
|---|---|
|
Common HTTP Features |
Static Content; Default Document; HTTP Errors; HTTP Redirection. |
|
Application Development |
ASP.Net; .Net extensibility; ISAPI extensions; ISAPI Filters. |
|
Microsoft .Net framework 3.5.1 |
Windows Communication Foundation HTTP Activation; Windows Communication Foundation Non-HTTP Activation. |
|
Microsoft .Net Framework 4.5 advanced services (Windows 8, Windows Server 2012) |
ASP.NET 4.5; WCF services •HTTP Activation; •Message Queuing (MSMQ) Activation; •Named Pipe Activation; •TCP Activation; •TCP Port Sharing. |
|
Health and Diagnostics: |
HTTP Logging; Logging Tools; Request Monitor; Custom Logging. |
|
Security |
Basic Authentication Request Filtering IP and Domain Restriction |
To check the availability of the needed components:
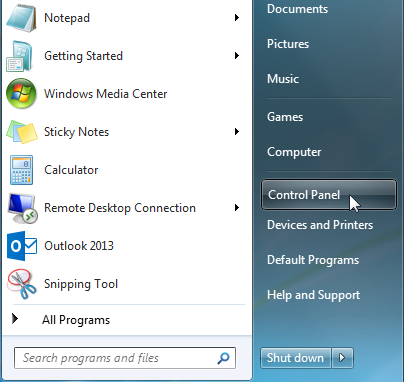
1.Select the [Control Panel] section in the [Start] menu (Fig. 314)
Fig. 314 The [Control Panel] section in the [Start] menu
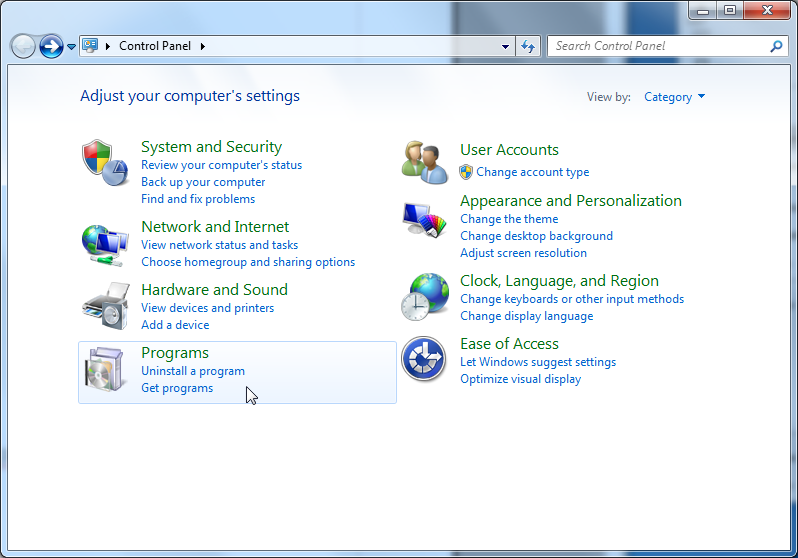
2.Select the [Programs] option in the opened window (Fig. 315).
Fig. 315 Selecting [Programs] option
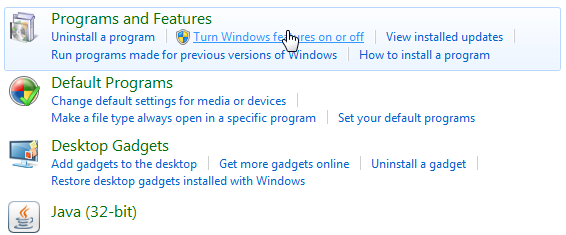
3.From the [Programs and Features] menu, select the [Turn Windows features on or off] option (Fig. 316).
Fig. 316 Selecting the [Turn Windows features on or off] option
4.Select all required components in the [Windows Features] window (Fig. 317).
Fig. 317 Selecting Web Server IIS and Windows components

Creating and setting up application website using IIS
To create and set up a website:
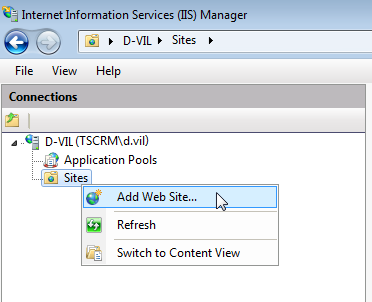
1.In the IIS control window, click the [Sites] folder and select the [Add Website] option from the context menu (Fig. 318).
Fig. 318 Creating a website for bpm'online application
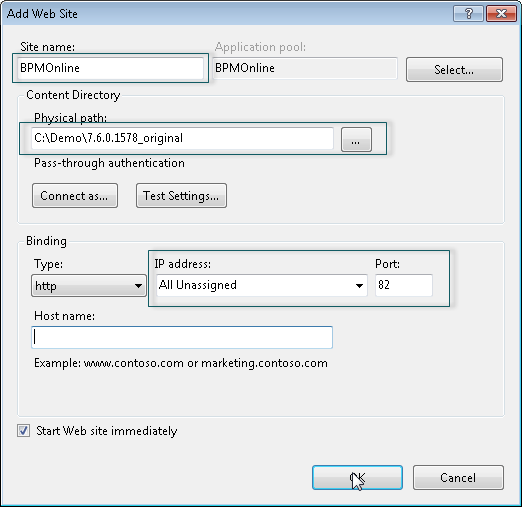
2.Specify the name of the website, the path to BPMonline files, IP address and website port (Fig. 319).
Attention
The following path C:\Inetpub\wwwroot is used by default. If needed, specify your own IP address.
Fig. 319 Website parameters input
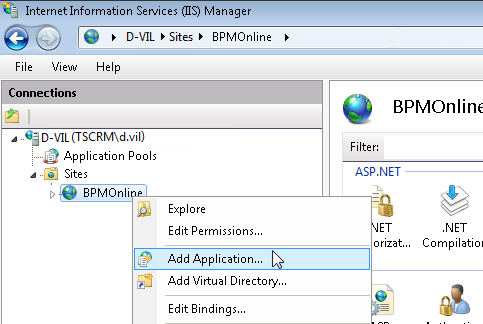
3.In the [Connections] field, click the created website and select the [Add Application] option in the menu (Fig. 320).
Fig. 320 Creating application on the website
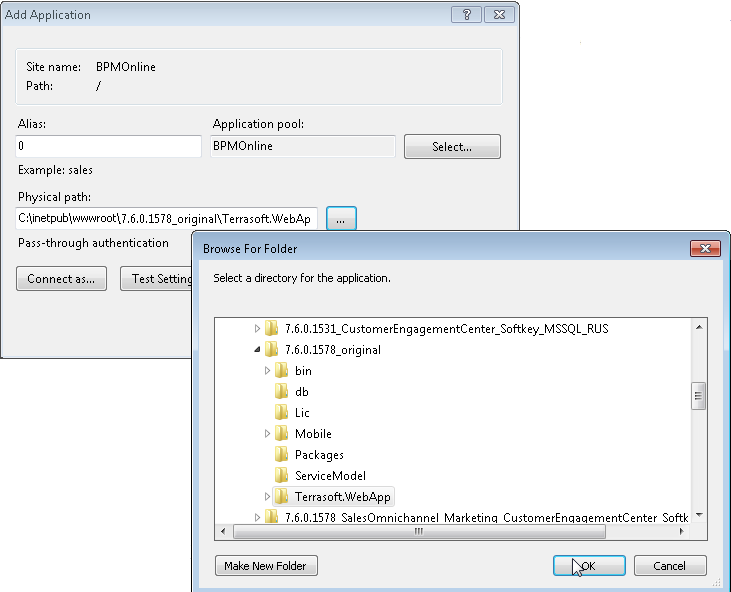
4.Specify the name of the application "0" in the [Alias] field. Specify the “Terrasoft.WEBApp” directory (Fig. 321).
Fig. 321 Application parameters input
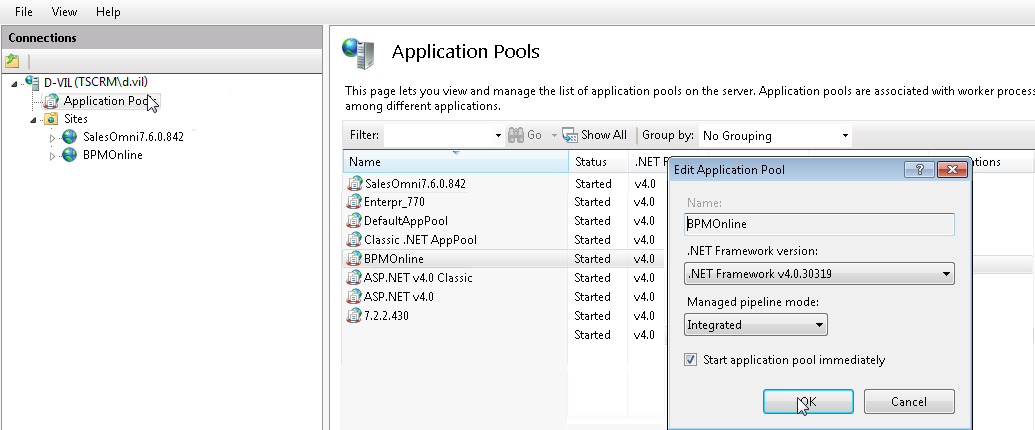
5.Go to the [Application Pools] section.
6.Select the [BPMonline] pool.
7.Select the [Integrated] mode in the [Managed pipeline mode] field.
8.Specify the Asp.Net - 4.0.30319 version in the [.Net Framework version] field (Fig. 322).
Fig. 322 Applications Pools parameters input.
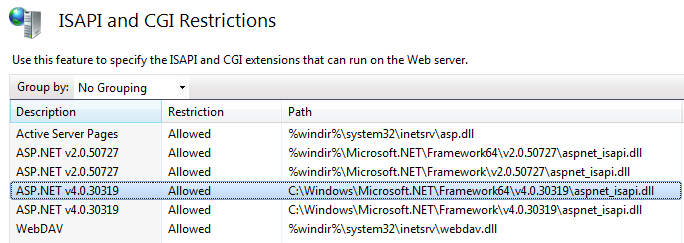
9.Check if the specified ASP.Net version is allowed. To do this:
a.Go to the ISAPI and CGI Restrictions on the web-server level (Fig. 323).
Fig. 323 Opening ISAPI and CGI Restrictions

b.Make sure that the [Allowed] status is checked in the [Restriction] field for the used ASP.Net version (Fig. 324).
Fig. 324 Status check for the ASP.Net version used
10.Make sure that all the required permissions are active. To do this:
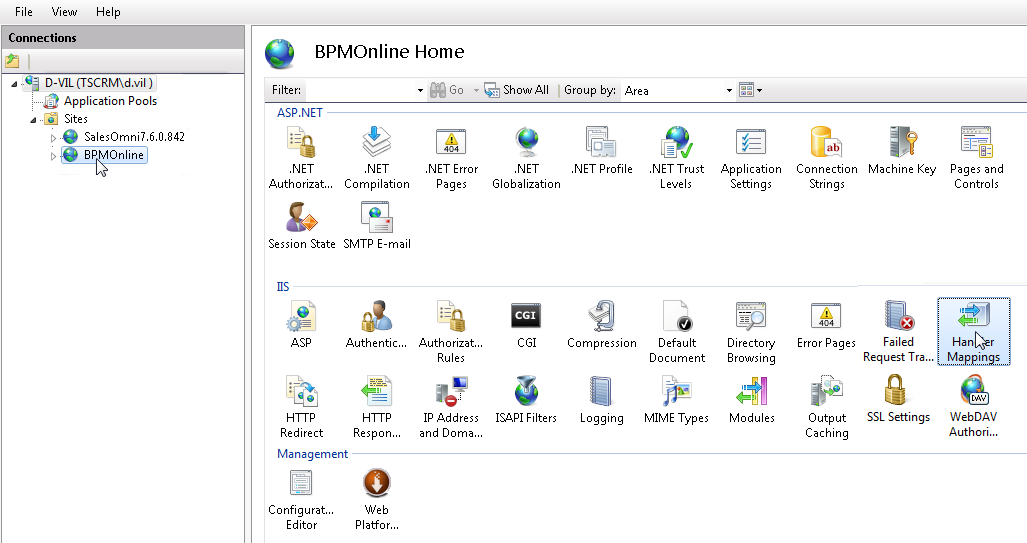
a.Open the Handler Mappings on the server level (Fig. 325).
Fig. 325 Opening the Handler Mappings
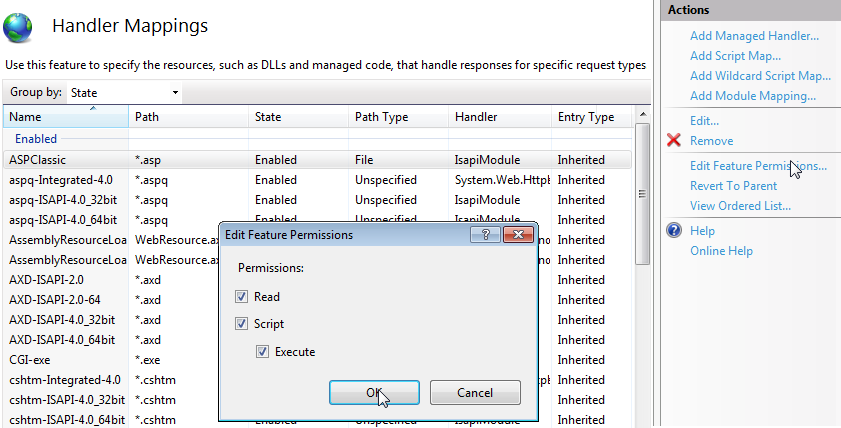
b.Select the [Edit Feature Permissions] action.
c.Make sure that all the required checkboxes are selected in the [Edit Feature Permissions] window (Fig. 326).
Fig. 326 Checking the required parameters
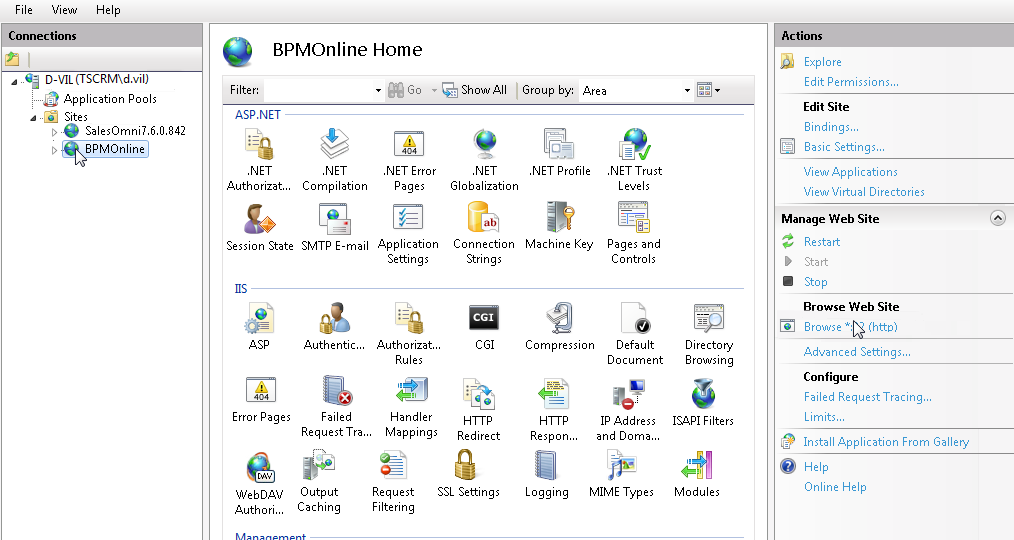
11.Restart the website (Fig. 327).
Fig. 327 Checking page display
12.Follow the website address and make sure that the authorization page is displayed.