You can select the columns that will be displayed in the list, as well as set up their width, sequence, and appearance. All lists can be set up individually for each system user.
You can display the columns of current and connected objects. For example, you can display the [Primary contact] column, as well as the [Job title] column connected to the [Primary contact] column for the “Account” object. Similarly, you can display the [Account] column, as well as the [Job title] column of the “Account” object for the “Activity” object.
Also, the list can display aggregate columns that show the summary information about the subordinate objects. For example, for the “Account” object, you can calculate the number of activities by account; for the “Contact” object, you can display the date of the last call by customer, etc.
Note
Objects that contain fields with the current object specified are called “subordinate objects” or “objects with reverse connection”.
The name of the connected column is generated in the format “Object.Column”, for example, “Primary contact.Job title” or “Account.City”.
The name of the aggregate column is generated in the format “Function(Object (the way it is connected)).Column”. For example, to see the date of the last activity registered for a contact, display the following column in the list: “Maximum(Activity(by column Contact)).End date”. The column caption that is displayed in the list can be customized.
Contents
• Setting up columns in the tile view list
• Adding the current object column
• Adding an aggregate column in the list
Setting up columns in the tile view list
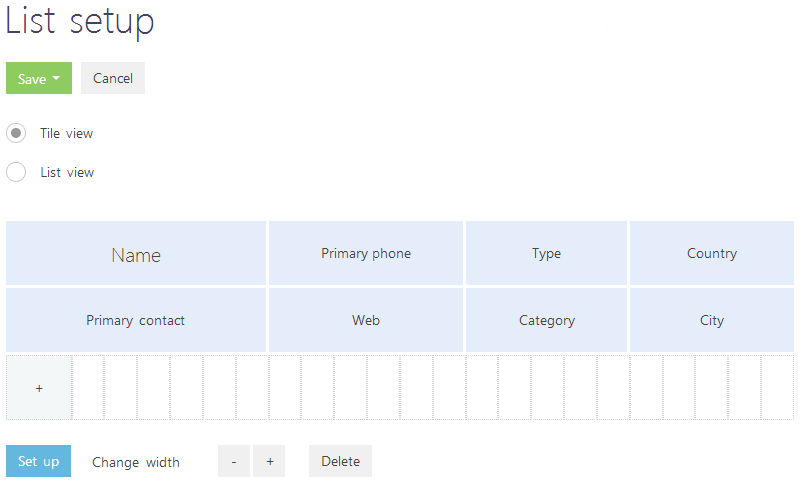
Select the [Set up columns] command in the [View] menu to open the columns setup page (Fig. 21).
Fig. 21 The columns setup window
The columns setup area consists of cells that can be filled in with the needed columns. The cells in the tile view can consist of several rows, and the cells in the list view can consist of only one row.
Use the [+] and [-] buttons to manage the width of columns. You can widen a column only if there is a free cell next to it.
To move a column, select it and then drag it to an empty cell holding the left mouse button. To hide a column, select it and then click the [Delete] button. If there are no columns in the row after the column has been removed, then the row will be hidden.
To add a new column, click the  button. If you add a column in the lowest row of the tile list, then additional empty row will be added below.
To set up the display parameters for a column, select it and then click the [Set up] button. In the tile view, you can change or hide column captions, specify functions and filters for calculating aggregate columns, as well as select the caption style.
To save changes, click the [Save] button. The changes will be saved for the current user. If the column settings must be saved for all users, select the [Save for all users] command from the [Save] button menu.
Note
To remove custom column settings in all sections, click the [Restore default settings] button in the user profile.
Adding the current object column
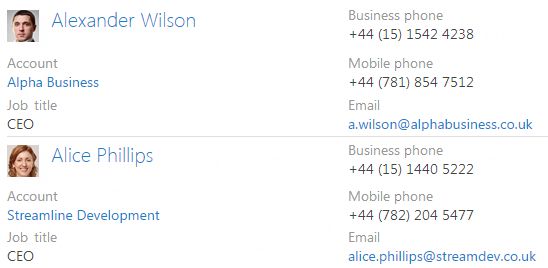
Described below is the procedure for adding current object columns to the list. For example, to display the [City] and [Department] columns in the Contacts section:
1. Open the Contacts section.
2. In the [View] menu, select the [Set up columns] command.
3. On the column edit page, click the  button.
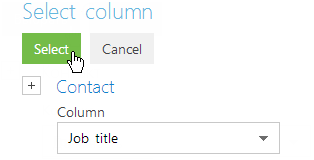
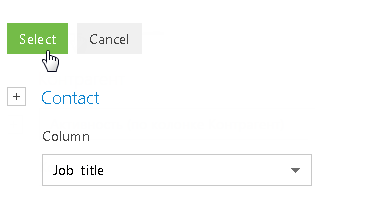
4. Select the column to be displayed, for example, “City”. Click the [Select] button (Fig. 22).
Fig. 22 Selecting a column to be displayed
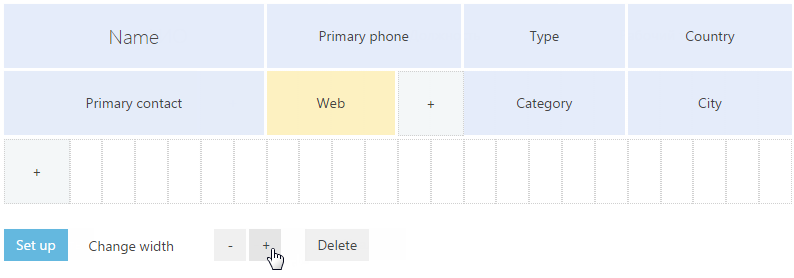
5. In the column settings area, select the added column and widen it by clicking the [+] button (Fig. 23).
6. Use the same procedure to add the [Department] column. Click the [Save] button.
As a result, the selected columns will be displayed in the Contacts section list (Fig. 24).
Fig. 24 Setting up columns in the [Contacts] section
Adding an aggregate column in the list
You can display aggregate (calculated) columns of the connected objects. For example, you can get the summary information about the “Account” object by the connected “Activity” object.
To display the number of activities connected to each account in the Accounts section:
1. Open the Accounts section.
2. In the [View] menu, select the [Set up columns] command.
3. On the column setup page, click the  button.
4. In the opened column selection dialog window:
a. Click the  button near the object name.
b. In the added field, select the object with the reverse connection, for example, “Activity (by column Account)”.
c. In the [Column] field, specify the column of the connected object, for example, “Quantity”.
d. Click the [Select] button (Fig. 25).
Fig. 25 Selecting an aggregate column
5. On the opened page, specify the display and filter parameters for the selected column (Fig. 26).
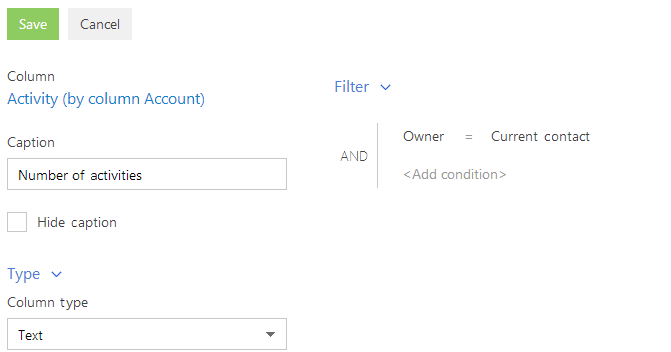
a. Enter the caption for the column to be displayed, for example, “Number of activities”.
b. In the [Column appearance] field, select the text size for the column caption. For example, if you need to display the caption in upper-case, select the “Title” format.
c. Specify the filter for data aggregating, if necessary. For example, to display only those activities that are connected to the specified owner, apply filtering by the [Owner] field.
6. Click the [Save] button on the column setup page.
7. Save the column setup parameters.
As a result, the accounts list will display the number of activities of the current user for each account.
Note
The [Format] detail is available in the tile view only.