 button at the top right corner of the application.
How to integrate with Asterisk
In bpm’online, the Asterisk integration functionality has a separate license. You need to form the license request, send it to our service team, upload the received licenses file into the system and finally, distribute the licenses between the users.
Note
See more details about licensing in the “Software licensing” and “License distribution” articles.
The integration can be performed if all prior Asterisk configurations are performed by the telephony administrator.
Asterisk provisioning
1.Create AMI user for bpm'online, specify the user's parameters in the “manager.conf” file, for example:
[terrasoft]
secret = terrasoft
deny=0.0.0.0/0.0.0.0
permit=0.0.0.0/0.0.0.0
read = system,call,log,verbose,command,agent,user,originate
write = system,call,log,verbose,command,agent,user,originate
Note
The “deny” and “permit” values should be replaced with the corresponding addresses.
2.Check the park feature activity and parameters of the “features.conf” file, for example:
parkext => 700
parkpos => 701-720
context => parkedcalls
parkingtime => 45
Attention!
The “parkingtime” value refers to the maximum put on hold time. Upon the expiry of this time the subscriber will resume the conversation with the agent. The “parkingtime” value should be sufficiently long to avoid early call return.
Setting bpm’online messaging service
The messaging service allows you to connect bpm’online to the telephony using AMI protocol to connect to Asterisk and distribute call events between bpm’online users.
1.Run the BPMonline Messaging Service Install.msi file on the message exchange server and proceed with the installation.
2.Specify the following parameters for Asterisk connector in the “Terrasoft.Messaging.Service.exe.config” configuration file:
<asterisk filePath=”” url=”Asterisk_name_or_server_address” port=”Asterisk_server_port” userName=”Asterisk login” secret=”Asterisk password” originateContext=”Outbound context” parkingLotContext=”Parking context” autoPauseOnCommutationStart=”true” queueExtensionFormat=”Local/{0}@from-queue/n” asyncOriginate=”true” sendRingStartedOnRingingState=”true” traceQueuesState=”false” packetInfoConfig=”Additional packages values to handle within the configuration” />
See the list of Asterisk connector parameters in the following table.
|
Parameter caption |
Parameter assignment |
|
FilePath |
Use this parameter for diagnostics of the system. It allows to repeat a set of events from the file. The default value should be empty. |
|
URL |
Asterisk server IP address parameter. |
|
Port |
AMI protocol port. By default, “5038”. |
|
OriginateContext |
The command is used to initialize the call from bpm’online phone number. The parameter contains the caption of the context from which the call will be made to the user phone number. The default value for FreePBX is “from-internal” |
|
parkingLotContext |
The context for call initialization to receive parking line. The default value is “originateContext”. |
|
AutoPauseOnCommutationStart |
The checkbox is used for the correct work with Asterisk queues. If the checkbox is selected, the system will put the agent on a pause in all queues after answering the call. The feature is used to avoid the second call during the handling of the first one and/or putting the first call on hold. |
|
queueExtensionFormat |
The call channel format while receiving the call from the queue. If using LocalChannel, the default value in FreePBX is “Local/{0}@from-queue”. |
|
sendRingStartedOnRingingState |
The checkbox stands for the correct handling of the call from the queue. If this checkbox is selected, the system will display the call with the user after receiving the “NewState” event with the Ringing parameter by AMI. The default value is “On”. |
|
traceQueuesState |
The checkbox is used to define the agent's status in the queues. It is used for debugging if the agent receives the second call from the queue while handling the first one in bpm’online. Information about the status of agents is being written to the log file of the connector. The default value is “Off”. |
Setting message exchange library
Message exchange library selection and setup is performed once by the system administrator.
1.Open the system designer by clicking the button at the top right corner of the application.
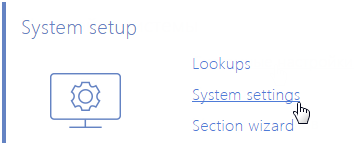
2.Click the [System settings] link in the [System setup] block (Fig. 231).
Fig. 231 Opening the [System settings] section
3.Select message exchange library Open the [Default message exchange library] system setting. On the system setting page:
a.Fill in the [Value by default] field by selecting the "Telephony integration library based on Asterisk (AMI) protocol" system setting.
b.Click the [Save] button.
4.Specify connection parameters for the message service. Open the “Message exchange server” system setting. On the system setting page:
a.In the [Default value] field, specify your message exchange server IP address as follows: "ws://0.0.0.0:2013" if your website is available using the http protocol or "wss://0.0.0.0:2013" if your website is available using the https protocol, where:
•"0.0.0.0" — IP address using which your message exchange server is available for the bpm'online users;
•"2013" — port that is used by default to connect to the message service. You can change the number of the port in the "Terrasoft.Messaging.Service.exe.config" configuration file.
Note
If your website is available using the https protocol and you are using a safe connection (wss) for the web sockets. It is required to install a safety certificate on the message exchange server and specify it in the configuration files of the message service. For more information about the setting, contact Terrasoft technical support at support.team@bpmonline.com.
b.Click the [Save] button.
Setting Asterisk parameters
These settings should be applied with each bpm’online user who received Asterisk integration license. Use the user login credentials to access the system.
1.Open the user profile page by clicking the [Profile] image button on the main page of the application.
2.Click the [Call Center parameters setup] button.
3.On the opened page, fill in the required values:
a.[Disable Contact Centre integration] – the checkbox allows you to disable bpm’online integration with the telephony. The call button will not be displayed on the communication panel of the application.
b.[Number] – Asterisk user line number. It matches with the phone number, by default. For example, to track the SIP/305 user line, specify the “305” value, and to track the SIP/office line, specify the “office” value.
c.[Outgoing call context] – specify outgoing call context if it differs from the systemic one specified in the “Terrasoft.Messaging.Service.exe.config” file for this particular user.
d.[Enable debugging] – the checkbox allows you to display troubleshooting information within the browser console. This troubleshooting information can be used when the telephony runs into problems and the customer addresses the service team.
4.Click the [Save] button on the page.
5.Update your browser page to apply the changes.
See also