To install bpm'online the following components are required:
1.MS SQL Server 2008 or higher
2.Microsoft .Net Framework 4.5
3.IIS 7 or higher
4.Redis Server 2.8 or 3.0.
To deploy bpm'online on-site application, do the following:
Deploy the database.
Install the Redis server.
Modify the ConnectionStrings.config file.
Enable and install obligatory Windows components.
Create and sett up application website using IIS.
Note
Deployment procedure of MS SQL Server or SVN server is covered in the documentation of these products.
Contents
•Deploying the bpm’online database
•Setting up the ConnectionStrings.config file
•Checking Windows mandatory components
•Creating and setting up application website using IIS
Deploying the bpm’online database
Deploy the bpm'online database on the SQL server by restoring it from a backup copy file that is located in the application folder. If required, you can use a database copy of your production website if, for example, you need to deploy a test site. The process of creating a DB backup is described in a separate article.
To restore a database:
1.Log in to Microsoft SQL Server Management Studio.
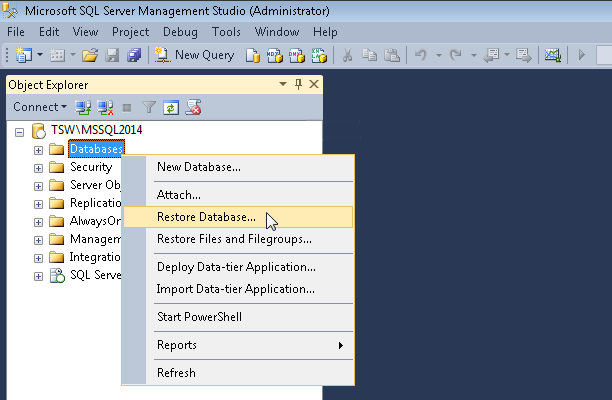
2.Click the [Databases] catalog and select the [Restore Database] option from the context menu (Fig. 438).
Fig. 438 Selecting database backup command
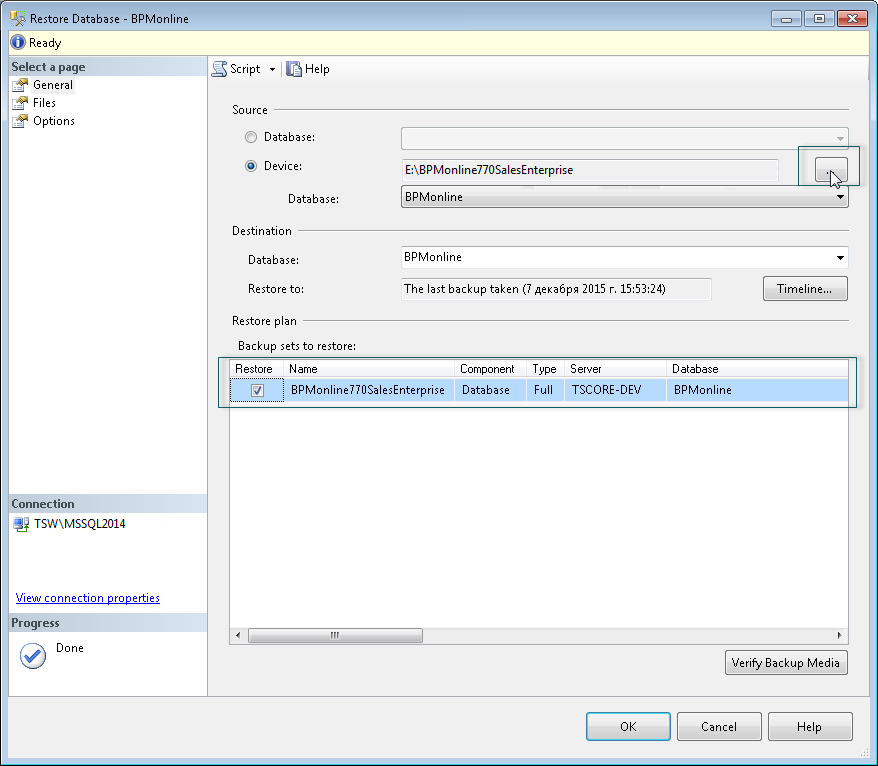
3. In the [Restore Database] window:
a.Specify the name of the database in the [Database] field;
b.Select the [Device] checkbox and specify the path to the database backup copy file. By default, the backup file in located in the “[db]” folder, which in its turn is located in the root folder with bpm'online executable bpm’online files (Fig. 439).
Fig. 439 Selecting database backup
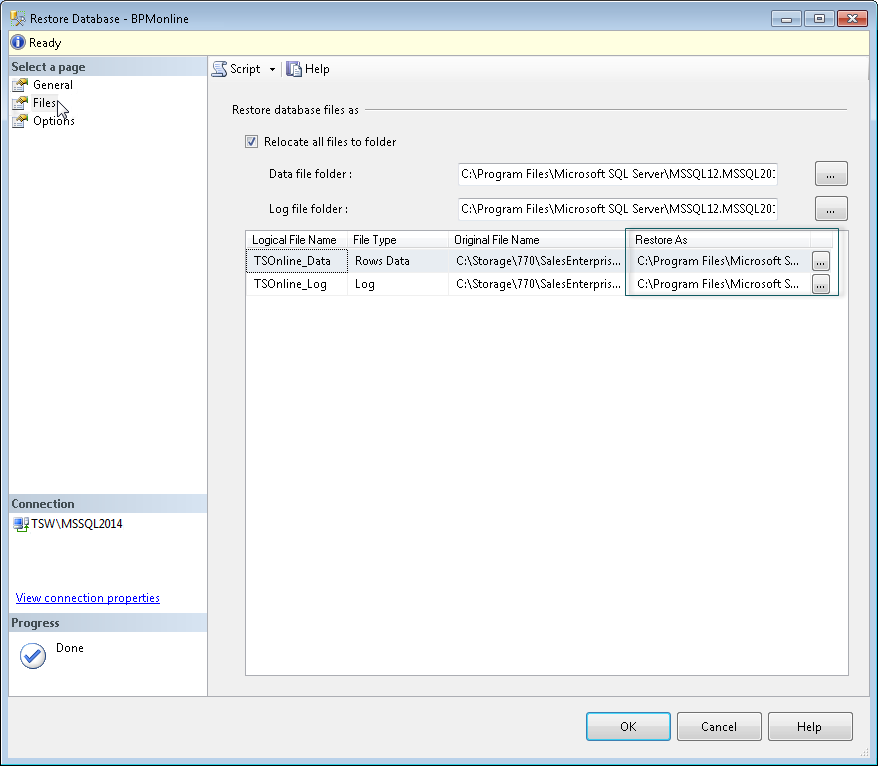
4.Go to the [Files] tab. In the [Restore the database files as] area, specify the paths and the names of the database files (Fig. 440). Specify the paths to the TS_Data.mdf and TS_Log.ldf database files.
Attention
It is required to create a folder that will be used for database files restoring beforehand, as the SQL Server may not create directories.
Fig. 440 Specifying the names and paths to S_Data.mdf and TS_Log.ldf files.
5.Click the [OK] button and wait for the database restore process to be finished.
Redis Server is installed from a setup file.
Run the redis-server.exe file to start Redis Server setup. During the installation, a number of commands will be run sequentially. Press Enter after each command is completed.
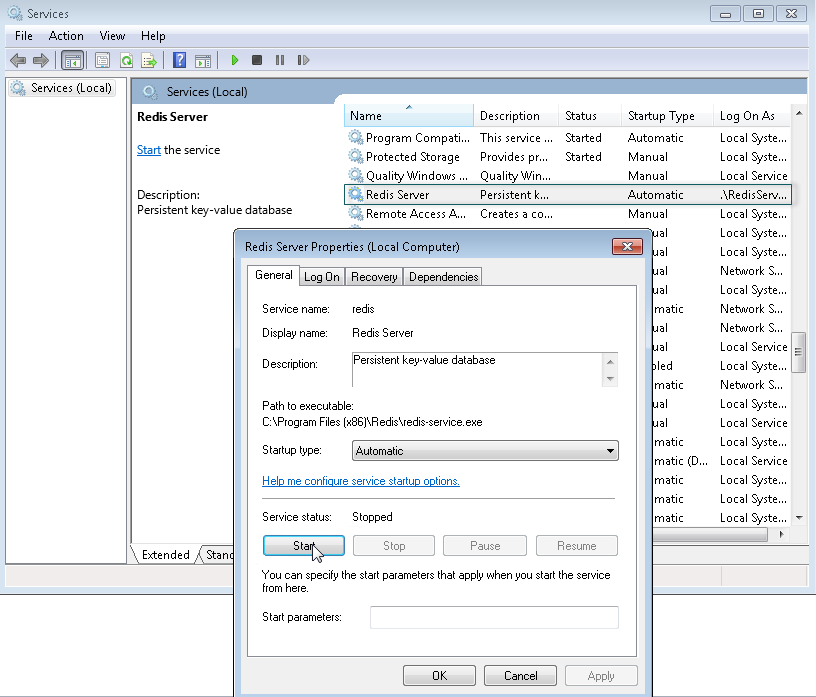
Start the Redis Server after the installment. To start the Redis Server, select [Control Panel]-[Administrative Tools]-[Services] or enter "Services.msc" in the command line (Fig. 441).
Fig. 441 Redis Server service start window
Setting up the ConnectionStrings.config file
To set up the ConnectionStrings.config file:
1.Edit the ConnectionStrings.config file located in the bpm’online root folder. Specify the connection parameters (connectionStrings) the restored database (name=”db”) and Redis Server (name=”redis”).
<?xml version="1.0" encoding="utf-8"?>
<connectionStrings>
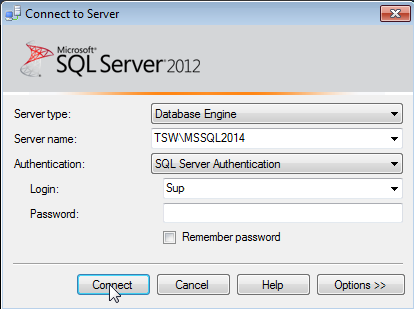
<add name="db" connectionString="Data Source=TSW\MSSQL2014;
Initial Catalog=SoftkeyRUS_ESE_HOTFIXSoftkey_RUS_MSSQL_7.7.0;
Persist Security Info=True; MultipleActiveResultSets=True;
User ID=Sup; Pooling = true; Max Pool Size = 100; Async = true" />
<add name="redis" connectionString="host=localhost;db=1;port=6379;
maxReadPoolSize=25;maxWritePoolSize=25" />
<add name="reports" connectionString="XpoProvider=MSSqlServer;
Data Source=TSW\MSSQL2014;Initial Catalog=BPMonline760Solution;Integrated Security=SSPI" />
<add name="defRepositoryUri" connectionString="" />
<add name="defWorkingCopyPath" connectionString="%TEMP%\%WORKSPACE%" />
<add name="defPackagesWorkingCopyPath"
connectionString="%TEMP%\%APPLICATION%\%WORKSPACE%\TerrasoftPackages" />
<add name="clientUnitContentPath"
connectionString="%TEMP%\%APPLICATION%\%WORKSPACE%\ClientUnitSrc" />
<add name="sourceControlAuthPath"
connectionString="%TEMP%\%APPLICATION%\%WORKSPACE%\Svn" />
</connectionStrings>
2.You can see the database server name (Data Source) in the authorization window while connecting to the server using Microsoft SQL Server Management Studio (Fig. 442).
Fig. 442 SQL server authorization window
3.The (Initial Catalog) database name should match the [Database] field value that you specified when restoring database (Fig. 439).
Checking Windows mandatory components
Make sure the IIS Web Server and Windows components are installed on the web server before creating and setting up a website.
|
Component |
Component items |
|---|---|
|
Common HTTP Features |
Static Content Default Document HTTP Errors HTTP Redirection. |
|
Application Development |
ASP.Net; .Net extensibility; ISAPI extensions; ISAPI Filters. |
|
Microsoft .Net framework 3.5.1 |
Windows Communication Foundation HTTP Activation Windows Communication Foundation Non-HTTP Activation. |
|
Microsoft .Net Framework 4.5 advanced services (Windows 8, Windows Server 2012) |
ASP.NET 4.5; WCF services
|
|
Health and Diagnostics: |
HTTP Logging Logging Tools Request Monitor Custom Logging. |
|
Security |
Basic Authentication Request Filtering IP and Domain Restriction |
To check the availability of the needed components:
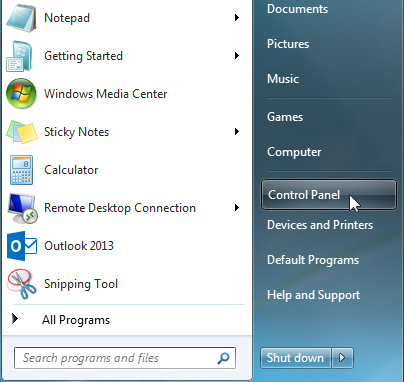
1.Select the [Control Panel] section in the [Start] menu (Fig. 443).
Fig. 443 The [Control Panel] section in the [Start] menu
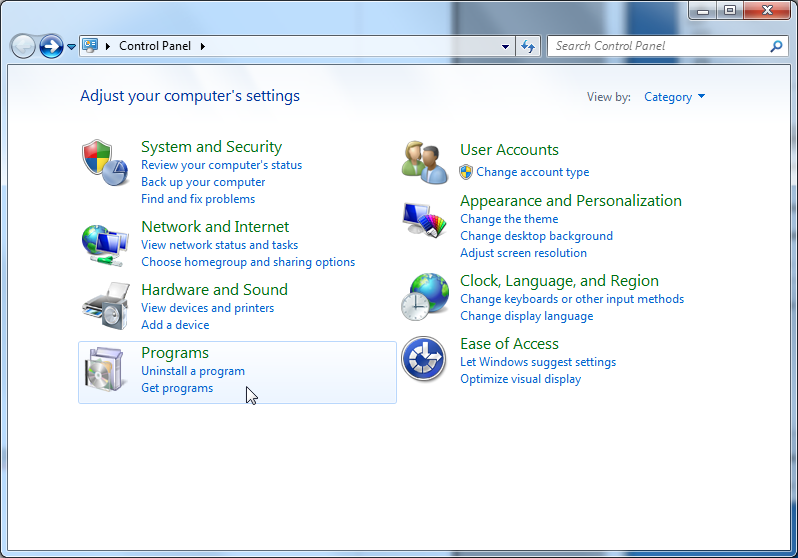
2.Select the [Programs] option in the opened window (Fig. 444).
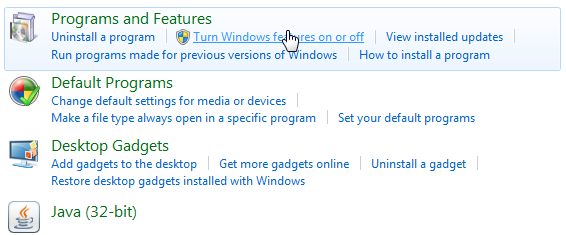
3.From the [Programs and Features] menu, select the [Turn Windows features on or off] command (Fig. 445).
Fig. 445 The [Turn Windows features on or off] command
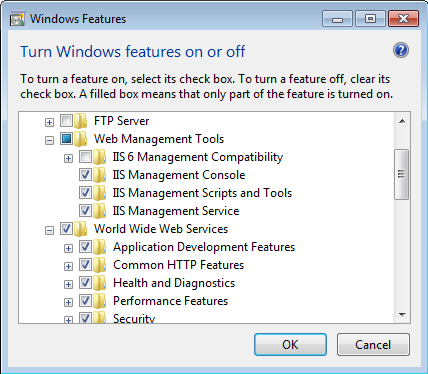
4.Select all required components in the [Windows Features] window (Fig. 446).
Fig. 446 Selecting Web Server IIS and Windows components
Creating and setting up application website using IIS
To create and set up a website:
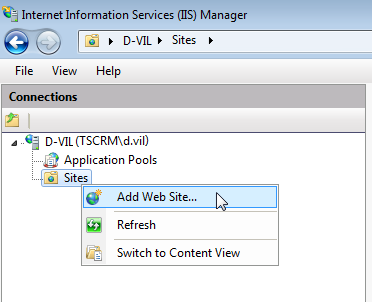
1.In the IIS control window, click the [Sites] folder and select the [Add Website] option from the context menu (Fig. 447).
Fig. 447 Creating a website for bpm'online application
2.Specify the name of the website, the path to bpm’online files, IP address and website port (Fig. 448).
Attention
The following path C:\Inetpub\wwwroot is used by default. If needed, specify your own IP address.
Fig. 448 New website parameters window

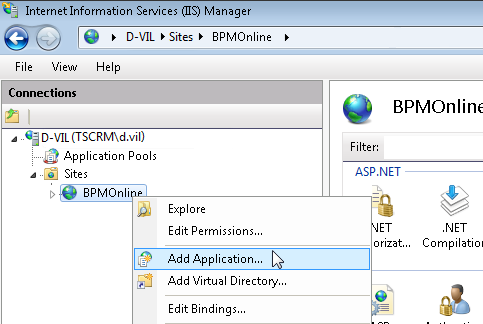
3.In the [Connections] field, click the created website and select the [Add Application] option in the menu (Fig. 449).
Fig. 449 Selecting IIS application adding command
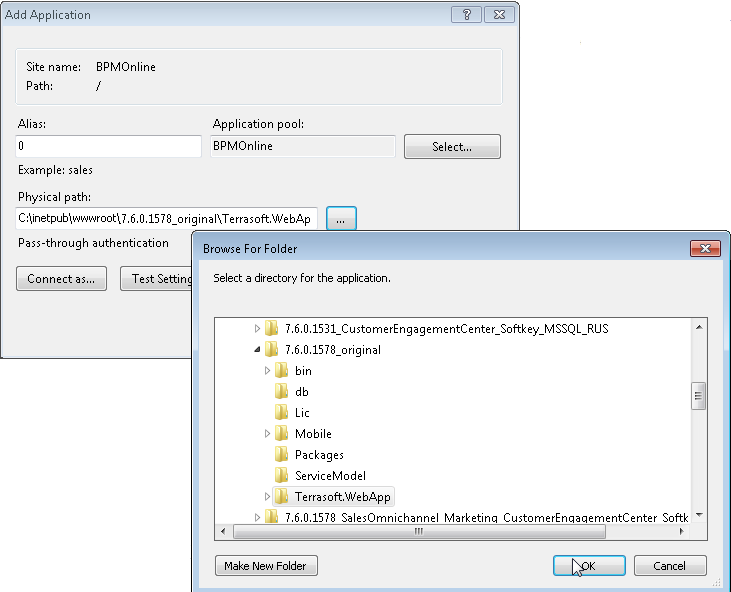
4.Specify the name of the application "0" in the [Alias] field. Specify the “Terrasoft.WEBApp” directory (Fig. 450).
Fig. 450 The application parameters selection window
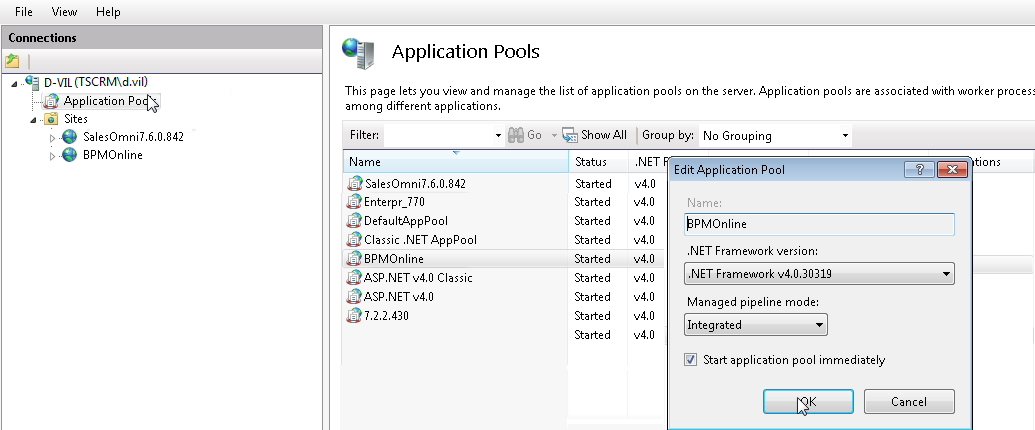
5.Go to the [Application Pools] section.
6.Select the [BPMonline] pool.
7.Select the [Integrated] mode in the [Managed pipeline mode] field.
8.Specify the Asp.Net - 4.0.30319 version in the [.Net Framework version] field (Fig. 451).
Fig. 451 Applications Pools parameters input window
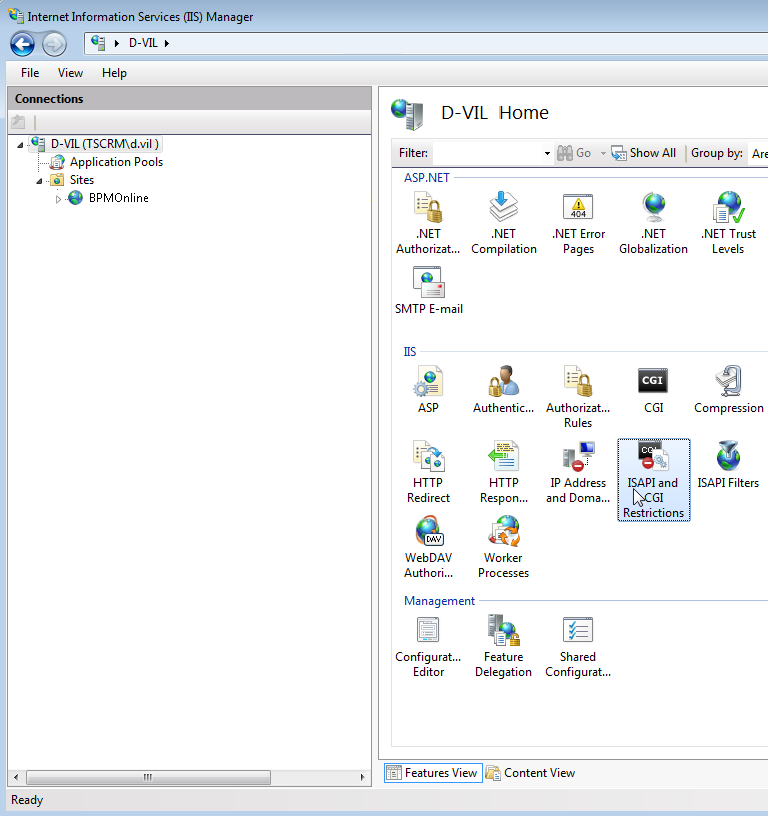
9.Check if the specified ASP.Net version is allowed. To do this:
a.Go to the ISAPI and CGI Restrictions on the web-server level (Fig. 452).
Fig. 452 Opening ISAPI and CGI Restrictions
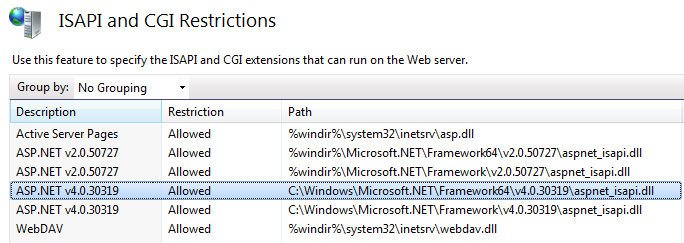
b.Make sure that the [Allowed] status is selected in the [Restriction] field for the used ASP.Net version (Fig. 453).
Fig. 453 Status check for the ASP.Net version used
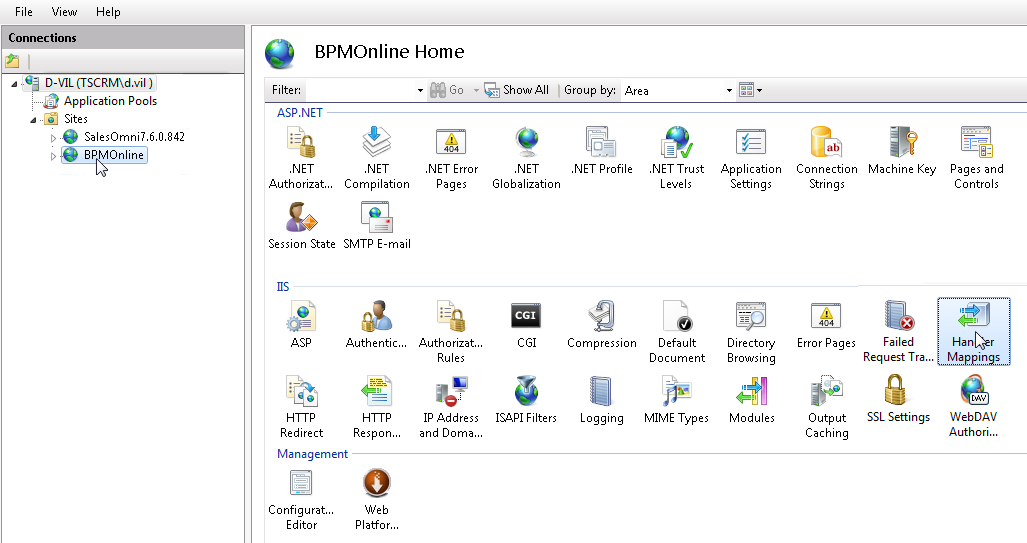
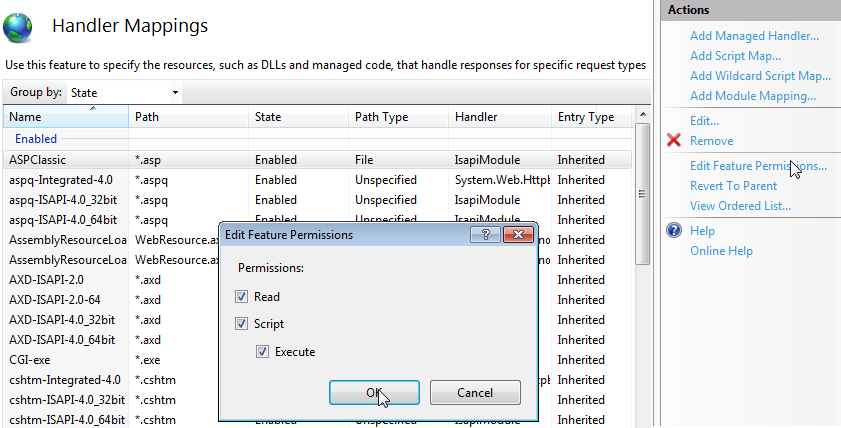
10.Make sure that all the required permissions are active. To do this:
a.Open the Handler Mappings on the server level (Fig. 454).
Fig. 454 Opening the Handler Mappings
b.Select the [Edit Feature Permissions] action in the [Actions] area.
c.Make sure that all the required checkboxes are selected in the [Edit Feature Permissions] window (Fig. 455).
Fig. 455 Checking required parameters in the [Edit Feature Permissions] window
11.Restart the website (Fig. 456).
Fig. 456 Select the [Browse] command in the website [Actions] area
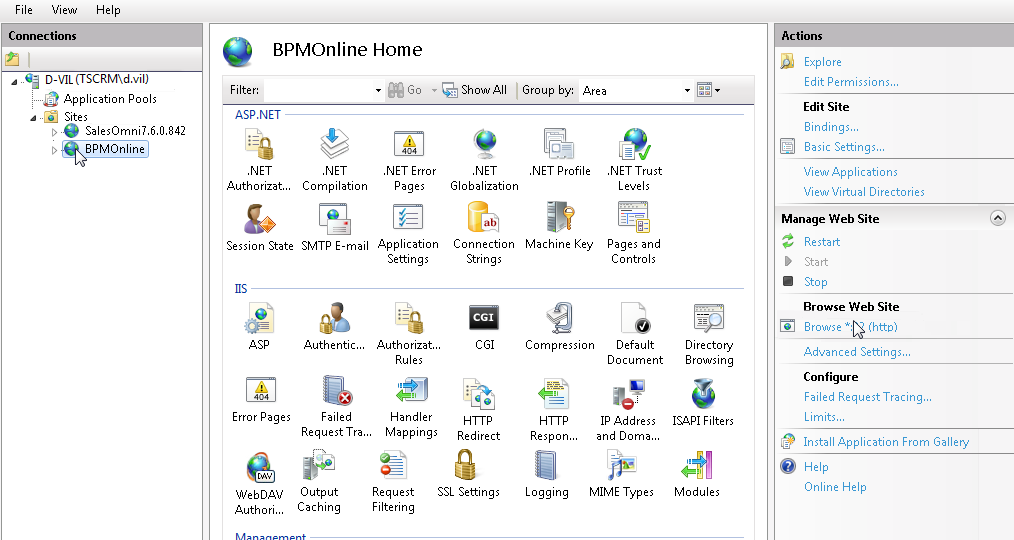
12.Follow the website address and make sure that the authorization page is displayed.
Note
To log in to a newly deployed application, use the default Supervisor user account. It is highly recommended to change the Supervisor password immediately.Login: Supervisor; Password: Supervisor.
See also