Set up OAuth authentication for Microsoft Office 365
OAuth is an open authentication standard that enables restricted access delegation. OAuth provides third-party applications secure delegated access to protected user resources without saving user credentials in the application.
OAuth authentication setup for Microsoft 365 consists of the following steps:
- Create parameters in Microsoft 365.
- Enter the parameters in Creatio.
Create parameters in Microsoft 365
-
Register your Creatio application in Azure Active Directory identity and access management service (Azure AD) as administrator. Learn more in the Microsoft documentation. To do this, sign in the Azure portal at portal.azure.com as administrator of Azure AD.
-
Click All Services in the menu and open the App Registrations section (Fig. 1).
Fig. 1 Open the App registrations section 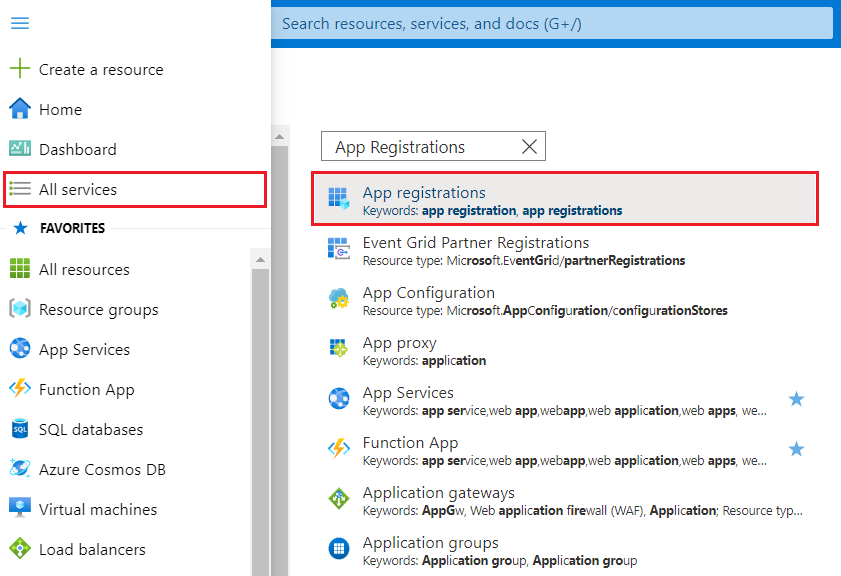
-
Click New registration (Fig. 2).
Fig. 2 New registration 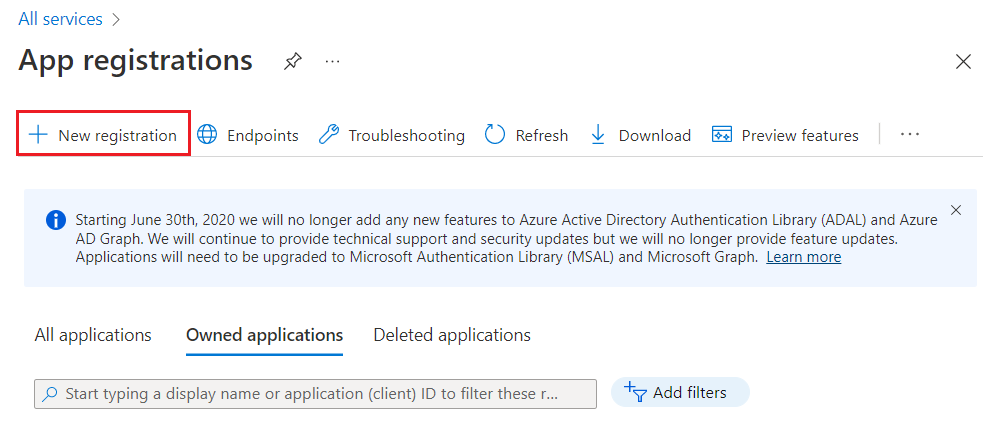
-
Enter "Creatio" in the Name field.
-
Select "Accounts in this organizational directory only" in the Supported Account Types field.
-
Select "Web" and specify the redirection URI in the Redirect URI field. The URI must follow this template:
https://[your_website].creatio.com/0/rest/Office365OAuthAuthenticator/ProcessAuthenticationCode(Fig. 3).Fig. 3 Register an application 
-
Click Register at the bottom.
-
Add permissions to provide application access to users. Learn more about adding web-API permissions in the Microsoft documentation.
-
Add permissions for Microsoft Graph API:
-
Click Add a permission (Fig. 4). This opens the Request API permissions section.
Fig. 4 Open the Request API Permissions section 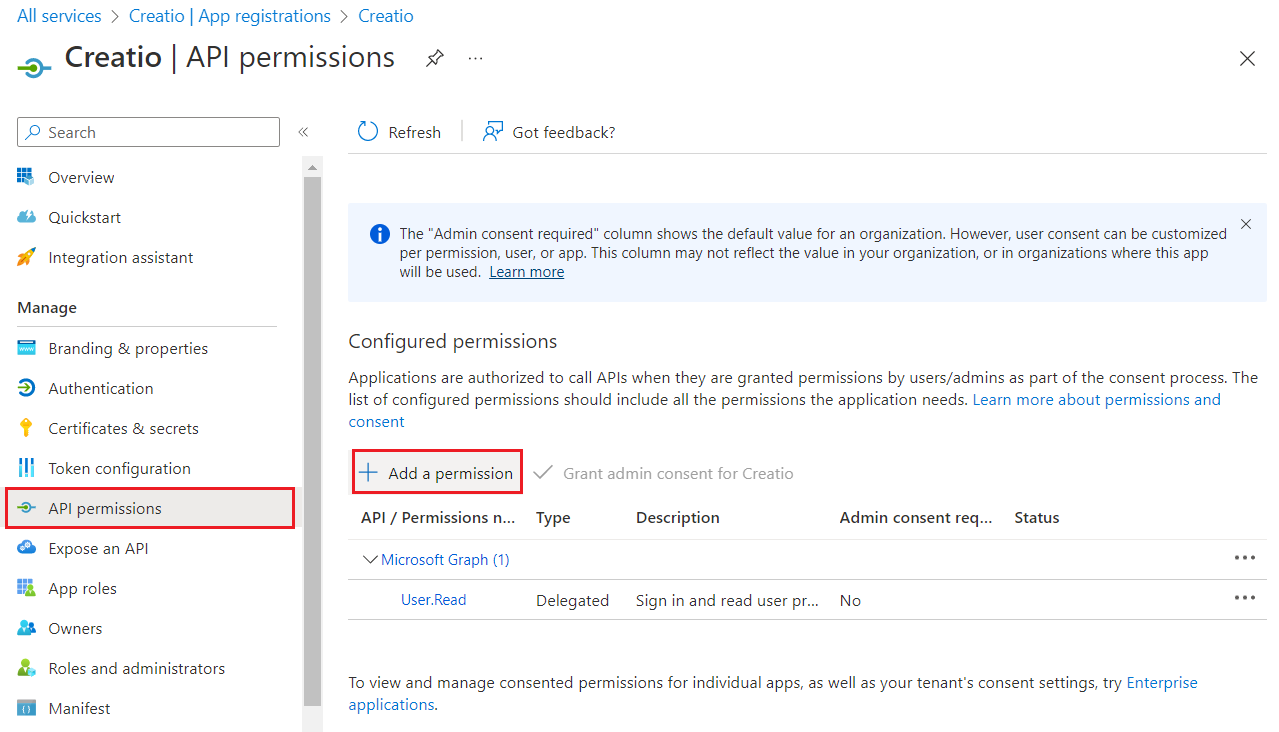
-
Open the APIs my organization uses tab in the section that opens.
-
Select "Microsoft Graph" in the list of supported APIs.
-
Specify the "Delegated permissions" permission type.
-
Select the following checkboxes: User.Read, Calendars.ReadWrite, OnlineMeetings.Read, and OnlineMeetingTranscript.Read.All.
noteThe Calendars.ReadWrite, OnlineMeetings.Read, and OnlineMeetingTranscript.Read.All permissions are required to use the AI meeting summary feature based on Microsoft Teams transcripts.
-
Click Add permissions.
-
-
Add permissions for Office 365 Exchange Online API:
- Click Add a permission. This opens the Request API permissions section.
- Open the APIs my organization uses tab in the section that opens.
- Select "Office 365 Exchange Online API" in the list of supported APIs.
- Specify the "Delegated permissions" permission type.
- Select the EWS.AccessAsUser.All checkbox (Fig. 5).
- Click Add permissions.
Fig. 5 Add permissions for Office 365 Exchange Online API 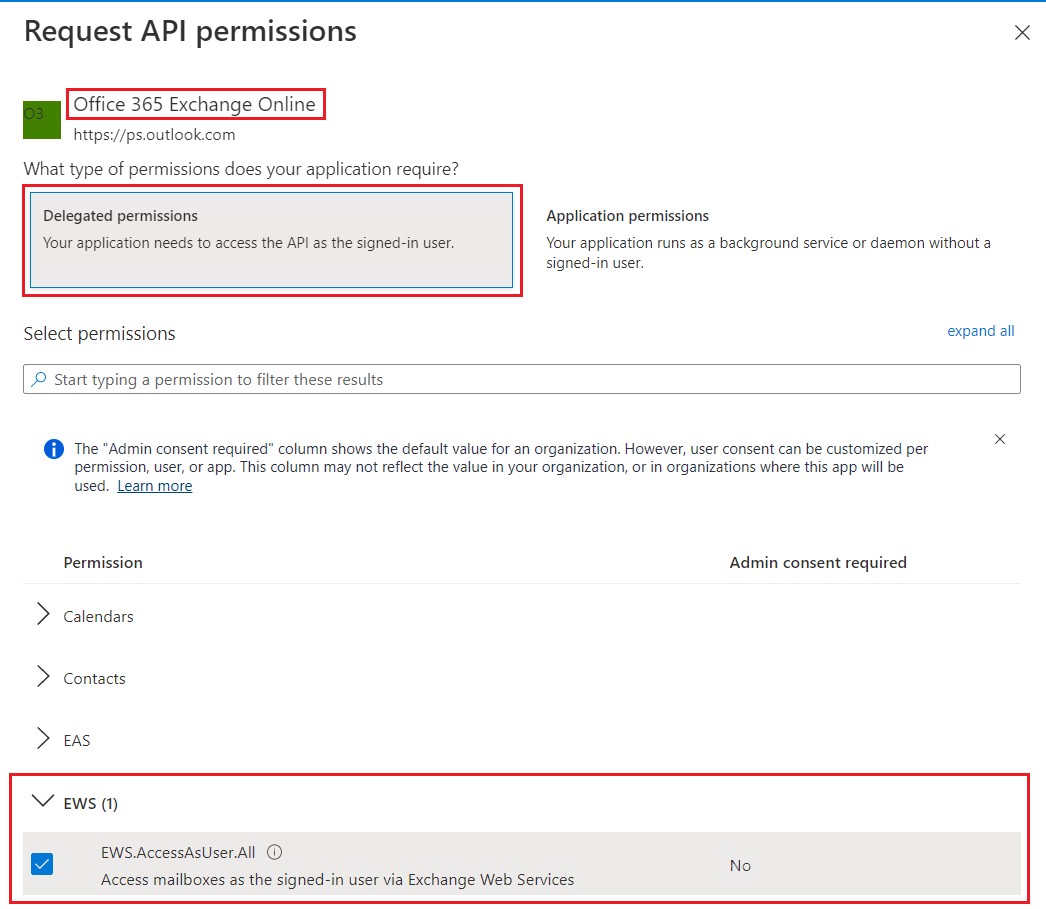
-
Click Grant admin consent for Tenant to grant admin consent to permissions configured for Creatio (Fig. 6). Learn more about the Admin consent button in the Microsoft documentation.
Fig. 6 Grant admin consent for tenant 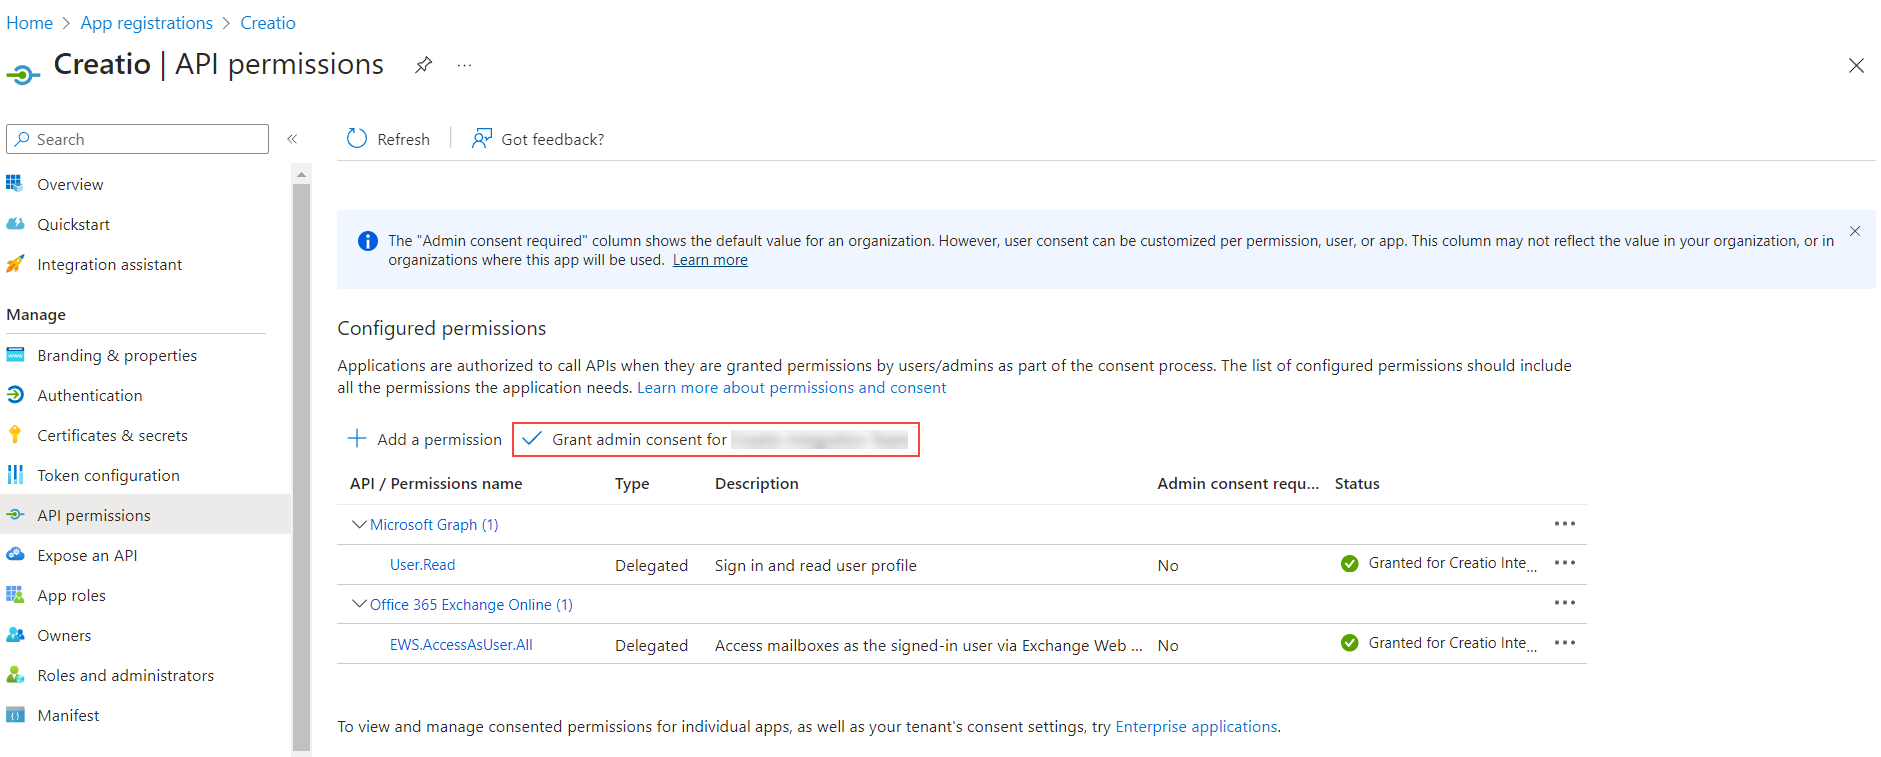
-
Click Overview in the menu and copy the application ID from the Application (client) ID field and the directory ID from the Directory (tenant) ID field (Fig. 7).
Fig. 7 Application (client) ID and Directory (tenant) ID fields 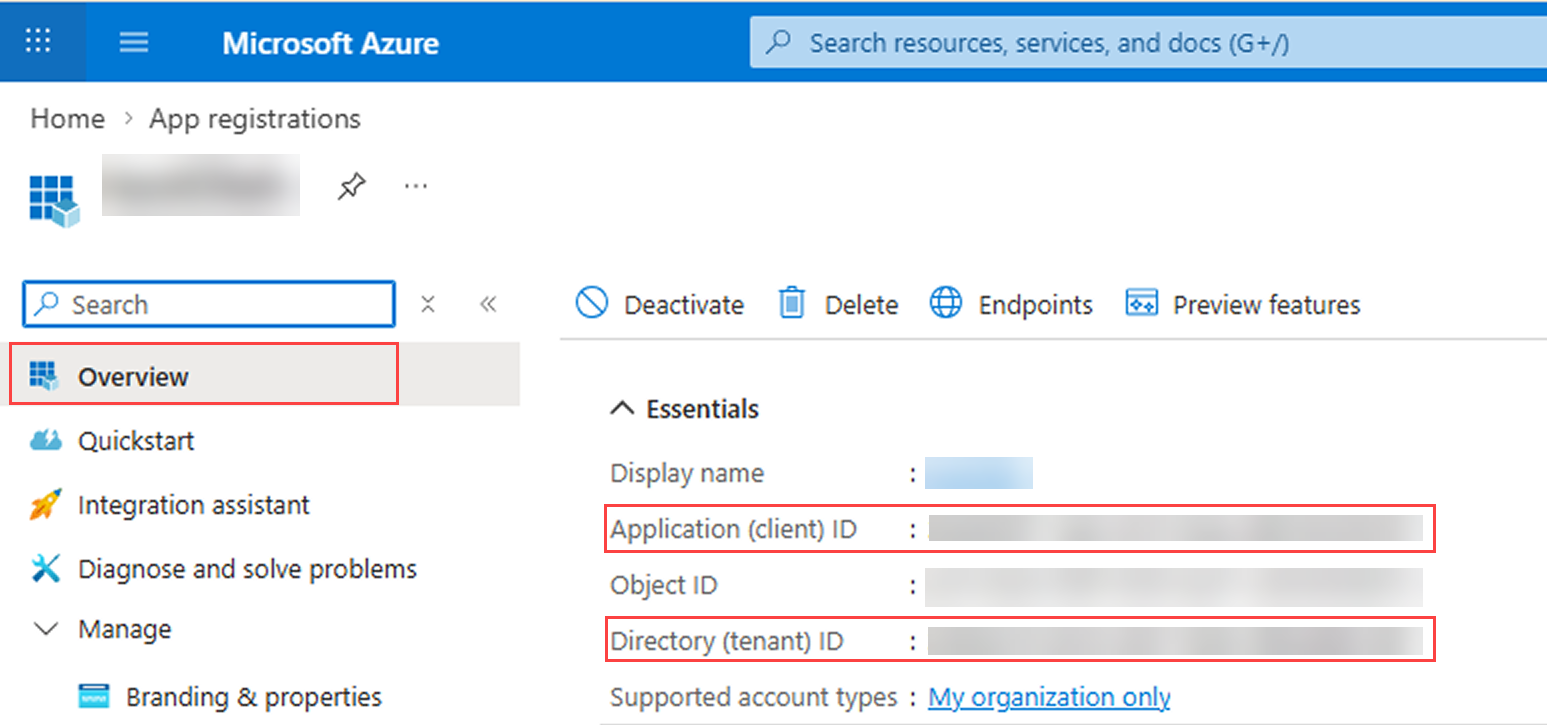
-
Create a client secret for Creatio. Learn more in the Microsoft documentation. To do this, open the Certificates & secrets section → New client secret (Fig. 8).
Fig. 8 Create a client secret 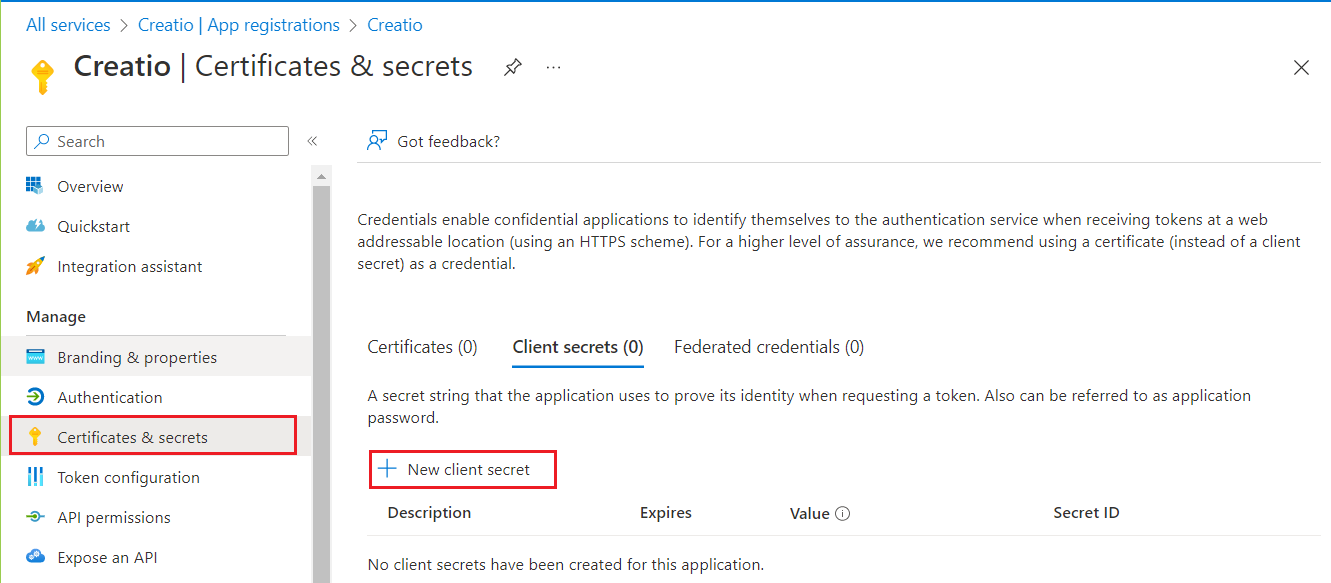
-
Specify the key duration in the Expires field. We recommend setting it to 24 months.
-
Copy the client secret from the Value column (Fig. 9).
Fig. 9 Value column 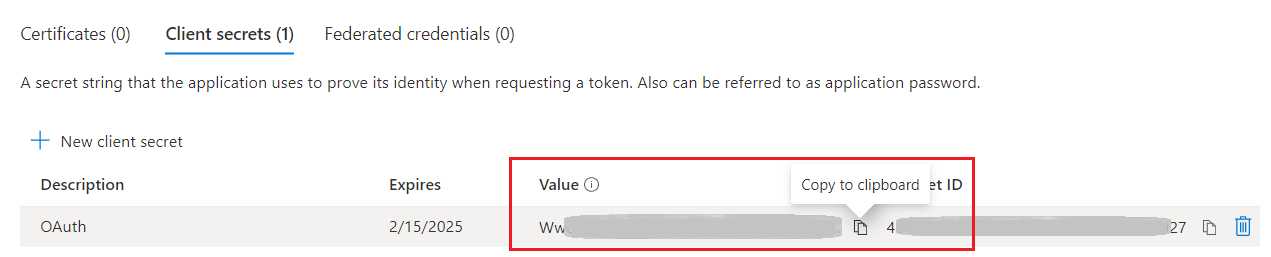 note
noteThe secret value expires after the specified period. After the expiration, create a new client secret by repeating steps 13-15 and add it to Creatio.
Enter the parameters in Creatio
-
Click the
 to open the System Designer.
 -
Go to the System setup block → the Lookups section.
-
Open the List of email providers lookup.
-
Open the "Office 365" email provider or copy it to add a new email provider (Fig. 10).
Fig. 10 Office 365 email provider 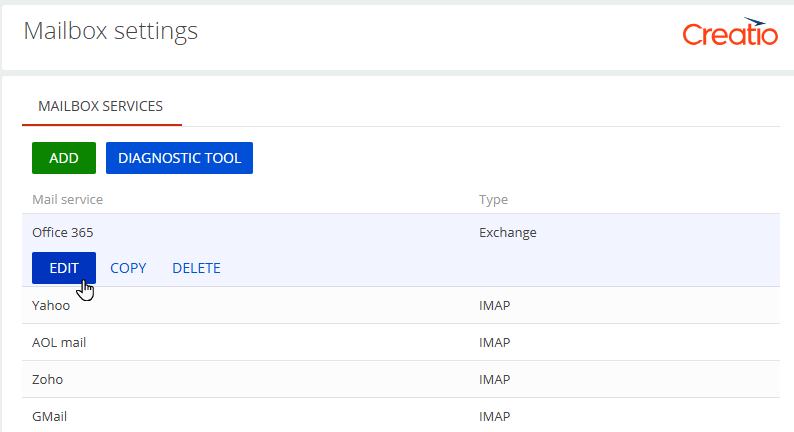
-
Change the Authentication type parameter to "OAuth 2.0." This brings up the Application (client) ID, Client secret, and Tenant ID fields.
-
Enter the value of the Application (client) ID field from Azure in the Application (client) ID field. Enter the value of the Value field from Azure in the Client secret field. Enter the value of the Directory (tenant) ID field from Azure in the Tenant ID field to use the AI meeting summary feature based on Microsoft Teams transcripts. (Fig. 11).
Fig. 11 Enter the client ID, tenant ID, and client secret in Creatio 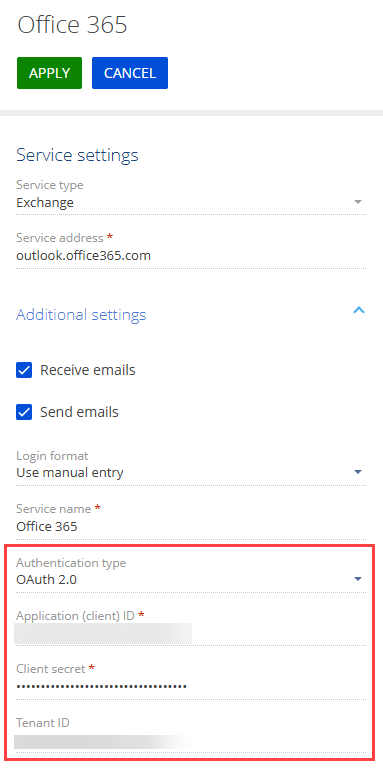
-
Click Apply.
As a result, you can set up your mailbox via OAuth.